1. Introduction
This T-shaped connector is designed to integrate seamlessly into single-phase track lighting systems. It allows you to navigate multiple turns in your track layout without requiring a new power feed. This component is essential for creating flexible and extensive track lighting configurations.
2. Safety Instructions
- This device is intended for indoor use only.
- Do not use this device if it appears damaged or defective.
- Keep the product out of reach of children.
- Installation should be performed by a qualified electrician to ensure safety and compliance with local electrical regulations.
- Always disconnect power to the track system at the main circuit breaker before performing any installation, maintenance, or modification.
- Do not exceed the specified voltage of 230 Volts.
3. Package Contents
- 1x Ledvion 1-Phase Rail T-Form Connector Left-1 (White)
4. Setup and Installation
Follow these steps to properly install your Ledvion T-Form Connector:
- Prepare the Installation Area: Ensure the track lighting system is de-energized by turning off the power at the circuit breaker. Verify with a voltage tester.
- Align the Connector: Position the T-form connector to align with the ends of the single-phase track sections you intend to join. The connector is designed to slide into the track.
- Insert the Connector: Gently slide the connector into the track ends. Ensure it is fully seated and securely engaged with the electrical contacts within the track. The 'Left-1' designation indicates its specific orientation for creating a left-hand turn in a T-junction.
- Secure Connections: Once the connector is in place, ensure all track sections connected to it are firmly attached and stable.
- Restore Power: After confirming all connections are secure and correct, restore power to the track system at the circuit breaker.
- Test the System: Turn on any connected luminaires to verify proper electrical connection and functionality.
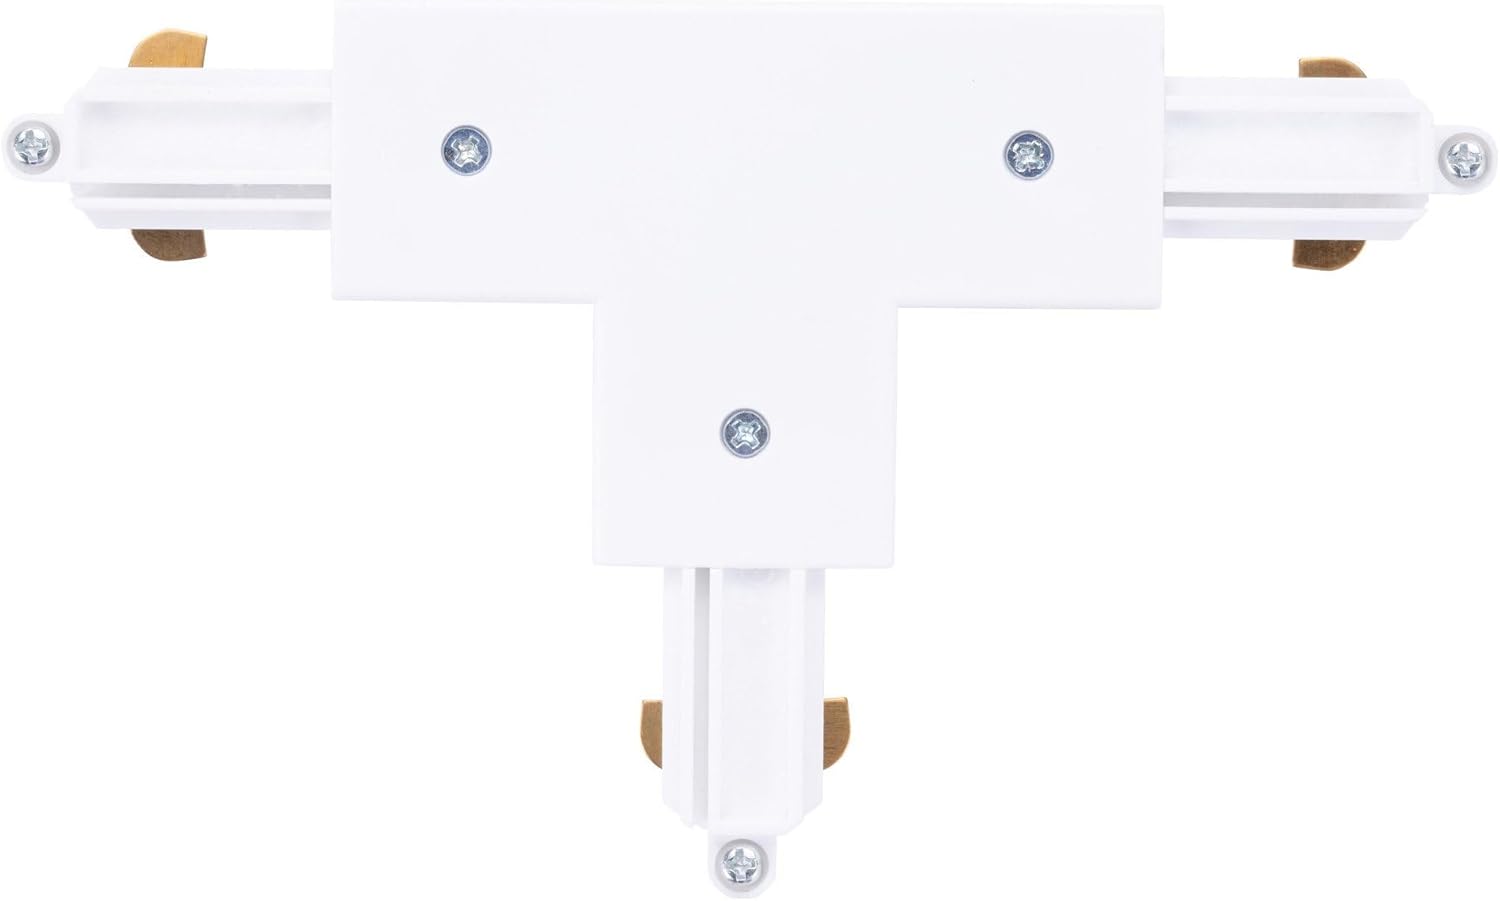
Figure 1: Top-down view of the Ledvion 1-Phase Rail T-Form Connector, showing its T-shape and connection points.

Figure 2: Angled view of the connector, illustrating the design for seamless integration into a single-phase track system.
5. Operating Instructions
The Ledvion T-Form Connector is a passive component of your track lighting system. Once correctly installed, it provides continuous electrical connection and structural support, enabling the creation of complex track layouts with multiple turns. No further user interaction is required for its operation.
6. Maintenance
- Cleaning: Clean the connector and surrounding track with a dry, soft cloth. Do not use liquid cleaners, abrasive materials, or solvents, as these can damage the product or its electrical contacts.
- Inspection: Periodically inspect the connector and track system for any signs of wear, damage, or loose connections. If any issues are found, disconnect power immediately and address the problem.
7. Troubleshooting
- No Power to a Section of the Track:
- Ensure the main power to the track system is on at the circuit breaker.
- Check that the T-form connector is fully and securely inserted into all connected track sections.
- Inspect the connector and track for any visible damage or loose wiring.
- Loose Connection:
- Disconnect power.
- Carefully re-seat the connector, ensuring it clicks or slides firmly into place.
- Verify that the track sections are properly aligned and supported.
8. Specifications
| Brand | Ledvion |
| Manufacturer | Ledvion |
| Model Number | LVT10016_R2 |
| Product Dimensions (L x W x H) | 22 x 17 x 1 cm |
| Item Weight | 106 grams |
| Color | White |
| Voltage | 230 Volts |
| Plug Type | Electrical |
| Batteries Required | No |
| Country of Origin | China |
9. Warranty and Support
This Ledvion product is guaranteed for 2 years from the date of purchase. Please retain your proof of purchase for warranty claims. Any unauthorized changes or modifications to the product will void this warranty.
For technical support, warranty claims, or further assistance, please contact your retailer or visit the official Ledvion website. Refer to the product packaging for specific contact details.

Figure 3: Product packaging, which includes important regulatory and warranty information.


