
1. Introduction
Thank you for choosing the ProfiCook PC-ES 1265 2-in-1 Espresso Machine. This appliance is designed to provide you with high-quality espresso using either ground coffee or Nespresso-compatible capsules, along with a milk frothing function for various coffee specialties. Please read this manual carefully before first use to ensure safe operation and optimal performance. Keep these instructions for future reference.
2. Safety Instructions
Always follow basic safety precautions when using electrical appliances to reduce the risk of fire, electric shock, and injury.
- Read all instructions before operating the appliance.
- Do not immerse the appliance, power cord, or plug in water or other liquids.
- Ensure the voltage indicated on the appliance matches your local mains voltage.
- Keep the appliance out of reach of children.
- Unplug from the outlet when not in use and before cleaning. Allow to cool before putting on or taking off parts, and before cleaning the appliance.
- Do not operate any appliance with a damaged cord or plug, or after the appliance malfunctions or has been damaged in any manner.
- Use only accessories recommended by the manufacturer.
- Do not use outdoors.
- Do not let the cord hang over the edge of a table or counter, or touch hot surfaces.
- Do not place on or near a hot gas or electric burner, or in a heated oven.
- Always attach the plug to the appliance first, then plug the cord into the wall outlet. To disconnect, turn any control to 'off', then remove the plug from the wall outlet.
- Use caution when handling hot steam and hot surfaces.
3. Product Overview
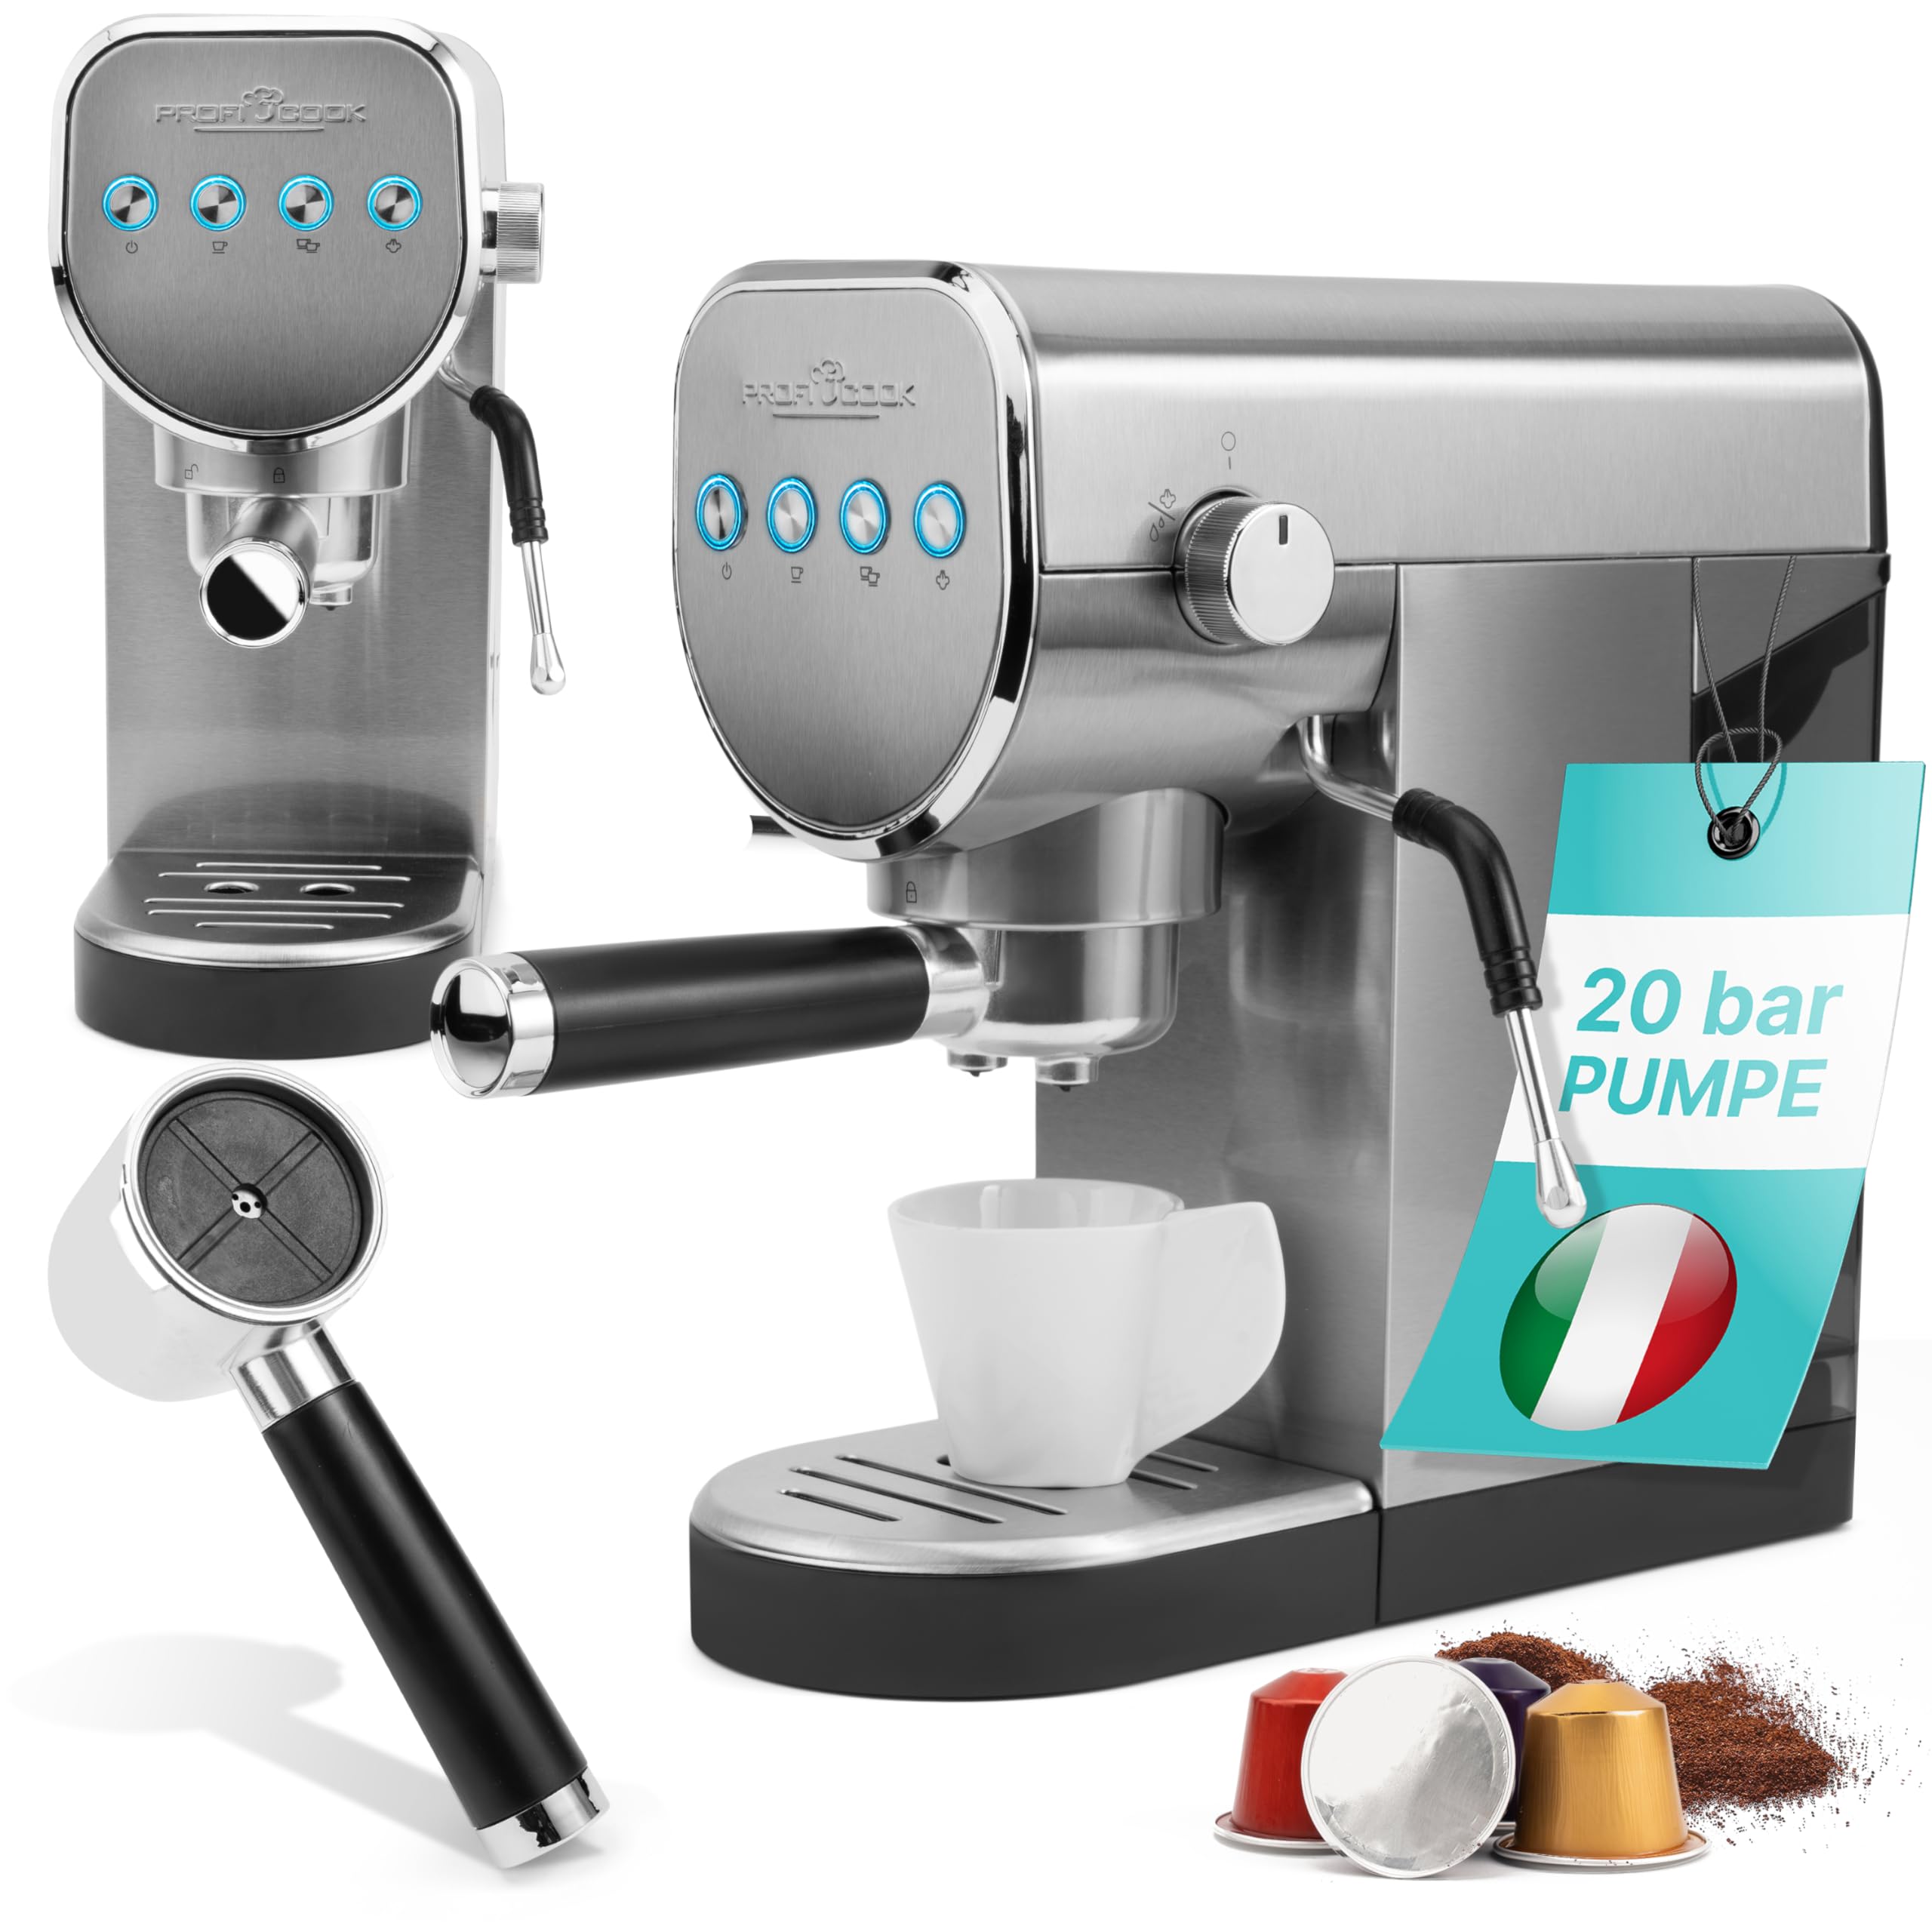
The ProfiCook PC-ES 1265 is a versatile espresso machine designed for ease of use and excellent coffee results.
3.1 Key Features
- 2-in-1 Functionality: Brews espresso from ground coffee or Nespresso-compatible capsules.
- 20 Bar Italian Pump: Ensures optimal pressure for rich espresso with perfect crema.
- Integrated Milk Frother: Swivel nozzle for preparing cappuccino, latte macchiato, and flat white.
- Cup Warming Function: Pre-heats cups to maintain coffee temperature.
- Removable Water Tank: 1-liter capacity for easy refilling and cleaning.
- Illuminated Operating Buttons: For intuitive control.
3.2 Components and Controls


3.3 Package Contents
Upon unpacking, ensure all items are present:
- ProfiCook PC-ES 1265 Espresso Machine
- 1 x Espresso Sieve with 2 Inserts (for 1 and 2 cups of ground coffee)
- 1 x Sieve with Adapter for Nespresso-compatible Capsules
- 1 x Coffee Scoop with Tamper
- Instruction Manual

4. Setup
4.1 Unpacking and Placement
- Carefully remove all packaging materials and check for any damage.
- Place the machine on a stable, level, heat-resistant surface, away from water sources and heat.
- Ensure adequate ventilation around the appliance.
4.2 First Use and Cleaning
Before first use, clean all removable parts and run a few cycles with water only.
- Wash the water tank, portafilters, and drip tray with warm soapy water, then rinse thoroughly.
- Fill the water tank with fresh, cold water up to the MAX line.
- Place a large cup or container under the coffee outlet and the steam nozzle.
- Turn on the machine and allow it to heat up.
- Run a cycle without coffee to flush the system. Repeat this process 2-3 times.
- Activate the steam function briefly to flush the steam wand.
4.3 Filling the Water Tank
The water tank is located at the back of the machine and is removable for easy filling.
- Lift the water tank from its position.
- Fill it with fresh, cold water up to the MAX mark. Do not overfill.
- Place the water tank back securely into the machine.
5. Operating Instructions
5.1 Pre-heating the Machine and Cups
For best results, always pre-heat the machine and your cups.
- Ensure the water tank is filled.
- Turn on the machine. The indicator lights will flash while heating.
- Once the lights are solid, the machine is ready.
- Place your espresso cups on the cup warming tray located on top of the machine.
5.2 Making Espresso with Ground Coffee


- Select the appropriate sieve insert for 1 or 2 cups and place it into the portafilter.
- Add finely ground espresso coffee to the sieve. Use the included scoop for measurement.
- Gently tamp the coffee down with the tamper end of the scoop to create an even surface.
- Wipe any excess coffee from the rim of the portafilter.
- Attach the portafilter to the brewing head of the machine by aligning it and twisting firmly to the right until secure.
- Place your pre-heated cup(s) under the portafilter spouts.
- Press the desired coffee button (single or double espresso). The machine will brew the coffee and stop automatically.
- Once brewing is complete, carefully remove the portafilter by twisting it to the left. Dispose of the used coffee grounds.
5.3 Making Espresso with Nespresso-compatible Capsules

- Insert the capsule adapter sieve into the portafilter.
- Place a Nespresso-compatible capsule into the adapter.
- Attach the portafilter to the brewing head of the machine by aligning it and twisting firmly to the right until secure.
- Place your pre-heated cup(s) under the portafilter spout.
- Press the desired coffee button. The machine will brew the coffee and stop automatically.
- Once brewing is complete, carefully remove the portafilter. Dispose of the used capsule.
5.4 Milk Frothing

- Fill a pitcher with cold milk (preferably cold, fresh whole milk for best results). Do not fill more than one-third of the pitcher.
- Ensure the machine is pre-heated and ready.
- Turn the steam control knob to the steam position. The steam indicator light will illuminate.
- Once the steam light is solid, position the steam nozzle just below the surface of the milk in the pitcher.
- Open the steam control knob fully to release steam. Move the pitcher up and down gently to create foam.
- Once the desired foam consistency and temperature are reached, close the steam control knob.
- Immediately clean the steam nozzle with a damp cloth to prevent milk residue from drying. Briefly open the steam knob again to clear any milk from inside the nozzle.
6. Maintenance and Cleaning
Regular cleaning ensures the longevity and optimal performance of your espresso machine.
6.1 Daily Cleaning
- Portafilter and Sieves: After each use, remove the portafilter and discard coffee grounds/capsules. Rinse the portafilter and sieve inserts under running water.
- Drip Tray: Empty and clean the drip tray and grid regularly.
- Water Tank: Empty any remaining water and rinse the water tank daily. Refill with fresh water for each use.
- Steam Nozzle: Clean immediately after frothing milk as described in section 5.4.
- Machine Exterior: Wipe the exterior of the machine with a soft, damp cloth. Do not use abrasive cleaners or solvents.
6.2 Descaling
Over time, mineral deposits (limescale) can build up in the machine, affecting performance. Descale your machine regularly, depending on water hardness and frequency of use (e.g., every 2-3 months).
- Use a commercially available descaling solution suitable for coffee machines. Follow the manufacturer's instructions for the descaling solution.
- Fill the water tank with the descaling solution mixed with water according to the product instructions.
- Place a large container under the coffee outlet and steam nozzle.
- Run several brewing cycles (without coffee) until half of the solution has passed through.
- Activate the steam function to allow some solution to pass through the steam wand.
- Turn off the machine and let it sit for 15-20 minutes.
- Turn the machine back on and run the remaining solution through the coffee outlet and steam wand.
- Rinse the water tank thoroughly and fill it with fresh water.
- Run at least 2-3 full water tanks through the machine (without coffee) to rinse out any descaling solution residue.
7. Troubleshooting
If you encounter issues with your ProfiCook PC-ES 1265, refer to the following table for common problems and solutions.
| Problem | Possible Cause | Solution |
|---|---|---|
| No coffee dispenses. | Water tank empty; machine not pre-heated; coffee too finely ground/tamped too hard; clogged filter. | Fill water tank; wait for pre-heating; use coarser grind/less tamping; clean filter/descale machine. |
| Coffee is too weak or watery. | Coffee too coarsely ground; not enough coffee; insufficient tamping; machine needs descaling. | Use finer grind; increase coffee amount; tamp more firmly; descale machine. |
| Coffee is too cold. | Cups not pre-heated; machine not fully pre-heated. | Pre-heat cups on warming tray; ensure machine is fully pre-heated (solid indicator lights). |
| No steam from frother. | Steam nozzle clogged; machine not hot enough for steam; water tank empty. | Clean steam nozzle; wait for steam indicator light to be solid; fill water tank. |
| Machine leaks water. | Water tank not properly seated; portafilter not securely attached; seals worn. | Ensure water tank is correctly placed; secure portafilter firmly; contact customer support if seals are worn. |
If the problem persists after attempting these solutions, please contact ProfiCook customer support.
8. Specifications
| Feature | Detail |
|---|---|
| Brand | ProfiCook |
| Model | PC-ES 1265 (also PC-ES-KA 1265, 501265) |
| Color | Stainless steel |
| Dimensions (L x W x H) | 29.1 x 13.8 x 29.8 cm |
| Weight | 3.2 kg |
| Water Tank Capacity | 1 Liter |
| Power | 1360 W |
| Voltage | 240 V |
| Material | Stainless steel |
| Pump Pressure | Up to 20 bar |
| Automatic Shut-off | Yes |
| Compatibility | Ground coffee, Nespresso-compatible capsules |
| Special Features | Integrated milk frother, Cup warming function |
9. Warranty and Support
ProfiCook products are manufactured with quality and care. This product is covered by a manufacturer's warranty in accordance with local regulations. Please retain your proof of purchase for any warranty claims.
For technical support, spare parts, or warranty inquiries, please contact your local ProfiCook customer service or the retailer from whom you purchased the product. Contact information can typically be found on the ProfiCook official website or on your purchase documentation.

