

Image: The VEVOR Brazed Plate Heat Exchanger EATB28-100, a compact and efficient heat transfer unit.
1. Introduction
This manual provides essential information for the safe and efficient operation, installation, and maintenance of your VEVOR Brazed Plate Heat Exchanger, model EATB28-100. Please read this manual thoroughly before installation and use, and retain it for future reference.
2. Safety Instructions
WARNING: Failure to follow these safety instructions could result in property damage, serious injury, or death.
- Ensure all installation and maintenance is performed by qualified personnel.
- Always depressurize the system before performing any maintenance or inspection.
- Wear appropriate personal protective equipment (PPE) during installation and maintenance.
- Do not exceed the maximum operating pressure and temperature specified for the unit.
- Ensure proper ventilation in the installation area.
- Check for leaks after installation and before full operation.
3. Product Overview
3.1 Features
- High-Quality Materials: Constructed from 316L stainless steel with 99% copper brazing at the ends and connections, ensuring durability and resistance to high pressure and temperature. UL and CE certified for reliability.
- Efficient Heat Transfer: Features an asymmetric herringbone pattern on high-conductivity stainless steel plates, creating turbulent flow for efficient heating and cooling. Achieves up to 99% thermal efficiency, generating 1100-1260K BTU per hour, saving pump power and electricity.
- Large Heat Exchange Area: Equipped with 100 plates, each measuring 5x12 inches, providing excellent heat transfer performance and maximum efficiency. Suitable for operating temperatures from -180°F to 440°F.
- Leak-Proof Design: Utilizes high-pressure vacuum brazing and undergoes helium leak testing to eliminate the possibility of micro-leaks, ensuring a long lifespan and high reliability.
- Stable Installation: Includes two 304 stainless steel brackets for easy and secure mounting, offering superior rust resistance and stability.
3.2 Specifications

Image: Detailed dimensions and key specifications of the VEVOR Brazed Plate Heat Exchanger EATB28-100.
| Specification | Value |
|---|---|
| Model | EATB28-100 |
| Thermal Efficiency | 90~99% |
| Heat Capacity | 1100-1260K BTU |
| Plate Area | 5x12 inch / 127x305mm |
| Plate Quantity | 100 |
| Ports | 4*1-1/4 inch MNPT |
| Material | 304/316 Stainless Steel, 99.9% Copper Brazing |
| Net Weight (with Accessories) | 33.51 lbs / 15.2 kg |
| Product Dimensions (L x W x H) | 11.85x4.96x9.69 inch / 301x126x246mm |
| Operating Temperature Range | -180°F to 440°F |
| Certifications | UL, CE |
3.3 Package Contents

Image: The VEVOR Brazed Plate Heat Exchanger shown alongside its two included stainless steel mounting brackets.
- Heat Exchanger x 1
- Mounting Brackets x 2
4. Setup and Installation
Proper installation is crucial for the performance and longevity of your heat exchanger. Follow these guidelines carefully.
4.1 Pre-Installation Checklist
- Verify that all package contents are present and undamaged.
- Ensure the installation location is suitable, with adequate space for maintenance and proper ventilation.
- Gather necessary tools and additional accessories (not included):
- For wall mounting: M10 self-tapping screws.
- For mounting to the back of a machine: M10 bolts and nuts.
- Appropriate pipe fittings (e.g., 1-1/4 inch MNPT water heater hoses with swivel fittings for easier connection).
4.2 Mounting the Heat Exchanger

Image: Illustration demonstrating the correct vertical installation of the heat exchanger using the provided stainless steel brackets. Incorrect horizontal installation is also shown as a warning.
- Attach the two stainless steel mounting brackets to the heat exchanger using appropriate fasteners.
- Securely mount the heat exchanger to a stable surface (wall or machine) using the brackets.
- Important: Install the unit vertically. Do not lay it horizontally, as this can impair performance and drainage.
4.3 Connecting Piping
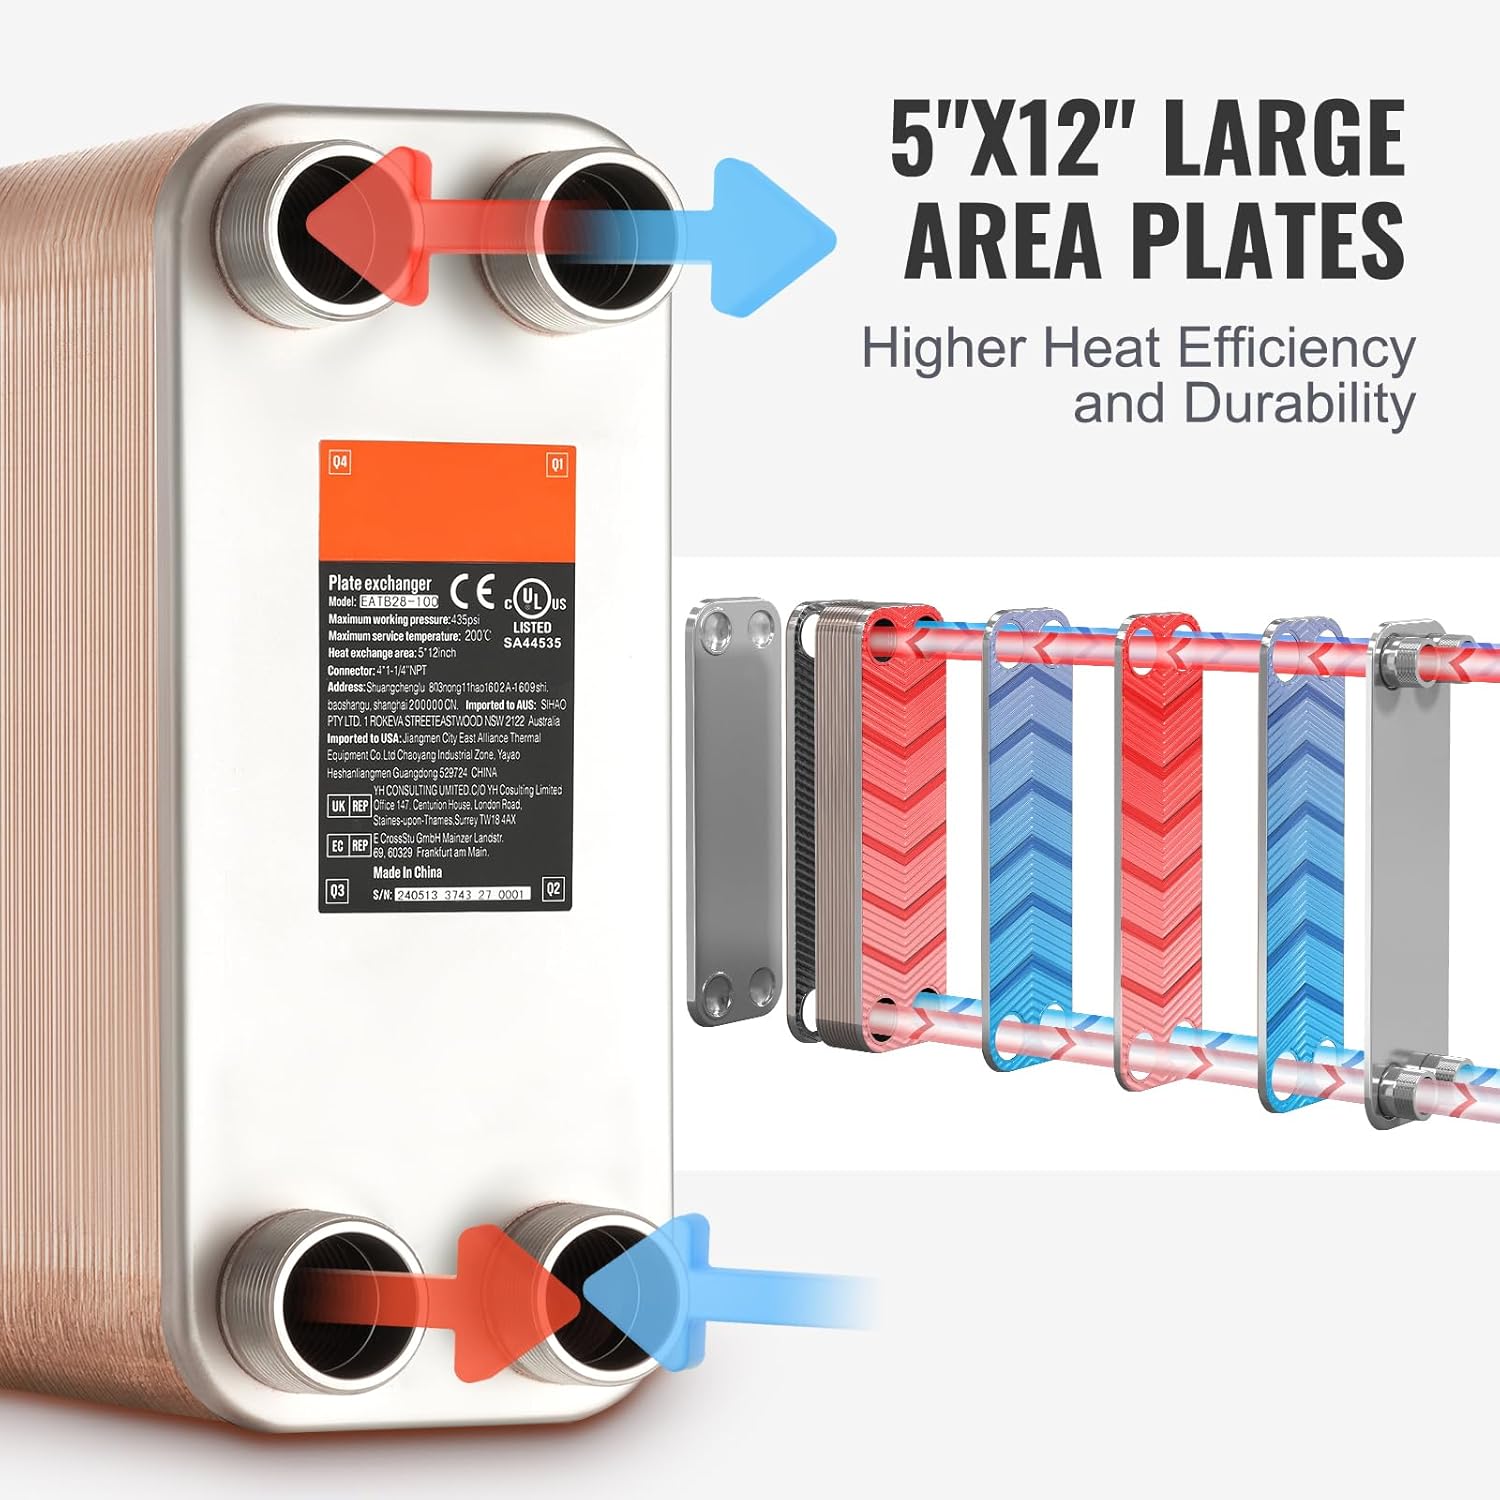
Image: Diagram illustrating the flow of hot and cold fluids through the heat exchanger plates, highlighting the efficient heat transfer process.
- Connect the hot fluid inlet and outlet to the designated ports.
- Connect the cold fluid inlet and outlet to the designated ports.
- Ensure all connections are tight and leak-free. Use appropriate sealants or thread tape as needed.
- The asymmetric herringbone pattern of the plates promotes turbulent flow, enhancing heat transfer efficiency.
5. Operating Instructions
Once installed, the heat exchanger operates by transferring thermal energy between two fluids without direct contact.
- Fluid Flow: Ensure a continuous and stable flow of both hot and cold fluids through their respective circuits.
- Temperature Monitoring: Monitor the inlet and outlet temperatures of both fluids to ensure the desired heat exchange is occurring.
- Pressure Monitoring: Keep an eye on system pressures to ensure they remain within the specified operating limits.
- Start-up: Gradually introduce fluids into the system to avoid sudden pressure surges.
- Shut-down: When shutting down, gradually reduce fluid flow and depressurize the system.

Image: Close-up view of the heat exchanger plates, emphasizing the asymmetric fishbone design that contributes to high heat efficiency (up to 99%).
6. Maintenance
Regular maintenance ensures optimal performance and extends the lifespan of your heat exchanger.
- Inspection: Periodically inspect the unit for any signs of external damage, corrosion, or leaks.
- Cleaning: Depending on the fluid quality, internal cleaning may be required to remove scale or fouling. This typically involves circulating a cleaning solution through the unit. Consult a professional for specific cleaning procedures.
- Leak Checks: Regularly check all connections for leaks. The unit is designed with high-pressure vacuum brazing and helium leak testing for reliability.
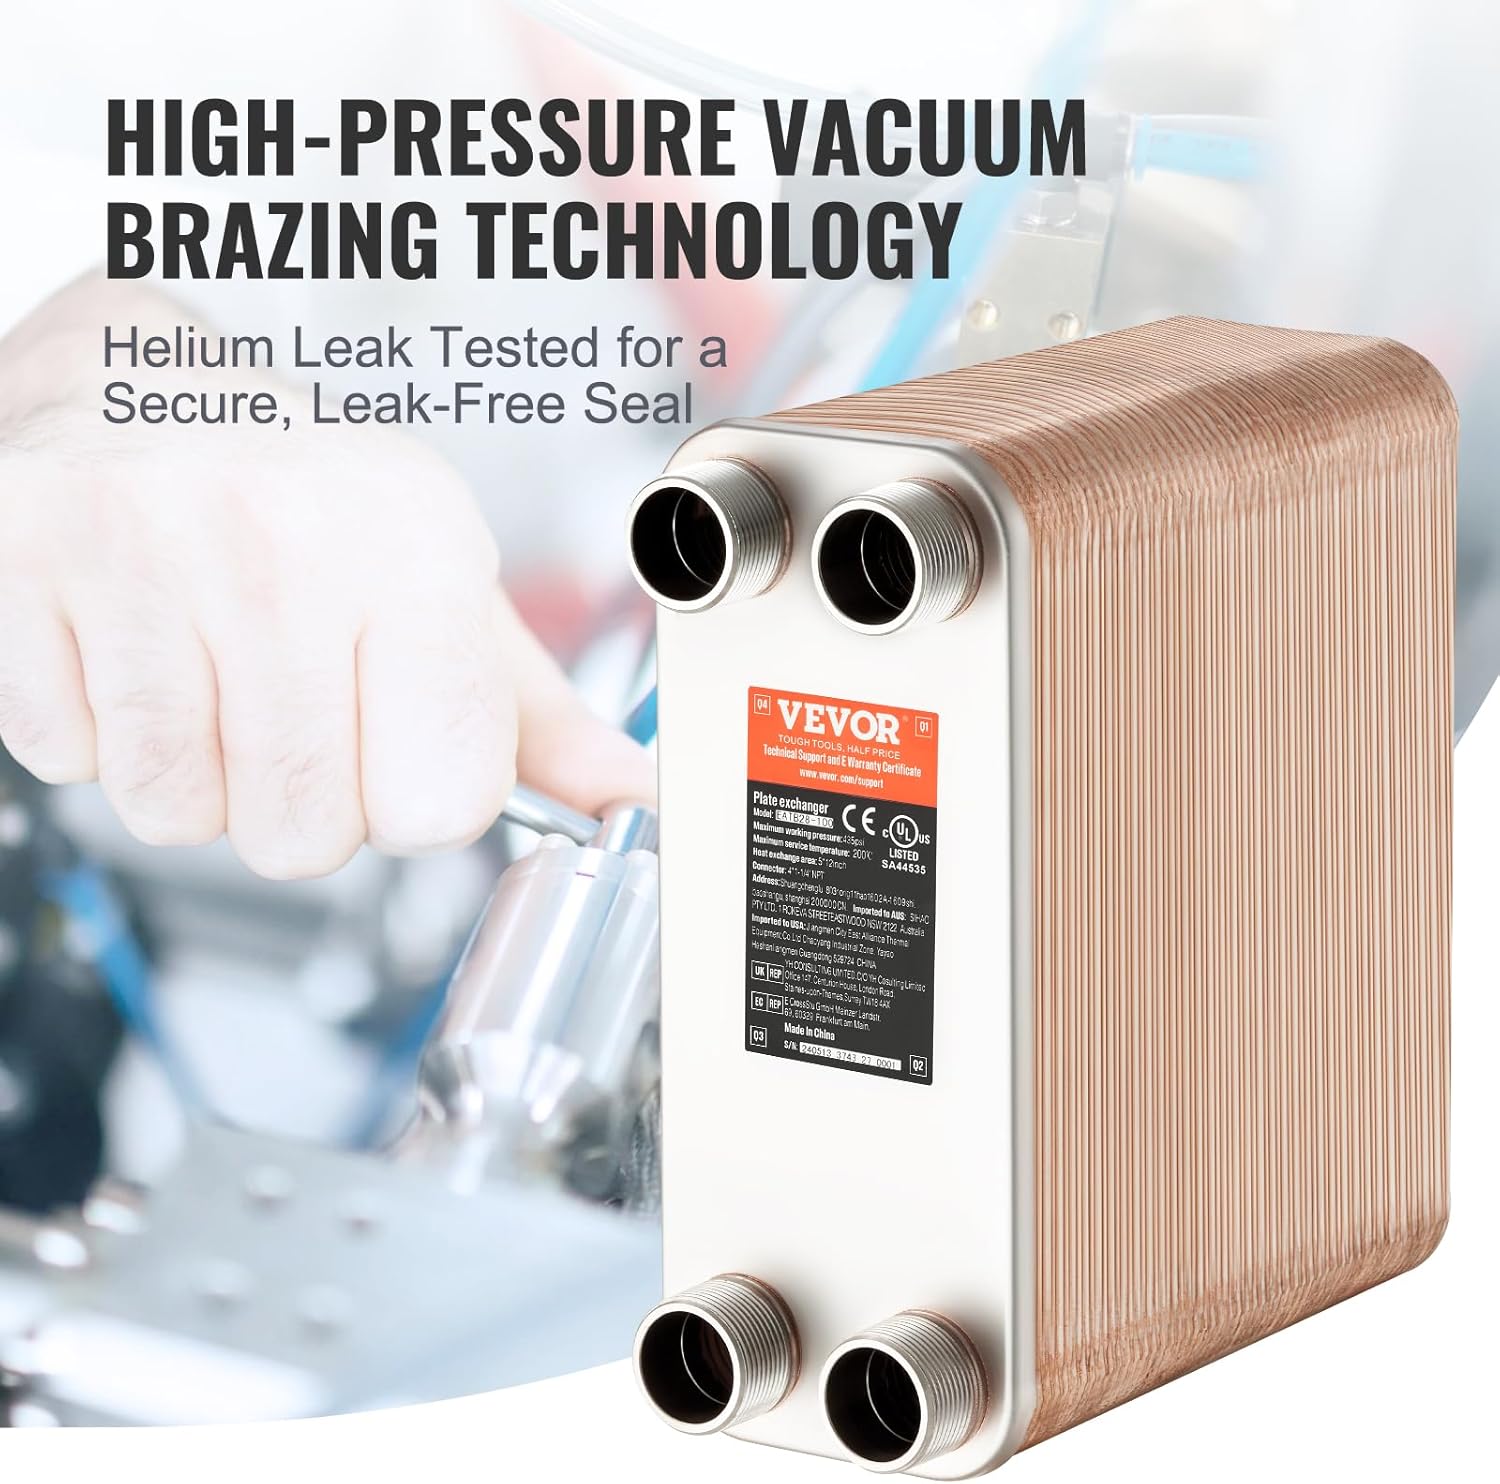
Image: The heat exchanger, highlighting its robust construction and the high-pressure vacuum brazing technology used to ensure a secure, leak-free seal.
7. Troubleshooting
This section provides solutions to common issues you might encounter.
| Problem | Possible Cause | Solution |
|---|---|---|
| Reduced Heat Transfer Efficiency | Fouling or scaling inside plates; insufficient fluid flow; air in the system. | Perform internal cleaning; check pump operation and flow rates; bleed air from the system. |
| Leaks from Connections | Loose fittings; damaged seals/thread tape. | Tighten connections; replace seals or reapply thread tape. |
| Unusual Noises | Air in the system; cavitation; vibration from connected equipment. | Bleed air; check pump for cavitation; inspect mounting and connected pipes for vibration. |
| Pressure Drop Across Unit | Fouling or blockage; incorrect pipe sizing. | Perform internal cleaning; verify pipe sizing and system design. |
8. Warranty and Support
VEVOR products are designed for reliability and performance. For warranty information, technical support, or service inquiries, please refer to the official VEVOR website or contact their customer service directly.
You can find more information and contact details on the VEVOR Store on Amazon.
9. Product Environment and Application

Image: The VEVOR Brazed Plate Heat Exchanger integrated into a typical mechanical room setting, demonstrating its application in various heating and cooling systems.
The VEVOR Brazed Plate Heat Exchanger is versatile and suitable for a wide range of applications, including:
- Floor heating systems
- Domestic hot water supply
- Snow melting systems
- Beer cooling and brewing processes
- Other industrial and residential heating/cooling applications


