
KTC H24V13
KTC 24 Inch FHD 1080P Computer Gaming Monitor User Manual
Model: H24V13
1. Introduction
Thank you for choosing the KTC 24 Inch FHD 1080P Computer Gaming Monitor. This manual provides essential information for setting up, operating, maintaining, and troubleshooting your new monitor. Designed for both professional gamers and everyday users, this monitor offers a superior visual experience with its advanced features and ergonomic design.
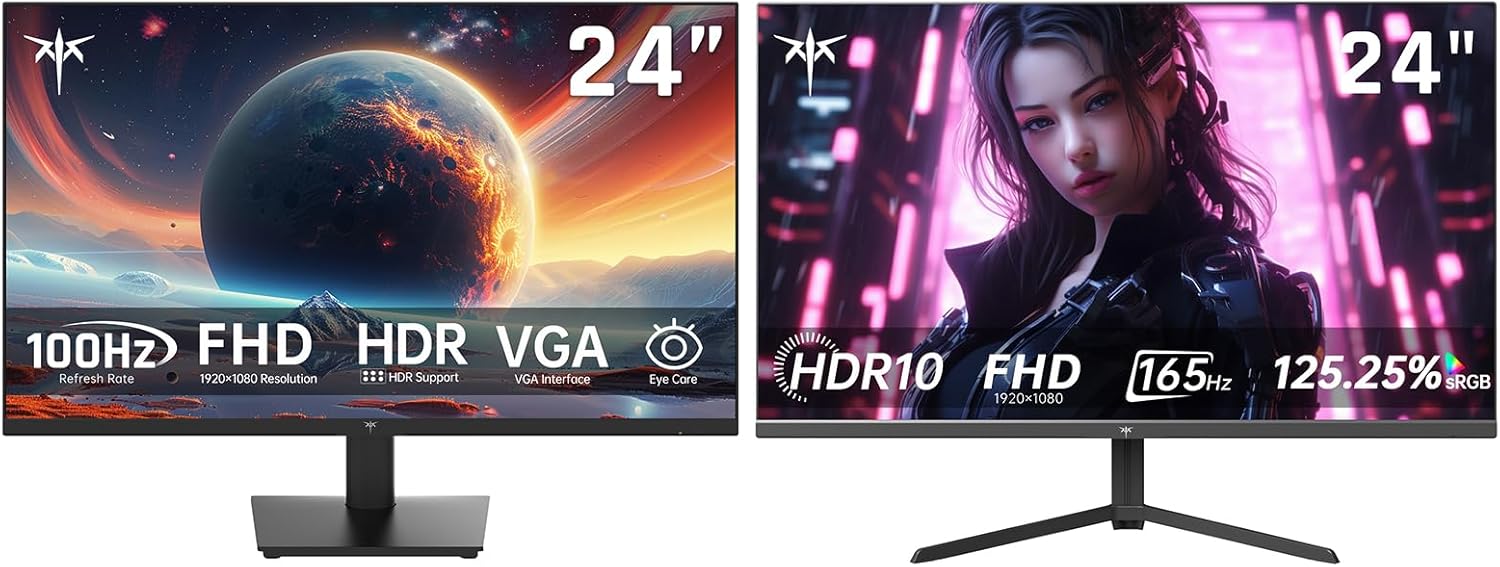
Figure 1.1: The KTC 24 Inch FHD 1080P Computer Gaming Monitor, showcasing its sleek design and 24-inch display. This image highlights the monitor's overall appearance and size.
Please read this manual thoroughly before using the product and retain it for future reference.
2. Safety Information
To ensure safe and optimal performance, please observe the following safety precautions:
- Do not expose the monitor to rain, moisture, or extreme temperatures.
- Avoid placing the monitor in direct sunlight or near heat sources.
- Ensure proper ventilation around the monitor to prevent overheating.
- Use only the power adapter supplied with the monitor.
- Do not open the monitor casing. Refer all servicing to qualified personnel.
- Clean the monitor with a soft, dry cloth. Avoid using abrasive cleaners or solvents.
- Position the monitor on a stable, level surface to prevent it from falling.
3. Package Contents
Please check the package contents to ensure all items are present:
- KTC 24 Inch FHD 1080P Computer Gaming Monitor (H24V13)
- Monitor Stand (Base and Neck)
- Power Adapter and Power Cable
- HDMI Cable
- User Manual (this document)
- Warranty Card (if applicable)
4. Setup
4.1 Assembling the Stand
- Carefully remove the monitor from its packaging, keeping the screen protected.
- Attach the stand neck to the monitor panel by aligning the grooves and securing with screws (if provided).
- Connect the stand base to the stand neck and tighten the captive screw at the bottom of the base.
- Place the assembled monitor on a stable, flat surface.

Figure 4.1: Illustration of monitor stand assembly and flexible tilt adjustment from -5° to 15°. The image also highlights HDMI 1.4, VGA, and Earphone ports, along with VESA 100mm x 100mm wall hanging support.
4.2 Connecting Cables
Connect the necessary cables to the corresponding ports on the back of the monitor and your computer/device.
- Power Cable: Connect the power adapter to the monitor's DC input port, then plug the power cable into a wall outlet.
- Video Input:
- For optimal performance, use the provided HDMI cable to connect your computer's HDMI output to one of the monitor's HDMI ports.
- Alternatively, use a DisplayPort cable to connect to the monitor's DisplayPort.
- A VGA port is also available for older connections.
- Audio Output: Connect headphones or external speakers to the 3.5mm earphone jack for audio output.

Figure 4.2: Overview of the monitor's diverse connectors, including HDMI, DisplayPort, earphone jack, and DC power ports, facilitating enhanced gaming connectivity with various devices like PCs, PlayStation, laptops, and Xbox.
4.3 Initial Power On and Configuration
- Press the power button on the monitor to turn it on.
- The monitor will automatically detect the active input source. If not, use the OSD joystick to manually select the input.
- Adjust display settings as needed using the On-Screen Display (OSD) menu.
5. Operating the Monitor
5.1 OSD Menu Navigation
The monitor features a 5-way joystick control located on the back or bottom for easy navigation of the On-Screen Display (OSD) menu.
- Press the joystick in to open the OSD menu.
- Move the joystick Up/Down/Left/Right to navigate through menu options.
- Press the joystick in again to confirm a selection or enter a sub-menu.
- Move the joystick Left to go back to the previous menu or exit the OSD.
5.2 Picture Settings
Adjust various display parameters to optimize your viewing experience:
- Brightness: Adjust the overall luminance of the screen.
- Contrast: Control the difference between the brightest and darkest areas.
- Color Temperature: Select from preset modes (e.g., Warm, Cool, User) or adjust RGB values manually.
- Picture Mode: Choose from various presets like Standard, Game, Movie, Text, etc., for different content types.
- HDR: Enable or disable High Dynamic Range for enhanced contrast and color.

Figure 5.1: The monitor's ability to display content in stunning color with a wide range of colors, neat limitless hues, and HDR support, featuring 104% sRGB Color Gamut, 4000:1 Contrast Ratio, and 300 cd/m² Typical Brightness.
5.3 Gaming Features
The KTC monitor is equipped with features to enhance your gaming experience:
- FreeSync Premium & G-Sync Compatible: Synchronizes the monitor's refresh rate with your graphics card to eliminate screen tearing and stuttering, providing smoother gameplay. Ensure this feature is enabled in your graphics card settings.
- Extreme Low Motion Blur (ELMB): Reduces motion blur for sharp gaming visuals, especially in fast-paced scenes, by achieving a 1ms response time.
- GAMEPLUS: Access in-game enhancements directly from the OSD:
- Crosshairs: Provides an on-screen crosshair for improved aiming accuracy in FPS games.
- Black Equalizer: Enhances visibility in dark areas of the game without overexposing bright areas, allowing you to spot hidden details.
- Timer: An on-screen timer for tracking in-game events.

Figure 5.2: Visual representation of the monitor's gaming capabilities, including FHD 1920x1080 resolution, 165Hz Refresh Rate, 1ms MPRT Response Time, AMD FreeSync support, and HDR10 compatibility, designed to fuel your gaming experience.
5.4 Eye Care Features
The monitor incorporates features to reduce eye strain during prolonged use:
- Anti-Glare Screen: Reduces reflections and glare from ambient light.
- Blue Light Filter: Minimizes harmful blue light emissions, which can contribute to eye fatigue. Adjust the level of blue light reduction through the OSD menu.
- Flicker-Free Technology: Eliminates screen flickering, further reducing eye strain.

Figure 5.3: The monitor's eye care features, including Low Blue Mode and Flicker-Free technology, designed to reduce glare and eye fatigue during extended use, as depicted with a user working on a spreadsheet.
5.5 Comprehensive Vision
The monitor's three-sided bezel-less design allows for a seamless multi-screen setup, providing an expansive and immersive viewing experience. The 178° viewing angle ensures consistent picture quality from various perspectives.

Figure 5.4: An example of a multi-monitor setup utilizing the KTC monitor's three-sided bezel-less design, demonstrating how it enables a comprehensive and immersive visual experience with a wide 178° viewing angle.
6. Maintenance
Proper maintenance ensures the longevity and optimal performance of your monitor.
- Cleaning the Screen: Gently wipe the screen with a soft, lint-free cloth. For stubborn marks, lightly dampen the cloth with water or a screen-specific cleaning solution. Never spray liquid directly onto the screen.
- Cleaning the Casing: Use a soft, dry cloth to wipe the monitor casing. Avoid using harsh chemicals or abrasive materials.
- Ventilation: Ensure the ventilation openings on the monitor are not blocked. Dust accumulation can be removed with a soft brush or compressed air.
- Power Off: Always turn off the monitor and unplug it from the power outlet before cleaning or if it will not be used for an extended period.
7. Troubleshooting
If you encounter issues with your monitor, refer to the following common problems and solutions:
| Problem | Possible Cause | Solution |
|---|---|---|
| No Power | Power cable not connected; Power outlet faulty; Monitor off. | Ensure power cable is securely connected. Test the power outlet. Press the monitor's power button. |
| No Signal | Video cable not connected; Incorrect input source selected; Computer not on/sleeping. | Check video cable connections (HDMI/DP/VGA). Select the correct input source via OSD. Wake up or turn on your computer. |
| Flickering Screen | Loose video cable; Graphics card issue; Refresh rate mismatch. | Reseat video cable. Update graphics drivers. Adjust refresh rate in display settings. |
| Image is too dark/bright | Brightness/Contrast settings incorrect. | Adjust Brightness and Contrast settings in the OSD menu. |
| Colors are incorrect | Color temperature or picture mode settings incorrect. | Adjust Color Temperature or select a different Picture Mode in the OSD menu. |
If the problem persists after trying these solutions, please contact KTC customer support.
8. Specifications
Detailed technical specifications for the KTC H24V13 monitor:
| Feature | Description |
|---|---|
| Model Number | H24V13 |
| Screen Size | 24 Inches |
| Panel Type | Fast IPS |
| Resolution | 1920 x 1080 (FHD 1080p) |
| Aspect Ratio | 16:9 |
| Refresh Rate | 165Hz (supports 144Hz) |
| Response Time | 1ms (ELMB) |
| Brightness | 300 cd/m² |
| Color Gamut | 125% sRGB |
| HDR Support | HDR 10 |
| Adaptive Sync | FreeSync Premium & G-Sync Compatible |
| Viewing Angle | 178° |
| Connectivity | HDMI 2.0 (x2), DisplayPort 1.4 (x2), VGA, Earphone Jack |
| VESA Compatibility | 100 x 100mm |
| Tilt Adjustment | -5° to 15° |
| Eye Care Features | Anti-Glare, Blue Light Filter, Flicker-Free |
9. Warranty and Support
KTC provides a limited warranty for this product. Please refer to the warranty card included in your package for specific terms and conditions. For technical support, troubleshooting assistance, or warranty claims, please contact KTC customer service through the official website or the contact information provided with your purchase.
You can also visit the KTC Store on Amazon for more product information and support resources.
Related documentsH24V13


Ask a question about this manual
Ask about setup, troubleshooting, compatibility, parts, safety, or missing instructions. Manuals+ will review the question and use this page’s manual context to help answer it.