1. Introduction
This manual provides detailed instructions for the assembly, operation, and maintenance of your HAPPRUN 100-inch Projector Screen and Stand. This portable projection system is designed for both indoor and outdoor use, offering a 16:9 aspect ratio and a 160° wide viewing angle for an optimal viewing experience. The screen supports both front and rear projection and is made from wrinkle-free polyester material for clear image display.

Image 1.1: HAPPRUN 100-inch Projector Screen and Stand assembled with a projected image.
2. Package Contents
Please verify that all components listed below are present in your package. If any items are missing or damaged, please contact customer support.
- 100-inch HD Projection Screen (1)
- Screen Frame (1 set)
- Support Tube (2)
- Leg Support Tube (4)
- Large Screw (4)
- Sponge Cushion (2)
- Nails (6)
- Fiber Rope (2)
- Carry Bag (1)
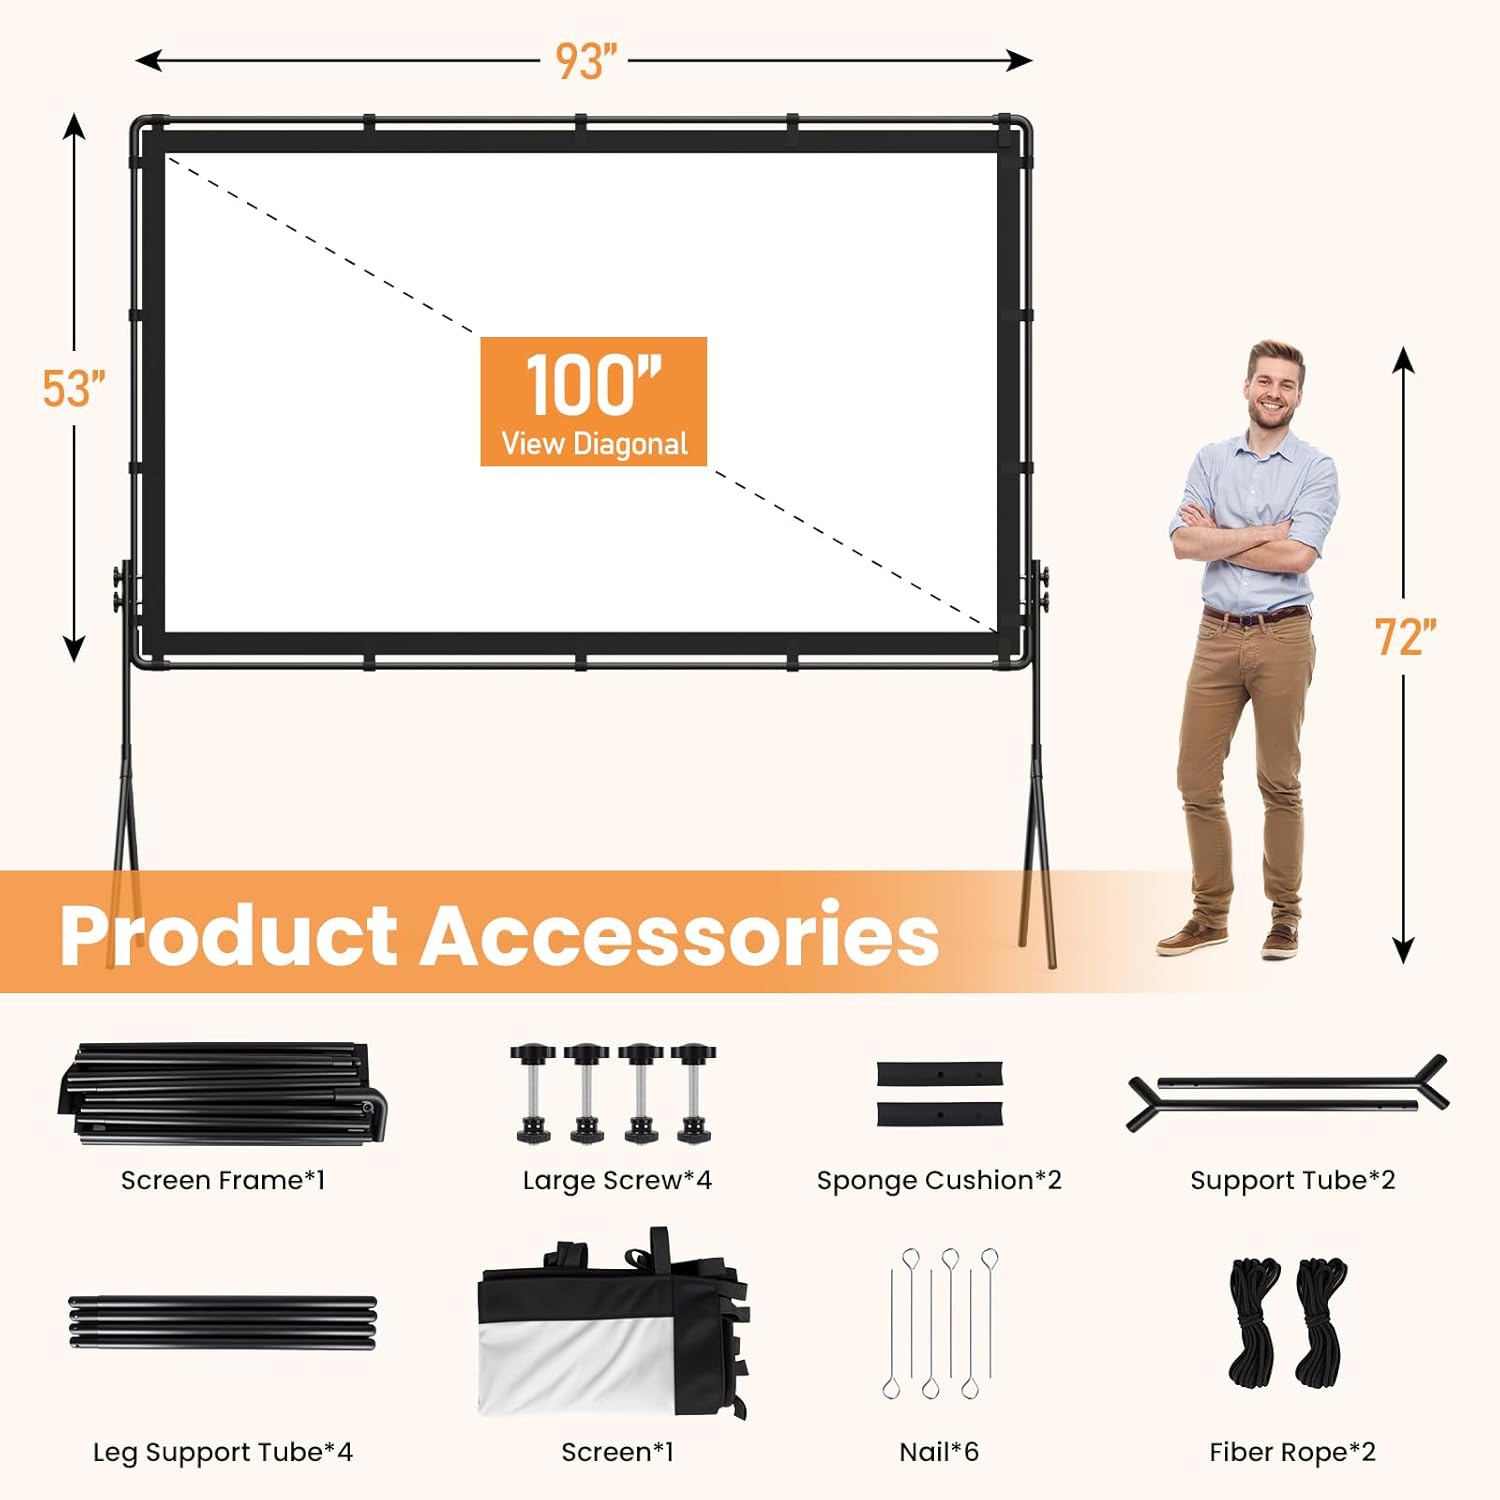
Image 2.1: Visual representation of all included product accessories.
3. Setup Instructions
Follow these steps to assemble your projector screen and stand. No tools are required for assembly.
- Set Up the Frame: Pull out the rope to automatically connect the frame components. Ensure all joints are securely engaged.

Image 3.1: Detail of frame assembly using the internal elastic rope system.
- Attach the Screen to the Frame: Secure the 100-inch projection screen to the assembled frame using the 18 hook and loop fasteners located around the screen's edges. Ensure the screen is taut and evenly attached.

Image 3.2: Attaching the screen to the frame using hook and loop fasteners.
- Mount the Stand: Connect the support tubes and leg support tubes to form the stand. Attach the assembled stand to the screen frame. Tighten the large screws to ensure the joints are stable and secure.

Image 3.3: Securing the frame to the stand by tightening the screws.
- Stabilize Outdoors (Optional): For outdoor use, insert the provided nails into the ground through the loops on the fiber ropes, then attach the ropes to the frame to enhance stability against wind.

Image 3.4: Using nails and ropes for additional stability when setting up outdoors.

Image 3.5: Overview of the four main setup steps.
4. Operating Instructions
4.1 Projection Modes
The HAPPRUN projector screen supports both front and rear projection. This allows for flexible placement of your projector, either in front of the screen or behind it, depending on your setup requirements and available space.

Image 4.1: Illustration of front and rear projection capabilities.
4.2 Viewing Angle
The screen offers a 160° wide viewing angle, ensuring a clear and vibrant image from various positions. This wide angle is ideal for group viewing in home theaters, outdoor cinemas, or conference rooms.

Image 4.2: Demonstrating the wide 160° viewing angle for multiple viewers.
4.3 Portability
The entire system is designed for portability. Once disassembled, all components fit into the included carry bag, making it easy to transport for family trips, camping, or backyard movie nights.

Image 4.3: The compact carry bag allows for easy transportation.
5. Maintenance
5.1 Cleaning the Screen
The screen is made of polyester milk silk material, which is designed to be wrinkle-free. To clean the screen, gently wipe it with a soft, damp cloth. Avoid using harsh chemicals or abrasive materials that could damage the screen surface.

Image 5.1: The screen's polyester material is designed to be wrinkle-free and durable.
5.2 Storage
When not in use, disassemble the screen and stand according to the reverse of the setup instructions. Store all components in the provided carry bag in a cool, dry place away from direct sunlight and extreme temperatures.
6. Troubleshooting
- Screen is not taut/has wrinkles: Ensure all hook and loop fasteners are securely attached around the frame. The polyester material is designed to be wrinkle-free; if wrinkles persist, gently stretch the screen during attachment.
- Stand feels unstable: Verify that all screws connecting the frame and stand are tightened. For outdoor use, always utilize the provided nails and fiber ropes to anchor the stand to the ground, especially in windy conditions.
- Missing parts: Refer to the "Package Contents" section. If any parts are missing upon arrival, contact HAPPRUN customer support immediately.
7. Specifications
| Feature | Detail |
|---|---|
| Screen Size (Diagonal) | 100 inches |
| Aspect Ratio | 16:9 |
| Viewing Angle | 160° |
| Projection Support | Front and Rear Projection |
| Material | Polyester (Wrinkle-Free) |
| Mounting Type | Tripod Mount |
| Item Weight | 10.08 pounds |
| Product Dimensions (Packaged) | 22.2"W x 6.3"H |
8. Warranty and Support
For warranty information or technical support, please refer to the HAPPRUN official website or contact their customer service directly. You can also visit the HAPPRUN Store on Amazon for additional product information and support resources.


