
1. Introduction
Thank you for choosing the WORKPRO 17-inch Heavy Duty Pull and Pry Bar. This tool is designed to assist in the professional and domestic installation of various flooring types, including laminate, vinyl plank (LVP, LVT), and hardwood floating floors. This manual provides essential information for safe and effective use, maintenance, and troubleshooting.
Please read this manual thoroughly before using the tool and retain it for future reference.
2. Safety Information
Always observe basic safety precautions when using hand tools to reduce the risk of injury.
- Wear Eye Protection: Always wear safety glasses or goggles to protect your eyes from flying debris.
- Inspect Tool Before Use: Check the pull bar for any signs of damage, bending, or wear. Do not use a damaged tool.
- Proper Grip: Maintain a firm grip on the tool during operation.
- Use for Intended Purpose: This tool is specifically designed for flooring installation. Do not use it for purposes other than those specified in this manual.
- Keep Work Area Clear: Ensure your work area is free from obstructions and tripping hazards.
- Keep Children Away: Store tools out of reach of children and ensure they are not present in the work area.
- Use Appropriate Striking Tool: When using the striking block, use a rubber mallet or a soft-faced hammer to prevent damage to the pull bar and reduce impact force.
3. Product Overview
The WORKPRO Pull and Pry Bar is constructed for durability and efficiency in flooring projects.

Figure 1: WORKPRO 17-inch Heavy Duty Pull and Pry Bar. This image shows the overall design of the black steel pull bar, featuring the striking block and the pry end.
Key Features:
- Enhanced Durability: Made from premium A3 steel with a black matt coating for strength, corrosion resistance, and rust resistance.
- Floor Protection: Features a soft felt backing and a fully felted bottom to prevent scratches on flooring surfaces during installation.
- Integrated Striking Block: A solid square steel block provides a convenient and robust point for hammering, facilitating the closing of gaps and seams in laminate floors without causing damage.
- Beveled Design: The specially designed beveled edge allows for effective use in tight spaces or close to walls.
- Optimal Dimensions: At 17 inches long and 6 mm thick, weighing 2.75 lb, it offers substantial leverage and resistance to warping.
- T-Shape Head: The "L" steel angle of the T-shape head ensures an accurate fit, protecting the tongue and groove of flooring planks.
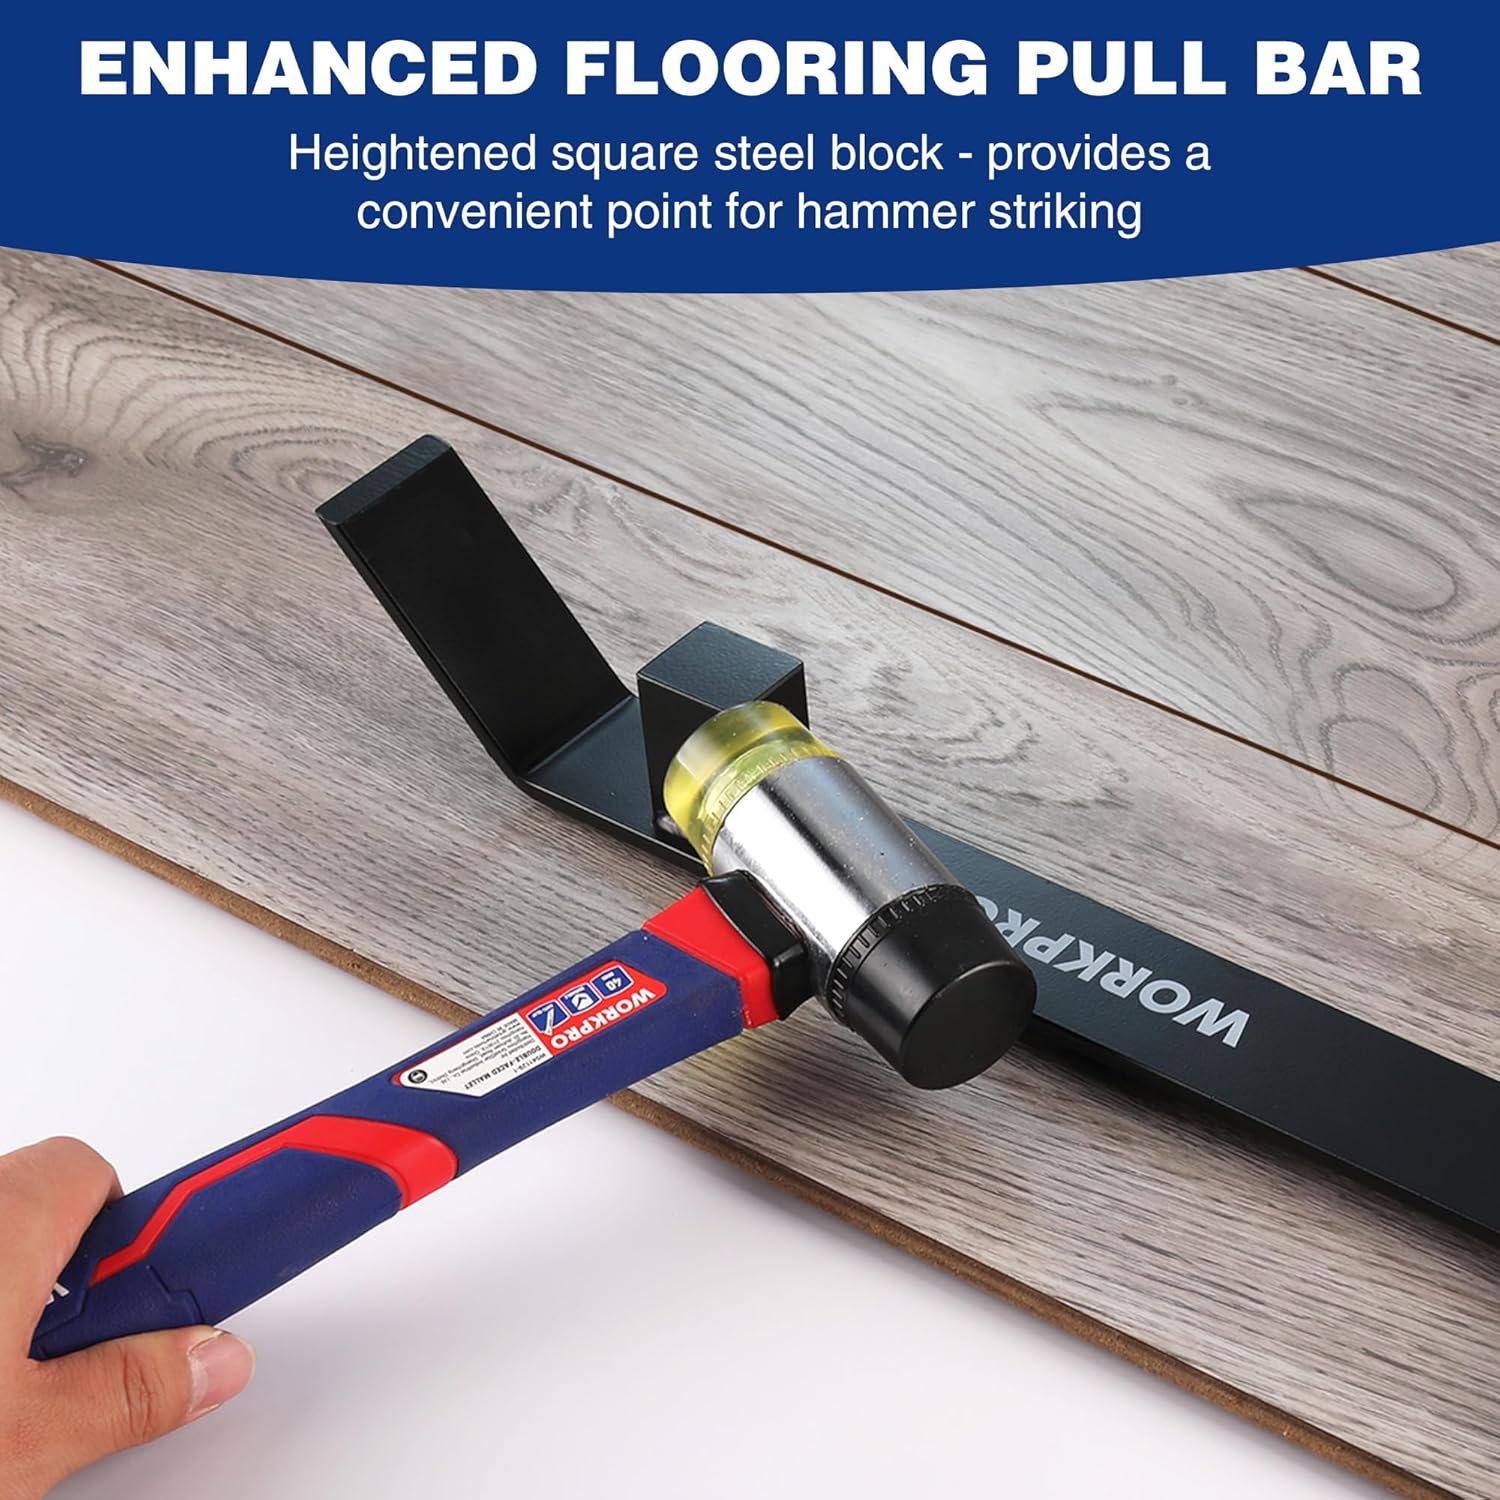
Figure 2: Close-up view highlighting the heavy-duty thick premium steel construction of the pull bar, emphasizing its solid, durable, and rust-proof qualities for long-lasting use.
4. Specifications
| Feature | Detail |
|---|---|
| Model Number | W045021AZ |
| Material | Premium A3 Steel |
| Color | Black |
| Length | 17 inches |
| Thickness | 6 mm |
| Item Weight | 2.75 lbs (approx. 1.25 kg) |
| Package Dimensions | 17.72 x 5.04 x 2.64 inches |
| Power Source | Hand-powered |
| Included Components | Pull bar |

Figure 3: Product size diagram illustrating the key dimensions and weight of the WORKPRO pull bar.
5. Setup and Preparation
The WORKPRO Pull and Pry Bar requires minimal setup. Ensure you have the following items ready before beginning your flooring installation:
- Safety Glasses: Essential for eye protection.
- Rubber Mallet or Soft-Faced Hammer: For striking the pull bar's block.
- Flooring Materials: Ensure your laminate, LVP, LVT, vinyl plank, or hardwood flooring is ready for installation.
- Clean Work Area: A clean, level surface is crucial for proper flooring installation.
6. Operating Instructions
The pull bar is primarily used to close gaps between flooring planks and to pry planks into position, especially near walls.
6.1. Closing Gaps with the Striking Block
- Position the Pull Bar: Place the T-shape head of the pull bar against the edge of the flooring plank that needs to be moved closer to the adjacent plank. Ensure the felted bottom is facing down to protect the floor.
- Align the Striking Block: Position the solid square steel block so it is accessible for striking with your mallet or hammer.
- Strike Gently: Using a rubber mallet or soft-faced hammer, gently but firmly strike the striking block. Apply controlled force to gradually close the gap between the planks. Avoid excessive force, which could damage the flooring or the tool.
- Check Alignment: After each strike, check the alignment of the planks to ensure they are properly engaged and the gap is closed.
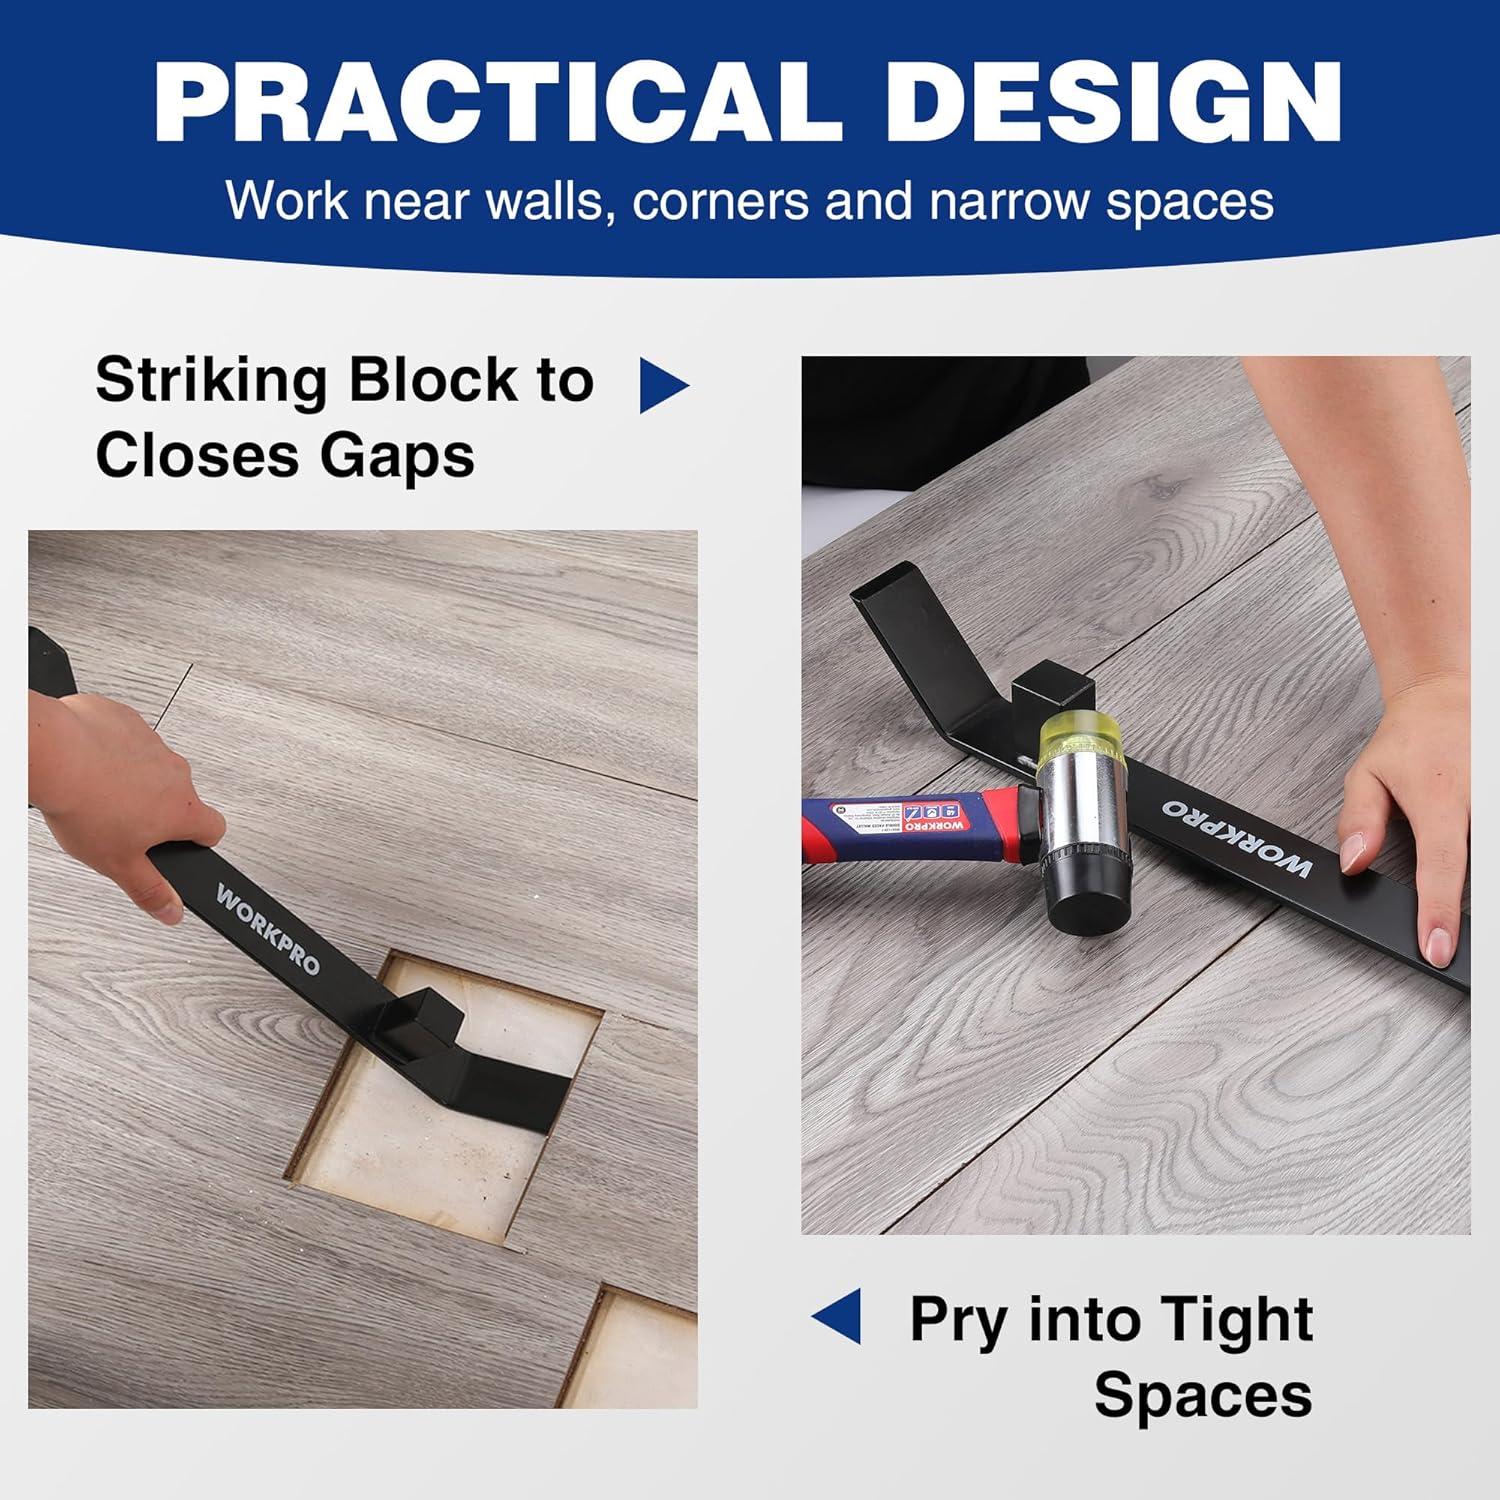
Figure 4: Demonstrates using the striking block of the pull bar with a mallet to close gaps between flooring planks.
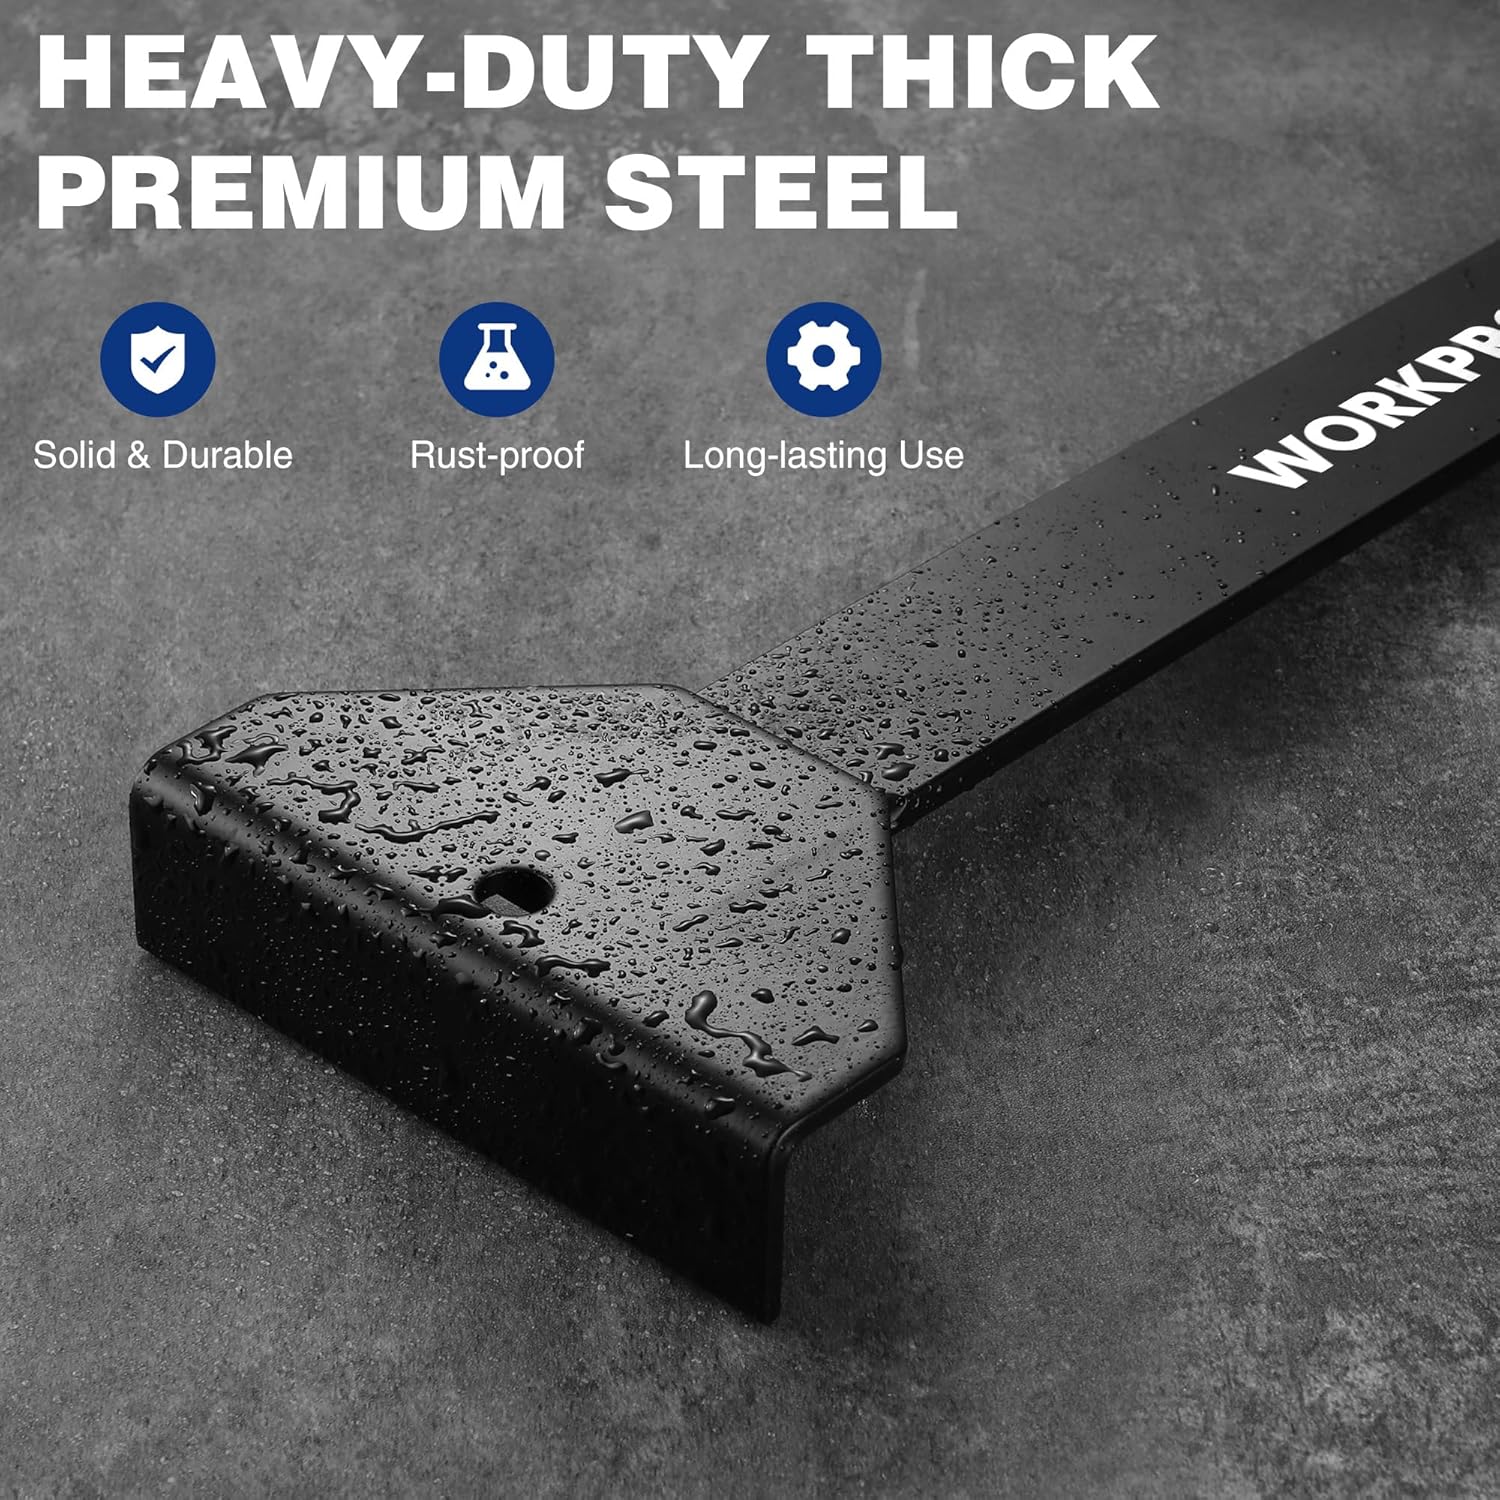
Figure 5: Another view of the enhanced flooring pull bar, illustrating the proper technique for striking the block to secure planks.
6.2. Prying in Tight Spaces
- Insert the Beveled End: When working close to a wall or in a tight corner, insert the beveled end of the pull bar between the last plank and the wall.
- Apply Leverage: Use the pull bar to gently pry the plank into its final position. The beveled design allows for effective leverage in confined areas.
- Protect Surfaces: Ensure the felted bottom and any protective padding are correctly positioned to prevent damage to the wall or the installed flooring.

Figure 6: Illustrates the use of the pull bar's beveled end to pry and fit flooring planks in tight spaces near a wall.

Figure 7: A composite image demonstrating both the striking block function for closing gaps and the prying action for fitting planks in tight areas.
7. Maintenance and Care
- Cleaning: After each use, wipe the pull bar clean with a dry cloth to remove any dust or debris. If necessary, use a slightly damp cloth and dry thoroughly.
- Inspection: Regularly inspect the tool for any signs of wear, bending, or damage, especially the felt backing and the striking block. Replace the tool if it shows significant damage that could affect its performance or safety.
- Storage: Store the pull bar in a dry place, away from moisture and corrosive materials, to prevent rust and prolong its lifespan.
8. Troubleshooting
The WORKPRO Pull and Pry Bar is a simple, robust tool. Most issues can be resolved by ensuring proper technique and tool condition.
- Problem: Flooring planks are not closing gaps effectively.
- Solution: Ensure the T-shape head is fully engaged with the plank. Apply consistent, firm strikes to the striking block. Verify that the flooring planks themselves are not damaged or obstructed.
- Problem: Scratches appear on the floor during use.
- Solution: Check the felt backing and bottom of the pull bar for wear or damage. Ensure no debris is trapped between the tool and the floor. Replace the tool if the felt is severely worn.
- Problem: Tool appears bent or damaged.
- Solution: Discontinue use immediately. A damaged tool can be unsafe and ineffective. Replace the tool.
9. Warranty and Support
For warranty information or technical support regarding your WORKPRO 17-inch Heavy Duty Pull and Pry Bar, please refer to the official WORKPRO website or contact their customer service department. Keep your purchase receipt as proof of purchase.
You can visit the WORKPRO store for more information: WORKPRO Official Store


