
Introduction
Thank you for choosing the Hisense APC09QC Portable Air Conditioner. This manual provides essential information for the safe and efficient operation of your new appliance. Please read these instructions thoroughly before use and retain them for future reference. This portable air conditioner is designed to provide cooling for indoor spaces, featuring a compact design and convenient mobility.
Safety Information
Always follow basic safety precautions when using electrical appliances to reduce the risk of fire, electric shock, and injury.
- Ensure the power supply matches the voltage specified on the unit's rating label.
- Do not operate the unit with a damaged cord or plug.
- Do not insert fingers or objects into the air inlet or outlet.
- Keep the unit away from flammable materials and open flames.
- Always unplug the unit before cleaning or servicing.
- Do not use the unit in wet environments such as bathrooms or laundry rooms.
- This appliance is not intended for use by persons (including children) with reduced physical, sensory or mental capabilities, or lack of experience and knowledge, unless they have been given supervision or instruction concerning use of the appliance by a person responsible for their safety.
Package Contents
Carefully unpack your portable air conditioner and check that all items are present.
- Hisense APC09QC Portable Air Conditioner Unit
- Air Exhaust Hose
- Window Sealing Kit (components may vary, refer to specific kit instructions)
- Remote Control (if included)
- User Manual (this document)
Product Overview
Familiarize yourself with the main components of your Hisense APC09QC Portable Air Conditioner.
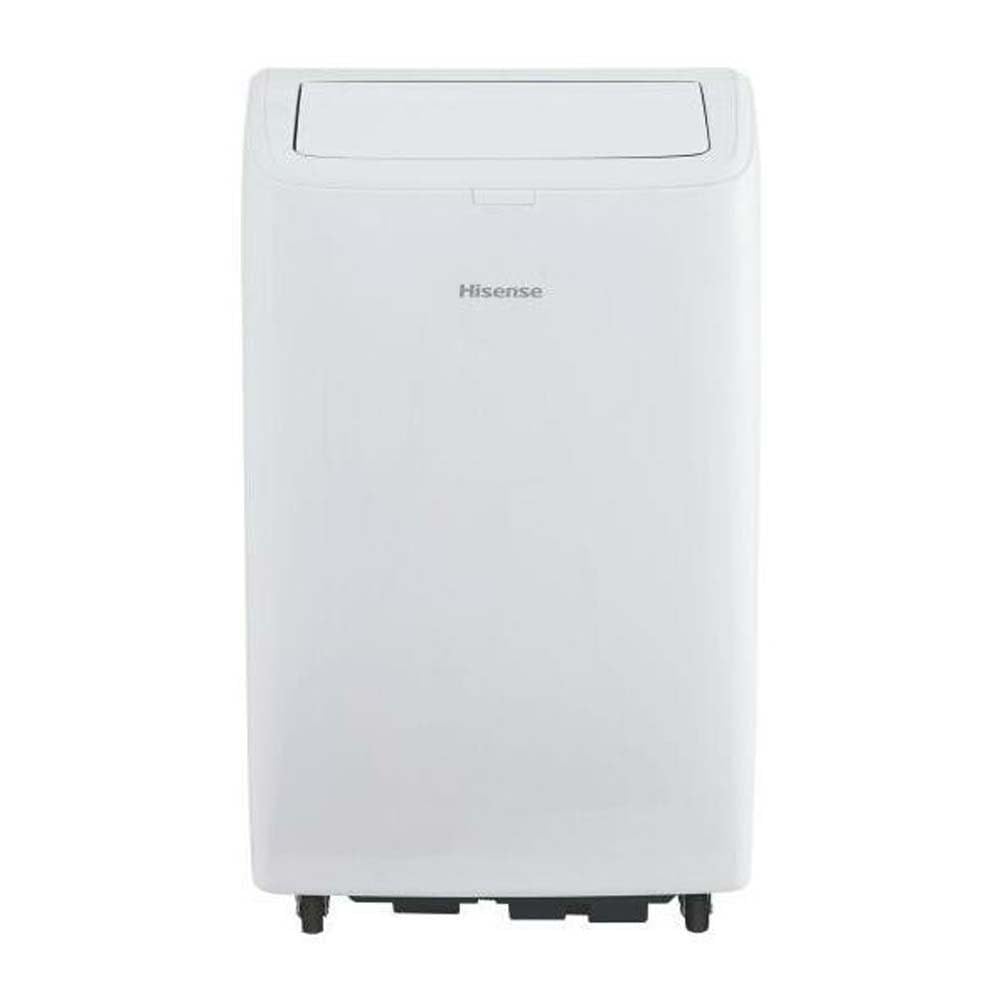
Figure 1: Front view of the Hisense APC09QC Portable Air Conditioner. The unit is white with the Hisense logo on the front. The top air outlet flap is open, showing the internal louvers.

Figure 2: Side view of the Hisense APC09QC Portable Air Conditioner. This image highlights the integrated side handle for easy transport and the caster wheels at the base, facilitating movement.

Figure 3: Top view of the Hisense APC09QC Portable Air Conditioner. The air outlet flap is closed, showing the sleek top panel where the control interface is typically located.
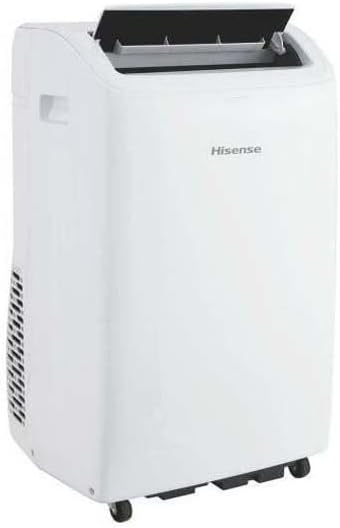
Figure 4: Rear-side view of the Hisense APC09QC Portable Air Conditioner. This angle shows the exhaust vent grille on the side, where the air exhaust hose connects.
Key Features:
- Control Panel: Located on the top of the unit for easy access to settings.
- Air Outlet: Adjustable louvers to direct airflow.
- Caster Wheels: For convenient movement between rooms.
- Side Handles: For lifting and carrying the unit.
- Air Filter: Removable for cleaning, located behind a grille (typically on the back or side).
- Exhaust Air Outlet: Connection point for the exhaust hose to vent hot air outside.
- Drain Port: For manual drainage of condensed water.
Setup
Proper setup is crucial for optimal performance and safety.
- Placement: Place the air conditioner on a flat, stable surface near a window. Ensure there is at least 20 cm (8 inches) of space around the unit for proper airflow. Do not block the air inlets or outlets.
- Exhaust Hose Installation:
- Attach one end of the air exhaust hose to the exhaust air outlet on the back of the unit. Twist or click into place securely.
- Extend the other end of the hose to the window.
- Install the window sealing kit according to its specific instructions. This typically involves fitting the adjustable window slider kit into the window opening and sealing any gaps to prevent hot air from re-entering the room.
- Connect the exhaust hose adapter to the window kit, ensuring a tight seal to expel hot air outdoors.
- Power Connection: Plug the power cord into a grounded electrical outlet. Ensure the outlet meets the electrical requirements of the unit (230 Volts).
- Initial Drainage Check: Before first use, ensure the drain plug is securely closed to prevent water leakage during operation.
Operating Instructions
Your Hisense APC09QC offers various modes and settings for personalized comfort.
Control Panel and Remote Control:
The unit can be operated via the control panel on top of the unit or the included remote control. The functions are generally identical.
- Power Button: Turns the unit ON or OFF.
- Mode Button: Cycles through available operating modes: Cool, Fan, Dehumidify.
- Temperature Up/Down Buttons: Adjusts the desired temperature setting.
- Fan Speed Button: Selects fan speed (Low, Medium, High).
- Timer Button: Sets the auto-on or auto-off timer.
- Sleep/Silent Mode Button: Activates a quieter operation mode for nighttime use.
Operating Modes:
- Cool Mode: Provides cooling. Set your desired temperature using the Up/Down buttons. The unit will cool until the room reaches the set temperature.
- Fan Mode: Circulates air without cooling. You can adjust the fan speed.
- Dehumidify Mode: Removes moisture from the air. The fan speed is typically fixed in this mode.
WiFi Connectivity and App Control:
The Hisense APC09QC is WiFi enabled and can be controlled via a smartphone application, such as ConnectLife. Refer to the app's instructions for pairing and remote operation. This allows for control through Google Assistant and Alexa.
- Download the ConnectLife app from your device's app store.
- Follow the in-app instructions to create an account and add your Hisense APC09QC unit.
- Once connected, you can control modes, temperature, fan speed, and set schedules remotely.
Maintenance
Regular maintenance ensures efficient operation and extends the lifespan of your air conditioner.
- Cleaning the Air Filter:
- The air filter should be cleaned every two weeks or more frequently depending on usage and air quality.
- Unplug the unit.
- Remove the filter from its housing (refer to the unit's diagram for exact location).
- Wash the filter with warm, soapy water. Rinse thoroughly and allow it to air dry completely before reinstalling.
- Draining Condensed Water:
- During cooling and dehumidifying, water condenses inside the unit. The unit has an internal reservoir.
- When the reservoir is full, the unit may stop operating and display an indicator.
- Unplug the unit. Place a shallow pan or tray under the drain port.
- Remove the drain plug to allow water to flow out. Re-insert the plug once drainage is complete.
- Cleaning the Exterior:
- Wipe the exterior with a soft, damp cloth. Do not use harsh chemicals or abrasive cleaners.
- Ensure no water enters the control panel or other electrical components.
- Storage:
- Before long-term storage, drain all condensed water completely.
- Clean the air filter and ensure the unit is dry.
- Store the unit in an upright position in a cool, dry place, away from direct sunlight.
Troubleshooting
Before contacting customer service, refer to the following common issues and solutions.
| Problem | Possible Cause | Solution |
|---|---|---|
| Unit does not turn on. | No power, power cord unplugged, circuit breaker tripped, full water tank. | Check power connection, reset circuit breaker, drain water tank. |
| Unit is not cooling effectively. | Dirty air filter, blocked air intake/outlet, exhaust hose not properly installed/sealed, room too large, windows/doors open. | Clean air filter, ensure clear airflow, properly install and seal exhaust hose, close windows/doors. |
| Water leakage. | Drain plug loose or open, unit not level, internal reservoir full. | Ensure drain plug is secure, place unit on a level surface, drain water tank. |
| Unit is noisy. | Unit not on a level surface, fan obstruction, normal operating sounds. | Ensure unit is level, check for obstructions, some noise is normal during operation. |
| WiFi connection issues. | Incorrect network password, unit too far from router, app issues. | Verify WiFi password, move unit closer to router, restart app/unit, consult app's troubleshooting guide. |
Specifications
Technical details for the Hisense APC09QC Portable Air Conditioner.
| Model Number | APC09QC |
| Dimensions (D x W x H) | 49 cm x 31 cm x 88 cm (19.3 in x 12.2 in x 34.6 in) |
| Weight | 25.5 kg (56.2 lbs) |
| Cooling Capacity | 9000 BTU/h (2.6 kW / 2236 fg/h) |
| Energy Efficiency Class | A |
| Seasonal Energy Efficiency Ratio (SEER) | 37.4 |
| Noise Level | 63 Decibels |
| Refrigerant | R-290 |
| Voltage | 230 Volts |
| Power Consumption (Cooling) | 2.6 kW |
| Applicable Floor Area | Up to 60 square meters |
| Special Features | Silent Mode, WiFi Enabled (App Control) |
| Control Method | Control Panel, Remote Control, Application |
| Number of Power Levels | 3 (Fan Speeds) |
| Minimum Window Opening Height | 70.8 cm (27.9 in) |
| Minimum Window Opening Width | 32 cm (12.6 in) |
Warranty and Support
Your Hisense APC09QC Portable Air Conditioner comes with a manufacturer's warranty.
- Warranty Period: This product is covered by a two-year manufacturer's warranty from the date of purchase. This warranty covers defects in materials and workmanship under normal use.
- Warranty Claims: For warranty service, please retain your proof of purchase. Contact Hisense customer support or the retailer where the product was purchased. Do not attempt to repair the unit yourself, as this may void the warranty.
- Customer Support: For technical assistance, troubleshooting beyond this manual, or to inquire about parts and service, please visit the official Hisense website or contact their customer service department. Contact information can typically be found on the Hisense website or in your product registration materials.


