
1. Introduction
Thank you for choosing the AODK 79" L Shaped Desk. This manual provides essential information for the safe assembly, operation, and maintenance of your new desk. Please read these instructions carefully before beginning assembly and retain them for future reference.
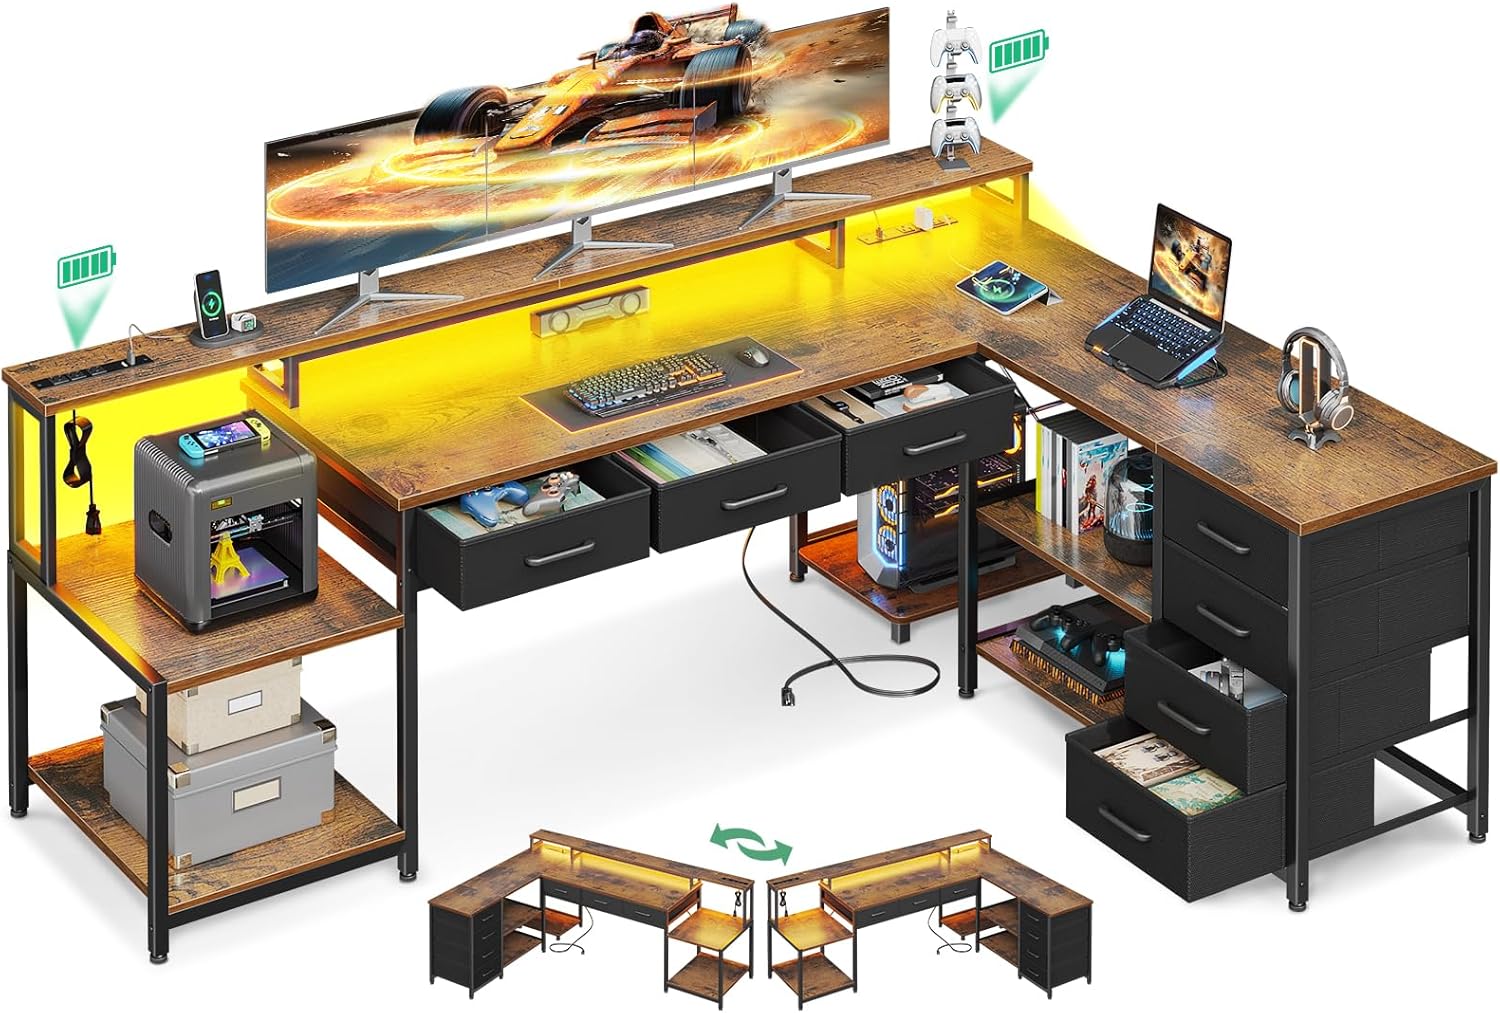
Image 1.1: Overview of the AODK 79" L Shaped Desk in a gaming environment.
2. Safety Information
- Always assemble the desk on a soft, clean surface to prevent scratches.
- Ensure all screws and fasteners are securely tightened before use. Periodically check for tightness.
- Do not overload the desk, shelves, or drawers. Refer to specifications for weight limits.
- Keep electrical components (power outlets, LED lights) away from water or excessive moisture.
- Use only the provided power cord and avoid using damaged cords or outlets.
- Keep small parts and packaging materials away from children to prevent choking hazards.
3. Package Contents
Before assembly, verify that all components listed in the included assembly guide are present and undamaged. The package typically includes:
- Desk panels (main desktop, monitor shelf, side shelves)
- Metal frame components and legs
- 3 under-desk fabric drawers
- 4-tier fabric drawers
- Built-in power outlet unit with AC and USB ports
- LED light strip
- CPU stand
- Assembly hardware (screws, bolts, tools)
- Assembly instruction manual
4. Setup and Assembly
The AODK L Shaped Desk features a reversible design, allowing you to configure the longer side to either the left or right, depending on your space requirements. Follow the detailed step-by-step instructions provided in the separate assembly manual included with your package.
General Assembly Steps:
- Unpack and Identify: Carefully unpack all components and lay them out. Compare with the parts list in your assembly guide.
- Assemble Frame: Construct the metal frame according to the chosen left or right configuration.
- Attach Desk Panels: Secure the main desktop, monitor shelf, and side shelf panels to the frame.
- Install Drawers: Assemble and insert the 3 under-desk fabric drawers and the 4-tier fabric drawers into their designated sections.
- Integrate Electrical Components: Install the built-in power outlet unit and attach the LED light strip as instructed.
- Final Adjustments: Ensure all connections are tight and the desk is stable. Use the adjustable leg pads to level the desk on uneven floors.

Image 4.1: Desk dimensions and illustration of the reversible design.
5. Operating Instructions
5.1 Built-in Power Outlets
The desk is equipped with a built-in power strip featuring 3 AC outlets (125V/12A) and 2 USB ports (5V/2A). To use, simply plug the desk's main power cord into a wall outlet. You can then connect your devices directly to the desk's integrated outlets for convenient power access.

Image 5.1: Detail of the integrated power outlets and monitor stand.
5.2 LED Lighting System
The integrated LED light strip offers 10 color variations and 10 lighting modes. Control the LED lights using the attached controller. Refer to the LED light's specific instructions for detailed operation of color changes, mode selection, and brightness adjustments.
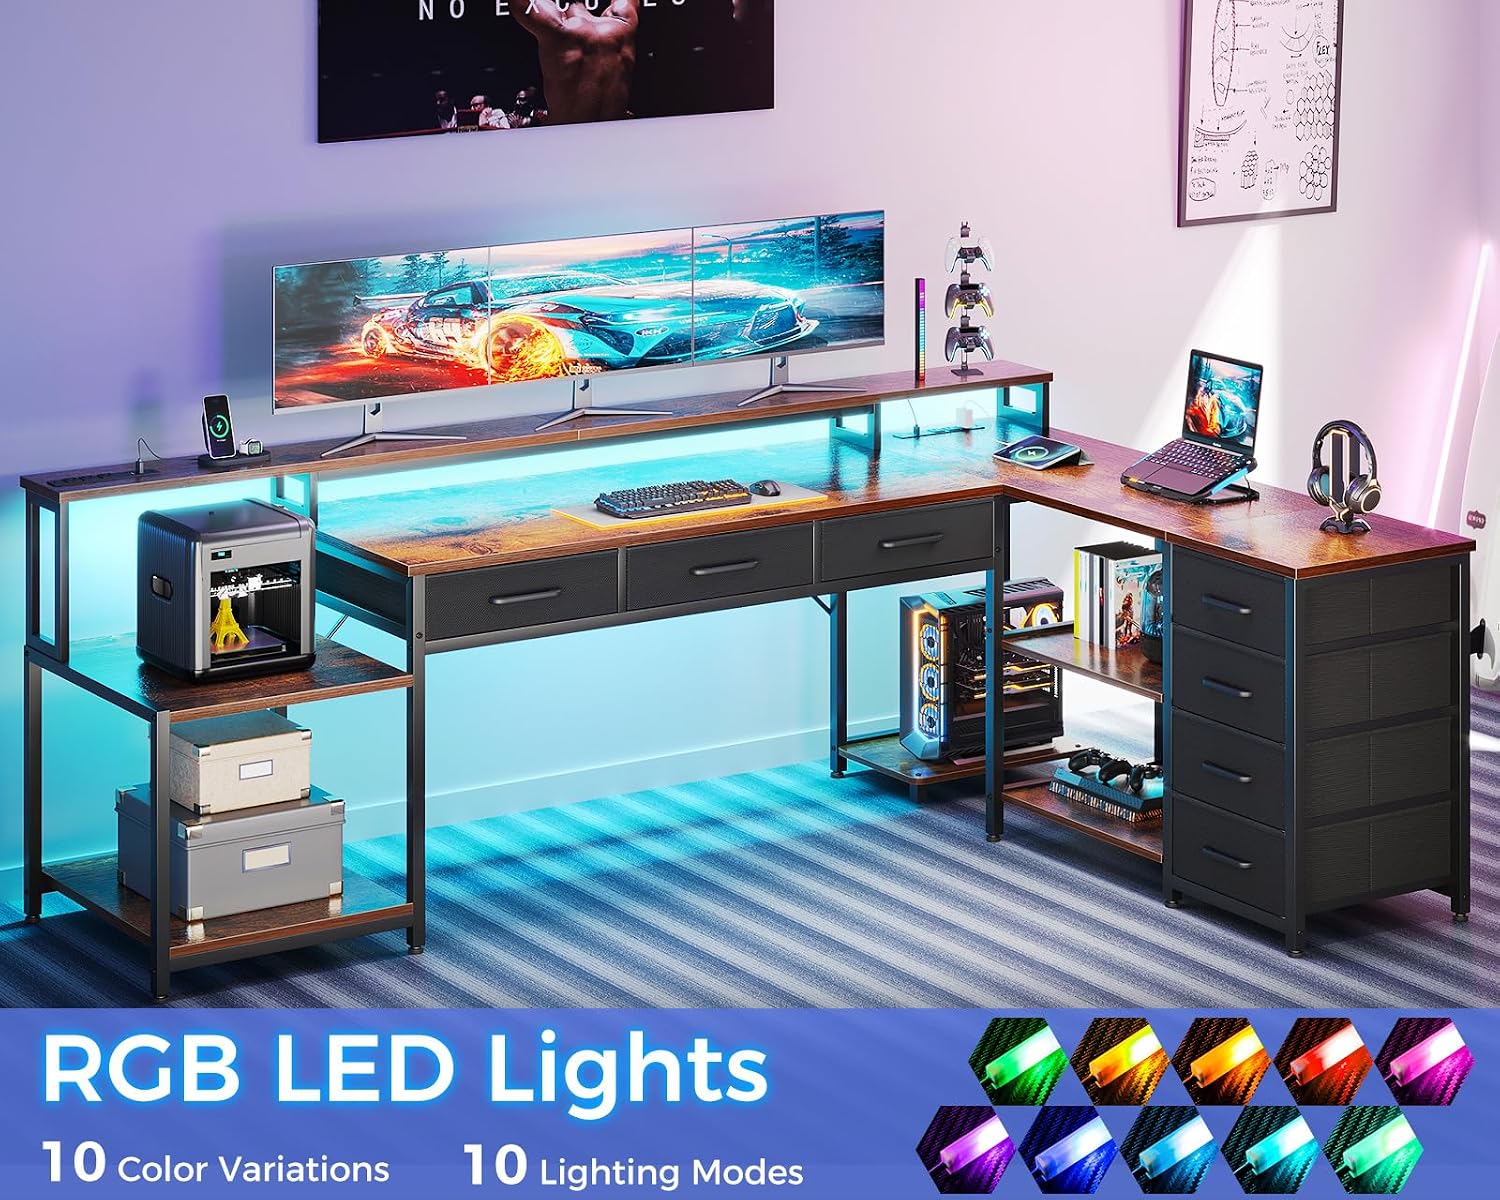
Image 5.2: RGB LED lights with various color and mode options.
5.3 Monitor Shelf
The elevated monitor shelf is designed to raise your display to an ergonomic viewing height, promoting better posture and reducing neck strain. It can accommodate multiple monitors or other desktop accessories.
5.4 Storage Features
The desk includes 3 fabric file drawers located beneath the desktop and a 4-tier fabric drawer unit on one side. Additionally, open storage shelves are provided for books, office accessories, and a dedicated CPU stand to protect your computer tower from dust and moisture.

Image 5.3: Detailed view of the 7 storage drawers.

Image 5.4: Multi-functional storage space including printer stand and CPU stand.
6. Maintenance
- Cleaning: Wipe surfaces with a soft, damp cloth. Avoid harsh chemicals or abrasive cleaners that may damage the finish.
- Drawer Care: The fabric drawers can be spot cleaned with a mild detergent. Ensure they are completely dry before reinserting.
- Hardware Check: Periodically inspect all screws and bolts to ensure they remain tight. Tighten as necessary to maintain stability.
- Electrical Components: Keep the power outlets and LED lights free from dust. Do not attempt to repair electrical components yourself.
7. Troubleshooting
7.1 Desk Instability
- Issue: Desk wobbles or is uneven.
- Solution: Check that all assembly screws are securely tightened. Adjust the leveling feet at the bottom of the desk legs to compensate for uneven flooring.
7.2 Power Outlets Not Working
- Issue: Devices plugged into the desk's outlets do not receive power.
- Solution: Ensure the desk's main power cord is securely plugged into a functional wall outlet. Check if the wall outlet itself is working by plugging in another device. If the issue persists, contact customer support.
7.3 LED Lights Not Functioning
- Issue: LED strip does not light up or respond to controls.
- Solution: Verify that the LED light strip is correctly connected to its power source and the desk's power unit. Ensure the desk's main power cord is plugged in. Check the controller for any loose connections or damage.
8. Specifications
- Brand: AODK
- Model Number: B02022101007UURTPNET2P613
- Overall Dimensions: 145.54 cm (D) x 199.39 cm (W) x 90.68 cm (H) / 57.3" (D) x 78.5" (W) x 35.7" (H)
- Weight: 37.6 kg (82.9 lbs)
- Material: Engineered Wood, Alloy Steel
- Color/Style: Vintage
- Drawers: 3 under-desk fabric file drawers, 4-tier fabric storage drawers
- Power Outlets: 3 AC Outlets (125V/12A), 2 USB Ports (5V/2A)
- LED Lights: 10 Color Variations, 10 Lighting Modes
- Special Features: Reversible Design, Monitor Shelf, CPU Stand, Storage Shelves
9. Warranty and Support
For warranty information or technical support, please refer to the warranty card included with your purchase or contact AODK customer service directly. Keep your purchase receipt as proof of purchase.
Contact Information: Please refer to the manufacturer's website or your purchase documentation for the most current contact details.


