
1. Introduction
This manual provides detailed instructions for the installation, operation, and maintenance of your Leadfan Car Stereo. This unit is specifically designed for Nissan Altima models manufactured between 2008 and 2012, equipped with manual air conditioning. Please read this manual thoroughly before installation and use to ensure proper function and safety.
The Leadfan Car Stereo features a 9-inch touchscreen display, wireless Apple CarPlay, Android Auto, GPS navigation, Bluetooth 5.1, WiFi connectivity, and supports a backup camera. It operates on an Android 12 system with 2GB RAM and 32GB ROM.
2. Safety Information
- Professional Installation Recommended: Due to the complexity of car electrical systems, professional installation is highly recommended. Incorrect wiring can cause damage to the unit or your vehicle.
- Power Disconnection: Always disconnect the vehicle's battery negative terminal before beginning any installation or wiring work to prevent electrical shorts and damage.
- Wiring: Ensure all wires are properly insulated and secured to prevent short circuits or interference. Do not route wires where they can be pinched or damaged.
- Driving Safety: Do not operate the unit's advanced features or watch videos while driving. Distracted driving can lead to accidents.
- Ventilation: Ensure the unit has adequate ventilation and is not installed in an enclosed space that could lead to overheating.
3. Package Contents
Verify that all items listed below are included in your package. If any items are missing or damaged, please contact customer support.

Image: Package contents and dimensions of the Leadfan Car Stereo.
- Leadfan 9-inch Car Stereo Unit
- Power Cable
- RCA Cable
- USB Cables (x2)
- GPS Antenna
- Radio Antenna Adapter
- Backup Camera
- Rear View Input Cable
- WiFi Antenna
- Bluetooth Antenna
- User Manual
4. Setup and Installation
This unit is designed for a plug-and-play installation in compatible Nissan Altima models (2008-2012 with Manual A/C). Ensure your vehicle matches these specifications before proceeding.
4.1 Pre-Installation Check
- Verify your Nissan Altima model year (2008-2012) and confirm it has manual A/C controls.
- Compare the shape and size of your vehicle's center console with the product images to ensure compatibility.
- Gather necessary tools (e.g., trim removal tools, screwdrivers).
4.2 Installation Steps
- Disconnect Battery: Disconnect the negative terminal of your car battery.
- Remove Old Unit: Carefully remove the existing car stereo and trim panels from your dashboard. Refer to your vehicle's service manual for specific instructions.
- Connect Wiring Harness: Connect the provided wiring harness to the car stereo and the vehicle's factory wiring. Ensure all connections are secure.
- Connect Antennas: Connect the GPS antenna, WiFi antenna, Bluetooth antenna, and radio antenna adapter to the corresponding ports on the back of the stereo unit. Position the GPS antenna in a location with a clear view of the sky (e.g., dashboard).
- Backup Camera Installation (Optional):

Image: Backup camera wiring diagram.
- Mount the backup camera at the rear of your vehicle, typically near the license plate.
- Connect the camera's power cable (red wire) to the car's reversing light positive (+) and the black wire to ground (-).
- Connect the video signal cable from the camera to the "Camera Input" port on the car stereo.
- Connect the pink wire from the stereo's power cable to the reversing trigger cable (usually the positive wire of the reverse light) to enable automatic camera display when reversing.
- Test Connections: Before fully reassembling, reconnect the car battery and perform a basic test of the stereo's functions (power on, radio, touchscreen response).
- Secure Unit: Mount the new car stereo into the dashboard opening and secure it with screws or clips.
- Reassemble: Reinstall all trim panels and ensure they are securely fastened.
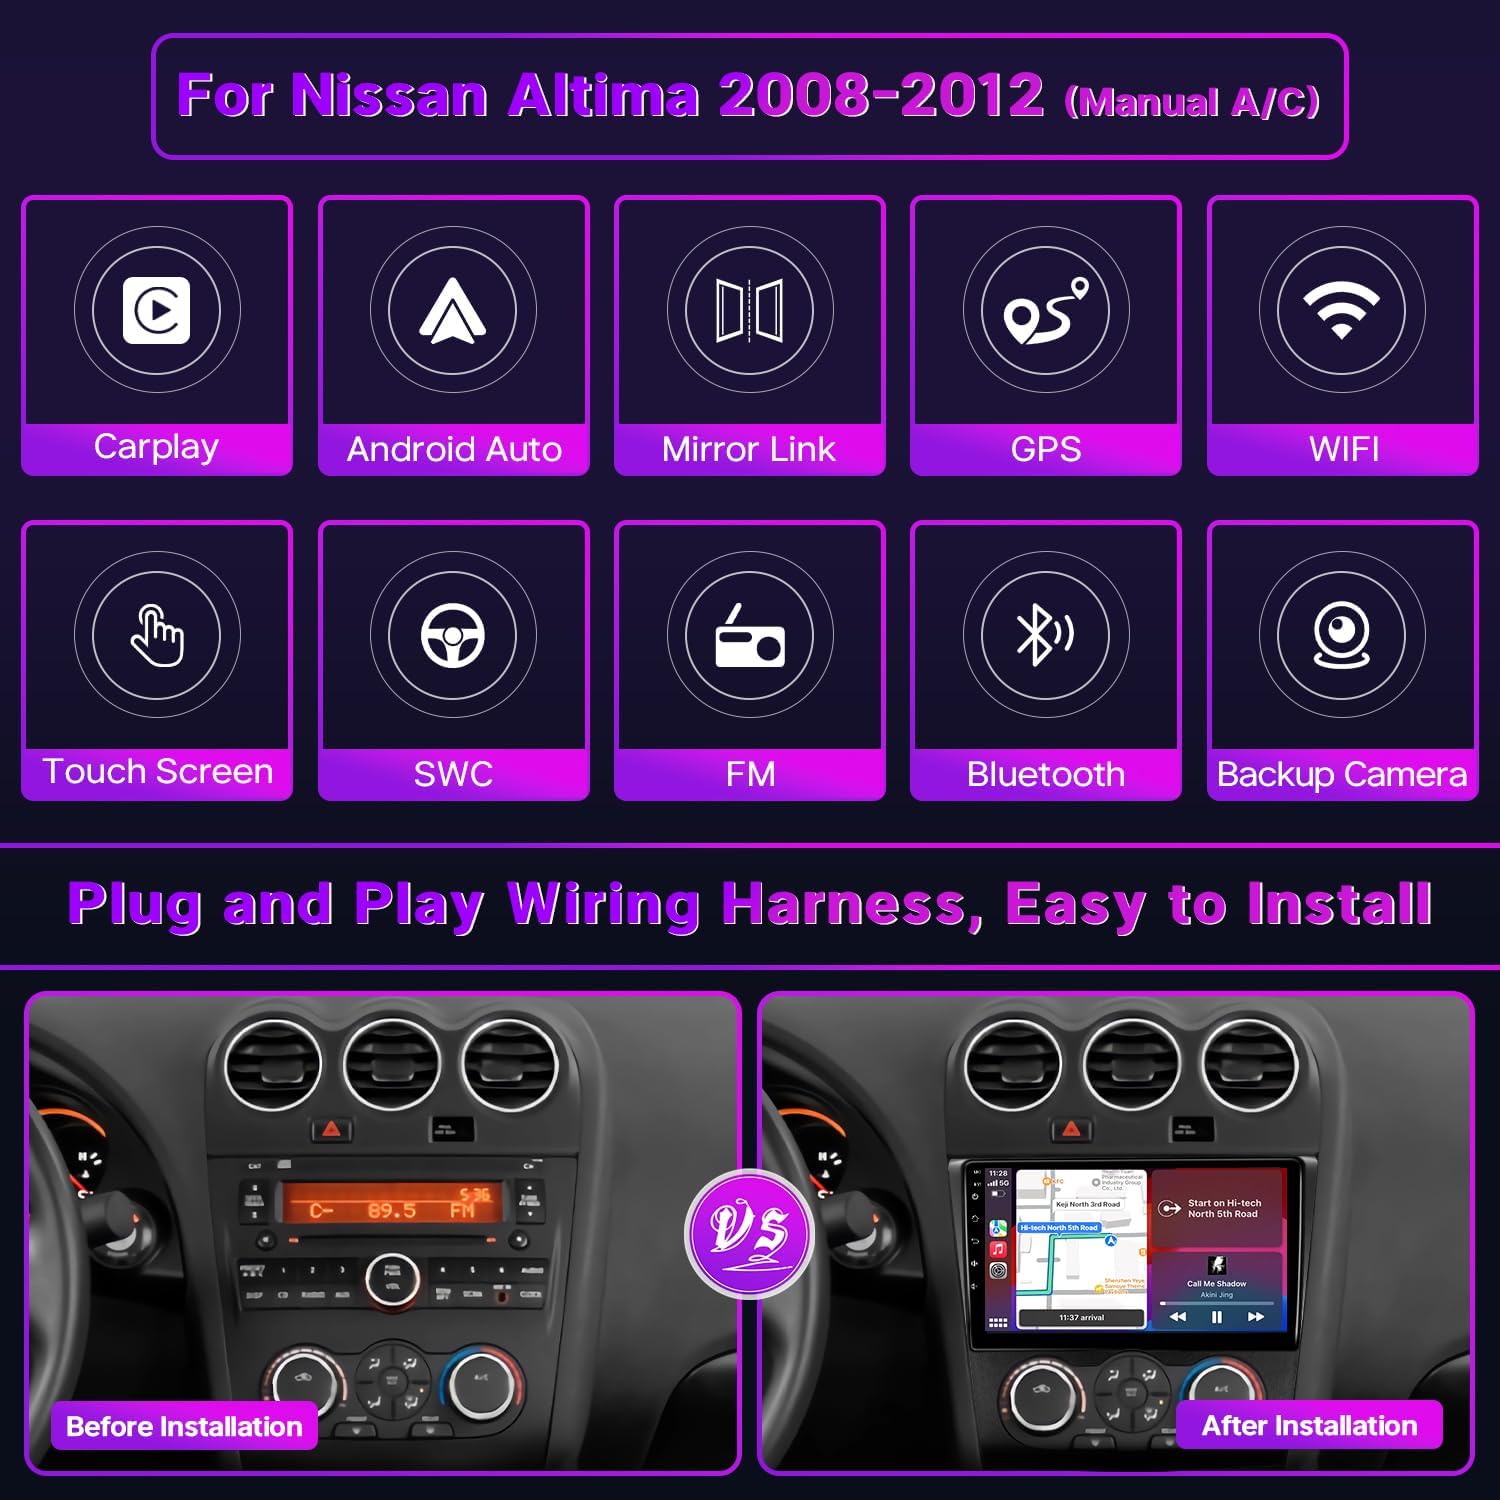
Image: Before and after installation view of the car stereo in a Nissan Altima dashboard.
5. Operating Instructions
Your Leadfan Car Stereo features an intuitive Android interface. Here are basic operating instructions for key functions.
5.1 Basic Touchscreen Operation
- Power On/Off: Press and hold the power button (usually on the front panel) to turn the unit on or off. A short press typically mutes or unmutes audio.
- Volume Control: Use the physical volume knob or the on-screen controls to adjust audio levels.
- Home Screen: Tap the Home icon to return to the main Android interface.
- Navigation: Swipe left/right on the screen to access different app pages. Tap icons to open applications.
- Split Screen: Some applications support split-screen mode. To activate, long-press an app icon or use the recent apps button and drag an app to one side of the screen.
5.2 Wireless Apple CarPlay & Android Auto
This unit supports wireless Apple CarPlay and Android Auto for seamless smartphone integration.

Image: Apple CarPlay, Android Auto, and Mirror Link interfaces.
- Enable Bluetooth & WiFi: Ensure Bluetooth and WiFi are enabled on your smartphone and the car stereo.
- Pair Device: On the car stereo, go to the Bluetooth settings and pair your phone.
- Launch CarPlay/Android Auto: Once paired, the CarPlay or Android Auto icon should appear on the stereo's home screen. Tap it to launch. Follow any on-screen prompts on your phone to grant permissions.
- Voice Control: Use voice commands (e.g., "Hey Siri" or "OK Google") for navigation, music, calls, and messages.
5.3 GPS Navigation & WiFi
The stereo includes a GPS navigation system and WiFi connectivity.

Image: WiFi connection and GPS navigation display.
- WiFi Connection: Go to Settings > Network & Internet > Wi-Fi. Select your desired network and enter the password to connect. This allows you to download apps, stream content, and update maps.
- GPS Navigation: Open the pre-installed navigation app (e.g., Google Maps). You can use both online and offline maps. Download offline maps via WiFi for navigation without an internet connection.
5.4 Bluetooth 5.1 & FM Radio
Enjoy hands-free calling and audio streaming via Bluetooth, and listen to your favorite radio stations.

Image: Bluetooth, FM Radio, Steering Wheel Controls, and Backup Camera features.
- Bluetooth Pairing: Go to Settings > Connected devices > Pair new device. Search for your phone and pair. Once connected, you can make/receive calls and stream audio.
- FM Radio: Open the FM Radio app. Use the on-screen controls to scan for stations, save presets, and adjust frequency.
- EQ Settings: Access the Equalizer (EQ) settings from the audio menu to customize sound output.
5.5 Steering Wheel Controls (SWC)
The unit supports your vehicle's existing steering wheel controls.
- Wiring: Ensure the SWC wires from the stereo harness are correctly connected to your vehicle's SWC wires during installation.
- Learning Function: Go to Settings > Steering Wheel Control. Follow the on-screen instructions to program each button on your steering wheel to the desired function on the stereo.
5.6 Backup Camera
When properly installed, the backup camera automatically displays the rear view when the vehicle is shifted into reverse.
- The camera provides a 170° wide-angle view with IP68 waterproof rating and night vision for clear visibility in various conditions.
- Parking guidelines will appear on the screen to assist with maneuvering.
6. Maintenance
- Cleaning the Screen: Use a soft, lint-free cloth to gently wipe the touchscreen. For stubborn smudges, slightly dampen the cloth with water or a screen-cleaning solution. Avoid harsh chemicals or abrasive materials.
- Software Updates: Periodically check for software updates via the system settings (if available) to ensure optimal performance and access to new features. Connect to a stable WiFi network for updates.
- General Care: Avoid exposing the unit to extreme temperatures, direct sunlight for prolonged periods, or excessive moisture.
7. Troubleshooting
If you encounter issues with your car stereo, refer to the following common problems and solutions.
| Problem | Possible Cause | Solution |
|---|---|---|
| Unit does not power on. | Loose power connection, blown fuse, incorrect wiring. | Check all power connections. Inspect vehicle fuses and the unit's fuse. Verify wiring according to the installation diagram. |
| No sound from speakers. | Speaker wires disconnected, volume muted, incorrect audio settings. | Check speaker wire connections. Ensure volume is not muted. Verify audio output settings in the stereo menu. |
| GPS signal is weak or inaccurate. | GPS antenna improperly placed, antenna faulty, environmental interference. | Ensure GPS antenna has a clear view of the sky. Check antenna connection. Try moving the antenna to a different location. |
| Bluetooth connection issues. | Phone not discoverable, incorrect pairing process, interference. | Ensure Bluetooth is enabled on both devices. Delete previous pairings and re-pair. Restart both devices. |
| Backup camera not displaying. | Camera power or video cable disconnected, reverse trigger wire not connected. | Check all camera wiring, especially the reverse trigger wire connection to the car's reverse light. |
| Steering Wheel Controls not working. | SWC wires not connected, controls not programmed. | Verify SWC wiring. Go to the Steering Wheel Control settings in the stereo and re-program the buttons. |
If these solutions do not resolve the issue, please contact Leadfan customer support for further assistance.
8. Specifications
| Feature | Specification |
|---|---|
| Display Size | 9 Inches |
| Resolution | 1024 x 600 |
| Operating System | Android 12 |
| RAM | 2GB |
| ROM | 32GB |
| Processor | 4-core |
| Connectivity | Bluetooth 5.1, USB, Wi-Fi |
| Special Features | Wireless Apple CarPlay, Android Auto, GPS Navigation, Touchscreen, Mirror Link, Split Screen, Backup Camera Support, Steering Wheel Control (SWC) |
| Audio Output Mode | Stereo |
| Mounting Type | Dashboard Mount |
| Item Weight | 4.4 pounds |
| Package Dimensions | 11.81 x 11.02 x 3.54 inches |
| Compatible Vehicle Service Type | Car (Nissan Altima 2008-2012 with Manual AC) |
9. Warranty and Support
Leadfan is committed to providing high-quality products and customer service.

Image: Leadfan customer support and warranty information.
- 30-Day Free Return: You are eligible for a free return within 30 days of purchase.
- 12-Month Replacement: The product is covered by a 12-month replacement policy for quality-related issues.
- Lifetime Technical Support: Leadfan provides lifetime technical support. Our team will respond to your inquiries within 24 hours.
- Professional Customer Service: Our dedicated customer service team is available to assist you with any questions or concerns.
For support, please refer to the contact information provided with your purchase or visit the official Leadfan website.


