
1. Introduction
This user manual provides essential information for the safe and effective operation of your FLARING 175amp MIG Welder, Model FM175. This versatile 5-in-1 welding machine supports Flux Core MIG, Gas MIG, Lift TIG, Stick (MMA, ARC), and Spool Gun welding modes, offering dual voltage compatibility (120V/240V). Please read this manual thoroughly before operating the machine to ensure proper usage and to maximize its performance and lifespan.

Figure 1.1: The FLARING 175amp MIG Welder (Model FM175) and its comprehensive accessory kit.
2. Safety Information
Welding can be dangerous. It is crucial to follow all safety precautions to prevent injury or damage. Always wear appropriate personal protective equipment (PPE), including a welding helmet with proper shade, flame-resistant clothing, welding gloves, and safety shoes. Ensure adequate ventilation to avoid inhaling fumes. Keep a fire extinguisher nearby. Disconnect power before performing any maintenance or adjustments.
- Electric Shock: Can kill. Do not touch live electrical parts. Insulate yourself from work and ground.
- Fumes and Gases: Can be hazardous to your health. Keep your head out of the fumes. Use enough ventilation and/or exhaust at the arc to keep fumes and gases away from the breathing zone.
- Arc Rays: Can burn eyes and skin. Wear a welding helmet with a proper filter shade to protect your face and eyes when welding or watching. Wear approved safety glasses with side shields under your helmet.
- Fire and Explosion: Welding can cause fire or explosion. Keep flammables away from welding area. Have a fire extinguisher readily available.
- Hot Parts: Can cause severe burns. Do not touch hot parts with bare hands. Allow cooling time before handling.
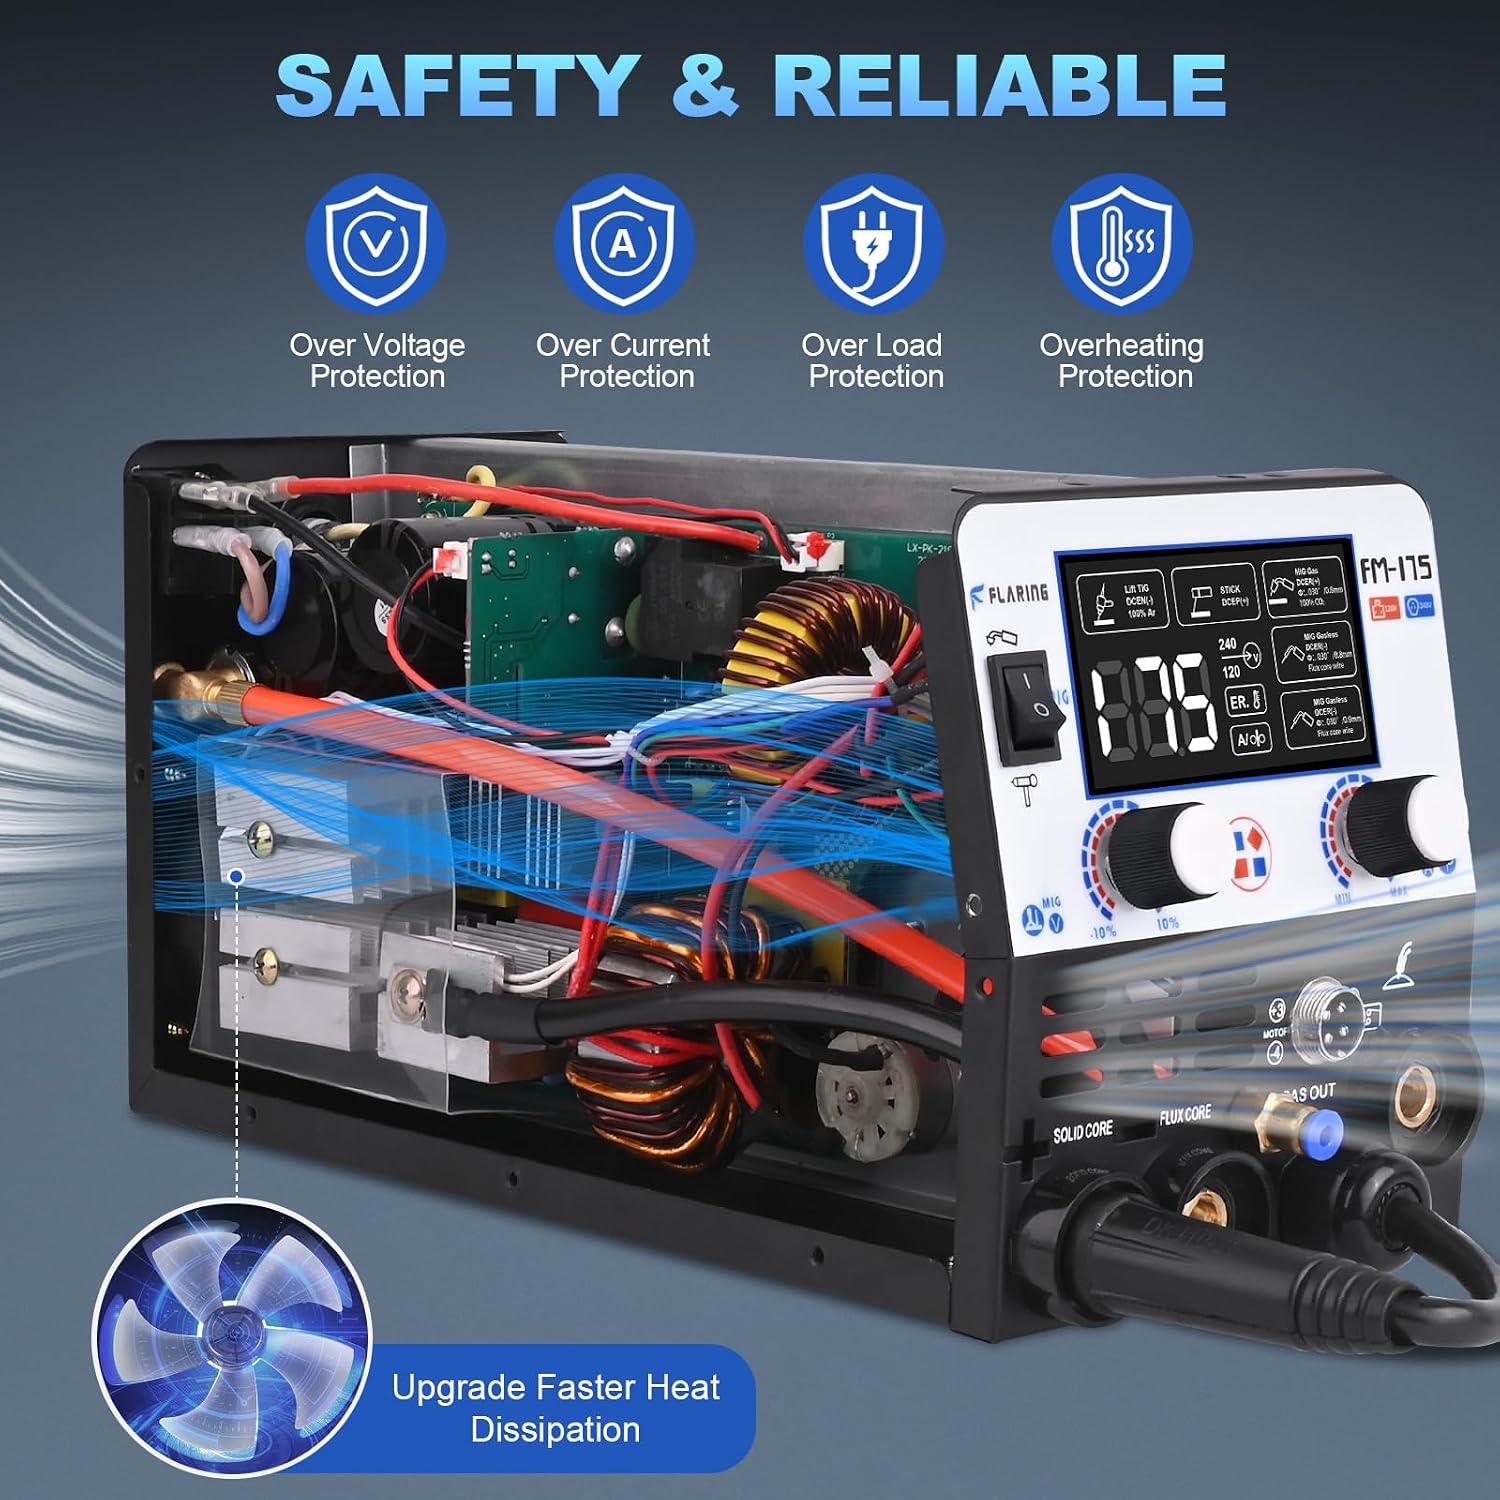
Figure 2.1: The welder features multiple built-in protections including over voltage, over current, overload, and overheating protection for enhanced safety.
3. Product Overview
3.1 Key Features
- 5-in-1 Multi-function: Supports Flux Core MIG, Gas MIG, Lift TIG, Stick (MMA, ARC), and Spool Gun welding.
- Dual Voltage (120V/240V): Automatic voltage sensing for versatile power input.
- Large LED Digital Display: Provides clear readings of voltage, current, and other parameters for improved operational efficiency.
- Synergic Control MIG: Auto mode simplifies setup by allowing selection of wire size for quick and easy operation, suitable for both beginners and professionals.
- High Welding Performance: Maximum output of 175A, capable of welding mild steel up to 5mm thick. Compatible with .030"/.035" (0.8/0.9mm) flux core wire and .030" (0.8mm) solid core wire. Performs well with 6010, 6011, 7014, and 7018 rods in Stick Welding mode.
- Enhanced Heat Dissipation: Features an upgraded fan system for faster heat dissipation, ensuring stable performance.
3.2 Included Components
The FLARING FM175 MIG Welder package includes the following items:
- FM175 MIG Welder Machine
- Air Hose
- Flux Core Wire Spool
- Consumable Set
- MIG Welding Torch
- Electrode Holder with Cable
- Earth Ground Clamp with Cable
- Wire Feed Wheels
- Wrench

Figure 3.1: Overview of the FLARING FM175 welder and its main accessories, including dimensions for portability.
4. Setup
4.1 Unboxing and Initial Inspection
Carefully remove all components from the packaging. Inspect the welder and accessories for any signs of damage during transit. Ensure all listed components are present. Keep the original packaging for future storage or transport.

Figure 4.1: All components included in the FLARING FM-175 package, laid out for inspection.
4.2 Connecting Power
The FM175 supports dual voltage (120V/240V). Connect the power cord to a suitable power outlet. The machine will automatically detect the voltage. Ensure the power source meets the welder's requirements to prevent damage.
4.3 Wire Installation
Proper wire installation is crucial for consistent welding. Open the wire feed compartment. Place the wire spool onto the spindle, ensuring it rotates freely. Thread the wire through the wire feed mechanism, making sure it passes through the correct groove on the wire feed wheel. Secure the wire with the wire pressing wheel. For flux core wire, use .030" or .035" (0.8mm or 0.9mm). For solid core wire, use .030" (0.8mm).

Figure 4.2: Detailed view of the wire feed structure, showing the wire spool, wire feeding wheel, automatic wire feed, and wire pressing wheel.

Figure 4.3: Visual guide for installing welding wire into the machine.
4.4 Panel Button Introduction
Familiarize yourself with the control panel for efficient operation:
- Function Select: Choose between MIG, TIG, or Stick welding modes.
- AC 120V/240V Input: Indicates the detected input voltage.
- MIG Torch/Spool Gun Switch: Toggles between MIG torch and optional spool gun.
- Current Display: Shows the welding current in amperes.
- OC Light: Over Current indicator light.
- Voltage Adjust: Knob to adjust welding voltage.
- Mode Selection: Further refine welding parameters within selected function.
- Current Adjust Function: Knob to adjust welding current.

Figure 4.4: The large LED display provides accurate data, making it easier for beginners to monitor welding parameters.

Figure 4.5: Detailed diagram of the control panel with numbered functions for easy identification.
5. Operating Modes
The FLARING FM175 offers five distinct welding modes:

Figure 5.1: Visual representation of the five welding modes supported by the FM175 welder.
5.1 MIG Welding (Gas & Gasless)
MIG welding is ideal for fast and efficient welding of various metals. The FM175 supports both gas-shielded MIG and gasless flux core MIG. For gas MIG, connect a suitable shielding gas cylinder (e.g., CO2 or Argon/CO2 mix) to the gas inlet on the machine. For gasless MIG, use flux core wire which contains a fluxing agent to protect the weld puddle from atmospheric contamination.

Figure 5.2: Comparison of MIG Gas and MIG Gasless welding processes.

Figure 5.3: Demonstrating MIG Gas welding with the FLARING FM-175.

Figure 5.4: Demonstrating MIG Gasless welding with the FLARING FM-175.
5.2 Lift TIG Welding
Lift TIG welding provides precise control and high-quality welds, especially on thinner materials. An optional Lift TIG torch is required for this mode. Ensure proper tungsten electrode selection and preparation, and use appropriate shielding gas (100% Argon recommended).

Figure 5.5: Demonstrating Lift TIG welding with the FLARING FM-175.
5.3 Stick (MMA/ARC) Welding
Stick welding is a robust process suitable for outdoor use and on dirty or rusty materials. The FM175 performs well with 6010, 6011, 7014, and 7018 rods. Connect the electrode holder and ground clamp as per standard stick welding procedures.

Figure 5.6: Demonstrating Stick welding with the FLARING FM-175.
5.4 Spool Gun Welding
Spool gun welding is particularly useful for welding softer wires like aluminum, as it minimizes wire feeding issues. An optional spool gun is required for this mode. Refer to the spool gun's specific instructions for setup and operation.

Figure 5.7: Overview of Lift TIG, Stick, and Spool Gun welding capabilities.

Figure 5.8: Examples of materials and applications suitable for welding with the FM175, including aluminum, square pipe, mild steel, thin steel pipe, and general metalwork.
6. Welding Performance
The FLARING FM175 is designed to deliver consistent and high-quality welds across various applications. Its 175A output allows for effective welding of mild steel plates up to 5mm thick. The synergic control simplifies parameter settings, contributing to clean and strong weld beads.

Figure 6.1: Examples of clean and strong weld beads achieved with the FLARING FM175.

Figure 6.2: A visual comparison highlighting the superior weld quality of the FM175 compared to other welders.
7. Maintenance
Regular maintenance ensures the longevity and optimal performance of your welding machine. Always disconnect the power supply before performing any maintenance.
- Cleaning: Periodically clean the exterior of the machine with a dry cloth. Use compressed air to blow out dust and debris from the internal components and cooling vents.
- Wire Feed System: Inspect the wire feed rollers and liner for wear or blockages. Clean any accumulated debris to ensure smooth wire feeding.
- Torch and Cables: Check the welding torch, electrode holder, and ground clamp for damage, frayed cables, or loose connections. Replace worn parts as necessary.
- Consumables: Regularly inspect and replace worn contact tips, nozzles, and diffusers on the MIG torch. For TIG, check tungsten electrodes. For Stick, ensure proper electrode storage.
- Storage: Store the welder in a clean, dry environment, away from excessive dust, moisture, and extreme temperatures.
8. Troubleshooting
If you encounter issues with your FLARING FM175 welder, refer to the following common troubleshooting tips. For more complex problems, contact FLARING customer support.
| Problem | Possible Cause | Solution |
|---|---|---|
| No Power | Power cord disconnected, circuit breaker tripped, faulty outlet. | Check power connections, reset breaker, try a different outlet. |
| No Arc | Poor ground connection, incorrect settings, worn consumables, wire feed issue. | Ensure ground clamp is on clean metal, verify settings, replace contact tip/nozzle, check wire feed. |
| Poor Weld Quality | Incorrect voltage/current, improper wire speed, contaminated material, wrong shielding gas. | Adjust settings, clean workpiece, ensure correct gas/wire type. |
| Overheating (OC Light On) | Exceeded duty cycle, blocked ventilation. | Allow machine to cool down, ensure clear airflow to vents. |
9. Specifications
Detailed technical specifications for the FLARING 175amp MIG Welder (Model FM175):
| Specification | Value |
|---|---|
| Brand | FLARING |
| Model Number | FM175 |
| Item Weight | 7.96 pounds |
| Product Dimensions | 12.2 x 5.51 x 9.45 inches |
| Color | White |
| Pattern | MIG Welder-5EN-175A-120/240V |
| Power Source | AC |
| Voltage | 120/240 Volts |
| Max Output Current | 175A |
| Max Weld Thickness (Mild Steel) | 5mm |
| Compatible Wire Diameter | .030"/.035" (0.8/0.9mm) flux core, .030" (0.8mm) solid core |
| Compatible Stick Rods | 6010, 6011, 7014, 7018 |
| Date First Available | May 15, 2024 |

Figure 9.1: Comprehensive technical specifications and performance data for the FLARING FM-175.
10. Warranty and Support
FLARING products are manufactured to high-quality standards and undergo rigorous testing. For specific warranty details, please refer to the warranty card included with your product or visit the official FLARING website. If you require technical assistance, have questions about operation, or need to report an issue, please contact FLARING customer support through the contact information provided on the product packaging or the official brand store.
FLARING Brand Store: Visit FLARING Store on Amazon
