1. Introduction
This manual provides detailed instructions for the installation, operation, and maintenance of your CAMECHO 4G+64G Car Stereo Radio. Please read this manual thoroughly before installation and use to ensure proper functionality and to maximize your experience with the device. This unit features an Android 13 system, 4GB RAM, 64GB ROM, a 9-inch HD touchscreen, Wireless Apple CarPlay, Android Auto, GPS navigation, Bluetooth 5.0, WiFi, FM/RDS radio, and a 16-band EQ.
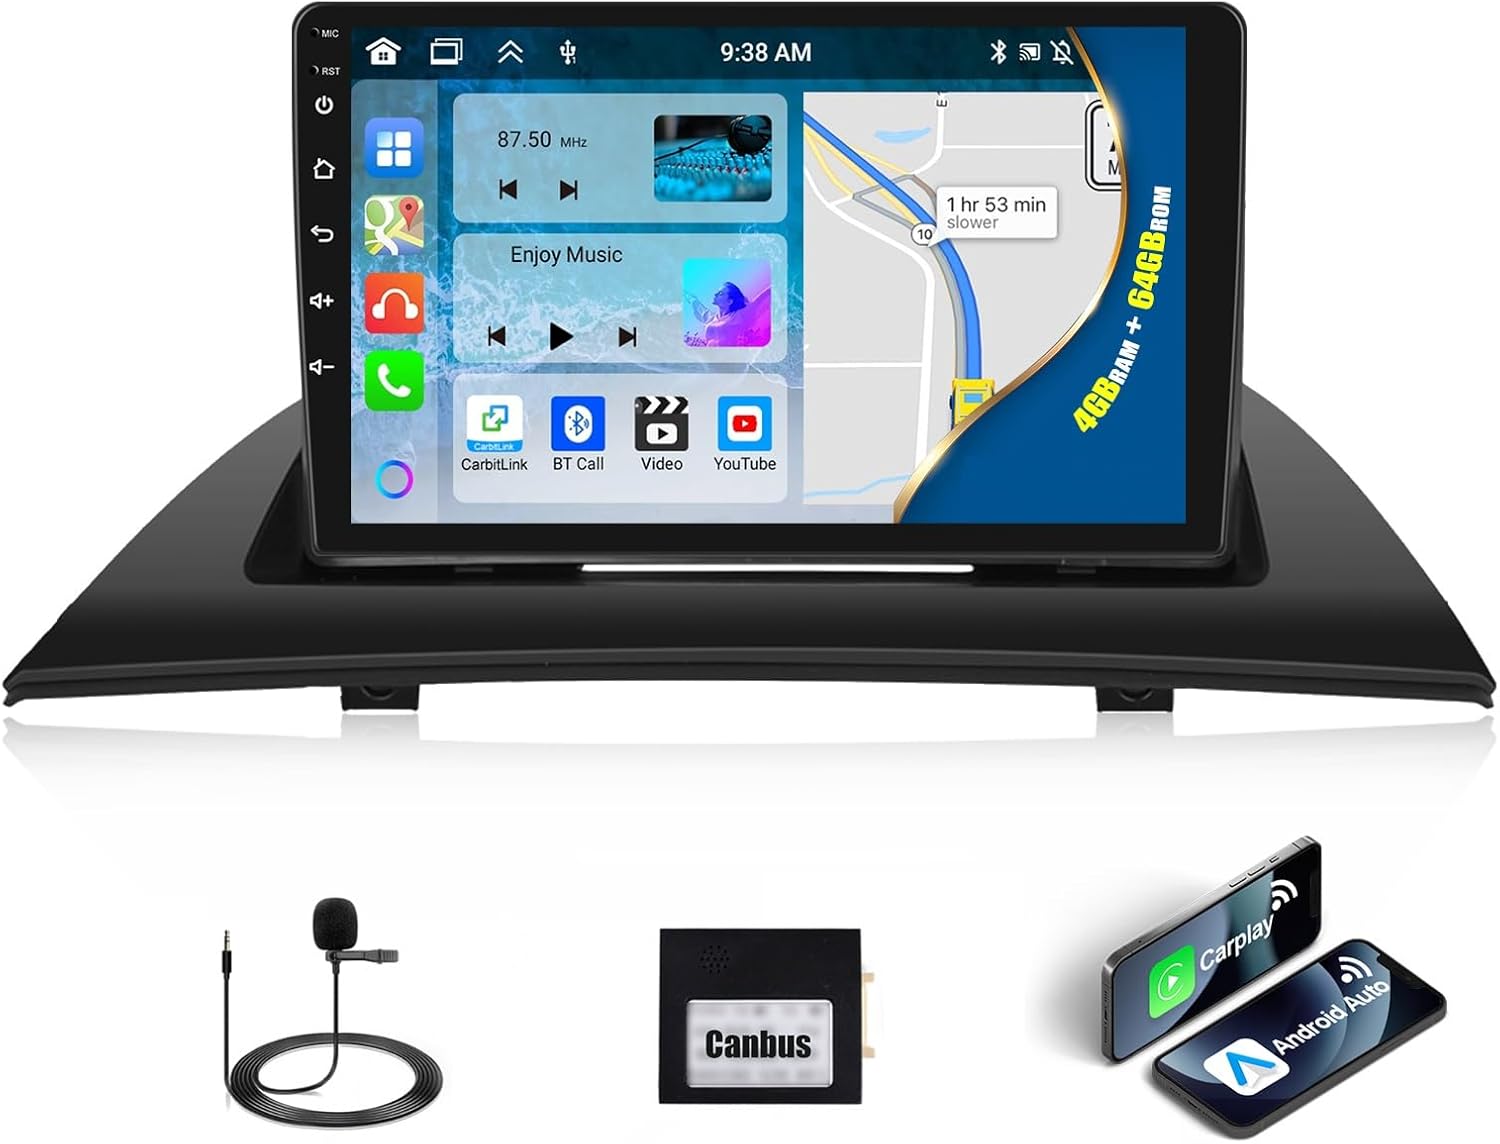
Image 1.1: CAMECHO Car Stereo Radio and main accessories.
2. Package Contents
Verify that all items listed below are included in your package:
- 1 x Android Head Unit
- 1 x External Microphone
- 1 x Protocol Box (Canbus)
- 1 x GPS Antenna
- 1 x Power Cable
- 1 x RCA Cable
- 2 x USB Cables (6Pin and 4Pin)
- 1 x Rear Camera Input Cable
- 1 x Installation Tool
- 1 x Instruction Manual

Image 2.1: Packing list and unit dimensions.
3. Compatible Car Models
This car stereo is specifically designed for BMW X3 E83 models manufactured between 2004 and 2012.

Image 3.1: Before and after installation in a BMW X3 E83.
Important Compatibility Notes:
- This unit is NOT COMPATIBLE with factory radios equipped with DSP (Digital Signal Processing), Optical Fiber, or Amplifier Systems (e.g., Harman Kardon, Bose, JBL).
- If your original car plug uses an amplifier sound system, you may need to purchase an additional fiber optic box to ensure audio output.
- For vehicles with Harman Kardon stereo systems or BOSE stereo systems, contact customer service for specific cable requirements (e.g., extension cable, optical fiber box, RCA cable).
4. Setup and Installation
Professional installation is recommended. Ensure the vehicle's power is disconnected before beginning installation.
4.1. Disassembly of Original Unit

Image 4.1: Disassembly steps for the original car radio.
- Use a pry bar to open the air outlet and remove it. Disconnect the wires connected to the car.
- Unscrew the two screws securing the top panel of the original car. Remove the top panel and release the clips at the bottom of the top panel.
- Pry out the original car's air conditioning button panel and disconnect its wires.
- Unscrew the two screws above the original car radio, remove the original car radio, and disconnect its wires.
4.2. Installation of New Head Unit
Before starting, prepare tools such as a plastic pry tool and a screwdriver.
- Pull the wires through from the position of the original car radio into the original car's top panel.
- Install the new radio frame and tighten the three screws at the back. Pull the wires out from the hole at the bottom of the new frame.
- Install the new car player onto the new frame, tightening the three screws at the back and the two screws at the bottom.
- Connect the wires between the new radio and the car, ensuring proper connections with the protocol box.
- Slide the unit into the dashboard.
- Tighten the two screws at the bottom of the car player.
- Reconnect the wires between the original car radio and the car.
- Place the back of the original car radio and tighten the two screws at the top of the original car radio.
- Connect the wire between the air conditioning button panel and the original car.
- Reinstall the air conditioning button panel and connect the wires between the air outlet and the car.
- Reconnect the wires between the air conditioning outlet and the car.
- Finally, reinstall the air conditioning outlet. The installation of the new car player is now complete.
4.3. Steering Wheel Control Setup

Image 4.2: Steering Wheel Control wiring and setup.
To enable steering wheel controls:
- Ensure the 8-pin cable is plugged into the connector of the head unit.
- Confirm the CANBUS box is connected.
- After connecting the Canbus, set the protocol correctly: Go to Settings > Factory Mode (Password: 8888) > 1 Vehicle > Automotive type, then choose the appropriate vehicle model (e.g., Audi + year and model of your car).
4.4. Reversing Camera Installation

Image 4.3: Reversing Camera wiring diagram.
To install a reversing camera (not included):
- Connect the positive pole of the camera's power supply to the car's reversing light positive.
- Connect the negative pole of the camera's power supply to the car's reversing light negative.
- The reversing trigger is controlled by the stereo; no separate connection is required for the trigger wire.
- Connect the white plug of the camera input cable to the main device.
Note: The reversing input must be plugged in even if a reversing camera is not used. If the camera does not work, adjust the backup camera resolution via Settings > Factory Mode (Password: 8888) > 3 Camera.
5. Operating Instructions
5.1. Wireless Apple CarPlay & Android Auto
The unit supports wireless Apple CarPlay and Android Auto for seamless smartphone integration.
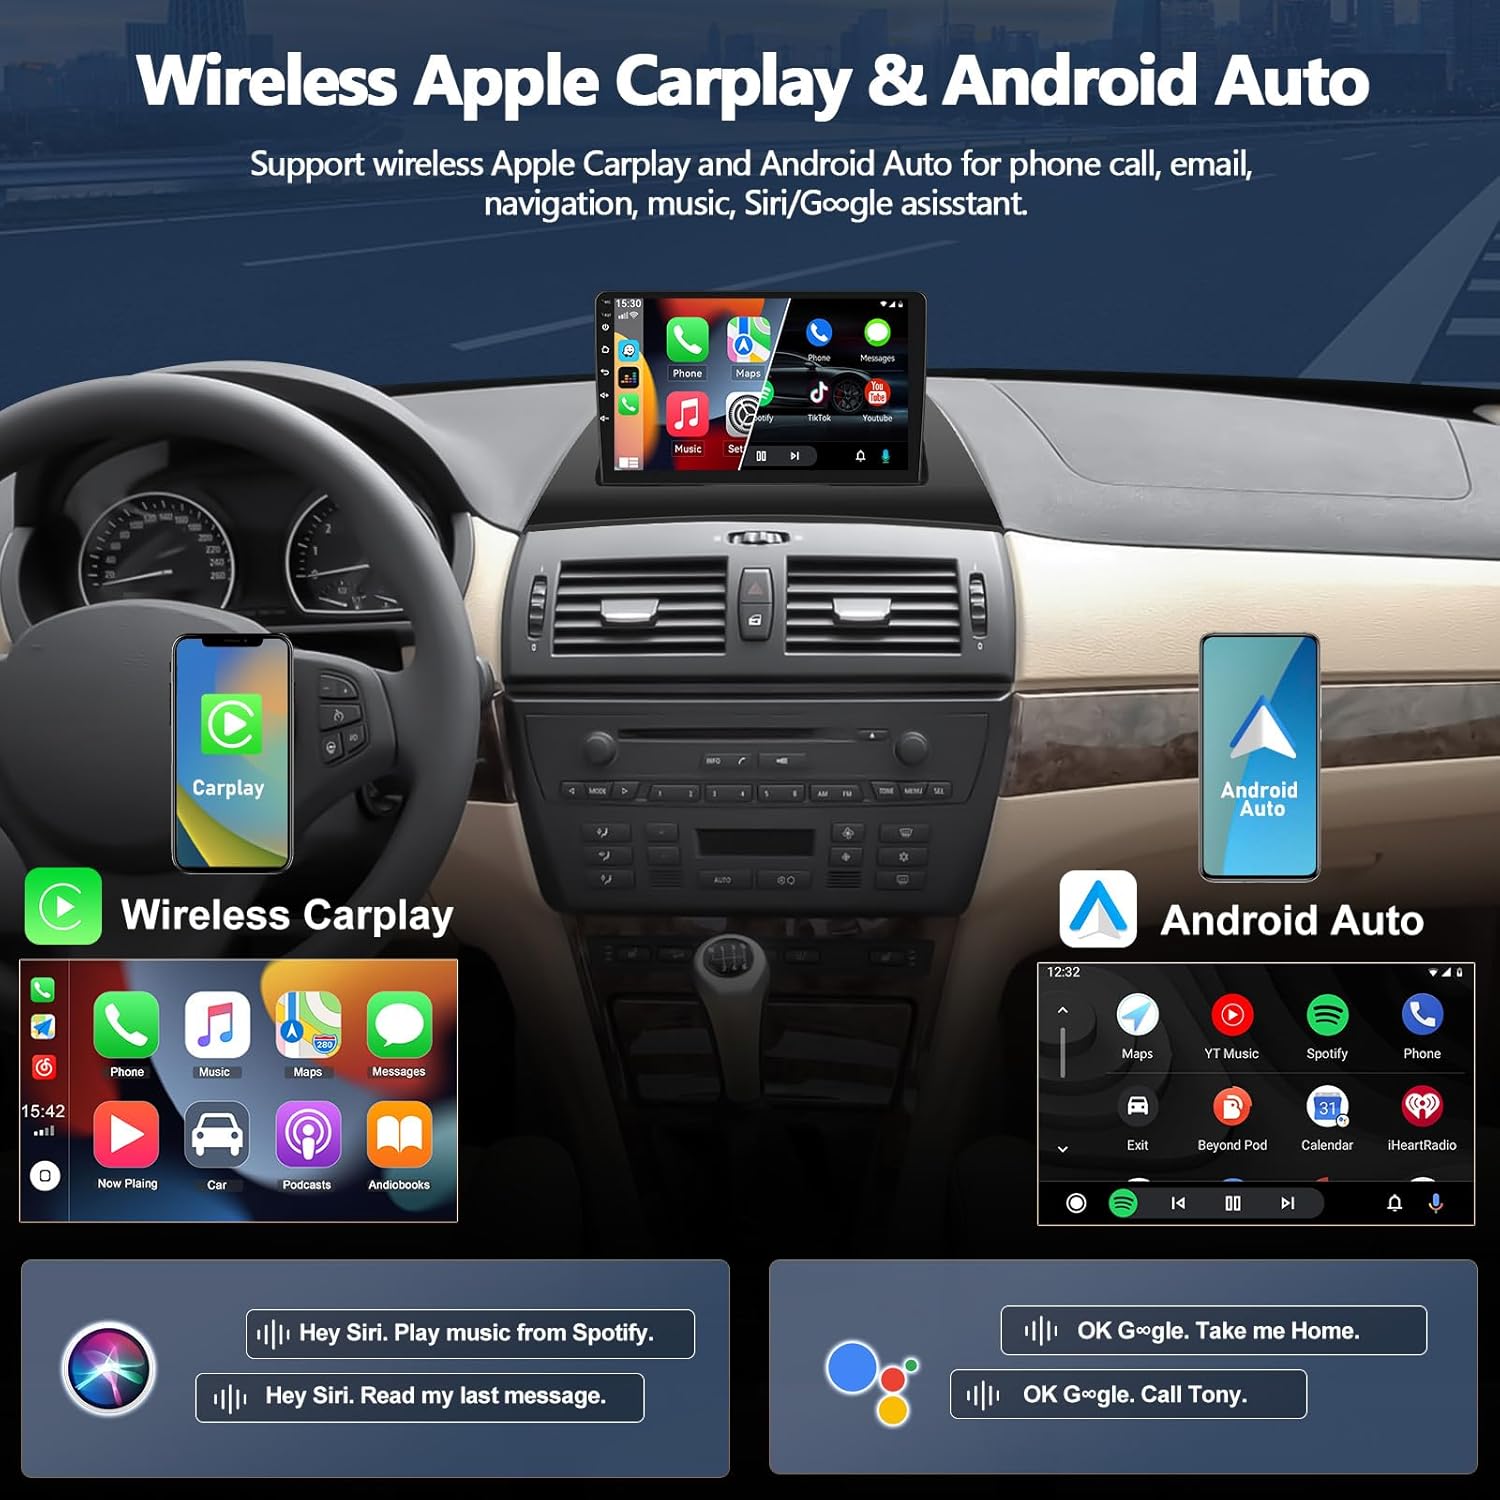
Image 5.1: Wireless Apple CarPlay and Android Auto interfaces.
For Wireless Apple CarPlay:
- Click the "ApplePlay" app on the head unit.
- Turn on Bluetooth on your iPhone and select the car radio's Bluetooth name.
- Allow access to Contacts and Favorite Sync.
- Wait for a moment; CarPlay mode will activate.
For Wireless Android Auto:
- Click the "Android Auto" app on the head unit.
- Turn on Bluetooth on your Android phone.
- Select the car radio's Bluetooth name and pair.
- Wait for a moment; Android Auto mode will activate.
This feature allows you to handle navigation, messages, phone calls, and music wirelessly.

Image 5.2: Wireless Apple CarPlay in use.

Image 5.3: Wireless Android Auto in use.
5.2. GPS Navigation & WiFi Connection
The unit includes a built-in GPS receiver and supports offline maps. It also allows WiFi connection for online services.

Image 5.4: GPS Navigation and WiFi features.
- GPS Navigation: Use the built-in GPS receiver for navigation. Offline maps can be downloaded from the Play Store for use in areas with no cellular signal. Compatible with Waze, Navfree, Yandex Map, and other navigation apps.
- WiFi Connection: Connect to WiFi or a mobile hotspot to download apps, stream videos (e.g., YouTube), and browse the internet.
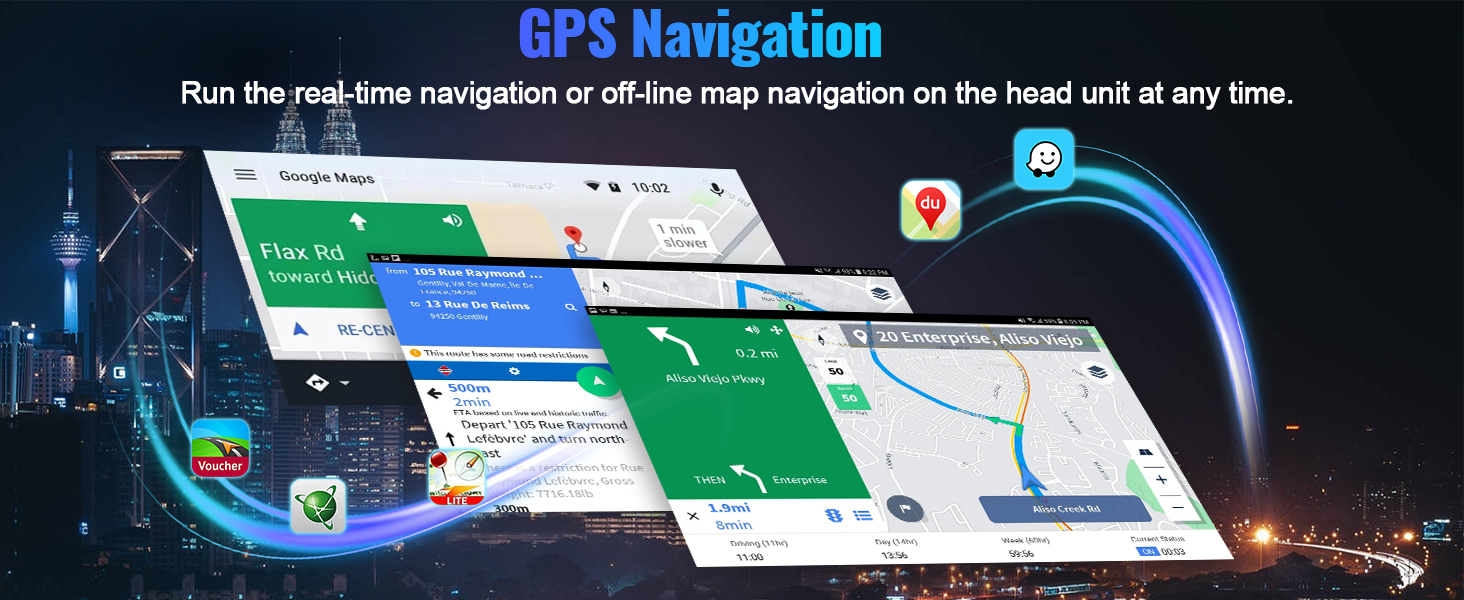
Image 5.5: GPS Navigation with various map options.

Image 5.6: WiFi connectivity for various applications.
5.3. Bluetooth 5.0 & FM/RDS Radio
Enjoy hands-free calls and high-quality audio streaming via Bluetooth 5.0, along with FM/RDS radio functionality.
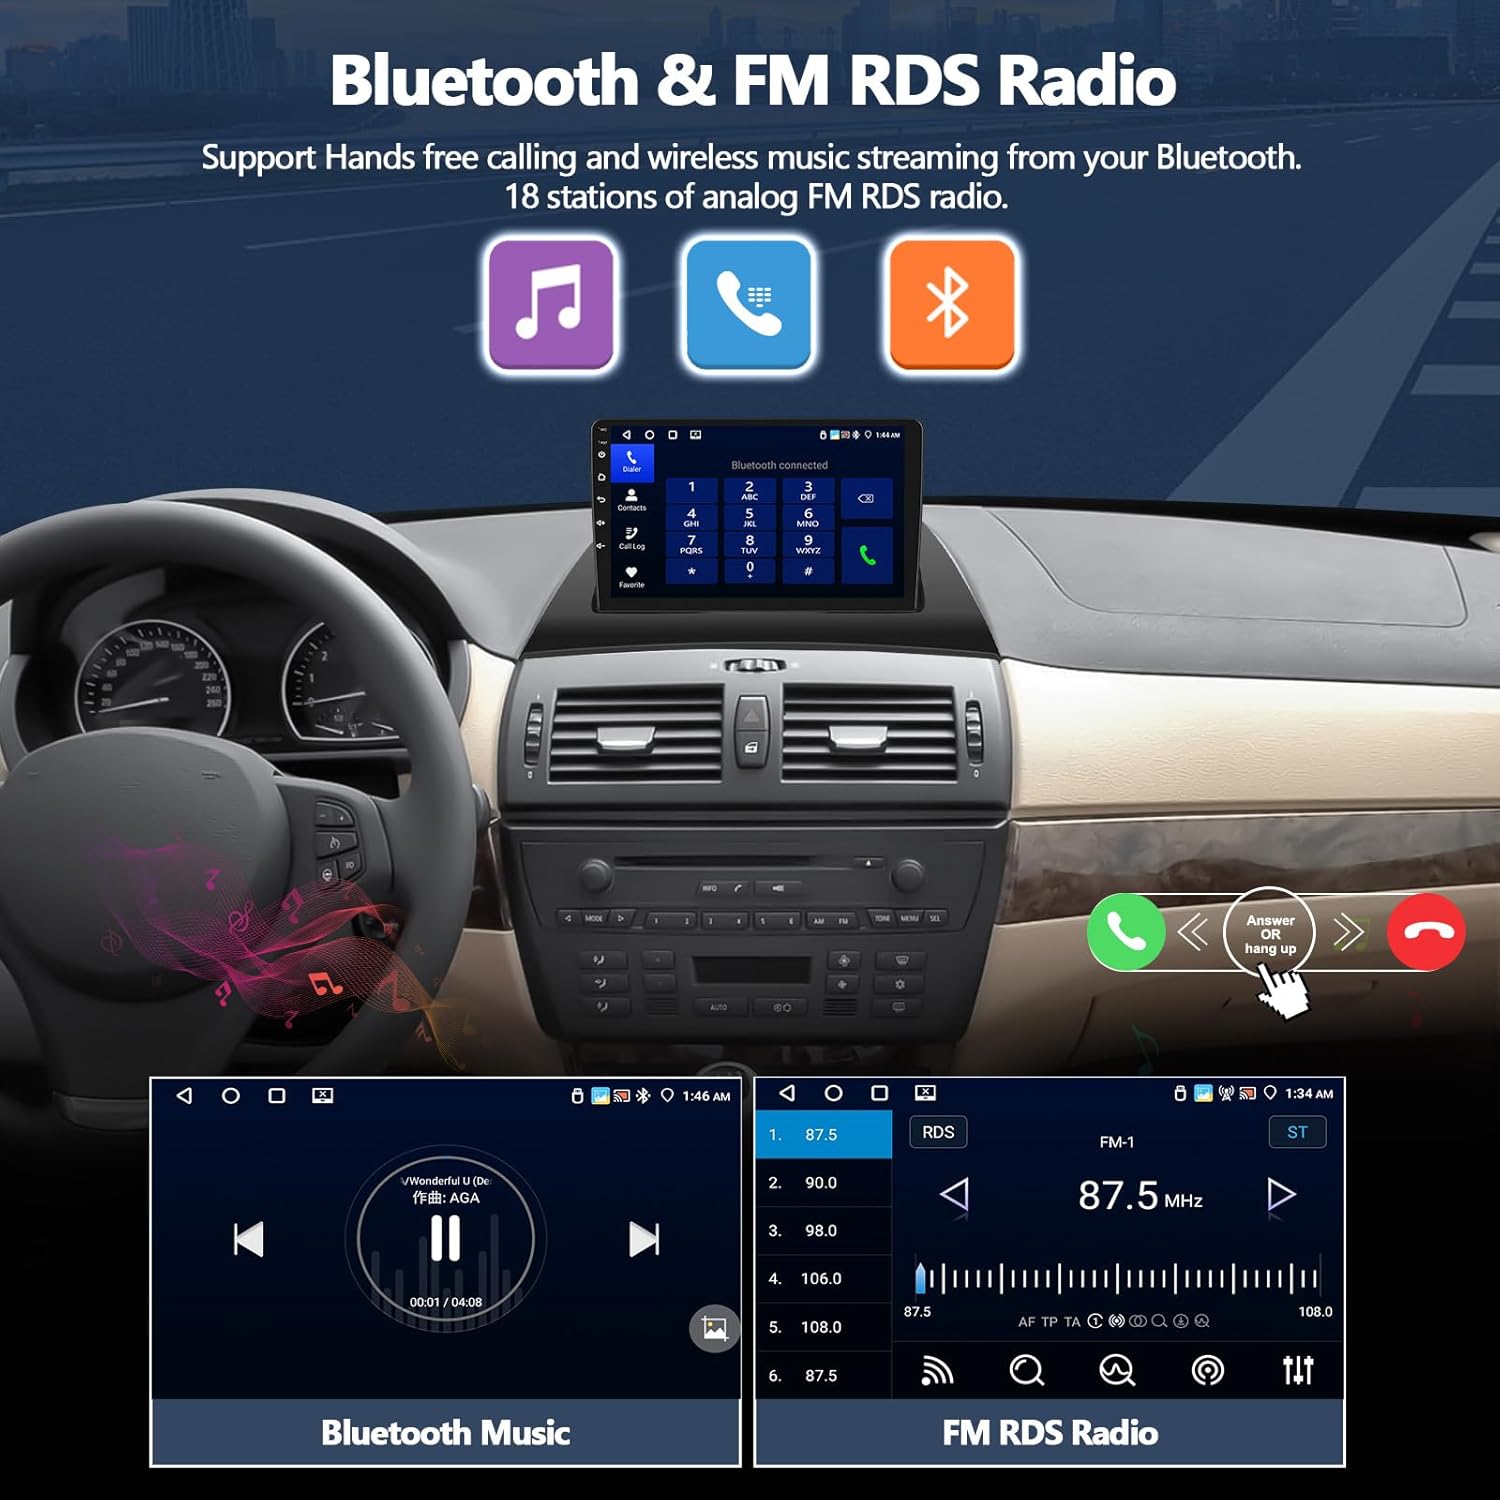
Image 5.7: Bluetooth and FM/RDS Radio interfaces.
- Bluetooth 5.0: Connect your smartphone for wireless audio streaming and hands-free calling. This reduces driving distractions.
- FM/RDS Radio: Supports FM/RDS radio with 18 station presets, allowing access to music, news, and sports broadcasts.

Image 5.8: Bluetooth 5.0 for hands-free calls and music.

Image 5.9: FM RDS Radio for listening to broadcasts.
5.4. Multi-functional Car Audio System
The unit offers various features to enhance your in-car entertainment and control.
- 16-Band EQ: Built-in 16-band equalizer for customized sound quality.
- 1080P Video Playback: Supports high-definition video playback (Resolution 1280*720).
- Dual USB Ports: Provides multiple connectivity options for media and charging.
- Adjustable Home Page APP Display: Customize your home screen by selecting and rearranging app icons.
- Phone Mirror Link: Wirelessly mirror your phone's screen to the head unit.
- Split Screen: Run two applications simultaneously on the screen.

Image 5.10: 32-Band Equalizer for audio customization.

Image 5.11: Optional Home Page APP customization.

Image 5.12: Split Screen functionality.

Image 5.13: Phone Mirror Link feature.
5.5. Video Overview of Features
Video 5.1: This video demonstrates various features of the CAMECHO car stereo, including UI desktop themes, wallpaper customization, CarPlay/Android Auto music playback and navigation, hands-free calling, dual-screen operation, FM/RDS radio, weather forecast, network radio, 32-band DSP equalizer, GPS navigation, and rear view camera functionality.
6. Maintenance
To ensure the longevity and optimal performance of your car stereo:
- Regularly clean the touchscreen with a soft, lint-free cloth. Avoid abrasive cleaners.
- Keep the unit free from dust and debris.
- Avoid exposing the unit to extreme temperatures or direct sunlight for prolonged periods.
- Ensure all cables are securely connected to prevent intermittent issues.
- Periodically check for software updates to improve performance and add new features.
7. Troubleshooting
7.1. If No Sound

Image 7.1: Troubleshooting steps for no sound.
If you experience no sound from the unit, follow these steps:
- Connect the AUX IN R/L (or AUDIO OUT R/L) from the RCA cable to the AUX IN R/L of the Power harness.
- Connect the AMP cable to the ACC cable of the Power harness.
- Open the "Car Amplifier" app from the drag-down page of the top bar on the head unit.
- For external power amplifiers, connect the power cable of the amplifier to the ACC cable of the Power harness.
7.2. General Troubleshooting Tips
- Unit Not Powering On: Check all power connections and ensure the vehicle's ignition is on. Verify fuses are intact.
- Touchscreen Unresponsive: Try restarting the unit. If the issue persists, perform a factory reset (refer to settings).
- GPS Signal Issues: Ensure the GPS antenna is properly installed and has a clear view of the sky.
- Bluetooth Connection Problems: Ensure Bluetooth is enabled on both the head unit and your phone. Delete previous pairings and try reconnecting.
- Poor Radio Reception: Check the radio antenna connection. In some areas, reception may be naturally weaker.
8. Specifications
| Feature | Specification |
|---|---|
| Operating System | Android 13 |
| RAM | 4GB |
| ROM | 64GB |
| Screen Size | 9 inches |
| Display Resolution | 1280*720 |
| Connectivity | Bluetooth 5.0, WiFi, USB |
| Special Features | Wireless Apple CarPlay, Android Auto, GPS Navigation, FM/RDS Radio, 16-Band EQ, Mirror Link, Split Screen |
| Compatible Vehicles | BMW X3 E83 (2004-2012) |
| Product Dimensions | 8.7"D x 12.5"W x 5.7"H |
| Item Weight | 3.68 pounds |
| Output Power | 45 Watts |
9. Warranty and Support
For warranty information, technical support, or any questions regarding your CAMECHO Car Stereo Radio, please contact our customer support team.
Customer Support Email: CAMECHOVIP@126.com

Image 9.1: Customer Support Contact Information.


