
LAUNCH Launch Creader Elite for Audi - THKY
Launch Creader Elite Code Reader User Manual
Model: Launch Creader Elite for Audi - THKY
Introduction
The Launch Creader Elite Code Reader is a professional bi-directional scan tool designed primarily for Audi vehicles, offering comprehensive full-system diagnostics and a wide range of service functions. It also serves as a universal OBDII code reader for all car brands manufactured after 1996. This manual provides detailed instructions on setting up, operating, and maintaining your device to ensure optimal performance and accurate vehicle diagnostics.

Figure 1: The Launch Creader Elite Code Reader, showcasing its compact design and user interface.
Key Features
- Full System Diagnostics for Audi: Read and clear DTCs from all major vehicle systems including Engine, SRS, ABS, Transmission, and more.
- Bi-Directional Control/Active Test: Perform active tests to control vehicle components and systems for accurate troubleshooting.
- 31+ Special Functions: Includes Oil Reset, SAS, EPB, TPMS, Throttle Matching, Injector Adaptation, Battery Registration, and more.
- Universal OBDII Functions: Supports 10 OBDII modes for all OBDII compliant vehicles (1996 and newer), including reading/erasing codes, data stream, freeze frame, I/M readiness, O2 sensor test, and EVAP system test.
- AutoVIN Technology: Automatically identifies vehicle information for quick and accurate software matching.
- Wireless WIFI Update: Convenient over-the-air software updates.
- User-Friendly Interface: Android system with a 4.0-inch color screen and button navigation.
- DTC Look-up Library: Provides professional fault code interpretations.

Figure 2: Overview of the diagnostic tool's primary capabilities.
Setup
- Unpacking: Carefully remove the Launch Creader Elite device and its accessories from the packaging. Verify all components listed in the package contents are present.
- Power On: Connect the device to your vehicle's OBDII port. The device will typically power on automatically.
- Initial Setup: Follow the on-screen prompts to select your preferred language and time zone.
- Wi-Fi Connection: Navigate to 'Settings' on the device, then 'Wi-Fi'. Select your Wi-Fi network and enter the password to connect. A stable internet connection is required for software updates and online features.
- Software Update: After connecting to Wi-Fi, go to the 'Upgrade' section. Check for available software updates and install them to ensure your device has the latest diagnostic capabilities and vehicle coverage.
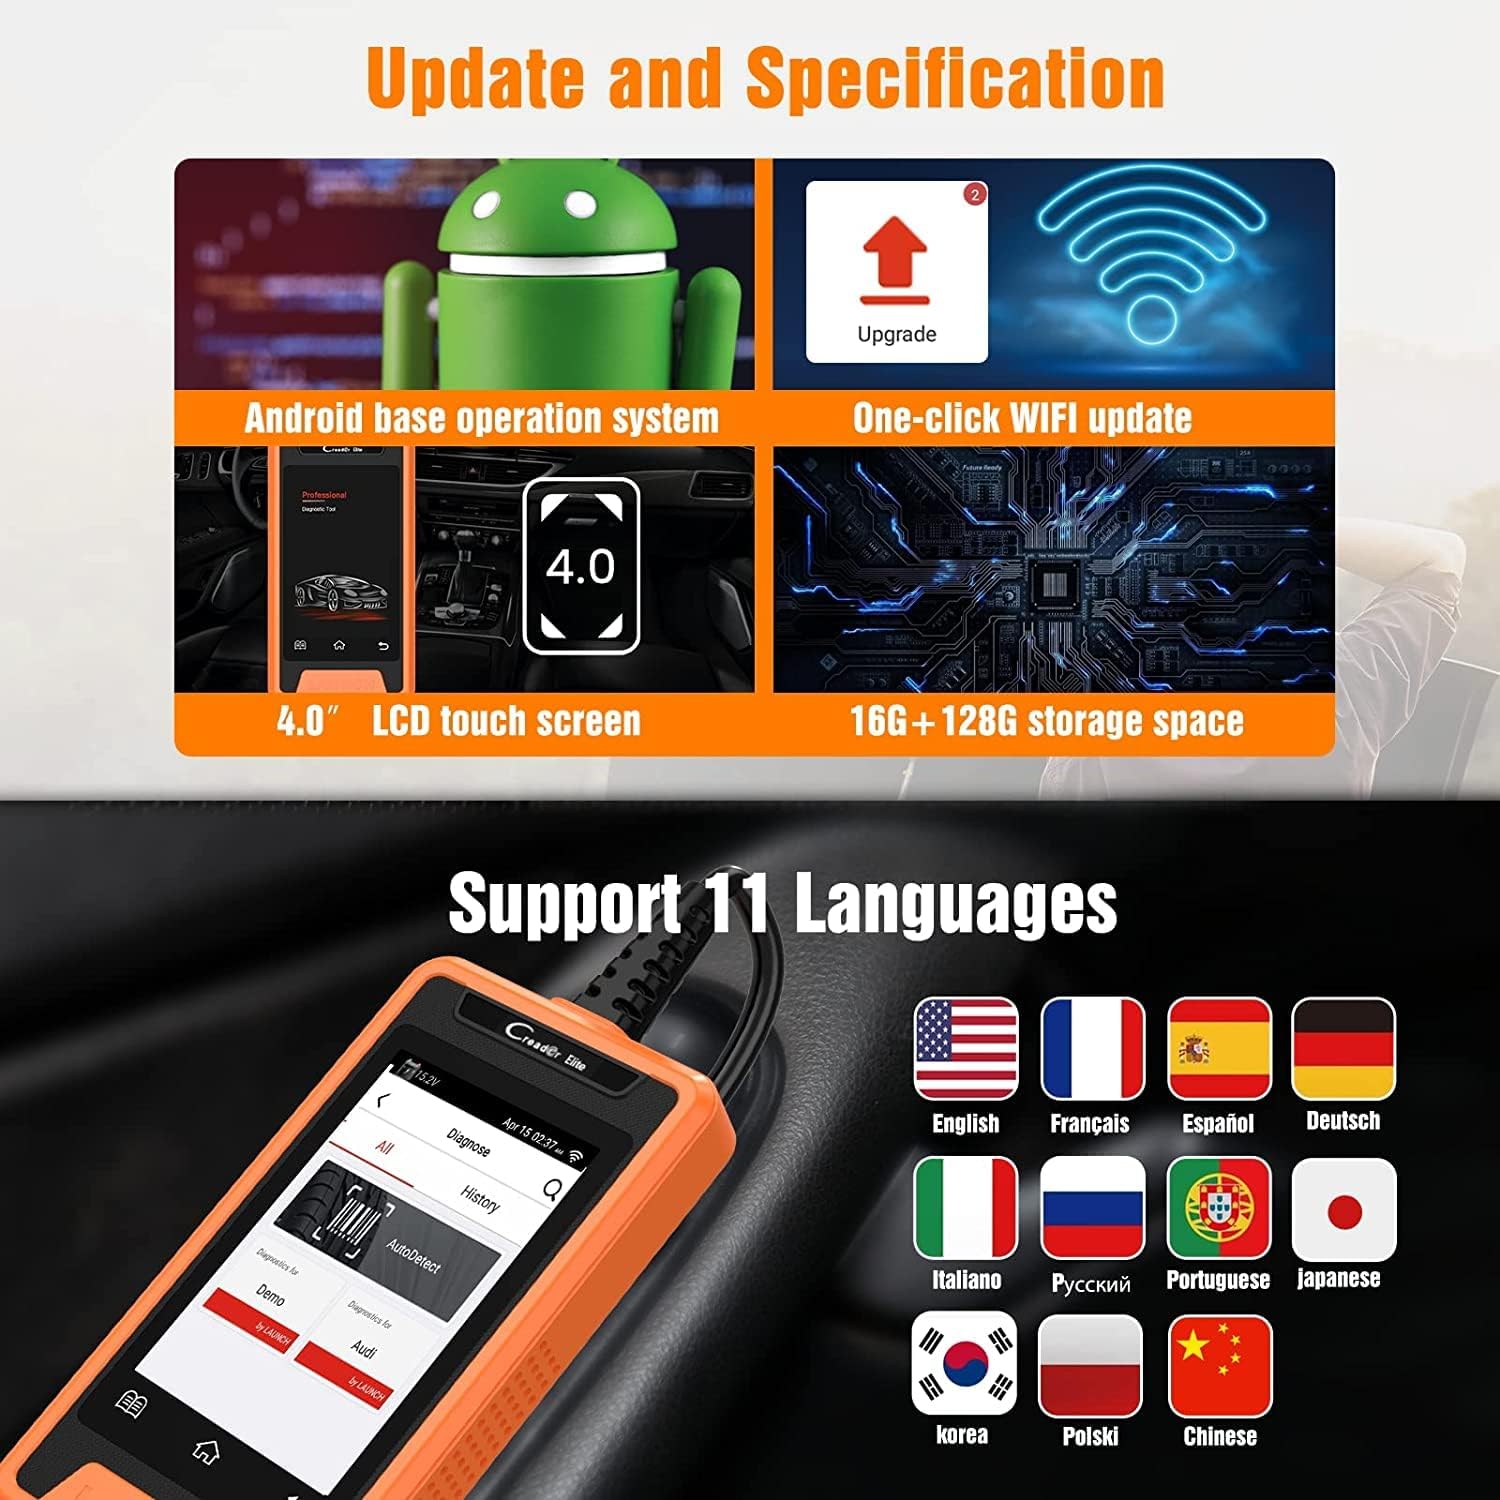
Figure 3: Device interface highlighting the update and specification options.
Operating Instructions
1. Vehicle Connection and Identification
Ensure the vehicle's ignition is in the ON position (engine off). Locate the vehicle's 16-pin OBDII Data Link Connector (DLC), usually under the dashboard. Plug the Creader Elite's cable into the DLC. The device will automatically power on and attempt to identify the vehicle via AutoVIN.
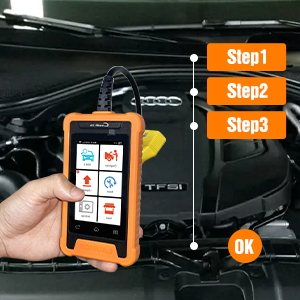
Figure 4: Main diagnostic screen with options for current diagnosis or history review.
2. Full System Diagnostics (Audi Specific)
From the main menu, select 'Diagnose'. The device will either automatically detect the vehicle or prompt you to manually select the vehicle make (Audi). Once connected, you can access all available vehicle systems to read and clear Diagnostic Trouble Codes (DTCs), view live data streams, and perform system-specific tests.
- Read DTCs: Displays current, pending, and permanent diagnostic trouble codes.
- Clear DTCs: Erases all diagnostic trouble codes from the vehicle's computer. Ensure the underlying issue is resolved before clearing codes.
- Live Data Stream: View real-time data parameters from various sensors and components.
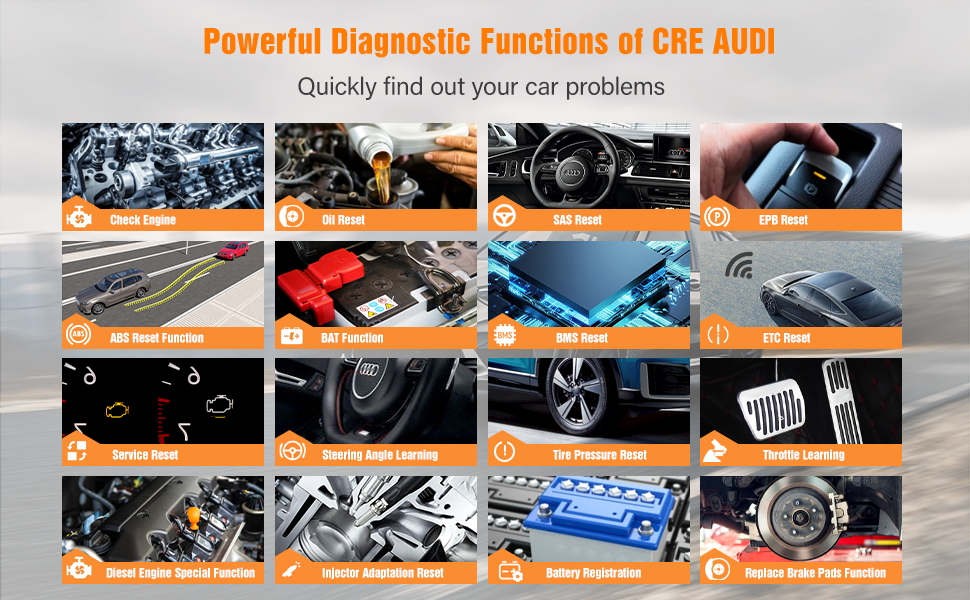
Figure 5: Comprehensive system coverage for Audi vehicles.
3. Bi-Directional Control / Active Test
This function allows you to send commands to the vehicle's ECUs to activate specific components or systems, such as turning on the fuel pump, cycling the ABS pump, or testing window motors. This is crucial for pinpointing faulty components.

Figure 6: Active Test functionality for component operation verification.
4. Special Functions (31+ Services)
The device offers numerous reset and adaptation functions. Navigate to the 'Reset' menu to access these services. Examples include:
- Oil Reset: Resets the oil life reminder after an oil change.
- EPB Reset: Resets the electronic parking brake after brake pad replacement.
- SAS Reset: Calibrates the steering angle sensor.
- TPMS Reset: Resets tire pressure monitoring system sensors.
- Battery Registration: Registers a new battery with the vehicle's Battery Management System (BMS).
- Throttle Matching: Relearns the throttle body position.
- Injector Adaptation: Codes new injector values into the ECU.

Figure 7: Examples of advanced diagnostic and reset functions.
Battery Registration Example:
- Prepare a new battery according to the car chassis number or VIN.
- Replace the old battery with the new battery (same capacity).
- Turn the ignition on, but do not start the engine.
- Plug in the CRE AUDI tool and select the battery registration screen.
- Register the new battery by following the on-screen instructions.
- Start the engine to confirm successful registration.

Figure 8: Step-by-step guide for battery registration.
5. Universal OBDII Functions
For non-Audi vehicles or general diagnostics, select 'OBD II' from the main menu. This mode provides standard OBDII functions applicable to all OBDII compliant vehicles (1996 and newer).
- Read/Erase Codes: Standard DTC reading and clearing.
- I/M Readiness: Checks the status of emission-related monitors.
- Freeze Frame Data: Captures vehicle conditions at the time a fault code is set.
- O2 Sensor Test: Retrieves O2 sensor monitor test results.
- On-Board Monitor Test: Retrieves results for emission-related diagnostic monitoring tests.
- EVAP System Test: Initiates a leak test for the vehicle's evaporative emission system.
- Component Test: Allows testing of specific components.
- Vehicle Information: Displays VIN, Cal ID, and CVN.
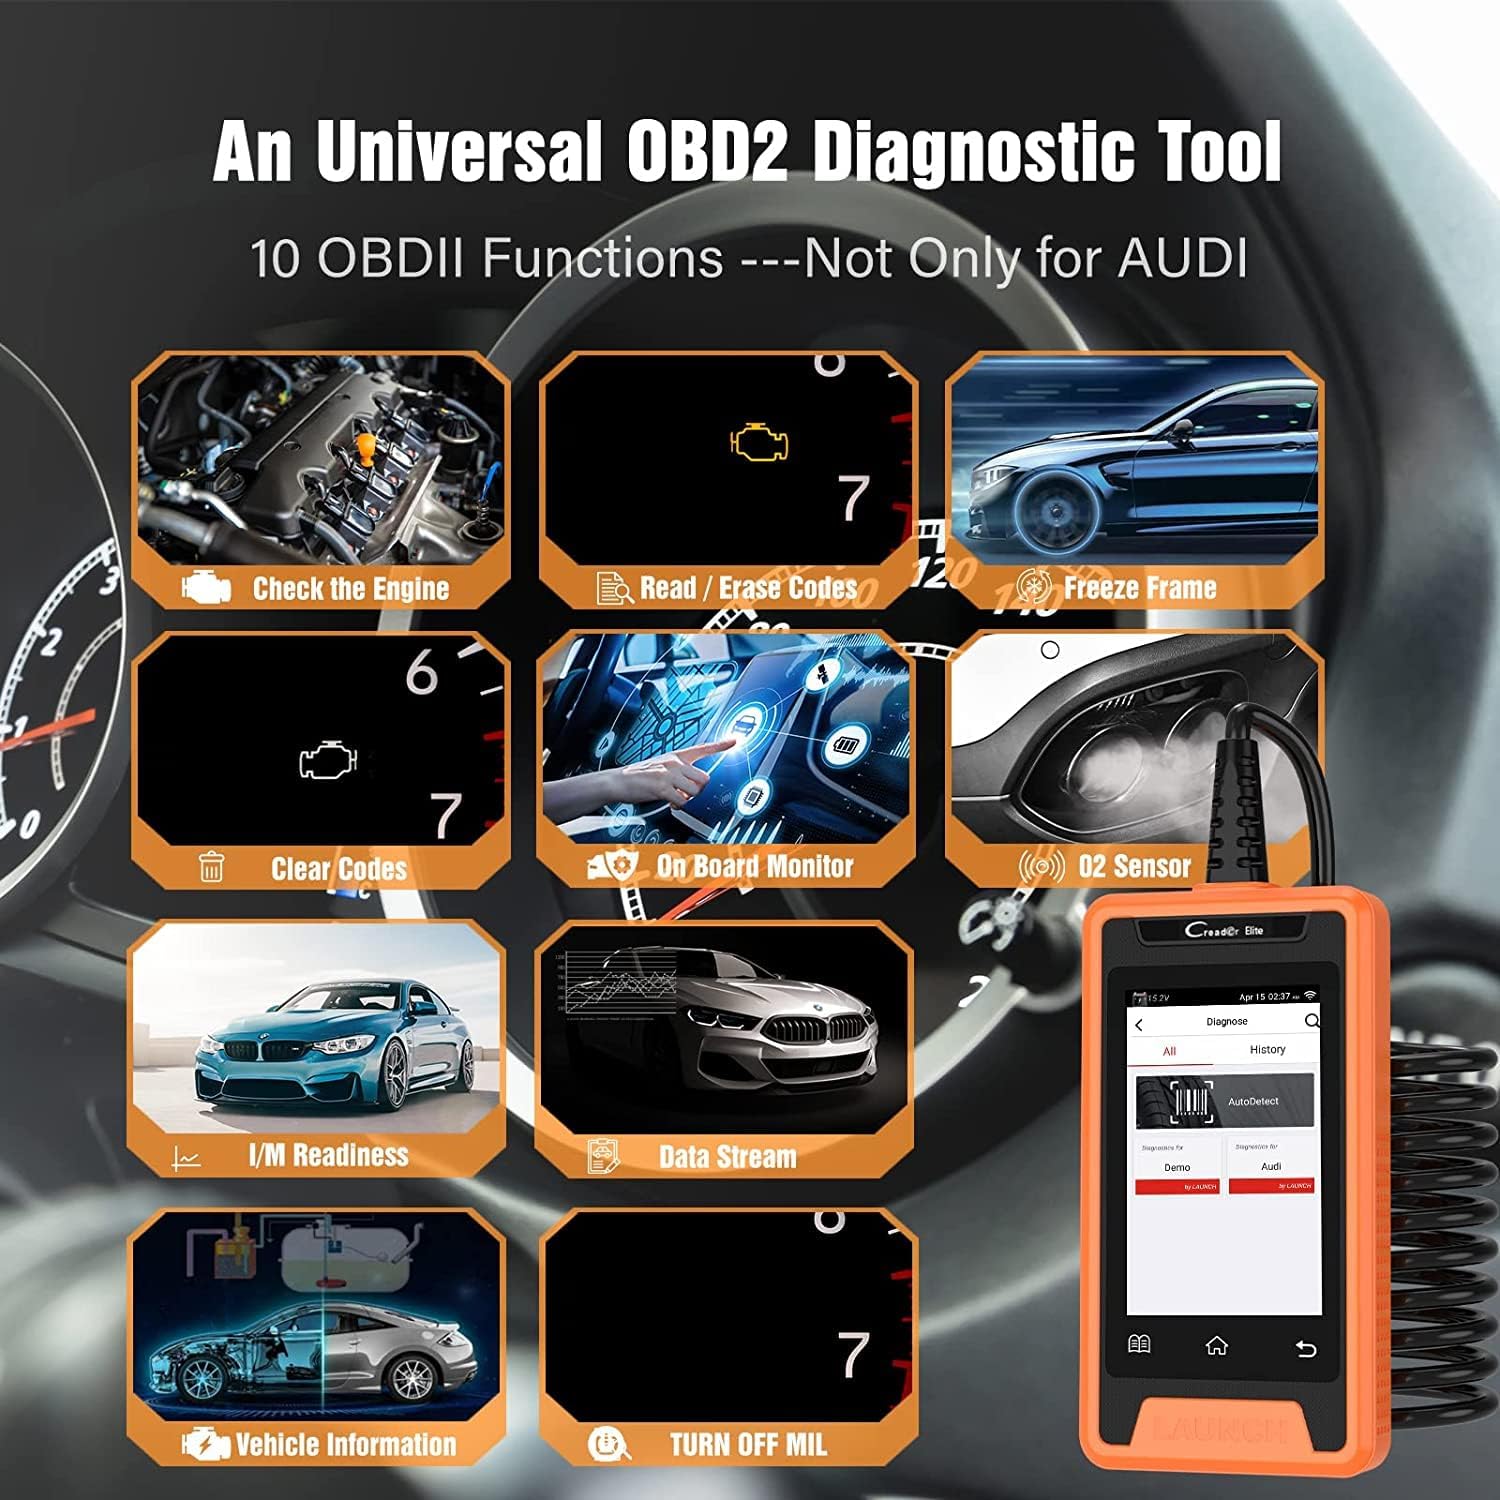
Figure 9: Universal OBD2 diagnostic capabilities.
Maintenance
- Cleaning: Use a soft, dry cloth to clean the device. Do not use abrasive cleaners or solvents.
- Storage: Store the device in a dry, cool environment away from direct sunlight and extreme temperatures.
- Software Updates: Regularly check for and install software updates via Wi-Fi to ensure the device has the latest vehicle coverage and bug fixes. This is crucial for maintaining optimal performance.
- Cable Care: Inspect the OBDII cable regularly for any signs of damage. Do not bend or crimp the cable excessively.
Troubleshooting
| Problem | Possible Cause | Solution |
|---|---|---|
| Device does not power on. | No power from vehicle OBDII port; faulty cable; device malfunction. |
|
| Unable to connect to vehicle ECU. | Incorrect vehicle protocol; faulty connection; vehicle communication issue. |
|
| Wi-Fi update fails. | Weak Wi-Fi signal; incorrect password; server issue. |
|
Specifications
- Model: Launch Creader Elite for Audi - THKY
- Operating System: Android 4.4
- Screen: 4.0 inch Color Screen
- Storage: Built-in 16GB RAM (expandable with 128GB storage mentioned in some images, but primary spec is 16GB)
- Connectivity: Wi-Fi for updates
- Weight: Approximately 1.4 pounds (0.63 kg)
- Dimensions: Approximately 11 x 8.5 x 2.1 inches (27.9 x 21.6 x 5.3 cm)
- Supported Protocols: OBDII/EOBD and specific Audi protocols.
- Languages: Supports 11 languages including English, French, Spanish, German, Italian, Russian, Portuguese, Japanese, Korean, Polish, Chinese.

Figure 10: Device specifications and update capabilities.
Warranty and Support
The Launch Creader Elite comes with a 1-year free software update period. After this period, the device will continue to function normally with all existing features. While updates improve capability and performance over time, they are not mandatory for continued use of the tool's current functions.
For technical support, troubleshooting assistance, or warranty inquiries, please contact LAUNCH customer service through their official channels. Refer to the product packaging or the LAUNCH official website for contact information.
Note: Always ensure you are using official software and updates to prevent potential issues and maintain device integrity.
Related documentsLaunch Creader Elite for Audi - THKY


Ask a question about this manual
Ask about setup, troubleshooting, compatibility, parts, safety, or missing instructions. Manuals+ will review the question and use this page’s manual context to help answer it.