Introduction
The Kerbl EasyProtect 70590 Automatic Chicken Coop Door provides reliable protection for your poultry by automatically opening and closing based on daylight or a set timer. This versatile system can be powered by either batteries or a mains connection, offering maximum flexibility for various coop setups.
Key features include:
- Automatic opening and closing based on daylight or time settings.
- Integrated self-locking mechanism to prevent accidental opening from the outside.
- Easy installation with the controller pre-mounted on the door.
- Flexible power options: battery (4 AA Mignon batteries included) or mains.
- Enhanced safety features, including delayed light sensor response, automatic motor overload stop, and resistance stop function.
- Manual control option directly on the device or via an external button (optional accessory).
Safety Information
Please read all safety instructions carefully before installing and operating the Kerbl EasyProtect 70590. Failure to follow these instructions may result in injury or damage to the product.
- Ensure the power supply is disconnected before performing any installation or maintenance.
- Keep hands and loose clothing clear of the moving door during operation.
- Do not attempt to modify the device. Repairs should only be performed by qualified personnel.
- Use only the specified power sources (batteries or mains adapter).
- Keep the device away from extreme temperatures and moisture.
Package Contents
The Kerbl EasyProtect 70590 package includes:
- 1 x Automatic Chicken Coop Door with pre-mounted controller
- 4 x AA Mignon Batteries
- 1 x Light Sensor with 1-meter cable
Note: Optional accessories such as a solar battery kit (Ref. 70556) and connection cable for car or pasture fence batteries (Ref. 70557) are sold separately.
Specifications
| Feature | Detail |
|---|---|
| Model Number | 70590 |
| Door Opening Dimensions (W x H) | 32.5 cm x 58 cm |
| Overall Product Dimensions (L x W x H) | 35 cm x 15 cm x 60 cm |
| Product Weight | 2.32 kg |
| Material | Aluminum |
| Color | Black |
| Power Supply | 4 x AA Mignon Batteries (included) or Mains Power |
| Light Sensor Cable Length | 1 meter |
| Recommended for | Poultry |
Setup and Installation
The Kerbl EasyProtect 70590 is designed for straightforward installation. The control unit is pre-mounted on the door for convenience.
- Choose Installation Location: Select a suitable location on your chicken coop for mounting the door. Ensure there is enough space for the door to slide freely and that the light sensor can be positioned effectively.

Figure 1: Front view of the Kerbl EasyProtect 70590 Automatic Chicken Coop Door, showing the pre-mounted control unit and the sliding door panel.
- Mount the Door: Securely attach the door unit to the chicken coop using appropriate fasteners (not included, as coop materials vary). Ensure the door is level and can move smoothly up and down.

Figure 2: Angled view of the automatic chicken coop door, highlighting its compact design and mounting points.
- Position the Light Sensor: The light sensor comes with a 1-meter cable, allowing flexible positioning. Mount the sensor inside the coop in a location that accurately reflects the ambient light conditions (e.g., not directly exposed to artificial light at night, but receiving natural daylight).
- Connect Power:
- Battery Power: Insert the 4 included AA Mignon batteries into the designated battery compartment on the control unit.
- Mains Power: If using mains power, connect a suitable power adapter (not included) to the control unit and plug it into a power outlet.
Note: For autonomous power, optional solar battery kits or car/pasture fence battery connection cables are available separately.
- Initial Test: After installation and power connection, perform a manual test to ensure the door opens and closes correctly.

Figure 3: The automatic door installed on a wooden chicken coop, shown in the open position, allowing chickens to exit or enter.

Figure 4: The automatic door installed on a wooden chicken coop, shown in the closed position, securing the coop.
Operating Instructions
The Kerbl EasyProtect 70590 offers both automatic and manual control options.
Automatic Operation (Light Sensor / Timer)
The primary mode of operation is automatic, controlled by either the integrated light sensor or a programmable timer.
- Light Sensor Control: The door will automatically open at dawn and close at dusk. The light sensor has a built-in time delay to prevent reactions to short-term brightness changes or flashes (e.g., car headlights).
- Timer Control: Refer to the control unit's display and buttons for setting specific opening and closing times. This allows for precise scheduling independent of natural light.
Consult the display on the control unit for current settings and to navigate through the menu options for time and light sensitivity adjustments.

Figure 5: Chickens freely moving in and out of the coop through the automatically opened door.
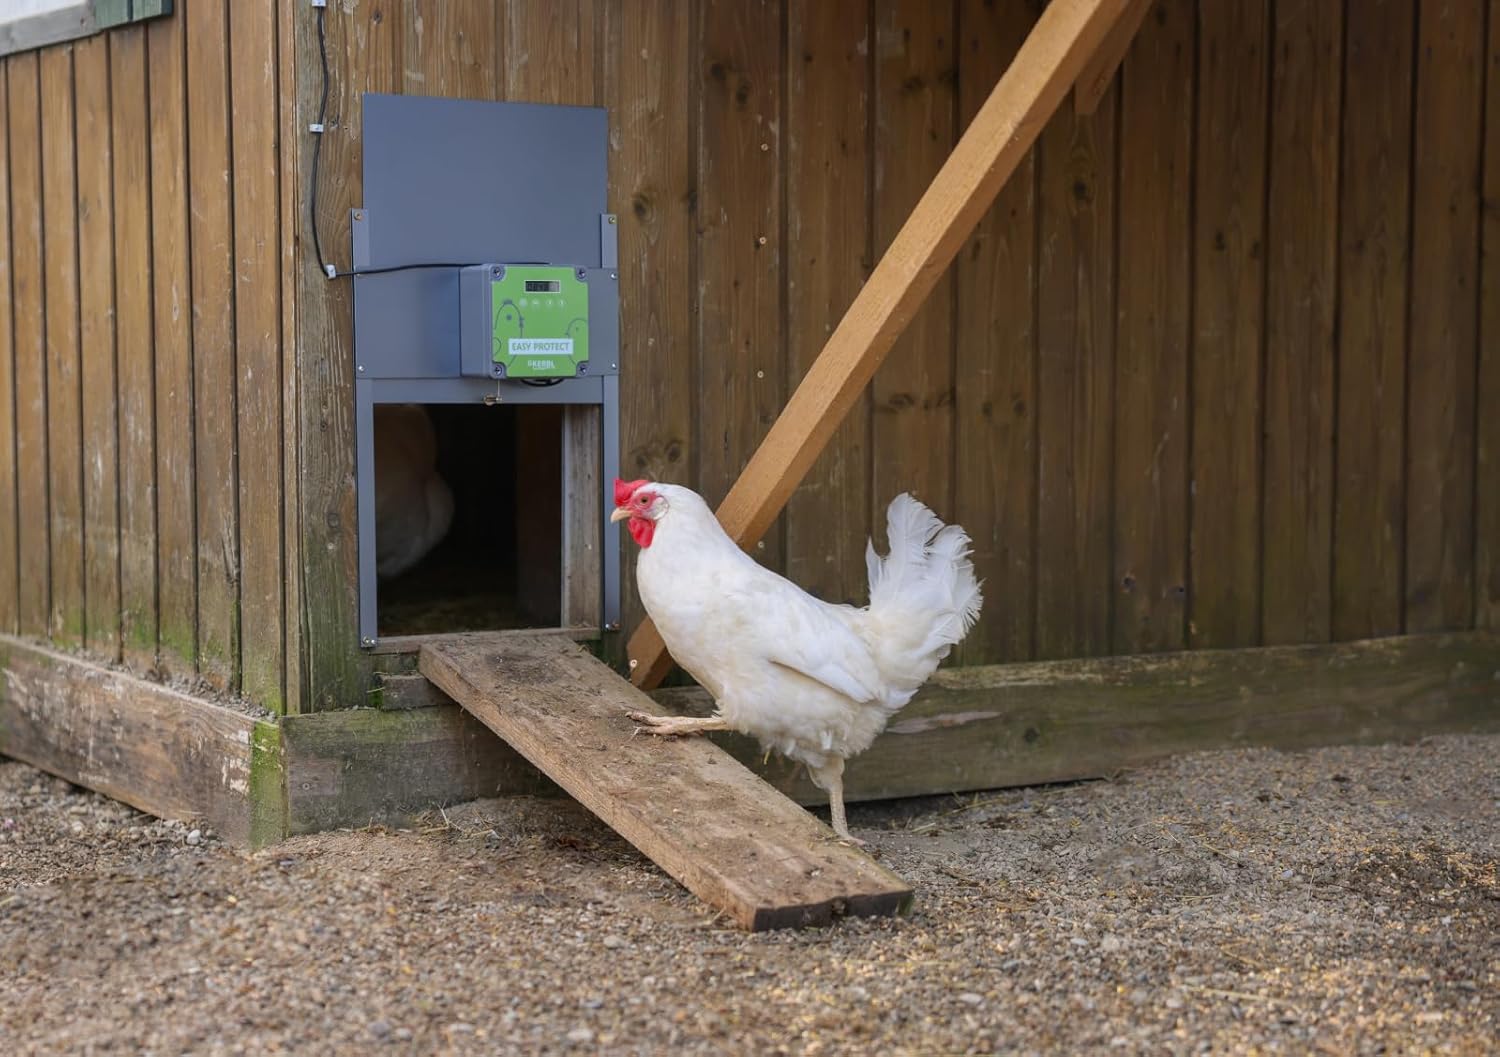
Figure 6: A chicken utilizing the open automatic door to enter its coop, demonstrating the door's functionality in a real-world setting.
Manual Operation
In addition to automatic control, the door can be operated manually:
- On-Device Control: The control unit has buttons that allow you to manually open or close the door. Refer to the specific button layout on your device for this function.
- External Button (Optional): An external button (Kerbl Ref. 70565, sold separately) can be connected to the control unit for remote manual operation.
Maintenance
Regular maintenance ensures the longevity and reliable operation of your Kerbl EasyProtect 70590.
- Cleaning: Periodically clean the door panel and the tracks to remove dirt, debris, or feathers that could impede smooth operation. Use a damp cloth; avoid abrasive cleaners.
- Battery Replacement: If using battery power, replace all four AA batteries when the low battery indicator appears on the control unit, or if the door's operation becomes sluggish.
- Track Lubrication: Occasionally apply a small amount of silicone-based lubricant to the door tracks to ensure smooth movement.
- Sensor Check: Ensure the light sensor is clean and unobstructed.

Figure 7: The automatic door seamlessly integrated into a different style of wooden chicken coop, shown in the closed position.
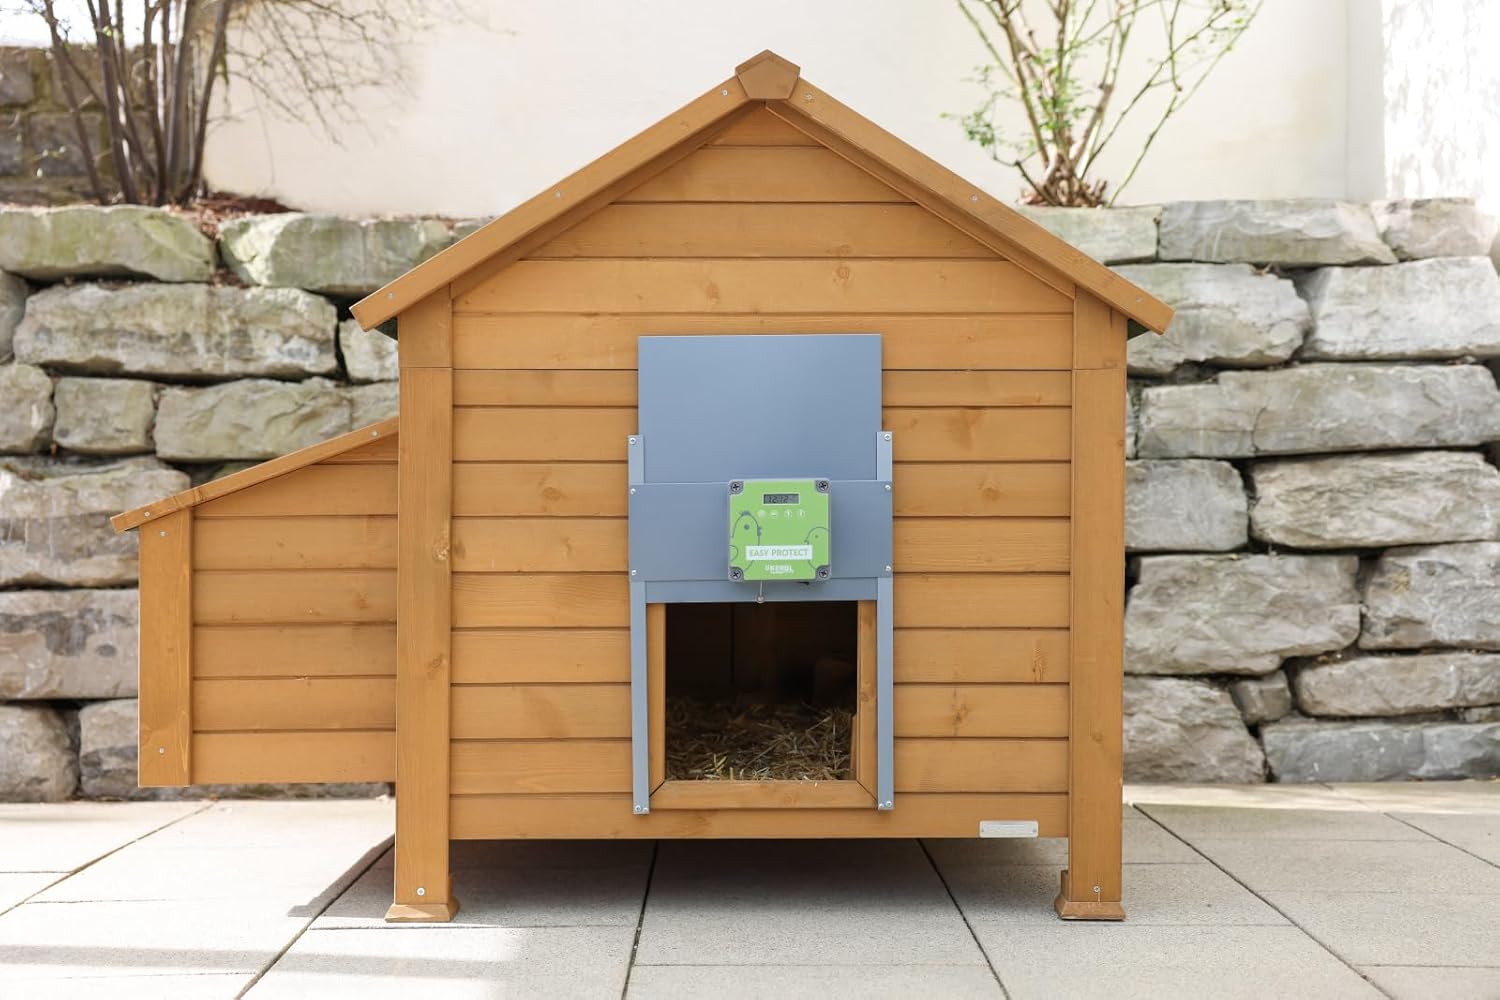
Figure 8: The automatic door on the same coop, now in the open position, ready for poultry access.
Troubleshooting
If you encounter issues with your Kerbl EasyProtect 70590, refer to the following common problems and solutions:
- Door Not Opening/Closing:
- Check power supply: Ensure batteries are fresh or mains adapter is properly connected.
- Check for obstructions: Clear any debris from the door tracks or the path of the door.
- Verify light sensor position: Ensure the sensor is not blocked or exposed to artificial light at night.
- Check timer settings: If using timer mode, confirm the set times are correct.
- Door Stops Mid-Operation:
- This may indicate the overload protection or resistance stop function has activated. Check for obstructions in the door's path.
- Ensure the door tracks are clean and lubricated.
- Inaccurate Light Sensor Response:
- Ensure the sensor is clean.
- Reposition the sensor to a location that receives consistent natural light.
- Adjust the light sensitivity settings on the control unit if available.
If problems persist, contact Kerbl customer support or your retailer for assistance.

Figure 9: A side view of a chicken coop featuring the installed automatic door, illustrating its compact integration.
Warranty and Support
For warranty information and customer support, please refer to the documentation provided with your purchase or contact your retailer. Keep your proof of purchase for any warranty claims.
Manufacturer: Kerbl
Model: 70590


