
GEARELEC AT500
GEARELEC AT500 Car OBD2 Scanner Diagnostic Tool User Manual
Model: AT500
Introduction
This manual provides comprehensive instructions for the operation, maintenance, and troubleshooting of your GEARELEC AT500 Car OBD2 Scanner Diagnostic Tool. Please read this manual thoroughly before using the device to ensure proper and safe operation.

Image: The GEARELEC AT500 OBD2 Scanner, showing its main menu screen and connected OBD-II cable.
What's in the Box
Upon opening the package, please verify that all components are present and in good condition:
- GEARELEC AT500 OBD2 Scanner Unit
- User Manual (this document)
Key Features
The GEARELEC AT500 OBD2 Scanner is equipped with a range of features designed for comprehensive vehicle diagnostics:
- Multi-Language Support: Supports 11 languages including English, German, Spanish, French, Italian, Dutch, Portuguese, Russian, Polish, Finnish, and Turkish.
- DTC Lookup & I/M Readiness: Features over 30,000 built-in Diagnostic Trouble Codes (DTCs) with descriptions, and a one-click I/M readiness function for emissions testing.
- Wide Vehicle Compatibility: Compatible with most vehicles manufactured after 1996 (US), 2002 (EU), and 2008 (Asia) that adhere to the OBD2 protocol.
- Battery Testing Capabilities: Includes voltage measurement, battery level display, charging status, diode ripple testing, and starter testing.
- Comprehensive Diagnostic Functions: Read and clear engine codes, view freeze frame data, live data streams, O2 sensor test, onboard monitor test, EVAP system test, component test, data logging, and vehicle information.
- User-Friendly Display: Equipped with a 2.8-inch color LCD screen for clear data presentation and an intuitive fault detection light.

Image: An overview of the GEARELEC AT500's key features, including full OBD2 modes, read/clear codes, EVAP, I/M readiness, battery level, multi-language support, O2 sensor test, vehicle info, on-board monitoring, data record/replay, freeze frame, DTC lookup, and live data stream.
Setup
Vehicle Compatibility
The AT500 scanner is designed to work with most OBD2/EOBD compliant vehicles. This generally includes:
- US-based cars manufactured after 1996
- EU-based cars manufactured after 2002
- Asia-based cars manufactured after 2008
It supports standard OBD2/EOBD protocols: ISO 9141, KWP2000, SAE J1850 CAN, J1850 VPW, and J1850 PWM.
Note: This tool is not compatible with new energy vehicles, hybrid vehicles, or vehicle models that do not adhere to the OBD2 protocol. It is also not compatible with diesel cars and some other trucks.

Image: Visual representation of the GEARELEC AT500's compatibility with US, EU, and Asia-based cars from specific years, along with supported OBD2/EOBD protocols and the 11 supported languages.
Connecting the Scanner
- Locate the vehicle's 16-pin Data Link Connector (DLC). This is typically found under the dashboard on the driver's side.
- Ensure the vehicle's ignition is in the "OFF" position.
- Firmly plug the AT500's OBD-II connector into the vehicle's DLC.
- Turn the vehicle's ignition to the "ON" position (engine can be off or running, depending on the test). The scanner will automatically power on.
Operating Instructions
Navigating the Menu
Use the directional arrows (Up, Down, Left, Right) to navigate through the menu options on the 2.8-inch LCD screen. Press the OK button to confirm a selection. The ESC button is used to return to the previous screen or exit a function.
Reading and Clearing Diagnostic Trouble Codes (DTCs)
- From the main menu, select "Diagnose" or "DTC Lookup".
- To read codes, select "Read Codes". The scanner will display current, pending, and permanent codes.
- To clear codes, select "Clear Codes". Warning: Clearing codes will erase all diagnostic trouble codes and freeze frame data from the vehicle's computer. Ensure you have recorded all necessary information before clearing codes.

Image: The GEARELEC AT500 displaying a DTC lookup result (P1100) and illustrating the effect of clearing a check engine light, showing a dashboard before and after the light is extinguished.
Viewing Live Data Stream
The Live Data Stream function allows you to view real-time sensor data from the vehicle's engine control unit (ECU). This can be displayed in numerical or graphical format.
- From the main menu, select "Live Data".
- Choose the parameters you wish to monitor.
- Observe the real-time data to identify potential issues or verify sensor operation.
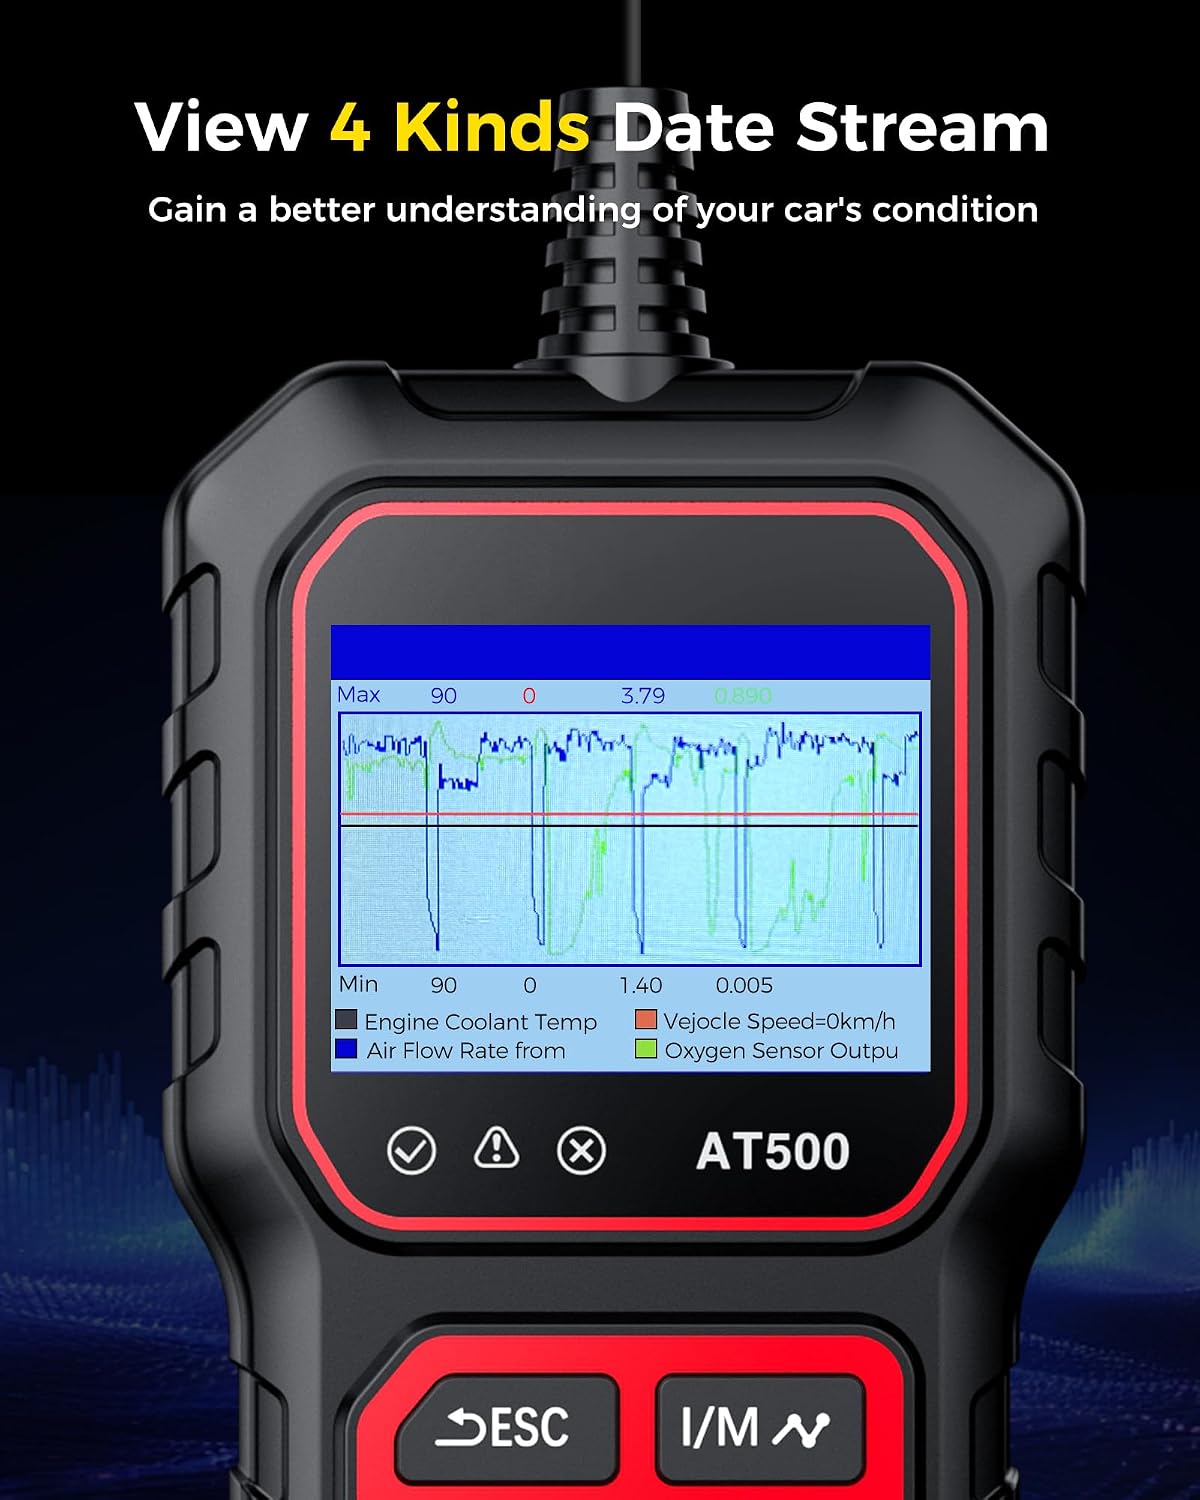
Image: The GEARELEC AT500 displaying a live data stream in a graphical format, showing parameters like Engine Coolant Temp, Air Flow Rate, Vehicle Speed, and Oxygen Sensor Output over time.
I/M Readiness & Smog Check
The I/M Readiness function checks the status of the emission-related monitoring systems on the vehicle. This is crucial for passing emissions tests.
- From the main menu, select "I/M Readiness".
- The scanner will display the status of various monitors (e.g., Misfire Monitor, Fuel System Monitor, Comprehensive Component Monitor). "OK" or "Complete" indicates the monitor has run and passed; "INC" or "Incomplete" means the monitor has not yet run its diagnostic cycle.
- Use this information to determine if your vehicle is ready for an emissions test.

Image: A hand operating the GEARELEC AT500, highlighting the I/M Readiness function on the screen, indicating its use for smog checks.
Battery System Testing
The AT500 includes advanced battery testing features to assess the health of your vehicle's battery and charging system.
- Voltage Measurement: Displays the current battery voltage.
- Battery Level Display: Indicates the battery's charge level.
- Charging Status Indication: Shows if the battery is charging correctly.
- Diode Ripple Testing: Checks for excessive AC ripple from the alternator.
- Starter Testing: Evaluates the starter motor's performance during engine cranking.
Access these functions from the "Battery System" or "Voltmeter" options on the main menu.
Maintenance
- Cleaning: Use a soft, dry cloth to clean the scanner's casing and screen. Do not use abrasive cleaners or solvents.
- Storage: Store the device in a clean, dry environment, away from extreme temperatures and direct sunlight.
- Cable Care: Avoid bending or twisting the OBD-II cable excessively. Always grasp the connector when plugging or unplugging, not the cable itself.
- Software Updates: Check the official GEARELEC website periodically for software updates to ensure optimal performance and compatibility with newer vehicle models.
Troubleshooting
| Problem | Possible Cause | Solution |
|---|---|---|
| Scanner does not power on. |
|
|
| "Link Error" or "Communication Error" message. |
|
|
| Cannot clear codes. |
|
|
Specifications
| Feature | Detail |
|---|---|
| Model | AT500 |
| Display | 2.8-inch Color LCD |
| Operating Voltage | 9-16V (from vehicle OBD-II port) |
| Supported Protocols | ISO 9141, KWP2000, SAE J1850 CAN, J1850 VPW, J1850 PWM |
| Supported Languages | English, German, Spanish, French, Italian, Dutch, Portuguese, Russian, Polish, Finnish, Turkish |
| Dimensions (L x W x H) | Approx. 5.79 x 3.03 x 0.94 inches (14.7 x 7.7 x 2.4 cm) |
| Weight | Approx. 9.5 ounces (269 grams) |
Warranty and Support
For warranty information and technical support, please refer to the official GEARELEC website or contact their customer service directly. Keep your purchase receipt as proof of purchase for warranty claims.
GEARELEC Official Store: Visit the GEARELEC Store on Amazon
Related documentsAT500

Ask a question about this manual
Ask about setup, troubleshooting, compatibility, parts, safety, or missing instructions. Manuals+ will review the question and use this page’s manual context to help answer it.