
SOOPYK FYT530-1-FBM
SOOPYK FYT530-1-FBM Countertop Bottleless Water Cooler Dispenser User Manual
Model: FYT530-1-FBM | Brand: SOOPYK
1. Introduction
This manual provides essential instructions for the installation, operation, and maintenance of your SOOPYK FYT530-1-FBM Countertop Bottleless Water Cooler Dispenser. Please read this manual thoroughly before using the appliance to ensure safe and efficient operation.

Image 1.1: The SOOPYK FYT530-1-FBM water cooler dispenser shown with its included installation kit components.
2. Important Safety Information
WARNING: To reduce the risk of injury and property damage, read all instructions and warnings before assembling, installing, and operating this water dispenser.
- Always connect the dispenser to a grounded electrical outlet.
- Do not operate the dispenser if the power cord is damaged.
- Keep the dispenser away from direct sunlight and heat sources.
- Ensure proper ventilation around the unit.
- This appliance is not intended for use by persons (including children) with reduced physical, sensory or mental capabilities, or lack of experience and knowledge, unless they have been given supervision or instruction concerning use of the appliance by a person responsible for their safety.
- Children should be supervised to ensure that they do not play with the appliance.
- The dispenser features a child safety lock for the hot water spout.
3. Product Features
The SOOPYK FYT530-1-FBM water cooler dispenser offers several advanced features for convenience and water quality:
- Bottleless Design: Connects directly to your water line, eliminating the need for heavy water bottles.
- Tri-Temperature Dispense: Provides hot, room temperature, and cold water on demand.
- 4-Stage Filtration System: Includes PP, CTO, UF, and CTO filters to reduce contaminants and improve taste.
- Self-Cleaning Feature: An automated sanitization process ensures clean water.
- Child Safety Lock: Prevents accidental hot water dispensing.
- Built-in Nightlight: Illuminates the dispensing area for easy use in low light conditions.
- Durable Construction: Features a stainless steel hot water tank.

Image 3.1: Key features of the dispenser, including three temperature options, child safety lock, nightlight, and UV sterilization.
4. Package Contents
Please check the package for the following items:
- SOOPYK FYT530-1-FBM Water Cooler Dispenser
- 1/4" Tubing
- Integrated Valve with 1/4" PT Taper Pipe
- PTFE Tape
- User Manual (this document)
- 4-Stage Filter Set (pre-installed or separate)
5. Setup and Installation
Follow these steps to set up your water cooler dispenser:
- Unpacking: Carefully remove the dispenser from its packaging. Retain packaging for future transport or storage.
- Placement: Place the dispenser on a flat, stable countertop surface. Ensure there is adequate space around the unit for ventilation (refer to dimensions).
- Water Line Connection:
- Locate a cold water supply line (e.g., under your sink).
- Turn off the main water supply.
- Install the integrated valve onto the cold water line using PTFE tape for a watertight seal.
- Connect the 1/4" tubing from the integrated valve to the water inlet on the back of the dispenser. Ensure connections are secure.
- Filter Installation (if not pre-installed): Open the filter compartment (usually at the back or side) and install the 4-stage filters according to the markings. Refer to Image 5.2 for an internal view of the filter setup.
- Power Connection: Plug the power cord into a grounded 115V~ 60Hz electrical outlet.
- Initial Flush: Before first use, dispense several cups of water from each temperature spout to flush the system and filters. Discard this water.

Image 5.1: Dispenser dimensions for proper placement on a countertop.

Image 5.2: Internal view showing the 4-stage filtration system and water tubing.
6. Operating Instructions
Your SOOPYK water dispenser is designed for easy operation:
- Power On: Locate the ON/OFF switches at the back of the unit (refer to Image 6.1). Turn on the switches for heating and cooling functions as desired.
- Dispensing Water:
- Place a cup under the desired spout.
- For cold or room temperature water, press the corresponding dispense button.
- For hot water, engage the child safety lock (if applicable, usually a button or lever) and then press the hot water dispense button.
- Nightlight Function: The built-in nightlight automatically illuminates the dispensing area for convenience in low-light conditions.

Image 6.1: Rear view of the dispenser showing power switches and specification label.
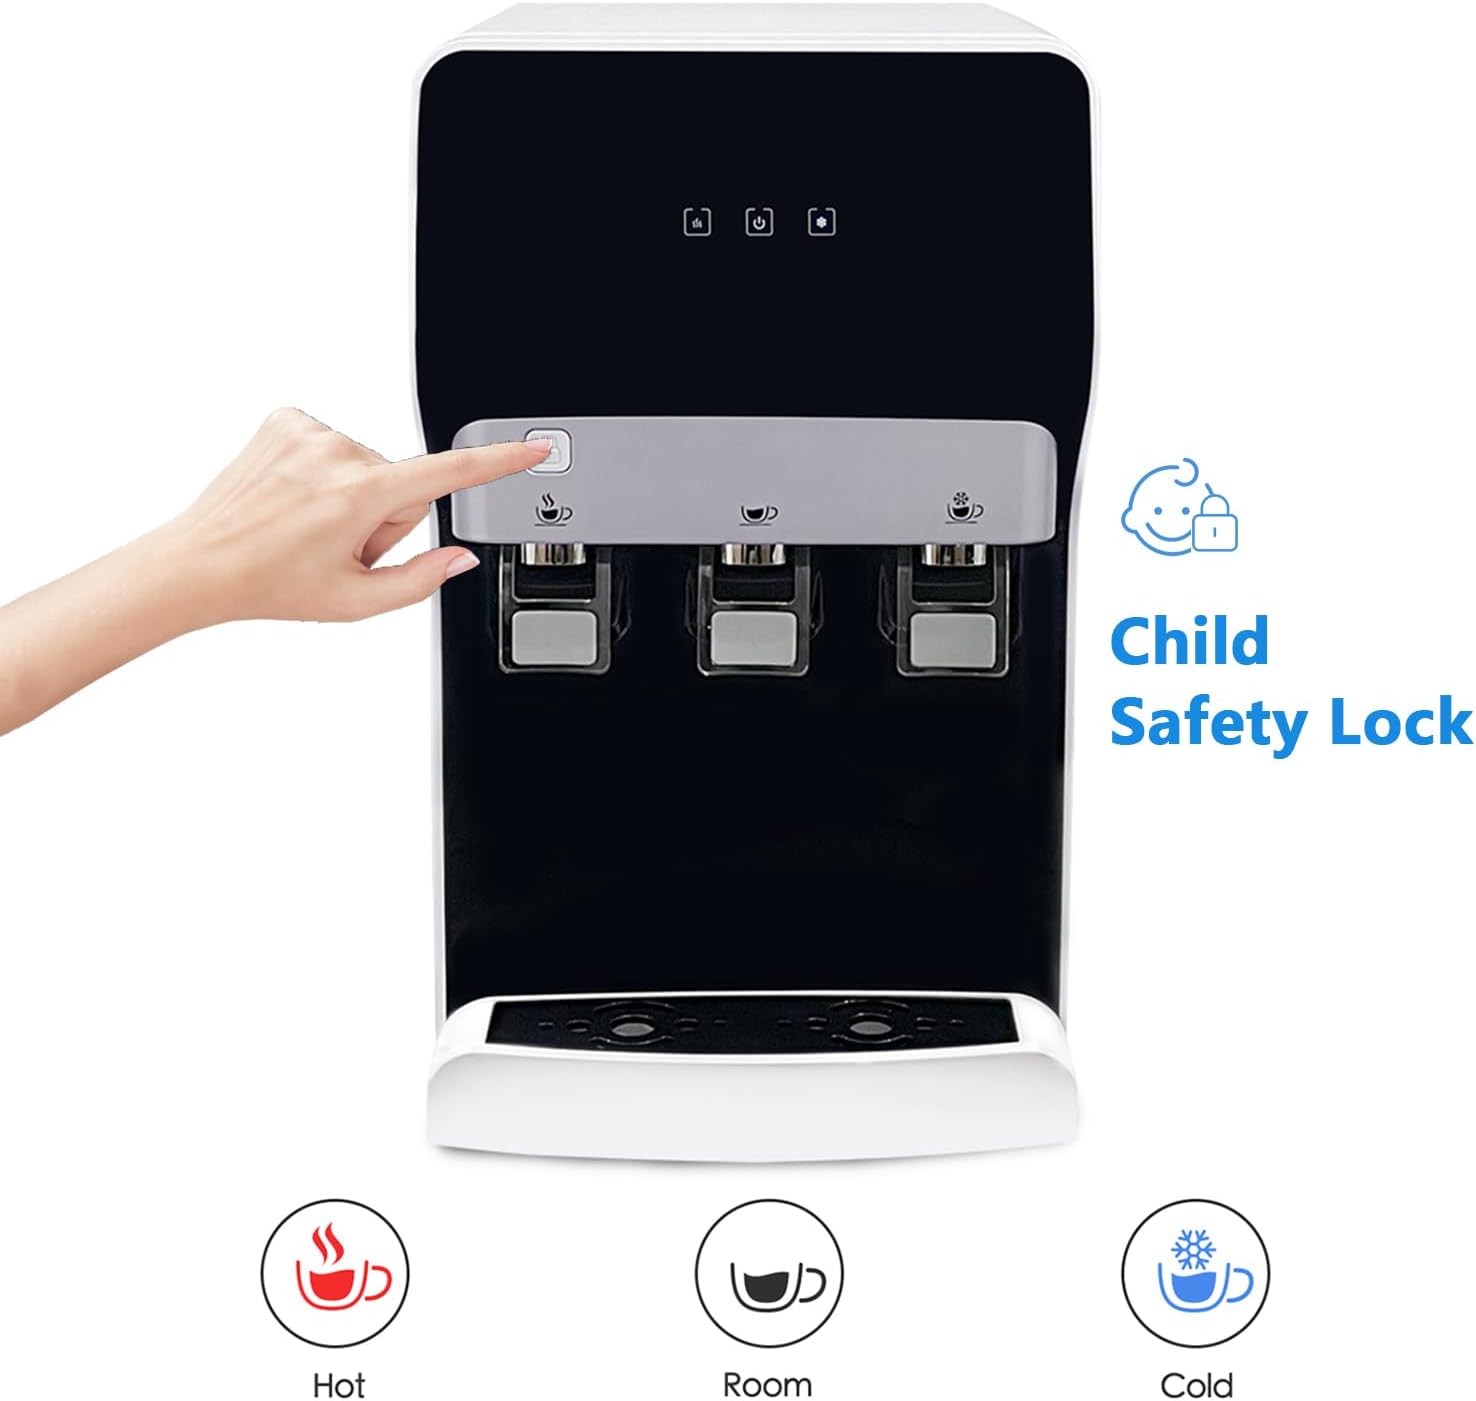
Image 6.2: Dispensing water with emphasis on the child safety lock for hot water.

Image 6.3: The dispenser's nightlight feature in operation.
7. Maintenance
Regular maintenance ensures optimal performance and longevity of your dispenser.
7.1. Self-Cleaning Feature
The dispenser is equipped with an automated self-cleaning function. Refer to the control panel for activation instructions. This feature sanitizes and purifies the internal water paths.
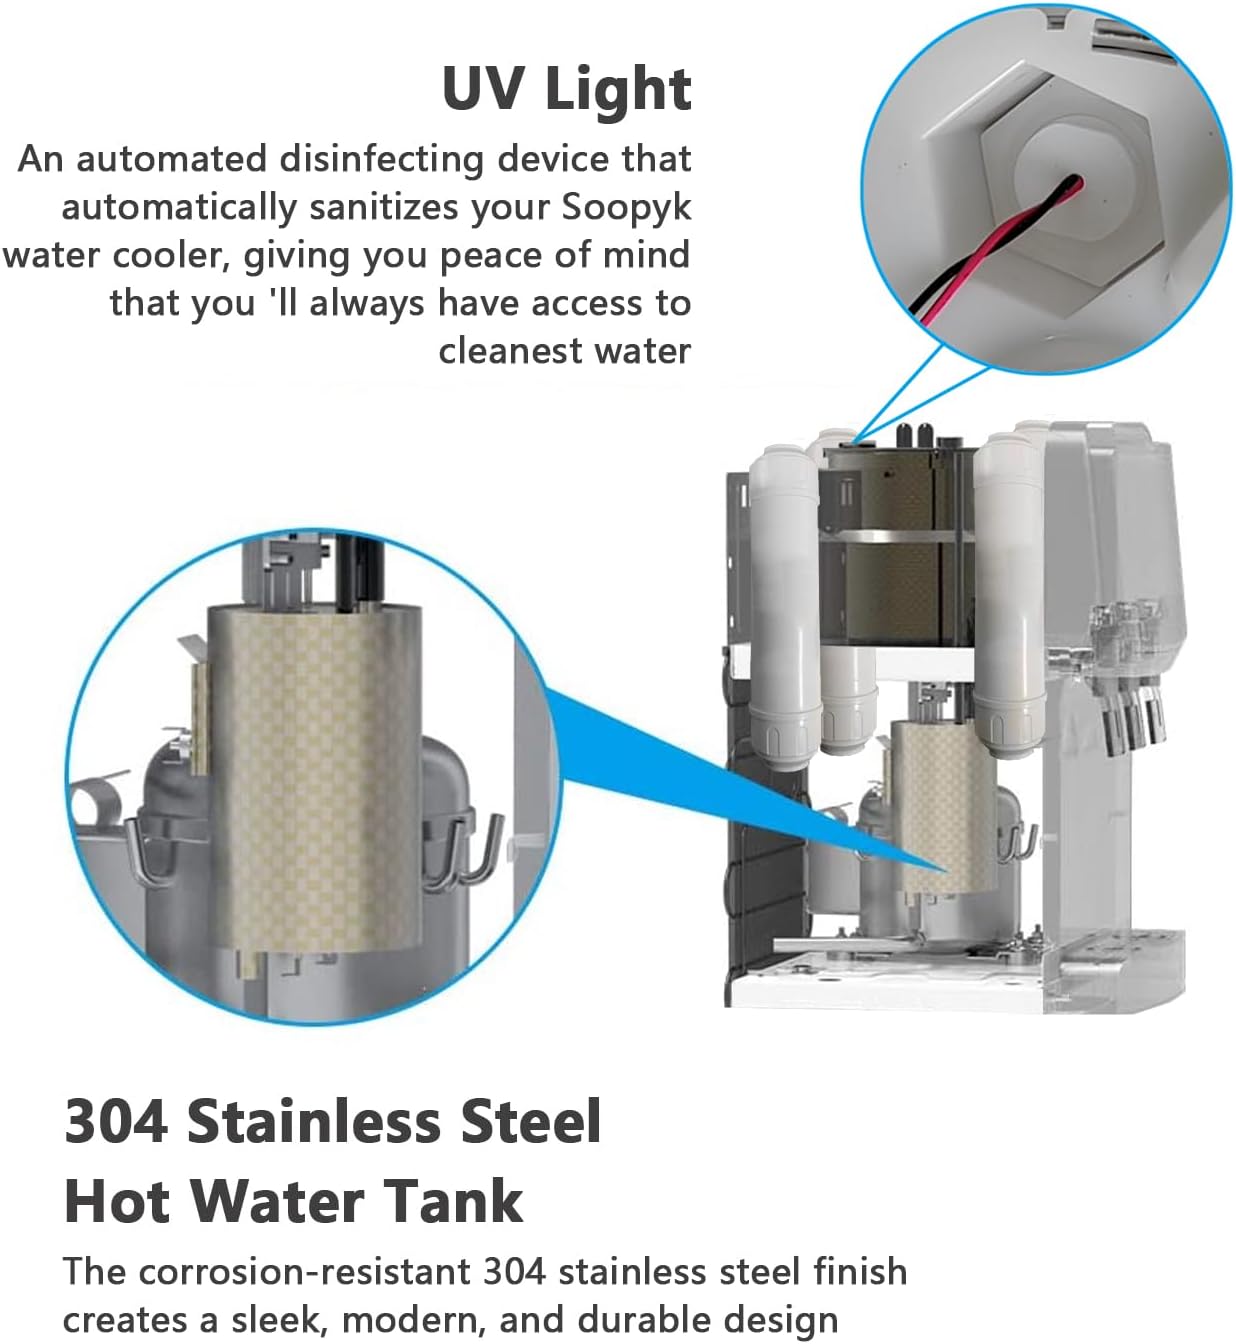
Image 7.1: Illustration of the UV light for sanitization and the stainless steel hot water tank.
7.2. Filter Replacement
The 4-stage filtration system requires periodic replacement to maintain water quality. The filter stages are PP, CTO, UF, and CTO.

Image 7.2: Detailed breakdown of the 4-stage filtration process.
- Turn off the water supply to the dispenser and unplug the unit.
- Open the filter compartment.
- Remove the old filters by twisting or unscrewing them.
- Insert new filters, ensuring they are securely seated.
- Close the filter compartment.
- Turn on the water supply and plug in the unit.
- Flush the system by dispensing several cups of water from each spout.
7.3. Cleaning the Drip Tray
The removable drip tray should be emptied and cleaned regularly to prevent overflow and maintain hygiene.
- Carefully pull out the drip tray from the front of the dispenser.
- Empty any collected water.
- Wash the tray with mild soap and water, then rinse thoroughly.
- Dry the tray completely before reinserting it into the dispenser.
8. Troubleshooting
If you encounter issues with your dispenser, refer to the table below for common problems and solutions.
| Problem | Possible Cause | Solution |
|---|---|---|
| No water dispensing. | Water supply off, clogged filter, kinked water line. | Check water supply valve. Replace filters. Inspect water line for kinks. |
| Water not hot/cold enough. | Heating/cooling switch off, insufficient time to reach temperature, unit overloaded. | Ensure heating/cooling switches are on. Allow 15-30 minutes for water to reach desired temperature. Avoid continuous dispensing of large volumes. |
| Leaking from unit. | Loose connections, cracked tubing, full drip tray. | Check all water line connections. Inspect tubing for damage. Empty and clean drip tray. |
| Unusual noise. | Compressor operation (normal), loose components. | A humming sound from the compressor is normal. If noise is excessive or unusual, contact customer support. |
If the problem persists after attempting these solutions, please contact SOOPYK customer support.
9. Specifications
| Feature | Detail |
|---|---|
| Brand | SOOPYK |
| Model Number | FYT530-1-FBM |
| Color | Black |
| Product Dimensions (L x W x H) | 39.12 x 30.48 x 53.34 cm (15.4 x 12 x 21 inches approx.) |
| Material | Polypropylene (PP), Stainless Steel |
| Rated Voltage | 115V~ |
| Rated Frequency | 60Hz |
| Heating Power | 500W |
| Cooling Power | 85W |
| Hot Water Output | ≥90°C, 5 L/h |
| Cold Water Output | ≤10°C, 2 L/h |
| Coolant | R134a/28g |
| Relative Humidity | ≤90% |
| Protection Class | I (Anti-Electric-Shock) |
| Installation Type | Countertop |
10. Warranty and Support
Specific warranty details are not provided in this manual. Please refer to the product packaging or contact SOOPYK customer service for warranty information and support inquiries.
For technical assistance or to purchase replacement parts/filters, please visit the official SOOPYK website or contact their customer support line.
Ask a question about this manual
Ask about setup, troubleshooting, compatibility, parts, safety, or missing instructions. Manuals+ will review the question and use this page’s manual context to help answer it.