
1. Introduction
Thank you for choosing the Techage CQ1S Solar Security Camera. This manual provides detailed instructions for the proper installation, operation, and maintenance of your new wireless outdoor security camera system. Designed for comprehensive home surveillance, the CQ1S features 2K resolution, 360° PTZ control, color night vision, two-way audio, and solar-powered operation for continuous use.
Please read this manual thoroughly before using the product to ensure optimal performance and safety.

Image 1.1: Techage CQ1S Solar Security Camera (2-Pack)
2. What's in the Box
Verify that all components are present and in good condition upon opening the package:
- Solar security camera/Solar panel x 2
- User Manual x 1
- Power Cable x 2
- Bracket for camera/Bracket for solar panel x 2
- Screws bags x 2
3. Safety Information
- Power Source: Only use the provided power cable and ensure the solar panel receives adequate sunlight for continuous operation.
- Installation: Install the camera and solar panel securely to prevent accidental falls. Ensure the installation location is stable and can support the weight of the devices.
- Water Resistance: The camera is IP66 waterproof, designed to withstand rain and snow. However, avoid submerging the device in water.
- Operating Temperature: The camera is designed to operate within a temperature range of -20°C (-4°F) to 50°C (122°F).
- Wi-Fi Connection: This camera supports 2.4GHz Wi-Fi networks only. It is not compatible with 5GHz Wi-Fi.
- Children and Pets: Keep packaging materials and small components away from children and pets to prevent choking hazards.
4. Product Overview
The Techage CQ1S camera system consists of a main camera unit with PTZ capabilities and a separate solar panel for power. Familiarize yourself with the key components:
- Camera Lens: Captures 2K resolution video.
- Infrared LEDs: For black and white night vision.
- White Light LEDs (Spotlight): For color night vision and deterrence.
- PIR Sensor: Passive Infrared sensor for human motion detection.
- Microphone: For two-way audio communication.
- Speaker: For two-way audio communication and audible alarms.
- Antennas: For Wi-Fi connectivity.
- SD Card Slot: Supports up to 128GB Micro SD card for local storage.
- Reset Button: Used for resetting the camera to factory settings or re-pairing.
- Solar Panel: Charges the camera's internal battery.

Image 4.1: Camera and Solar Panel Components
5. Setup Guide
5.1 Physical Installation
- Choose a Location: Select an outdoor location with a clear, unobstructed view of the area you wish to monitor. Ensure the camera is within range of your 2.4GHz Wi-Fi network.
- Solar Panel Placement: Mount the solar panel in a location that receives direct sunlight for several hours each day to ensure continuous charging. Avoid shaded areas.
- Mount the Camera: Use the provided mounting bracket and screws to securely attach the camera to a wall or desired surface.
- Connect Solar Panel: Connect the power cable from the solar panel to the charging port on the camera.
5.2 App Installation & Pairing
- Download VicoHome App: Search for "VicoHome" in the Apple App Store (for iOS) or Google Play Store (for Android) and download the application.
- Create Account: Open the VicoHome app and follow the on-screen instructions to create a new user account.
- Add Device: Tap the "+" icon in the app to add a new device. Select your camera model.
- Power On Camera: Ensure the camera is powered on. The camera will enter pairing mode, indicated by a flashing LED light.
- Connect to Wi-Fi: Follow the app prompts to connect the camera to your 2.4GHz Wi-Fi network. Enter your Wi-Fi password when requested.
- Scan QR Code: The app will generate a QR code. Hold your phone with the QR code in front of the camera lens (approx. 6-8 inches away) until you hear a confirmation sound from the camera.
- Complete Setup: Once connected, the camera will appear in your VicoHome app. You can then name your camera and begin live viewing.
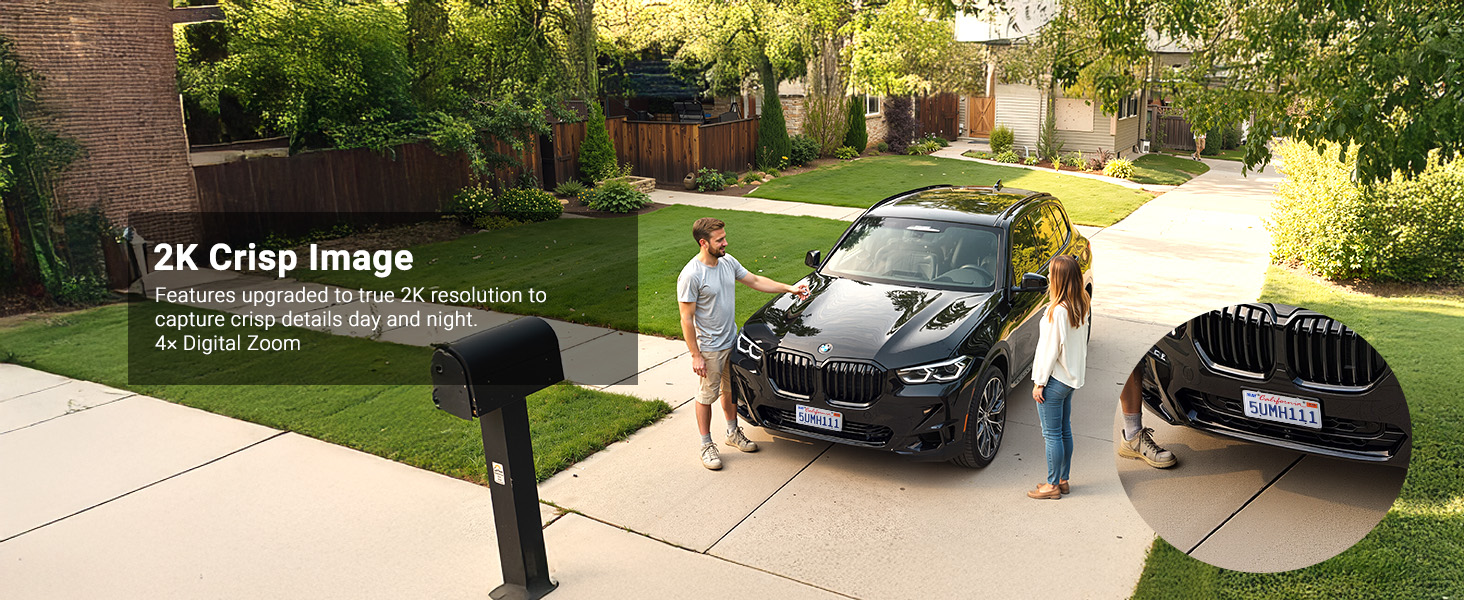
Image 5.1: VicoHome App Interface and SD Card Slot
6. Operating Your Camera
6.1 Live View and Playback
Open the VicoHome app and select your camera to access the live view. From here, you can monitor your property in real-time. You can also access recorded events from the cloud or SD card storage.
6.2 PTZ (Pan-Tilt-Zoom) Control
The camera supports 355° horizontal pan and 90° vertical tilt. Use the directional controls within the VicoHome app to remotely adjust the camera's viewing angle. The camera also features 4x digital zoom.

Image 6.1: 360° Coverage with PTZ Control
6.3 Motion Detection & Alerts
The camera utilizes a PIR sensor for human motion detection. When motion is detected, the camera can:
- Send instant notifications to your phone.
- Activate the built-in spotlight.
- Trigger an audible siren.
You can customize motion detection sensitivity and set activity zones within the VicoHome app to reduce unnecessary notifications. Advanced AI recognition (person, vehicle, pet, package) is available with premium cloud plans.

Image 6.2: Multi-Alarms with Spotlight and Siren
6.4 Color Night Vision
The camera is equipped with white light LEDs that enable full-color night vision, providing clearer and more vibrant footage in low-light conditions compared to traditional infrared black and white night vision.

Image 6.3: 2K Color Night Vision
6.5 Two-Way Audio
The built-in microphone and speaker allow for real-time two-way communication. You can speak to visitors or deter intruders directly through the VicoHome app.

Image 6.4: Clear Two-way Audio
6.6 Storage Options (SD Card / Cloud)
The camera supports local storage via a Micro SD card (up to 128GB, not included). Additionally, it offers secure cloud storage with a free 3-day rolling event recording. Premium cloud plans are available for extended recording history and advanced features like AI recognition and customizable alert zones.
6.7 Alexa Integration
The Techage CQ1S camera is compatible with Amazon Alexa. Link your camera to the Alexa app to view live feeds on compatible Amazon Echo Show devices using voice commands.

Image 6.5: Work with Smart Things (Alexa Compatibility)
6.8 Multi-User Sharing
You can share access to your camera's live feed and recordings with family and friends through the VicoHome app. This allows multiple users to monitor the property simultaneously.
7. Maintenance
- Cleaning: Periodically clean the camera lens and solar panel with a soft, damp cloth to ensure clear image quality and efficient solar charging. Do not use harsh chemicals.
- Battery Care: While solar-powered, ensure the solar panel receives sufficient direct sunlight. If the camera's battery level drops significantly due to prolonged cloudy weather or insufficient sunlight, you may need to temporarily charge it using the provided power cable and a standard USB power adapter (not included).
- Firmware Updates: Regularly check the VicoHome app for available firmware updates. Keeping your camera's firmware updated ensures optimal performance, new features, and security enhancements.
8. Troubleshooting
| Problem | Possible Cause | Solution |
|---|---|---|
| Camera offline/cannot connect to Wi-Fi | Weak Wi-Fi signal; Incorrect Wi-Fi password; Camera too far from router; 5GHz Wi-Fi network; Temporary network issue. | Ensure camera is within 2.4GHz Wi-Fi range. Verify Wi-Fi password. Move camera closer to router or use a Wi-Fi extender. Note: Camera only supports 2.4GHz Wi-Fi. Try restarting your router. If persistent, press the reset button on the camera to re-pair. |
| Battery drains quickly | Insufficient sunlight for solar panel; Frequent motion detection events; Live viewing for extended periods. | Ensure solar panel is in direct sunlight for several hours daily. Reduce motion detection sensitivity or activity zones. Limit live viewing time. If necessary, manually charge the camera via USB. |
| Poor image quality at night | Lens obstruction; Insufficient ambient light for color night vision. | Clean the camera lens. Ensure the spotlight is enabled in the app for color night vision. If the area is extremely dark, the camera will default to infrared (black and white) night vision. |
| False motion alerts | High sensitivity; Moving objects (trees, shadows, small animals) outside desired detection area. | Adjust motion detection sensitivity in the VicoHome app. Define specific activity zones to monitor only relevant areas. Consider premium features for AI recognition to filter out non-human motion. |
| Cannot connect both cameras (2-pack) to app | Each camera needs to be added individually; Pairing issue with one unit. | Ensure you follow the pairing process for each camera separately. If one camera fails to connect, try resetting it and re-pairing. Verify both cameras are powered on. |
| Cloud storage requires payment | Free tier limitations exceeded; Accessing premium features. | The camera includes free 3-day rolling event recording. Extended cloud storage, AI recognition, and customizable alert zones are premium features that require a subscription. Local SD card storage is always an option without subscription. |
9. Specifications
| Model Number | TA-GJ-2-CQ1S-30WSL |
| Video Capture Resolution | 2K (3MP Max Webcam Image Resolution) |
| Connectivity Technology | Wireless (Wi-Fi 2.4GHz only) |
| Power Source | Solar Powered |
| PTZ Coverage | 355° Horizontal, 90° Vertical |
| Night Vision | Color Night Vision, Infrared Night Vision (Range: 33 Feet) |
| Audio | 2-Way Talk |
| Weather Resistance | IP66 Waterproof |
| Storage Options | Micro SD Card (up to 128GB), Cloud Storage |
| Compatible Devices | Smartphone, Tablet (via VicoHome App), Amazon Alexa |
| Material | Acrylonitrile Butadiene Styrene (ABS), Polycarbonate (PC) |
| Item Dimensions (L x W x H) | 11.2 x 8.97 x 6.14 inches |
| Item Weight | 3.96 pounds |
10. Warranty and Support
Techage is committed to providing high-quality security products. For warranty information, technical assistance, or any product-related inquiries, please contact Techage customer support directly. Refer to the contact information provided with your product packaging or visit the official Techage website for the most up-to-date support details.
Note: Please retain your purchase receipt as proof of purchase for warranty claims.

Image 10.1: Free Technical Support


