
1. Introduction
Thank you for choosing the Baseus Bowie E12 True Wireless Earphones. This manual provides detailed instructions on how to set up, operate, and maintain your earphones to ensure optimal performance and longevity.
1.1 Package Contents
- Baseus Bowie E12 True Wireless Earphones (Left and Right)
- Charging Case
- USB-C Charging Cable
- User Manual
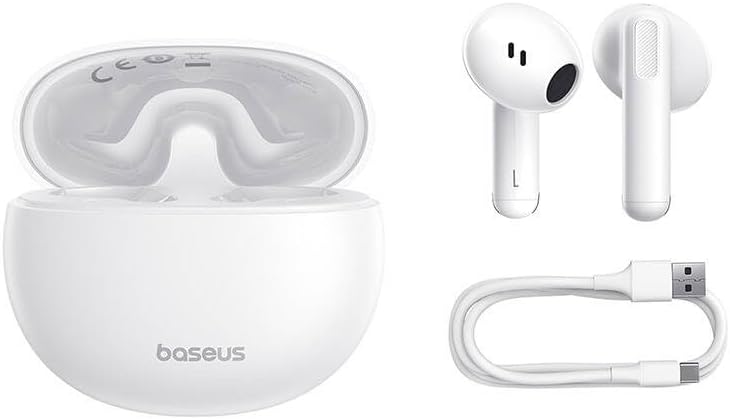
Figure 1.1: Package contents including the earphones, charging case, and USB-C charging cable.
2. Setup
2.1 Initial Charging
Before first use, fully charge the earphones and the charging case.
- Place both earphones into the charging case.
- Connect the USB-C charging cable to the charging port on the case and the other end to a USB power adapter (not included) or a computer's USB port.
- The indicator light on the charging case will show charging status. A full charge typically takes approximately 1.5 hours for the case and 1 hour for the earphones.

Figure 2.1: Earphones placed inside the charging case.
2.2 Pairing with a Device
The earphones will automatically enter pairing mode when taken out of the charging case.
- Ensure the earphones are charged.
- Open the charging case and remove both earphones. They will automatically power on and enter pairing mode.
- On your device (smartphone, tablet, computer), enable Bluetooth.
- Search for "Baseus Bowie E12" in the list of available Bluetooth devices and select it to connect.
- Once connected, a voice prompt will confirm successful pairing.
Note: The earphones will automatically reconnect to the last paired device when removed from the case, if Bluetooth is enabled on the device.
3. Operating Instructions
3.1 Touch Controls
The Baseus Bowie E12 earphones feature touch-sensitive areas on each earbud for easy control of music playback and calls.
| Action | Left Earbud | Right Earbud |
|---|---|---|
| Play/Pause | Single tap | Single tap |
| Next Track | Double tap | |
| Previous Track | Double tap | |
| Answer/End Call | Single tap | Single tap |
| Reject Call | Press and hold (2s) | Press and hold (2s) |
| Activate Voice Assistant | Triple tap | Triple tap |
3.2 Wearing the Earphones
For optimal sound quality and comfort, ensure the earphones are properly seated in your ears.
- Identify the Left (L) and Right (R) earphones.
- Gently insert each earphone into the corresponding ear canal.
- Adjust the angle until it feels secure and comfortable, and the sound is clear.

Figure 3.1: Detailed view of an earbud, highlighting the design for proper fit.
4. Maintenance
4.1 Cleaning
Regular cleaning helps maintain sound quality and hygiene.
- Use a soft, dry, lint-free cloth to wipe the earphones and charging case.
- For stubborn dirt, slightly dampen the cloth with water or a mild, non-abrasive cleaner. Avoid getting moisture into openings.
- Gently clean the speaker mesh with a dry cotton swab or a small, soft brush to remove earwax or debris.
- Do not use harsh chemicals, alcohol, or abrasive materials.
4.2 Storage
When not in use, store the earphones in their charging case to protect them and keep them charged.
- Store in a cool, dry place, away from direct sunlight and extreme temperatures.
- Avoid dropping or subjecting the earphones and case to strong impacts.
5. Troubleshooting
If you encounter issues with your Baseus Bowie E12 earphones, refer to the following common solutions:
5.1 No Sound or Intermittent Connection
- Check Battery: Ensure both earphones and the charging case are sufficiently charged.
- Re-pair: Disconnect "Baseus Bowie E12" from your device's Bluetooth settings, then re-pair following the instructions in Section 2.2.
- Distance: Ensure the earphones are within the Bluetooth range (typically 10 meters) of your device.
- Interference: Move away from strong Wi-Fi signals, other Bluetooth devices, or microwave ovens that might cause interference.
5.2 Only One Earphone Working
- Check Battery: Ensure both earphones are charged.
- Reset: Place both earphones back into the charging case, close the lid for 5 seconds, then open and remove them. This often re-syncs them.
- Re-pair: If the issue persists, try unpairing and re-pairing the earphones as described above.
5.3 Earphones Not Charging
- Check Cable: Ensure the USB-C charging cable is securely connected to both the case and the power source. Try a different cable or power adapter.
- Clean Contacts: Gently clean the charging contacts on both the earphones and inside the charging case with a dry cotton swab.
- Case Battery: Ensure the charging case itself has sufficient power.
6. Specifications
Detailed technical specifications for the Baseus Bowie E12 True Wireless Earphones.
| Feature | Specification |
|---|---|
| Brand | Baseus |
| Model Name | Bowie E12 |
| Model Number | A00059801216-Z1 |
| Form Factor | Intraauricular (In-Ear) |
| Product Dimensions | 10 x 5 x 1.27 cm |
| Item Weight | 100 g |
| Color | White |
| Included Components | 1 pack (Earphones, Charging Case, USB-C Cable) |
| Batteries Required | No (Built-in rechargeable batteries) |
Note: Specifications are subject to change without prior notice.
7. Warranty and Support
Baseus products are designed with quality and reliability in mind. For warranty information and customer support, please refer to the official Baseus website or contact your local distributor.
You can also download the official Baseus app for additional features and support:
For further assistance, please visit the official Baseus website or contact their customer service directly. Contact information may also be found on the product packaging.

Figure 7.1: Product packaging with support information and QR code for app download.