1. Introduction
This manual provides detailed instructions for the installation, operation, and maintenance of your RAINPOINT Sprinkler Timer 2 Outlet. Please read this manual thoroughly before use to ensure proper functionality and longevity of your device.
2. Product Features
- Uneven/Regular/Daily Watering Cycle Modes: Specific Day, Regular Day Cycle (every 2/3/4/5/6 days), or Daily Watering.
- 2 Zone with 3 Separate Programs: Water 2 areas 1-3 times within a day (morning, noon, evening). Automatic watering duration from 1 minute to 3 hours 59 minutes.
- 3 Switchable Automatic & Manual Modes: ZONE L, ZONE R, and BOTH ZONES for individual or simultaneous use. Auto mode: 1-239 mins, manual mode: 1-479 mins.
- Upgraded Dual Zone Technology: Built-in premium 2-zone valve with self-cleaning function for faster and smoother water flow.
- 1-3 Days Rain Delay: Postpone schedule for 24/48/72 hours based on local weather.
3. Package Contents
- RAINPOINT Sprinkler Timer 2 Outlet (Model: ITV201P)
- User Manual
- (Batteries not included)
4. Safety Information
- Do not immerse the timer in water.
- Use only fresh alkaline batteries of the specified type.
- Protect the timer from freezing temperatures. Remove batteries and store indoors during winter.
- Ensure all connections are tight to prevent leaks.
5. Setup
5.1 Battery Installation
The timer requires 2 AA alkaline batteries (not included). Open the battery compartment cover on the back of the unit. Insert the batteries, ensuring correct polarity (+/-). Close the cover securely.

Image: Step-by-step guide showing battery insertion into the timer.
5.2 Connecting the Timer
- Screw the timer onto your outdoor faucet. Ensure the connection is hand-tight to prevent leaks.
- Connect your garden hoses to the two outlets (Zone L and Zone R) at the bottom of the timer.

Image: The RainPoint Sprinkler Timer connected to a water faucet with two hoses attached to its outlets.
6. Operating Instructions
The RAINPOINT Sprinkler Timer features a large LCD display and a rotary dial for easy programming. The dial has positions for SET CLOCK, START TIME, HOW LONG, HOW OFTEN, ON, and OFF.
6.1 Setting the Clock
- Turn the dial to SET CLOCK.
- Use the + and - buttons to adjust the current time. Press OK/MANUAL to confirm.
6.2 Programming Watering Schedules (Automatic Mode)
The timer supports 3 separate programs (P1, P2, P3) for each zone (Zone L, Zone R, or Both Zones).
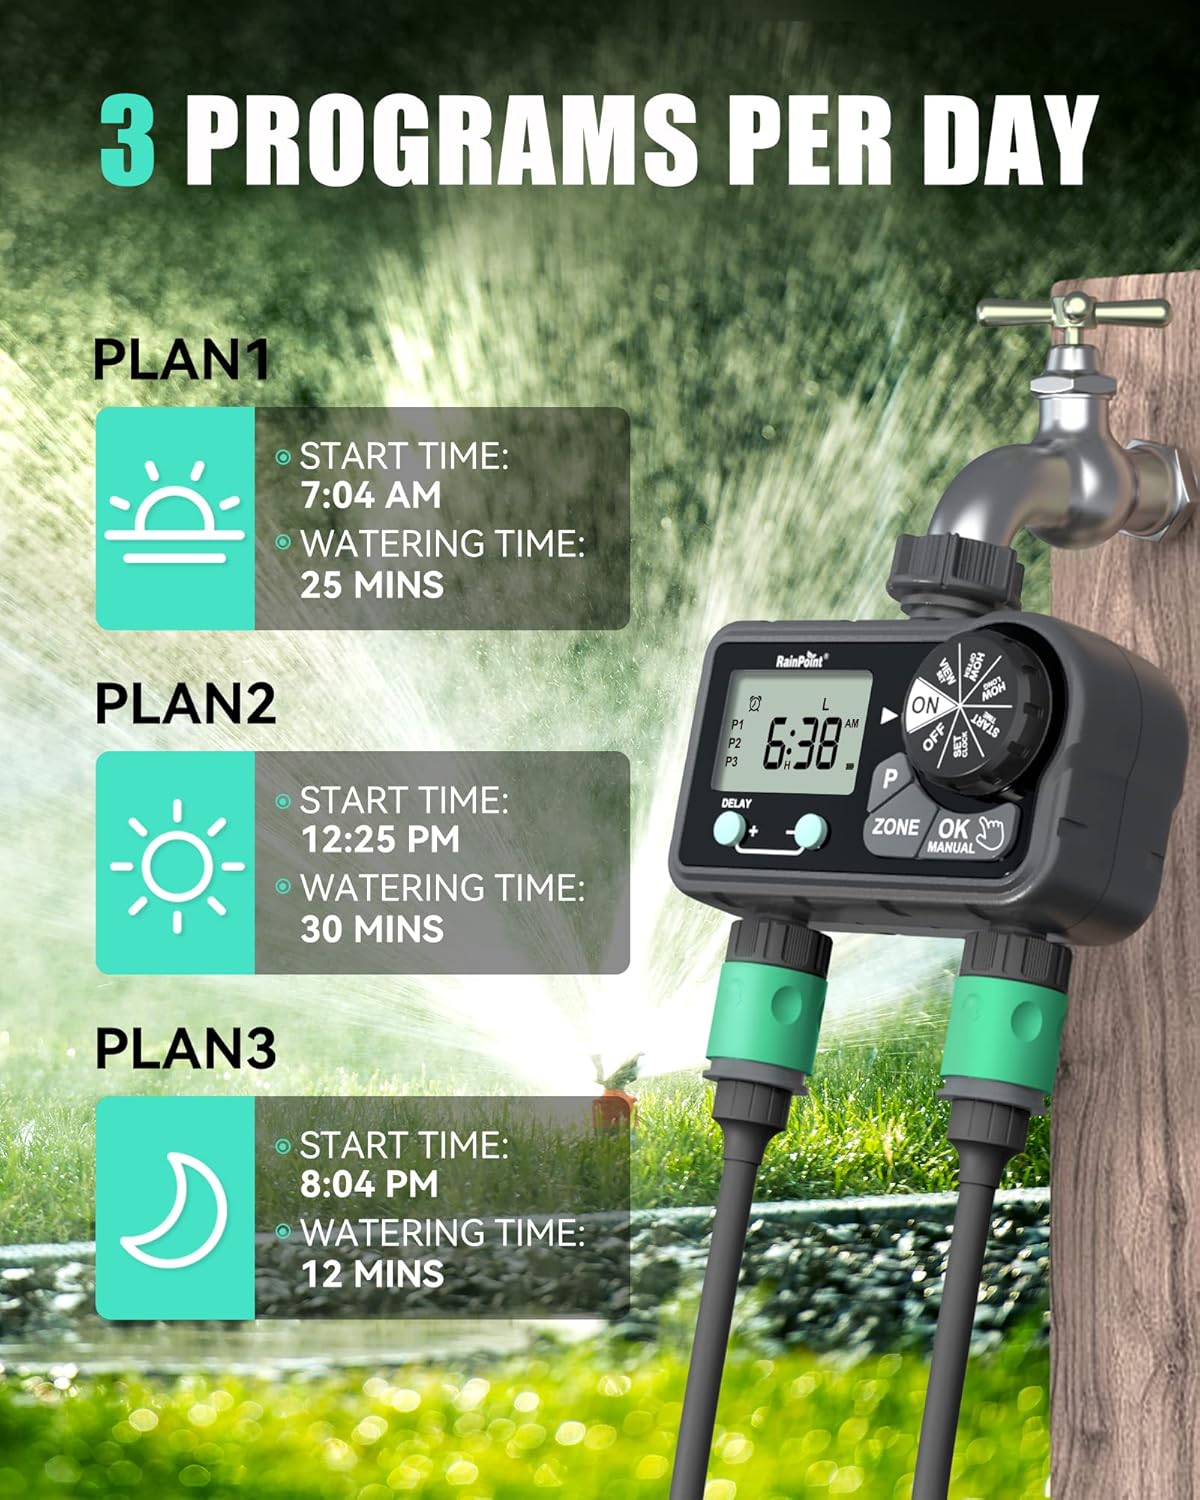
Image: Visual representation of setting up to 3 watering programs per day.
Setting Start Time:
- Turn the dial to START TIME.
- Press the P button to select Program 1 (P1), Program 2 (P2), or Program 3 (P3).
- Press the ZONE button to select Zone L, Zone R, or Both Zones.
- Use + and - buttons to set the desired start time for the selected program and zone. Press OK/MANUAL to confirm.
Setting Watering Duration (How Long):
- Turn the dial to HOW LONG.
- Press the P button to select the program (P1, P2, or P3) you wish to set the duration for.
- Press the ZONE button to select Zone L, Zone R, or Both Zones.
- Use + and - buttons to set the watering duration (1 minute to 3 hours 59 minutes). Press OK/MANUAL to confirm.
Setting Watering Frequency (How Often):
Choose between Specific Day, Regular Day Cycle, or Daily Watering.

Image: Illustration of the three watering frequency modes available on the timer.
- Turn the dial to HOW OFTEN.
- Press the P button to select the program (P1, P2, or P3).
- Press the ZONE button to select Zone L, Zone R, or Both Zones.
- Use + and - buttons to select the desired frequency:
- Specific Day: Select individual days of the week (e.g., TUE, FRI, SAT).
- Regular Day Cycle: Set to water every 2, 3, 4, 5, or 6 days.
- Daily: Water every day.
- Press OK/MANUAL to confirm.
6.3 Manual Watering
To initiate manual watering:
- Ensure the dial is on ON.
- Press the OK/MANUAL button.
- Use the ZONE button to select Zone L, Zone R, or Both Zones.
- Use + and - buttons to set the manual watering duration (1 minute to 479 minutes).
- Press OK/MANUAL again to start watering.
- To stop manual watering, press OK/MANUAL again or turn the dial to OFF.

Image: A user demonstrating the manual watering mode of the RainPoint Sprinkler Timer.
Video: A demonstration of the RainPoint Sprinkler Timer's features, including setting the clock and programming watering schedules.
6.4 Rain Delay Function
To temporarily pause your watering schedule due to rain:
- Ensure the dial is on ON.
- Press the DELAY + button.
- Use the + and - buttons to select the delay duration (24, 48, or 72 hours).
- The timer will automatically resume its programmed schedule after the delay period.
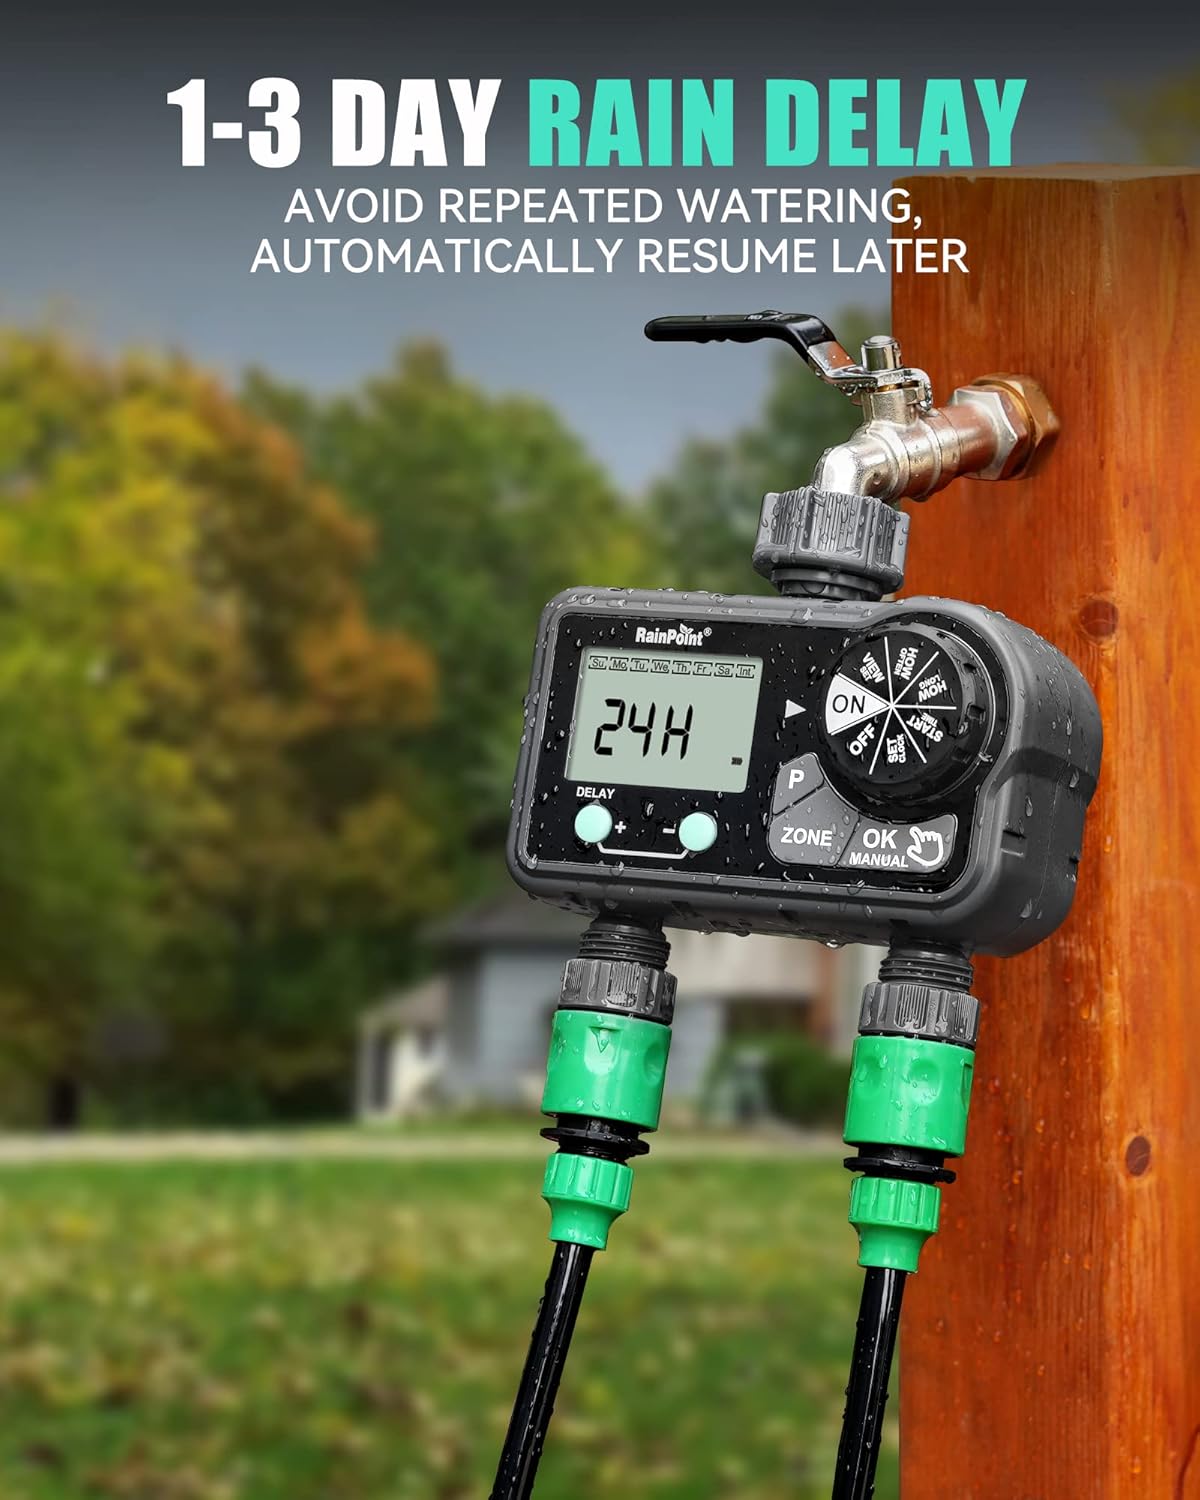
Image: The timer's display showing a 24-hour rain delay activated.
7. Maintenance
- Battery Replacement: Replace batteries when the low battery indicator appears on the screen. Always use fresh alkaline batteries.
- Cleaning: Periodically clean the filter washer located at the inlet to prevent debris from clogging the timer.
- Winter Storage: Before the first frost, remove the timer from the faucet, drain any remaining water, remove batteries, and store the unit indoors in a dry, protected area.
8. Troubleshooting
| Problem | Possible Cause | Solution |
|---|---|---|
| Timer not watering. | Batteries low or dead; incorrect program settings; faucet off. | Replace batteries; verify program settings (start time, duration, frequency); ensure faucet is fully open. |
| Water leaking from connections. | Loose connection; missing or damaged washer. | Tighten connections; check and replace rubber washers if necessary. |
| Display is blank or dim. | Low or dead batteries. | Replace batteries. |
| Water flow is weak. | Clogged filter washer; low water pressure. | Clean the filter washer at the inlet; check household water pressure. |
9. Specifications
- Product Dimensions: 5.8 x 3 x 6.2 inches
- Item Weight: 1.34 pounds
- Manufacturer: RainPoint Irrigation
- ASIN: B0CWR9LM4H
- Color: Black
- Number of Settings: 17
- Watering Duration: 1 min to 3h 59 min (Auto), 1 min to 479 min (Manual)
- Rain Delay: 24h, 48h, 72h
- Power Source: 2 x AA Alkaline Batteries (not included)
10. Warranty and Support
RAINPOINT offers a 5-year warranty on this product, ensuring quality and reliability. For technical support, warranty claims, or any inquiries, please refer to the contact information provided on the product packaging or visit the official RAINPOINT website.
Official RAINPOINT Store: Visit Store


