1. Introduction and Safety Guidelines
Welcome to the ENGWE MilePort 1 Folding Electric Bike user manual. This guide provides essential information for the safe assembly, operation, maintenance, and troubleshooting of your new electric bike. Please read this manual thoroughly before your first ride to ensure optimal performance and safety.
Important Safety Information
- Always wear a helmet when riding.
- Familiarize yourself with local traffic laws and regulations.
- Perform a pre-ride safety check before each use, including brakes, tires, and battery level.
- Do not ride under the influence of alcohol or drugs.
- Avoid riding in adverse weather conditions or on slippery surfaces.
- Ensure all components are securely fastened before riding.
2. Package Contents
Upon unpacking, please verify that all items listed below are present and undamaged. If any items are missing or damaged, contact customer support immediately.
- ENGWE MilePort 1 Folding Electric Bike (main unit)
- 468Wh Removable Battery
- Battery Charger
- Pedals (Left and Right)
- Front and Rear Reflectors
- Multifunctional Phone Holder
- Tool Kit (for assembly)
- User Manual (this document)
3. Assembly and Initial Setup
The MilePort 1 electric bike comes partially assembled. Follow these steps to complete the setup.
3.1 Unboxing and Initial Inspection
Carefully remove all components from the packaging. Inspect the bike and all accessories for any signs of damage during transit.
Video: MilePort 1 Unboxing & Assembly. This video demonstrates the unboxing process and initial assembly steps for the electric bike.
3.2 Handlebar Installation
Unfold the handlebar stem and secure it using the folding buckle. Ensure it is locked firmly in place. Adjust the handlebar height to your preference and tighten the screws beside and above the neck using the provided tools.
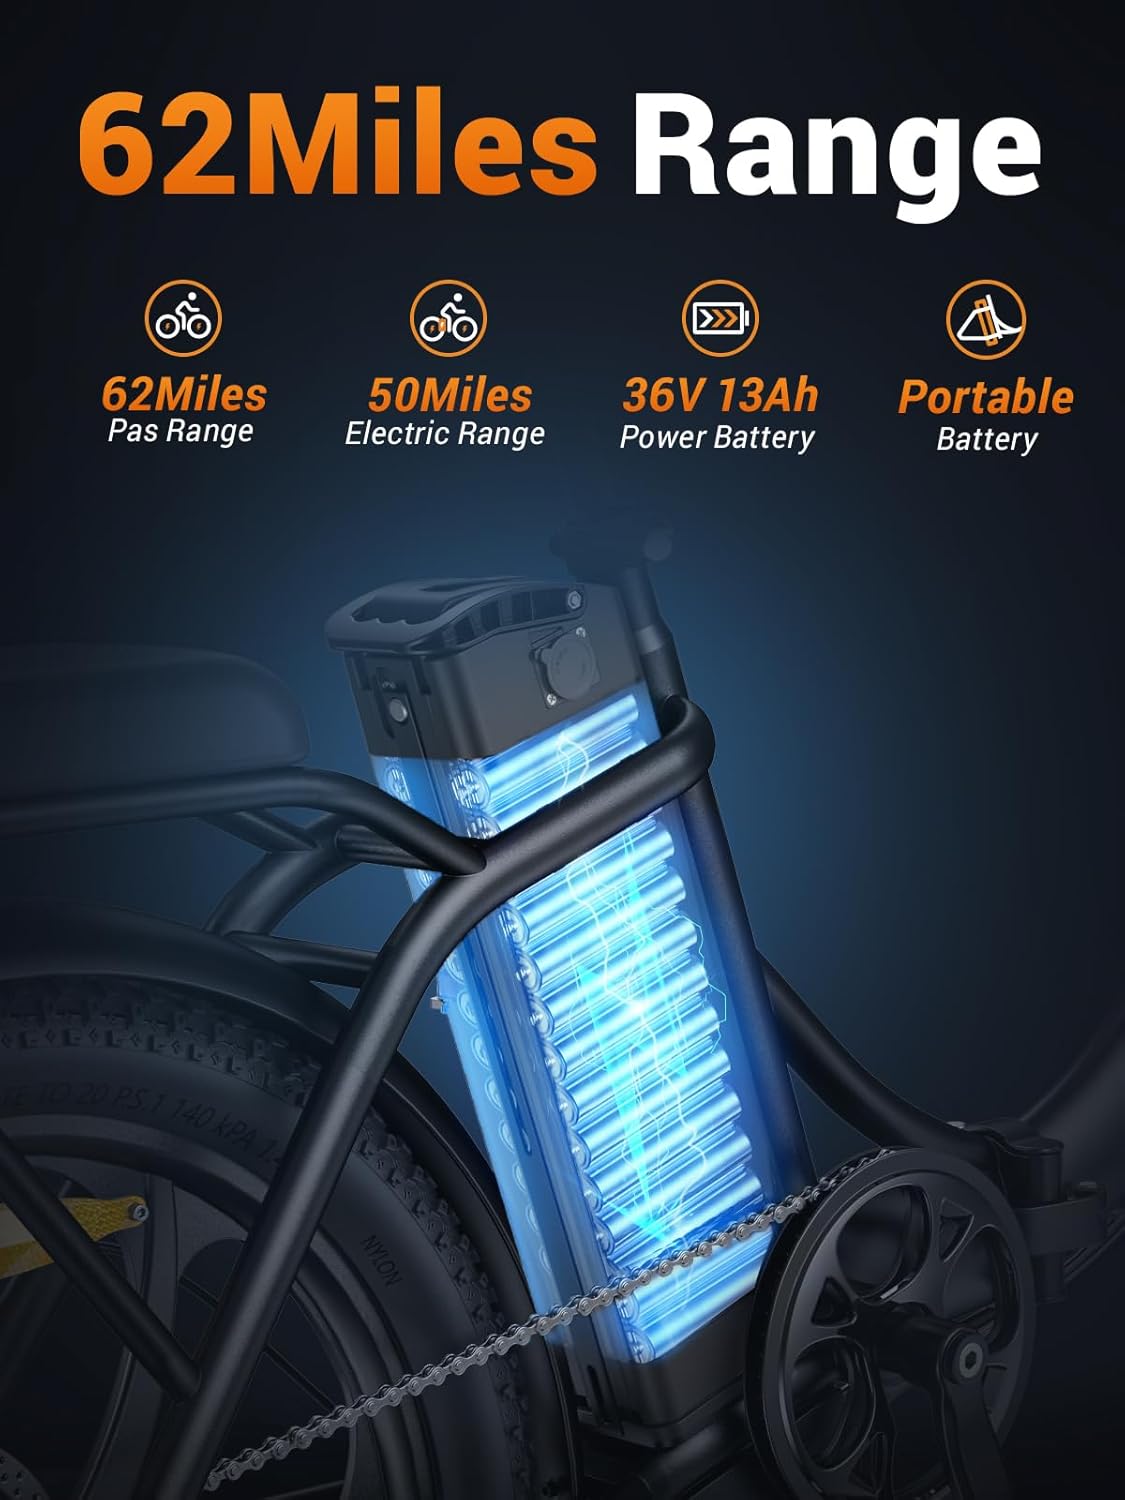
Image: The ENGWE MilePort 1 electric bike with its handlebar unfolded and secured, ready for riding.
3.3 Front Wheel and Fender Installation
Attach the front wheel to the fork, ensuring the brake disc aligns correctly with the caliper. Secure the wheel with the quick-release skewer or nuts. Install the front fender above the wheel, attaching it to the fork using the provided screws.

Image: Close-up of the 20"x3.0" fat tires and front fork suspension of the MilePort 1 electric bike, highlighting its robust design.
3.4 Pedal Installation
Identify the left (L) and right (R) pedals. The left pedal tightens counter-clockwise, and the right pedal tightens clockwise. Thread them into the corresponding crank arms and tighten securely with a wrench.
3.5 Reflector Installation
Install the front and rear reflectors onto the wheels. Ensure they are securely fastened and visible from appropriate angles.
3.6 Headlight Connection
Connect the headlight cable. Ensure the arrows on the connectors align before pushing them together firmly.

Image: The LED headlight and rear reflector of the MilePort 1 electric bike, emphasizing high visibility for safer riding.
3.7 Phone Holder Installation
Attach the multifunctional phone holder to the handlebar. Adjust its position for optimal viewing and secure it tightly.

Image: A close-up of the multifunctional phone holder mounted on the handlebar of the MilePort 1 electric bike, designed for convenient access during rides.
3.8 Battery Installation and Charging
Insert the removable 468Wh battery into its compartment on the bike frame. Ensure it clicks into place and is locked with the key. Before your first ride, fully charge the battery using the provided charger. The battery can be charged on or off the bike.

Image: The 468Wh removable battery integrated into the frame of the MilePort 1 electric bike, highlighting its extended range capabilities.

Image: The MilePort 1 electric bike being charged with its portable battery, illustrating the convenience of charging at home or in the office.
4. Operating Instructions
4.1 Powering On/Off
To power on the bike, insert the key into the battery lock and turn it clockwise. Then, press and hold the power button on the display unit located on the handlebar. To turn off, reverse the process.
4.2 Riding Modes
Your MilePort 1 offers multiple riding modes:
- Pedal-Assist Mode: The motor provides assistance as you pedal. Adjust the assist level using the '+' and '-' buttons on the display.
- Electric Mode: Use the throttle for full electric power without pedaling.
- Manual Mode: Ride the bike like a traditional bicycle without motor assistance.
Video: MilePort 1 Electric Bike Overview. This video showcases the key features and riding experience of the MilePort 1 electric bike.
4.3 Gear Shifting
The bike is equipped with a 7-speed gear system. Use the thumb shifter on the handlebar to change gears, adapting to different terrains and inclines for efficient riding.

Image: Close-up of the 7-speed gear shifter on the MilePort 1 electric bike, illustrating its mechanism for optimal speed and control.
4.4 Braking
The MilePort 1 features disc brakes for reliable stopping power. Squeeze the brake levers gently to slow down and firmly to stop. Test the brakes before each ride.
4.5 Headlight Operation
To turn on the LED headlight, long-press the "+" button on the display for 3 seconds. Repeat the action to turn it off.
5. Maintenance
Regular maintenance ensures the longevity and safe operation of your electric bike.
- Cleaning: Wipe the bike with a damp cloth. Avoid high-pressure washing directly on electrical components.
- Battery Care: Charge the battery regularly, even when not in use, to maintain its health. Store in a cool, dry place.
- Tire Pressure: Check tire pressure before each ride. Maintain recommended PSI for optimal performance and safety.
- Brakes: Regularly inspect brake pads and cables for wear. Adjust or replace as needed.
- Chain: Keep the chain clean and lubricated for smooth gear changes and to prevent rust.
- Fasteners: Periodically check all nuts, bolts, and quick releases to ensure they are tight.
6. Troubleshooting
Here are solutions to common issues you might encounter:
| Problem | Possible Cause | Solution |
|---|---|---|
| Bike does not power on | Battery not inserted/locked, low battery, loose connections. | Ensure battery is fully inserted and locked. Charge the battery. Check all cable connections. |
| Motor not assisting | Low battery, pedal-assist level set to zero, brake levers engaged. | Charge battery. Increase pedal-assist level. Ensure brake levers are fully released. |
| Brakes feel weak | Worn brake pads, loose brake cables, air in hydraulic system (if applicable). | Inspect and replace brake pads. Adjust brake cable tension. Consult a professional for hydraulic brake issues. |
| Unusual noises during ride | Loose components, dry chain, misaligned gears. | Check all fasteners. Lubricate the chain. Inspect gear alignment and adjust if necessary. |
For issues not listed here or if problems persist, please contact ENGWE customer support.
7. Product Specifications
| Feature | Detail |
|---|---|
| Bike Type | Electric Bike |
| Model Name | MilePort 1 |
| Brand | ENGWE |
| Age Range | Adult |
| Color | Black |
| Frame Material | Aluminum |
| Frame Type | Folding |
| Wheel Size | 20 Inches |
| Wheel Width | 3 Inches |
| Motor Wattage | 700 watts (Peak) |
| Battery | 468 Watt Hours (Removable) |
| Max Speed | 20 MPH |
| Max Range | Up to 62 Miles (Pedal-Assist Mode) |
| Number of Speeds | 7 |
| Brake Style | Disc |
| Suspension Type | Dual |
| Maximum Weight Recommendation | 265 Pounds |
| Minimum User Height | 61 Inches |
| Folded Size | 35x14x29 inches (approx.) |
| Ebike Weight | 62 lbs |
8. Warranty and Support
The ENGWE MilePort 1 Folding Electric Bike comes with a 1-Year Limited Warranty. This warranty covers manufacturing defects and workmanship under normal use. Please retain your proof of purchase for warranty claims.
For technical support, warranty inquiries, or replacement parts, please contact ENGWE customer service. Refer to the contact information provided with your purchase or visit the official ENGWE website.
Manufacturer: ENGWE


