
EPOMAKER TH40
EPOMAKER TH40 40% Layout VIA Mechanical Keyboard User Manual
Model: TH40 | Brand: EPOMAKER
1. Introduction
The EPOMAKER TH40 is an ultra-compact 40% layout mechanical keyboard designed for efficiency and portability. It features versatile tri-mode connectivity (Bluetooth, 2.4GHz wireless, and USB-C), hot-swappable switches, advanced gasket mount design for a comfortable typing experience, and dynamic RGB lighting. This manual provides comprehensive instructions for setup, operation, maintenance, and troubleshooting to ensure optimal use of your TH40 keyboard.

Figure 1: EPOMAKER TH40 40% Layout VIA Mechanical Keyboard in purple and white keycaps.
2. What's in the Box
- EPOMAKER TH40 Mechanical Keyboard
- Keycap Puller
- USB Cable (USB-A to USB-C)
- User Manual
- 2.4GHz USB-A Dongle
- Extra Switches (typically 3)
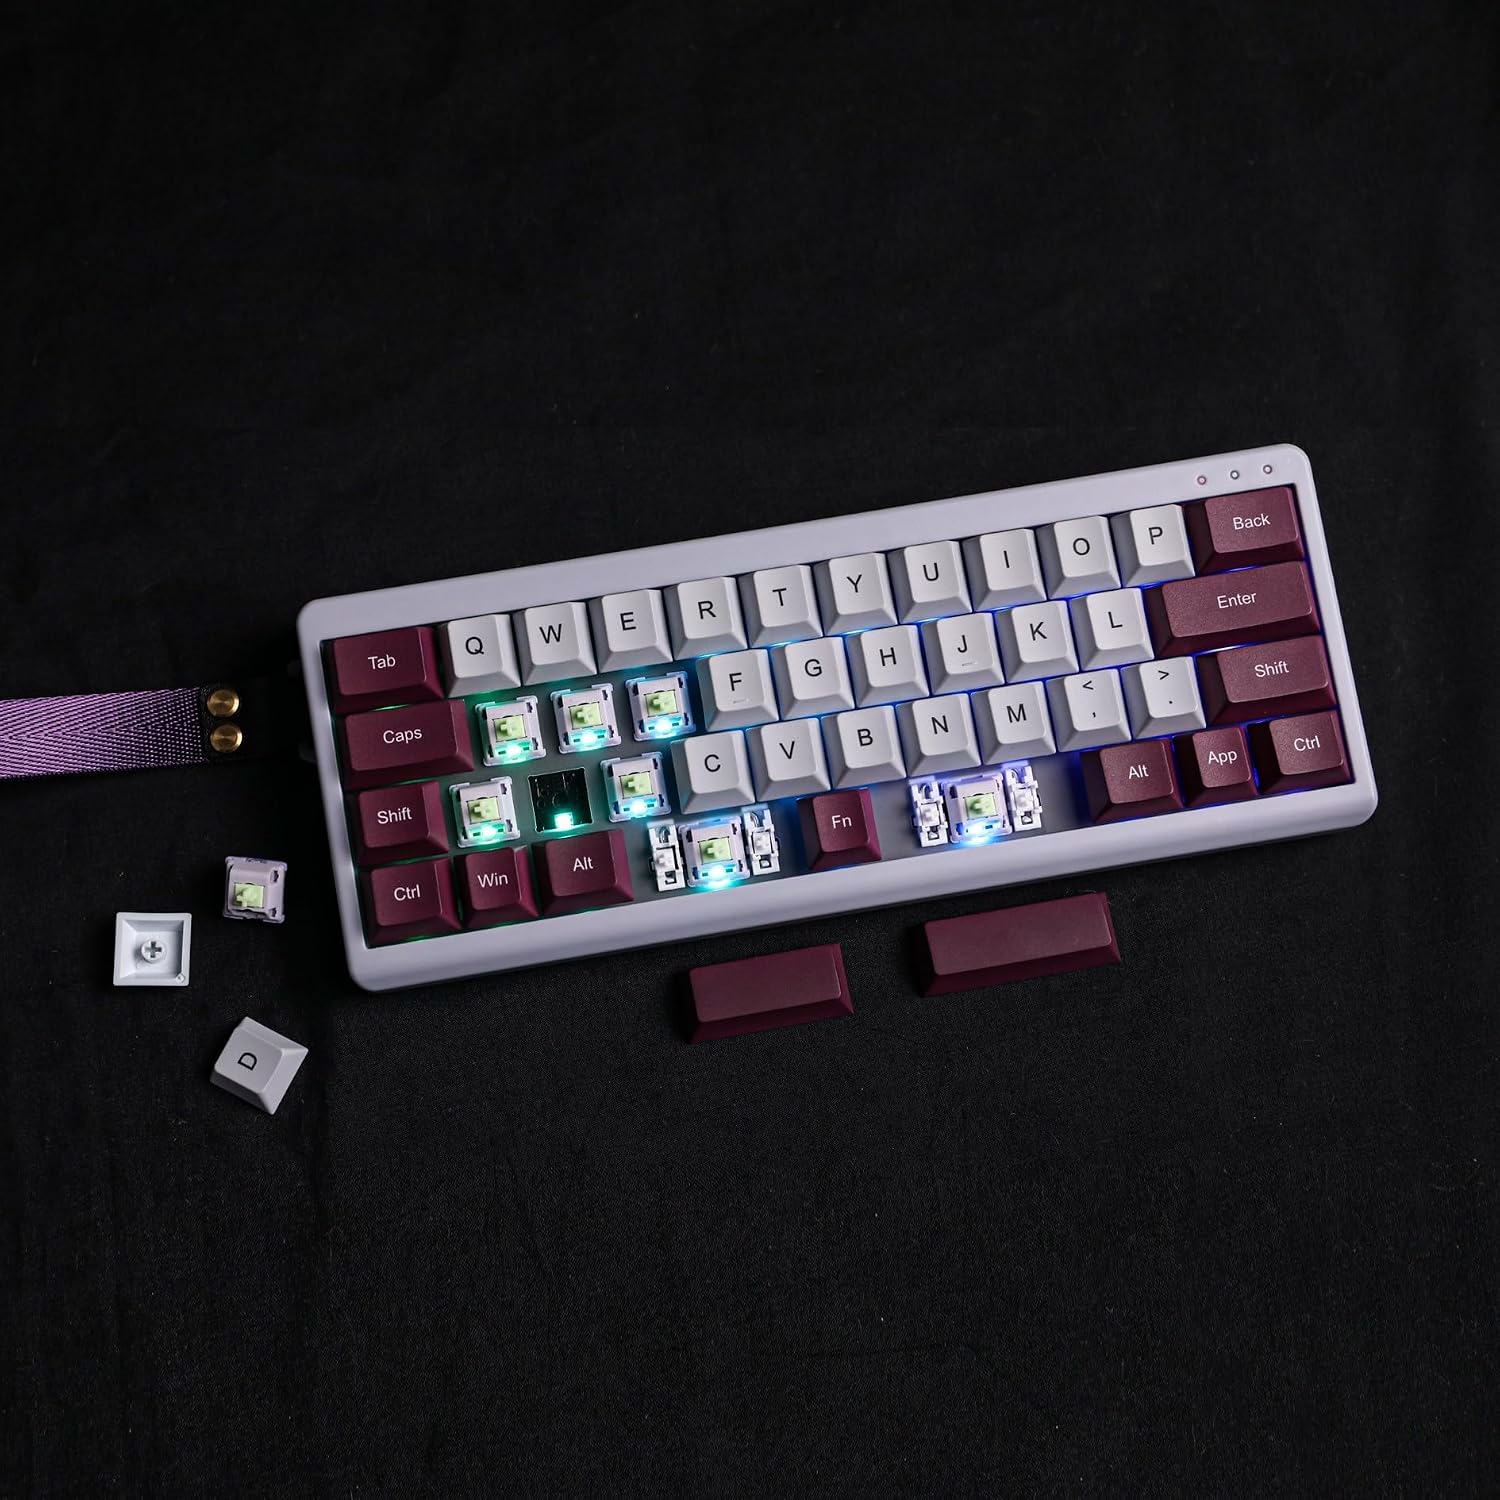
Figure 2: Included accessories with the EPOMAKER TH40 keyboard, showing the keyboard, USB cable, keycap/switch puller, and extra switches.
3. Setup
3.1. Physical Connection (Wired Mode)
Connect the provided USB-A to USB-C cable to the USB-C port on the keyboard and the USB-A end to your computer. The keyboard will automatically enter wired mode and begin charging.
3.2. 2.4GHz Wireless Setup
- Locate the 2.4GHz USB-A dongle.
- Toggle the switch on the side of the keyboard to the "2.4G" position.
- Plug the 2.4GHz dongle into an available USB-A port on your computer.
- The keyboard should automatically connect. If not, press FN + F to initiate pairing.
3.3. Bluetooth Setup
- Toggle the switch on the side of the keyboard to the "BT" position.
- On your device (computer, tablet, smartphone), enable Bluetooth and search for new devices.
- Press and hold FN + A, FN + S, or FN + D for 3-5 seconds to enter pairing mode for Bluetooth device 1, 2, or 3 respectively. The indicator light will flash rapidly.
- Select "EPOMAKER TH40" from the list of available Bluetooth devices on your screen.
- Once connected, the indicator light will stop flashing and remain solid.

Figure 3: Tri-mode connectivity options for the TH40 keyboard, including USB-C, 2.4GHz wireless, and Bluetooth.
3.4. VIA Software Installation
The TH40 is fully programmable via VIA software. Download the latest VIA software and the corresponding JSON file for your TH40 model (2.4G or USB) from the official EPOMAKER website. Load the JSON file into VIA to customize key assignments, macros, and lighting effects.

Figure 4: VIA software interface displaying the keyboard layout for customization.
Video 1: A detailed guide on how to use the VIA software for keyboard customization, including loading JSON files and remapping keys.
4. Operating Instructions
4.1. 40% Layout and Layers
The TH40 features an ultra-compact 40% layout, which means it omits the number pad, arrow keys, and traditional top row of number keys. Functionality for these keys is accessed through multiple layers using the FN key. The keyboard supports four switchable layers, three of which are programmable via VIA.
- Split Spacebar with FN Key: The TH40 includes a unique split spacebar with an FN key conveniently placed between the 2.25u and 2.75u spacebars. This design minimizes finger travel and can increase typing speed.
- N-Key Rollover (NKRO): The TH40 supports full N-Key Rollover, allowing multiple keys to be pressed simultaneously without conflict, ensuring fast and smooth typing.
4.2. RGB Lighting Controls
The TH40 features dynamic RGB lighting with customizable effects. Use the following FN combinations to control the lighting:
- FN + Enter: Turn On/Off Backlight
- FN + Z: Toggle Backlight Effect
- FN + N/H: Adjust Brightness (N for decrease, H for increase)
- FN + B/M: Adjust Color (B for decrease, M for increase)
Figure 5: The TH40 keyboard showcasing its vibrant RGB backlighting.
4.3. Battery Check
To check the battery level, press FN + L_Spacebar. The indicator lights will show the current battery status.
4.4. Mac & Windows Compatibility
The TH40 is compatible with both Mac and Windows operating systems. Use FN + R_Shift to switch between Mac and Windows layouts.
Video 2: A short demonstration highlighting the portable 40% layout and wireless gaming capabilities of the keyboard.
5. Maintenance
5.1. Hot-Swappable Switches
The TH40 features hot-swappable sockets, allowing you to easily change switches without soldering. Use the provided switch puller tool to carefully remove existing switches and insert new ones. Ensure the new switches are compatible (3-pin or 5-pin) and align correctly before pressing them into place.

Figure 6: Demonstration of hot-swappable switches on the TH40, showing how to remove and replace them.
5.2. Cleaning
To clean your keyboard, first disconnect it from power. Use a keycap puller to remove keycaps and a soft brush or compressed air to remove dust and debris from between the switches. Wipe keycaps with a damp cloth and mild soap if necessary. Ensure all components are dry before reassembling.
6. Troubleshooting
- Connectivity Issues: Ensure the mode switch (2.4G/USB/BT) is in the correct position. For wireless modes, check battery level. For Bluetooth, ensure the keyboard is in pairing mode and your device's Bluetooth is enabled. Try re-pairing if connection is lost.
- VIA Software Not Recognizing Keyboard: Ensure the keyboard is connected via USB-C and the switch is set to "USB" mode. Download the correct JSON file for your specific TH40 model from the EPOMAKER website and load it into VIA.
- Keys Not Responding: Check if the switches are properly seated. If a specific key is not working, try replacing its switch with one of the spares.
- RGB Lighting Issues: Use the FN combinations mentioned in Section 4.2 to cycle through effects, adjust brightness, and change colors. Ensure the keyboard is not in a low power state.
7. Specifications
| Feature | Detail |
|---|---|
| Layout | 40% (44 Keys) |
| Connectivity | Bluetooth 5.0, 2.4GHz Wireless, USB-C Wired |
| Programmability | VIA Software (4 layers, 3 programmable) |
| Switches | Hot-swappable (3-pin/5-pin compatible) |
| Mounting Style | Gasket Mount |
| Key Rollover | Full N-Key Rollover (NKRO) |
| Backlighting | Dynamic RGB (South-facing LEDs) |
| Battery Capacity | 3000mAh Lithium Ion (included) |
| Dimensions | 10.16 x 3.82 x 1.38 inches |
| Weight | 1.67 pounds |
| Compatible Devices | Laptop, PC, Tablet, Smartphone |
8. Warranty and Support
EPOMAKER products come with a standard manufacturer's warranty. For detailed warranty information, technical support, or service inquiries, please visit the official EPOMAKER website or contact their customer service directly. Keep your proof of purchase for warranty claims.
Official EPOMAKER Store: Visit the EPOMAKER Store on Amazon
Related documentsTH40


Ask a question about this manual
Ask about setup, troubleshooting, compatibility, parts, safety, or missing instructions. Manuals+ will review the question and use this page’s manual context to help answer it.