
1. Introduction
Thank you for choosing the Nexgrill Deluxe 6-Burner Propane Gas Grill. This manual provides essential information for the safe assembly, operation, and maintenance of your new grill. Please read all instructions carefully before use to ensure a safe and enjoyable grilling experience.

Figure 1.1: Nexgrill Deluxe 6-Burner Propane Gas Grill (Model 720-0896X)
2. Important Safety Information
WARNING: For outdoor use only. Do not store or use gasoline or other flammable vapors and liquids in the vicinity of this or any other appliance.
Always ensure proper ventilation when operating the grill. Keep children and pets away from the grill during operation. Never leave a lit grill unattended. Always check for gas leaks before each use. Refer to local codes for proper installation and connection.
3. Setup and Assembly
Assembly of the Nexgrill Deluxe 6-Burner Propane Gas Grill is required. Please follow the step-by-step instructions provided in the separate assembly guide included with your purchase. Ensure all components are present and undamaged before beginning assembly.
- Unpack all components and verify against the parts list.
- Assemble the main grill body and cabinet structure.
- Attach side shelves and the searing side burner.
- Install the main burners, cooking grids, and warming rack.
- Connect the propane tank securely.

Figure 3.1: Product dimensions for assembly planning.
4. Operating Instructions
4.1. Ignition System
The grill features a one-button electric ignition for dependable lighting. To ignite a main burner:
- Ensure the propane tank is connected and the gas supply is open.
- Push and turn the desired burner control knob to the HIGH position.
- Immediately press and hold the electronic ignition button until the burner ignites.
- Once lit, release the ignition button and adjust the flame to the desired cooking temperature.
4.2. Main Burners and Cooking Area
Your grill is equipped with 6 main burners, each providing 10,000 BTUs, for a total output of 60,000 BTUs. The expansive cooking surface offers 806 square inches of total cooking space, ideal for large gatherings.

Figure 4.1: Total cooking area of 806 square inches.
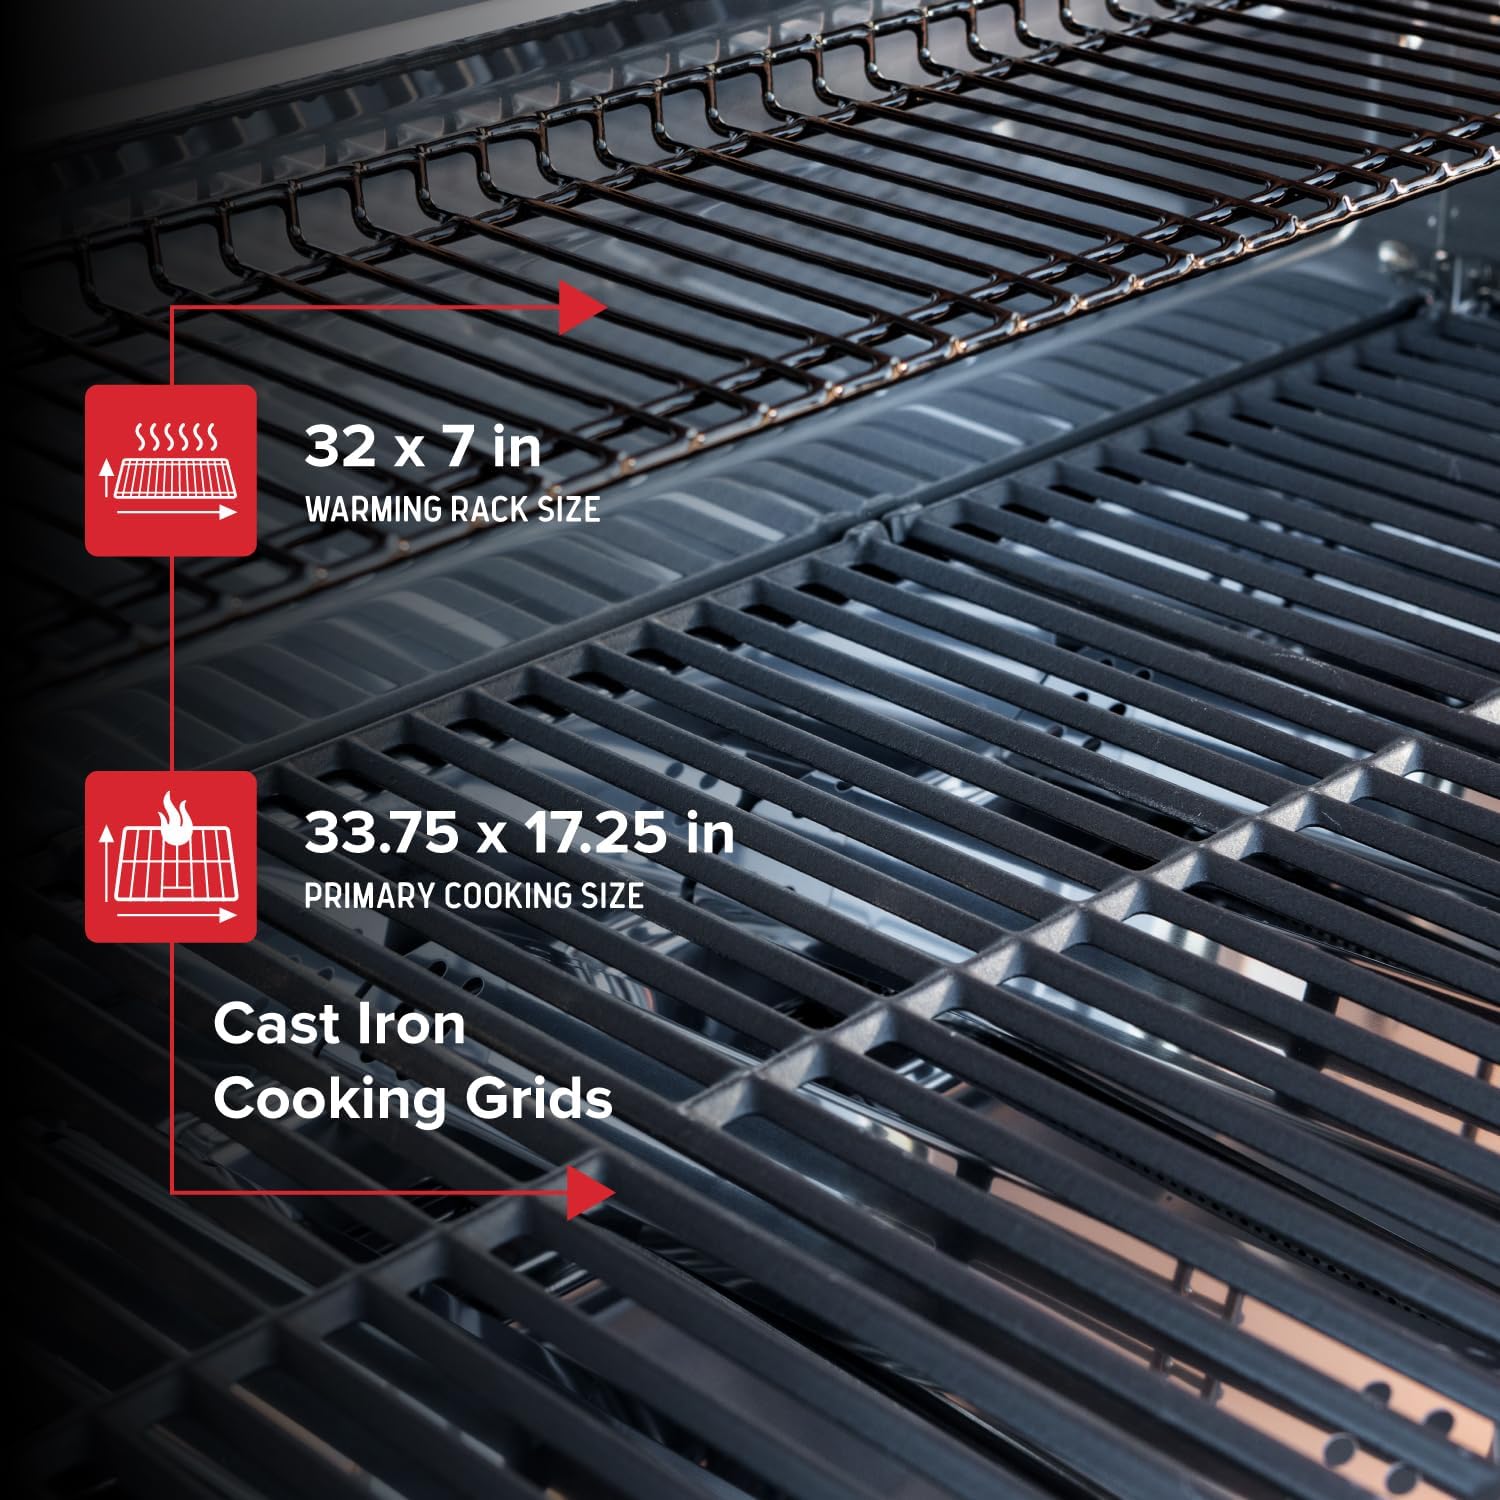
Figure 4.2: Porcelain-coated cast iron cooking grids and warming rack dimensions.
4.3. Ceramic Searing Side Burner
The powerful 15,000 BTU ceramic side burner is designed for achieving a perfect sear on meats, locking in juices and enhancing flavor. To use the searing burner:
- Open the lid of the side burner.
- Push and turn the side burner control knob to the HIGH position.
- Press and hold the electronic ignition button until the burner ignites.
- Place your pan or food directly over the ceramic element for high-heat searing.

Figure 4.3: Close-up of the 15,000 BTU ceramic searing side burner.
4.4. Rotisserie Kit
An included rotisserie kit allows for even cooking of large meats like chicken, turkey, and roasts. Follow the specific instructions provided with the rotisserie kit for assembly and operation. Ensure the rotisserie motor is securely mounted and the food is balanced for smooth rotation.
4.5. Temperature Monitoring
The lid-mounted thermometer allows for easy monitoring of the internal grill temperature, ensuring precise cooking control.

Figure 4.4: Overview of grill features including electronic ignition and searing side burner.
5. Maintenance and Care
Regular cleaning and maintenance will extend the life of your grill and ensure optimal performance.
- Cooking Grids: The porcelain-coated cast iron cooking grids are non-stick and easy to clean. Clean after each use with a grill brush while the grids are still warm.
- Grease Tray: The removable grease tray should be cleaned regularly to prevent grease fires.
- Exterior: The stainless steel frame is rust-resistant and easy to clean. Wipe down with a damp cloth and mild detergent. Avoid abrasive cleaners.
- Burners: Periodically inspect burner ports for blockages and clean as necessary.

Figure 5.1: Stainless steel burners, designed for durability and easy maintenance.
6. Troubleshooting
If you encounter issues with your grill, refer to the following common troubleshooting tips:
| Problem | Possible Cause | Solution |
|---|---|---|
| Burner not lighting | No gas flow, clogged burner port, faulty igniter | Check propane tank, clear burner ports, check igniter battery/connection. |
| Uneven heating | Clogged burner ports, improper flame adjustment | Clean burner ports, adjust flame settings. |
| Gas smell | Gas leak | Immediately turn off gas, check all connections, apply soapy water to connections to detect bubbles. If leak persists, do not use and contact qualified service. |
7. Specifications
| Feature | Detail |
|---|---|
| Brand | Nexgrill |
| Model Name | 720-0896X |
| Product Dimensions (D x W x H) | 22.29"D x 59.85"W x 46.45"H |
| Item Weight | 118.61 Pounds |
| Fuel Type | Gas (Propane, also compatible with Natural Gas conversion kit, sold separately) |
| Main Burner Count | 6 |
| Main Burner Output | 60,000 BTUs (6 x 10,000 BTUs) |
| Side Burner Count | 1 (Ceramic Searing Burner) |
| Side Burner Output | 15,000 BTUs |
| Total Cooking Surface Area | 806 Square Inches (approx. 582 sq in primary + 224 sq in warming rack) |
| Cooking Grids Material | Porcelain-coated Cast Iron |
| Frame Material | Stainless Steel |
| Special Features | Removable Grease Tray, Heavy Duty, Warming Rack, Rotisserie Kit Included, One Button Electric Ignition, LED-lit control dials, Organized Double Door Cabinet, 4 Smooth-rolling Casters |
| Assembly Required | Yes |
8. Warranty and Support
This Nexgrill product comes with a 1 Year Manufacturer Warranty. For specific warranty details and claims, please refer to the warranty card included with your product or contact Nexgrill customer support.
For further assistance, troubleshooting, or to order replacement parts, please visit the official Nexgrill website or contact their customer support team. You can also find more information on the Nexgrill Store on Amazon.
For customer support inquiries, please refer to the contact information provided in your product packaging or on the manufacturer's website.


