
VILTROX VX-18M II
VILTROX VX-18M II Heavy Video Tripod with VT-01 Fluid Head User Manual
Model: VX-18M II
Brand: VILTROX
1. Introduction
This manual provides detailed instructions for the proper assembly, operation, and maintenance of your VILTROX VX-18M II Heavy Video Tripod with VT-01 Fluid Head. Please read this manual thoroughly before using the product to ensure optimal performance and longevity. Retain this manual for future reference.

Image 1.1: The VILTROX VX-18M II Heavy Video Tripod with VT-01 Fluid Head and carrying bag.
2. Package Contents
Verify that all items listed below are present in your package:
- VX-18M Heavy Duty Tripod
- VT-01 Fluid Head with Quick Release Plate
- Pan Bar Handle
- Rubber Horseshoe Feet
- Carrying Bag
3. Component Identification
Familiarize yourself with the main components of your tripod system:
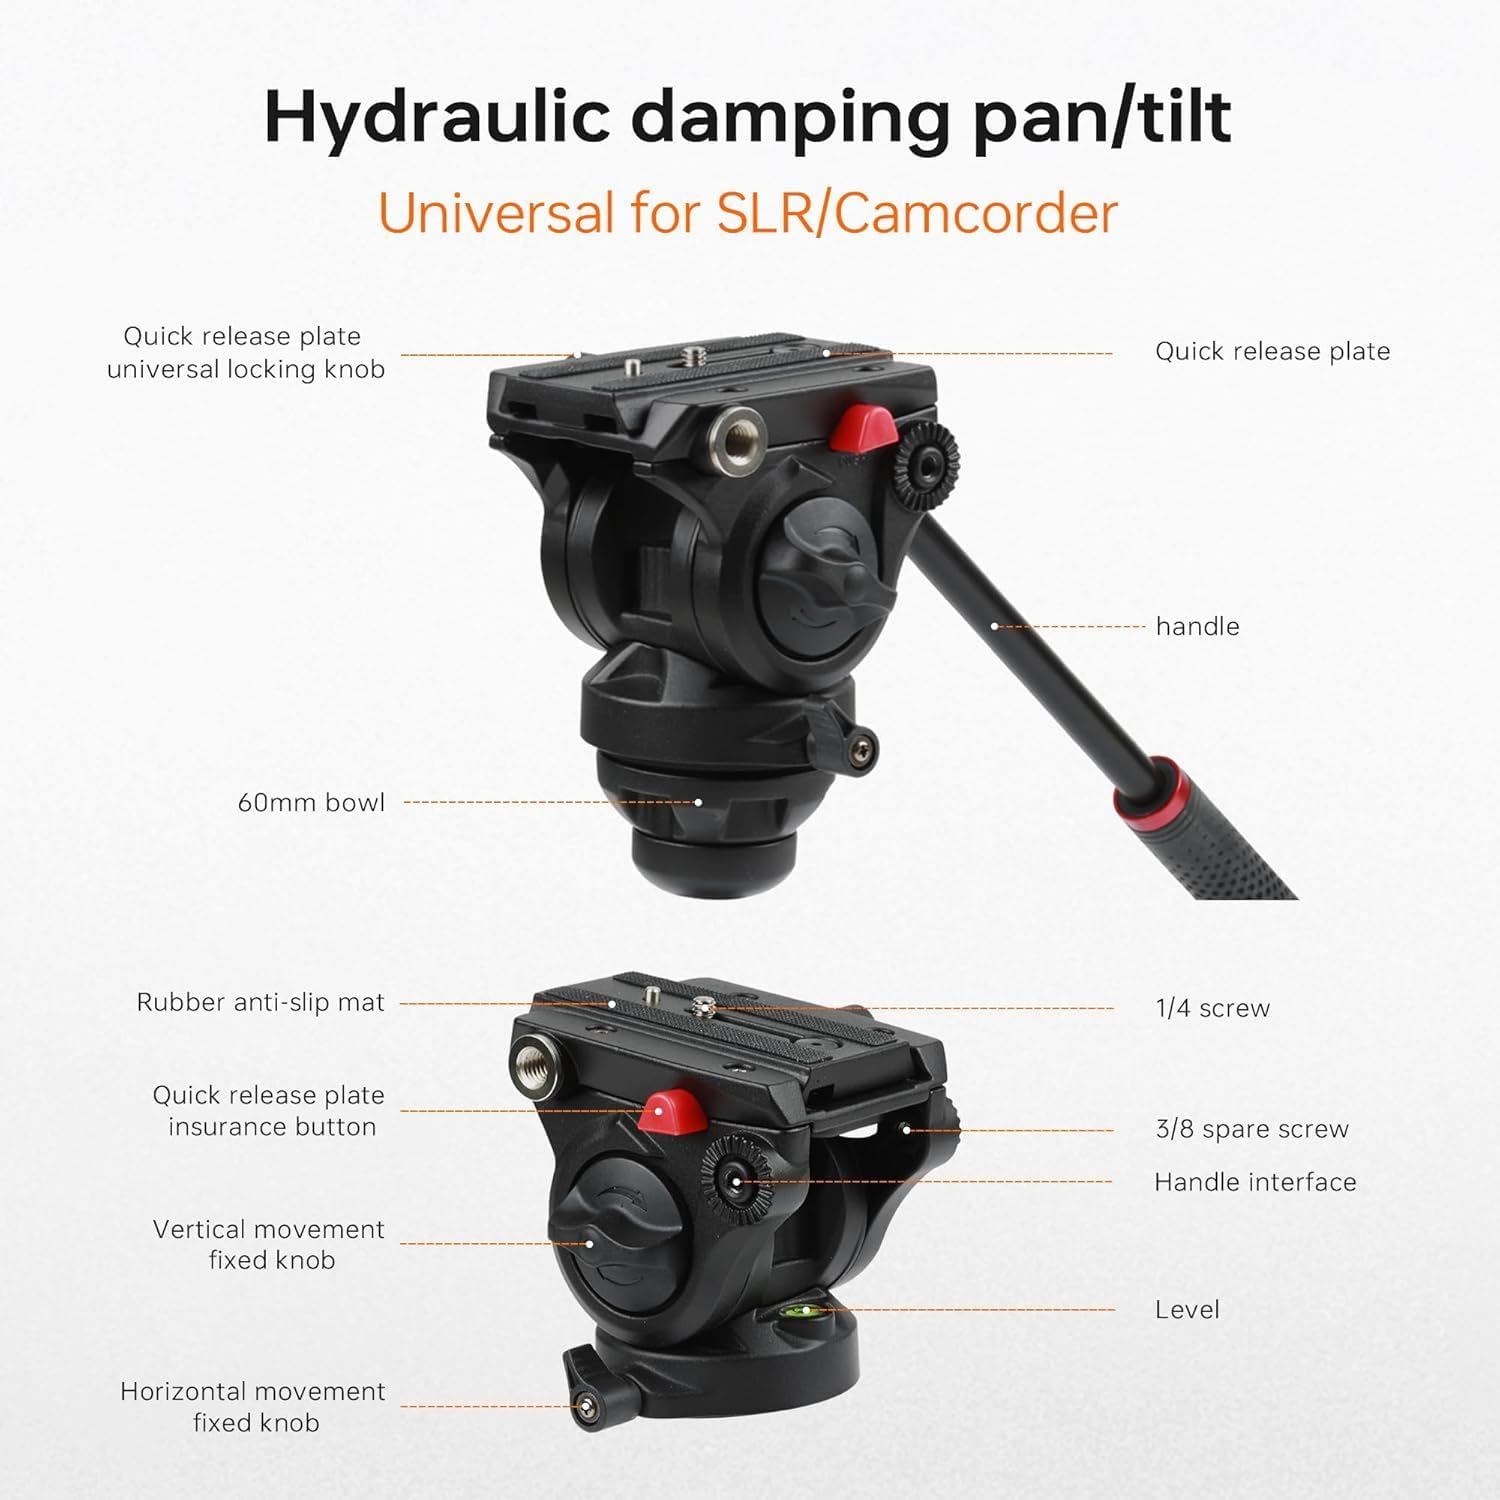
Image 3.1: Detailed view of the VT-01 Fluid Head, showing the quick release plate, handle, 60mm bowl, 1/4" and 3/8" screws, and various adjustment knobs.
- VT-01 Fluid Head: Provides smooth pan and tilt movements.
- Quick Release Plate: For attaching and detaching your camera quickly.
- Pan Bar Handle: Used for controlling pan and tilt movements.
- Tripod Legs: Three-section legs for height adjustment.
- Leg Locking Knobs: Secure the extended leg sections.
- 60mm Bowl: Allows for quick leveling of the fluid head.
- Rubber Horseshoe Feet: Provide stable grip on various surfaces.
4. Setup Instructions
4.1. Unpacking and Initial Assembly
- Carefully remove all components from the carrying bag and packaging.
- Place the tripod on a flat, stable surface.
4.2. Attaching the Fluid Head
The VT-01 Fluid Head is typically pre-attached to the tripod. If not, align the fluid head's base with the tripod's 60mm bowl and secure it using the locking mechanism located beneath the bowl.
4.3. Extending Tripod Legs and Adjusting Height

Image 4.1: Illustration of the knob locking system for adjusting tripod leg height.
- Loosen the leg locking knobs on each leg section.
- Extend the legs to the desired height. The tripod can extend from 84.5 cm (33.3 inches) to 188 cm (74 inches).
- Firmly tighten all leg locking knobs to secure the legs in position.
- Spread the tripod legs to achieve a stable base. The safety ring can be used to secure the legs during transport.
4.4. Leveling the Fluid Head

Image 4.2: The 60mm ball-shaped bowl design facilitates quick and precise leveling of the fluid head.
The 60mm bowl design allows for quick leveling. Loosen the horizontal movement fixed knob (refer to Image 3.1), adjust the head until the bubble level indicates a level position, then tighten the knob to secure.
4.5. Attaching Your Camera
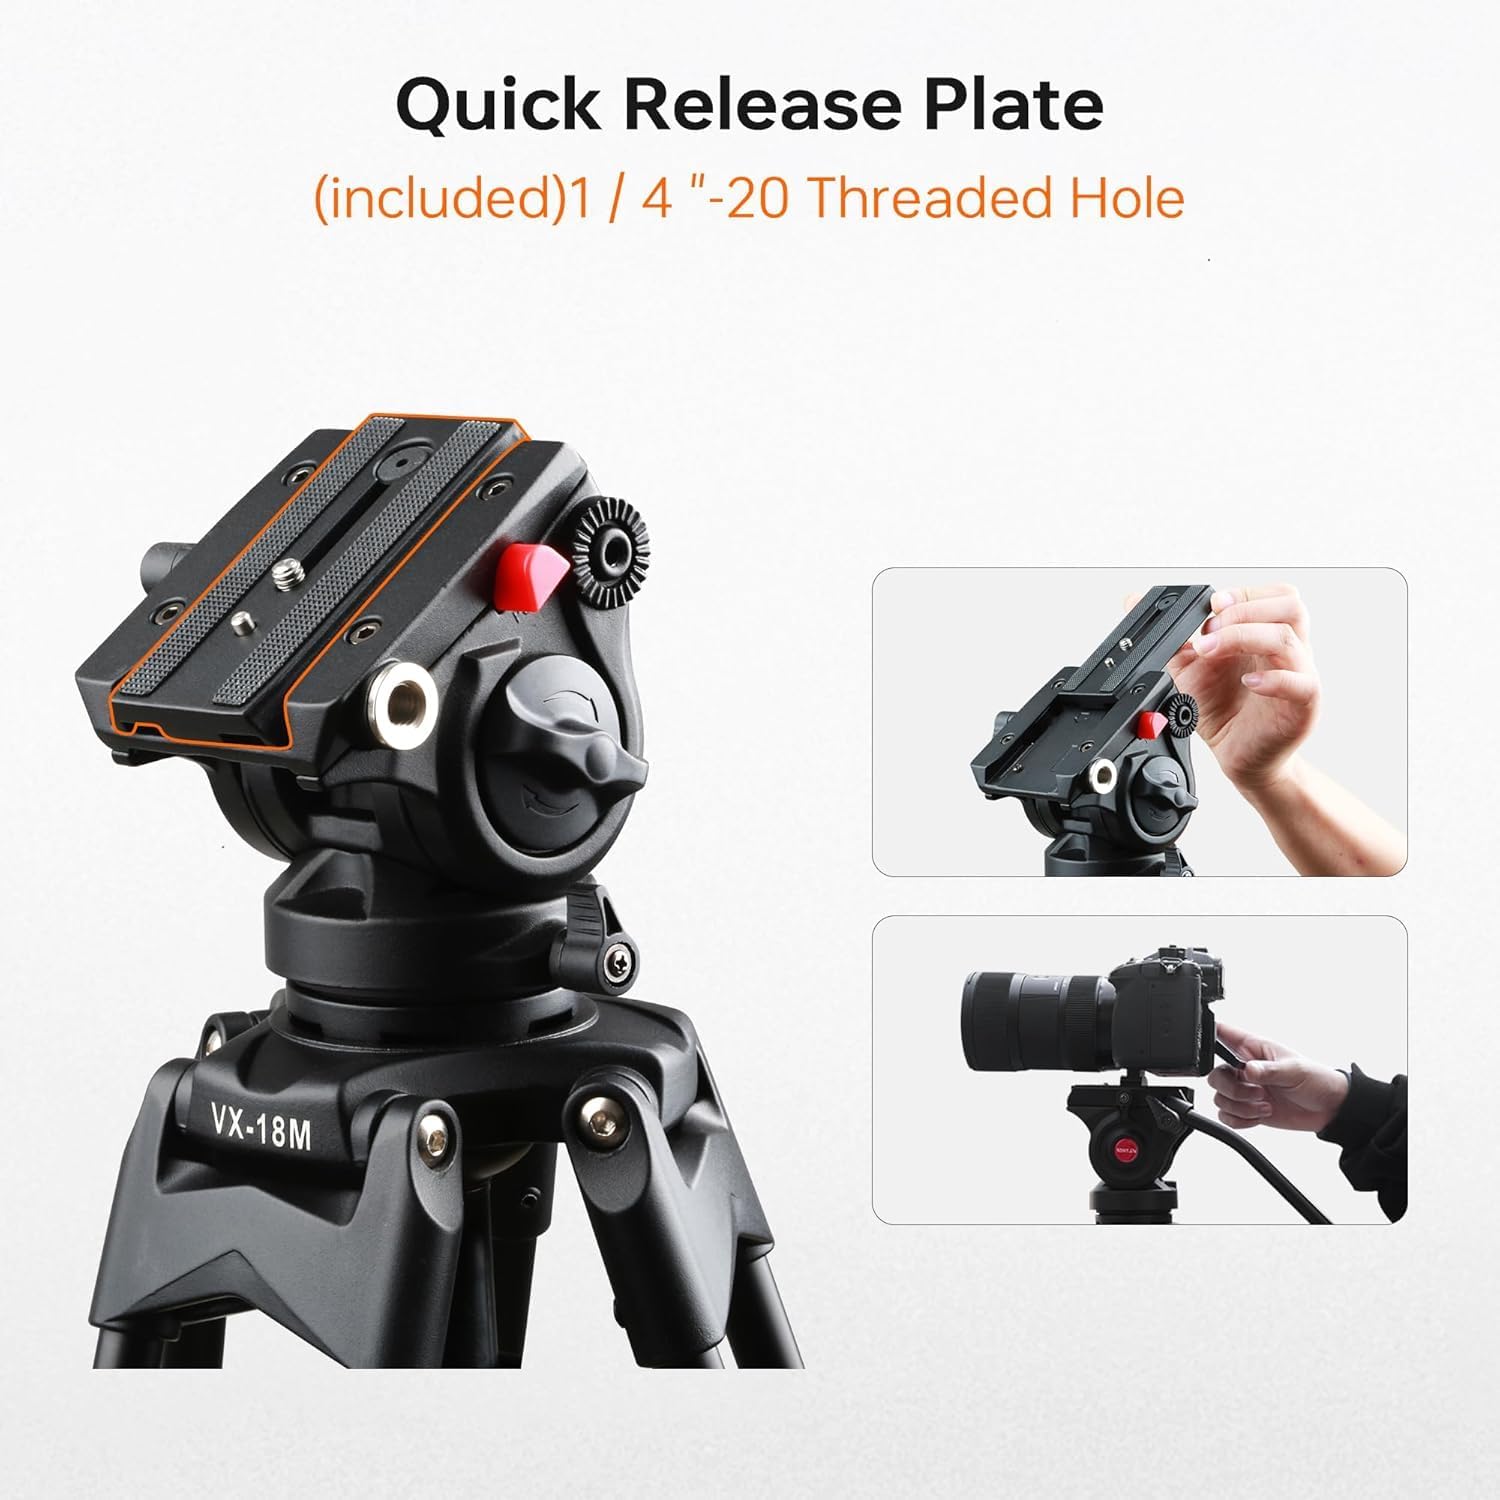
Image 4.3: The quick release plate with 1/4"-20 threaded hole for camera attachment.
- Remove the quick release plate from the fluid head by pressing the insurance button and sliding the plate out.
- Attach the quick release plate to the bottom of your camera or video equipment using the 1/4" or 3/8" screw. Ensure it is securely fastened.
- Slide the quick release plate with your camera back into the fluid head until it locks into place. Verify it is secure before releasing your grip on the camera.
5. Operation
5.1. Pan and Tilt Movements
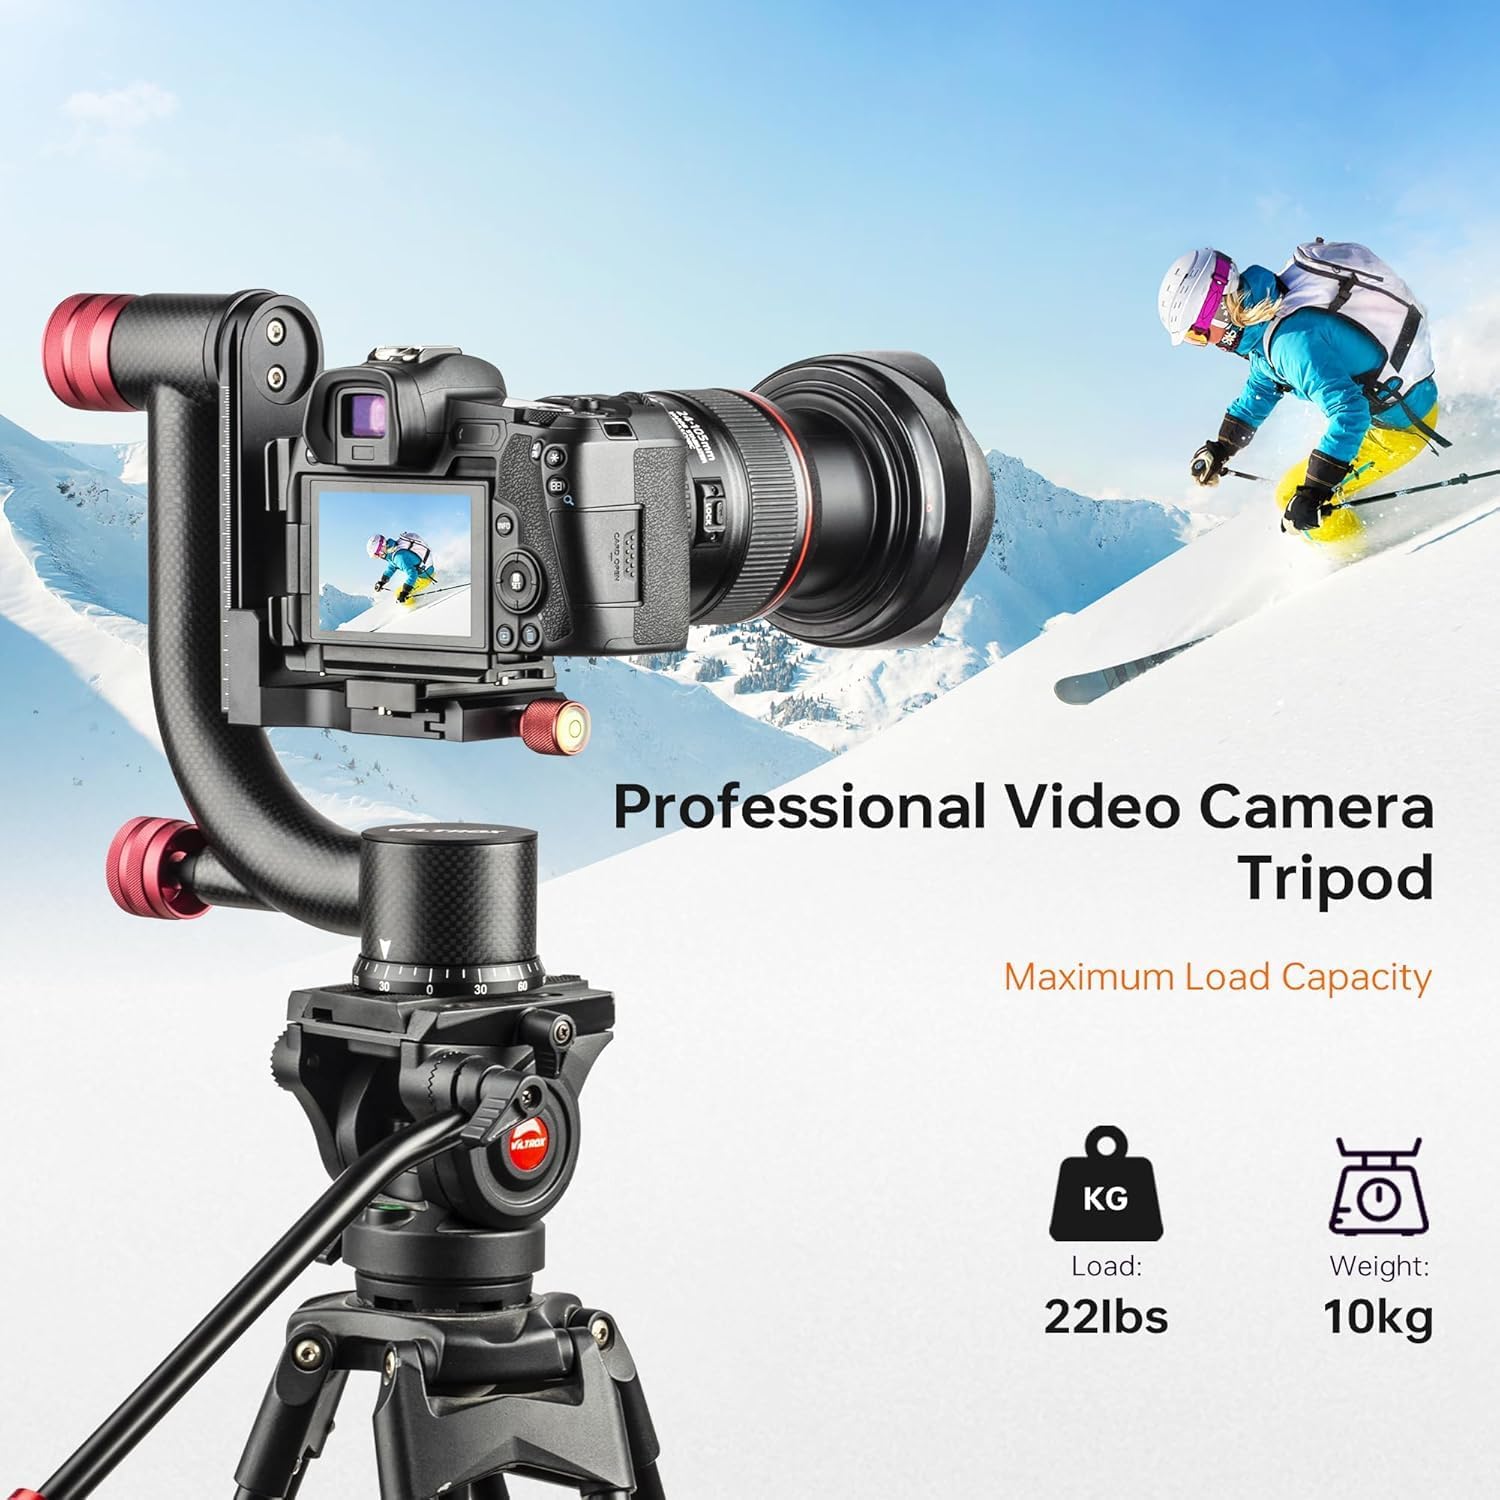
Image 5.1: The fluid head allows for a tilt range of +90° to -70°.
The VT-01 Fluid Head provides smooth movements for capturing video. Loosen the vertical movement fixed knob for tilt adjustments and the horizontal movement fixed knob for pan adjustments (refer to Image 3.1).
- Tilt Range: The head can tilt 90° forward and 80° backward.
- Pan Rotation: The head offers a full 360° pan rotation for panoramic shots.

Image 5.2: The 360° pan rotation enables panoramic video capture.
Use the pan bar handle to guide movements. Tighten the respective knobs to lock the head in position.
5.2. Pan Bar Handle Adjustment
The pan bar handle is interchangeable and features adjustable angles. Loosen the handle interface screw (refer to Image 3.1), adjust the handle to a comfortable angle, and then tighten the screw to secure it.
5.3. Feet Configuration

Image 5.3: The tripod feet can be switched between rubber pads for indoor use and steel spikes for outdoor, uneven terrain.
The tripod is equipped with non-slip rubber horseshoe feet suitable for various surfaces. For outdoor use on soft or uneven terrain, the rubber feet can be retracted or removed to expose steel spikes, providing enhanced stability.
6. Maintenance
- Cleaning: Wipe the tripod and fluid head with a soft, dry cloth after each use. For stubborn dirt, use a slightly damp cloth and mild soap, then dry thoroughly. Avoid harsh chemicals or abrasive materials.
- Lubrication: The fluid head is designed for maintenance-free operation. Do not attempt to lubricate internal components, as this may affect performance.
- Storage: When not in use, collapse the tripod legs, secure all locking mechanisms, and store it in the provided padded carrying bag. Store in a cool, dry place away from direct sunlight and extreme temperatures.
- Inspection: Periodically check all screws, knobs, and leg locks for tightness. Tighten any loose components to ensure safe operation.
7. Troubleshooting
| Problem | Possible Cause | Solution |
|---|---|---|
| Tripod is unstable or wobbles. | Legs not fully extended or locked; uneven surface; excessive load. | Ensure all leg sections are fully extended and locking knobs are tightened. Adjust leg spread for a wider base. Verify equipment weight does not exceed maximum load capacity. |
| Fluid head movements (pan/tilt) are stiff or jerky. | Locking knobs engaged; debris in fluid head mechanism. | Ensure pan and tilt locking knobs are fully disengaged. Clean the fluid head exterior. Do not attempt to disassemble or lubricate the fluid head. |
| Pan lock causes slight rotation of the camera. | Over-tightening; camera not perfectly balanced. | Ensure the camera is balanced on the quick release plate. Tighten the pan lock knob gently but firmly, avoiding excessive force. |
| Quick release plate does not secure camera. | Plate not fully inserted; camera screw loose. | Ensure the quick release plate is fully seated in the fluid head and the insurance button has engaged. Verify the camera is securely attached to the quick release plate. |
8. Specifications
| Feature | Specification |
|---|---|
| Model Number | VX-18M II |
| Maximum Load Capacity | 10 kg (22 lbs) |
| Adjustable Height Range | 84.5 cm (33.3 inches) to 188 cm (74 inches) |
| Fluid Head Tilt Range | 90° forward, 80° backward |
| Fluid Head Pan Rotation | 360° |
| Material | Durable Aluminum Alloy |
| Item Weight | 5.49 kg (12.1 pounds) |
| Package Dimensions | 99.06 x 20.32 x 19.05 cm (39 x 8 x 7.5 inches) |
9. Warranty and Support
Warranty information for the VILTROX VX-18M II Heavy Video Tripod is typically included with the product packaging or available on the official VILTROX website. Please refer to these resources for details regarding warranty coverage and terms.
For technical support, service inquiries, or additional product information, please visit the official VILTROX store or contact their customer service department:
- VILTROX Official Store: Visit Store
Ask a question about this manual
Ask about setup, troubleshooting, compatibility, parts, safety, or missing instructions. Manuals+ will review the question and use this page’s manual context to help answer it.