
1. Introduction
The VAR TECH V 6610+ is a high-precision digital lux meter designed for accurate measurement of illumination (lux) levels. Featuring auto-ranging capabilities and a detachable flexible sensor, it is suitable for various applications requiring precise light intensity readings. This manual provides detailed instructions for the safe and effective use of your device.
2. Safety Information
Please read and understand all safety warnings and operating instructions before using this instrument. Failure to do so may result in injury or damage to the meter.
- Do not operate the meter in environments with explosive gas, vapor, or dust.
- Avoid exposing the sensor to direct sunlight or strong artificial light sources for extended periods, as this may affect accuracy.
- Keep the meter dry. Do not use it in wet conditions.
- Clean the meter with a soft, dry cloth. Do not use abrasive cleaners or solvents.
- Ensure batteries are inserted correctly according to polarity markings. Remove batteries if the meter will not be used for a long period.
3. Product Overview
The VAR TECH V 6610+ Digital Lux Meter consists of a main unit with a display and control buttons, and a detachable light sensor connected via a coiled cable.
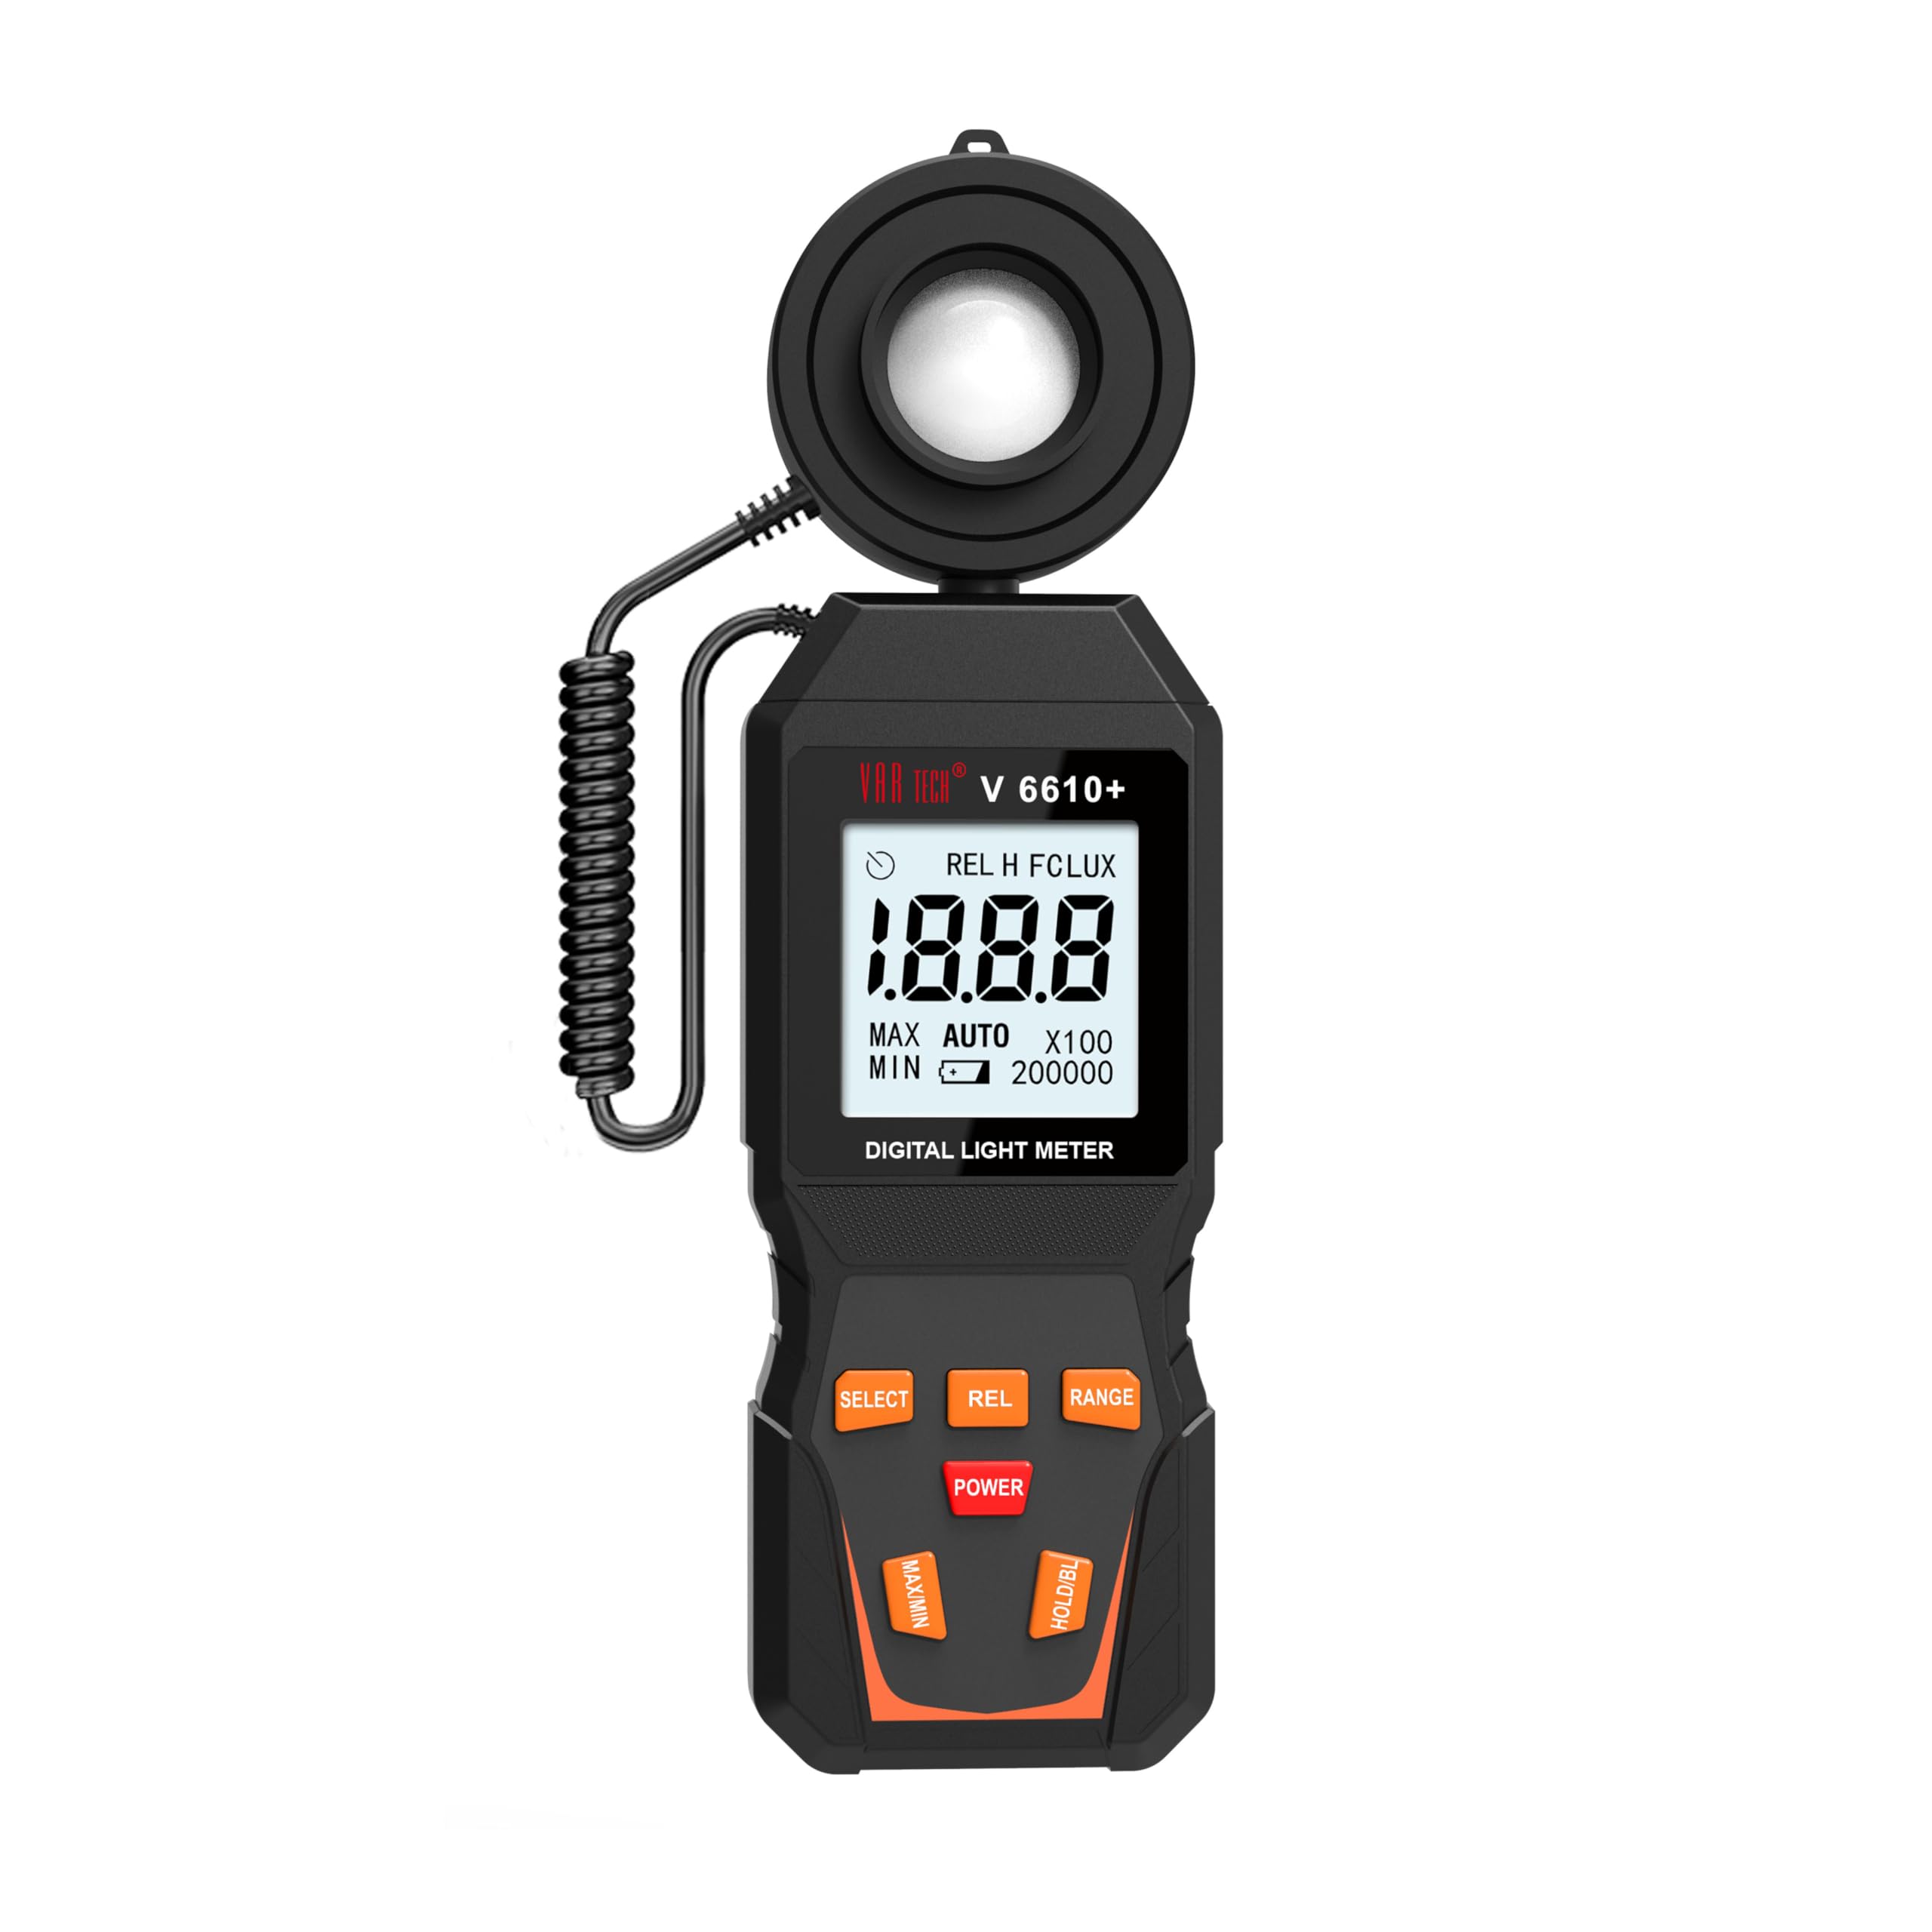
Figure 1: VAR TECH V 6610+ Digital Lux Meter showing the main unit and the detachable light sensor.
3.1 Key Features:
- Digital Display: 3½ Digits (2000 Counts) for clear readings.
- Auto Ranging: Automatically selects the appropriate measurement range from 0.1 to 200,000 LUX.
- Detachable Flexible Sensor: Allows for precise positioning and measurement in various environments.
- Data Hold: Freezes the current reading on the display.
- Min./Max. Hold: Records the minimum and maximum measured values.
- Backlight: Illuminates the display for use in low-light conditions.
- REL (Relative Measurement): Measures the difference between a reference value and current readings.
- LUX/FC Select: Allows switching between Lux and Foot-Candle units.
- REC (Record): Function for data logging.
4. Setup
4.1 Battery Installation
- Locate the battery compartment cover on the back of the meter.
- Open the cover by sliding or unscrewing it.
- Insert two (2) AAA batteries, ensuring correct polarity (+/-) as indicated inside the compartment.
- Replace the battery compartment cover securely.
4.2 Sensor Connection
Connect the detachable light sensor to the main unit by plugging its connector into the designated port on the meter. Ensure a firm connection.

Figure 2: VAR TECH V 6610+ Digital Lux Meter showing the sensor connected to the main unit, held in a hand.
5. Operating Instructions
5.1 Power On/Off
Press the POWER button to turn the meter on or off.
5.2 Measurement Unit Selection (LUX/FC)
Press the SELECT button to toggle between Lux and Foot-Candle (FC) measurement units.
5.3 Auto Ranging
The meter automatically adjusts its measurement range. The display will indicate the current range (e.g., x100 for 100 times the displayed value).
5.4 Data Hold
Press the HOLD button to freeze the current reading on the display. Press it again to release the hold function.
5.5 Min./Max. Hold
Press the MIN/MAX button to activate the minimum/maximum recording mode. The meter will display the highest (MAX) or lowest (MIN) light intensity detected since the mode was activated. Press again to cycle through MAX, MIN, and normal measurement modes.
5.6 Backlight
Press the LIGHT button to turn the display backlight on or off for improved visibility in dark environments.
5.7 Relative Measurement (REL)
Press the REL button to enter relative measurement mode. The current reading becomes the reference value (0), and subsequent measurements show the difference from this reference. Press again to exit.
5.8 Record Function (REC)
The REC function allows for data logging. Refer to the full manual for detailed instructions on using this feature, as it may involve specific button sequences or memory storage.
6. Maintenance
6.1 Cleaning
Wipe the meter's casing with a soft, dry cloth. For the sensor, use a soft, lint-free cloth to gently clean the light-sensitive dome. Do not use abrasive materials or chemical solvents.
6.2 Battery Replacement
When the low battery indicator appears on the display, replace the batteries as described in Section 4.1. Always use fresh AAA batteries.
6.3 Storage
If the meter is not used for an extended period, remove the batteries to prevent leakage. Store the meter in its carrying pouch in a cool, dry place, away from direct sunlight and extreme temperatures.
7. Troubleshooting
- Meter does not power on:
- Check if batteries are installed correctly with proper polarity.
- Replace with new AAA batteries.
- Inaccurate readings:
- Ensure the sensor is clean and free from obstructions.
- Verify the sensor is positioned correctly towards the light source.
- Check for strong electromagnetic interference nearby.
- Display shows "OL" (Overload):
- The light intensity exceeds the meter's maximum measurement range. Move the sensor further from the light source or use appropriate filters if available.
8. Specifications
| Parameter | Value |
|---|---|
| Model Number | V 6610+ |
| Measurement Range | 0.1 ~ 200,000 LUX |
| Display | 3½ Digits (2000 Counts) |
| Sensor Type | Detachable Flexible Sensor |
| Power Source | 2 x AAA Batteries (included) |
| Item Weight | 300 g |
| Product Dimensions (L x W x H) | 15.4 x 6 x 3.1 cm |
| Included Components | Lux Meter, Pouch |
| Country of Origin | China |
9. Warranty and Support
The VAR TECH V 6610+ Digital Lux Meter comes with a warranty and service support directly from VAR TECH. For any technical assistance, warranty claims, or service inquiries, please contact VAR TECH directly.
Manufacturer: V A R TECH
Website: www.var-tech.com
Please retain your purchase receipt as proof of purchase for warranty purposes.


