
1. Introduction
This manual provides comprehensive instructions for the installation, operation, and maintenance of your Leadfan Double Din Car Stereo, Model X5W. This advanced car stereo system is designed to enhance your driving experience with its 7-inch Full HD touchscreen, wireless Apple CarPlay and Android Auto compatibility, Bluetooth 5.1, Mirror Link functionality, and support for a backup camera. Please read this manual thoroughly before use to ensure proper functionality and safety.

Figure 1: Leadfan Double Din Car Stereo, Model X5W.
2. Safety Information
- Voltage Compatibility: The operating voltage for this car stereo is 12V. It is not compatible with 24V systems found in large trucks. Using the stereo with voltage exceeding 16V will cause damage.
- Wiring: Ensure correct wiring connections. If the ACC wire (red) and B+ wire (yellow) are connected in reverse during installation, the product will lose its memory function when power is off. The yellow wire (memory wire) should connect to the battery's constant current positive. The red wire should connect to the ACC line (ignition switch controlled positive). The black wire connects to the negative power supply.
- Professional Installation: If you are unsure about the installation process, it is recommended to seek professional assistance to prevent damage to the unit or your vehicle.
- Driving Safety: Always prioritize safe driving. Do not operate complex functions or watch videos that may distract you while driving.
3. Package Contents
Verify that all items listed below are included in your package:
- 1x Leadfan Double Din Car Stereo (Model X5W)
- 1x Rear View Camera with Cable
- 2x Wire Harnesses
- 1x Remote Control
- 2x Brackets and Screws
- 1x User Manual & Troubleshooting Guide
Note: Additional connectors, dash kits, or harnesses may be required for a perfectly fitted installation in some car models. These are not included and must be purchased separately.
4. Product Overview
The Leadfan Double Din Car Stereo features a 7-inch capacitive touchscreen with a resolution of 1024x600, offering a clear and responsive interface. The unit includes physical buttons on the left side for essential controls such as source selection, volume adjustment, and mute. It also provides convenient access points for USB, AUX, and a microphone.

Figure 2: 7-inch HD Capacitive Touchscreen.
The rear panel of the stereo unit provides various input and output ports for connectivity, including audio outputs (L-OUT, R-OUT), video outputs (V-OUT1, V-OUT2), video input (V-IN), camera input (CAMIN), and an antenna port (ANT). A USB port is also available on the front panel for easy access.

Video 1: Leadfan Radio Display - A detailed look at the physical unit and its various ports.
5. Installation
The Leadfan Double Din Car Stereo is designed to fit standard double din openings. The minimum front panel size is 173(L) x 98(W) x 65(H) mm (6.81 x 3.86 x 2.56 inches). Please measure your vehicle's dashboard opening to ensure compatibility. If your dash opening is not suitable, a dash kit may be required.
5.1 Wiring Diagram
Refer to the following diagram for proper wiring connections. Incorrect wiring can damage the unit or vehicle electrical system.

Figure 3: Wiring Diagram and Dimensions.
- Red Wire (ACC): Connect to the ignition switch (ACC) for switched power.
- Yellow Wire (B+): Connect to the constant 12V battery positive for memory retention.
- Black Wire (GND): Connect to a chassis ground point.
- Speaker Wires: Connect to your vehicle's speakers, ensuring correct polarity.
- Backup Camera: Connect the camera's video output to the CAMIN input and its power to the reverse light circuit.
6. Setup
6.1 Initial Power On and Basic Settings
Upon first power-on, the unit will display a welcome screen. You can access various settings to customize your experience. These include radio area, steering wheel control, startup logo, EQ, brightness, background, language, and time settings.
Video 2: X5 Series Screen Display & Settings - Demonstrates how to navigate and adjust various system settings.
6.2 Customizing Startup Logo
You can personalize your stereo's startup screen with a custom logo. The recommended resolution for logo images is 1024x600 pixels. Create a folder named "LOGO" on a USB disk and place your desired image files (e.g., JPG format) inside. Insert the USB disk into the stereo's USB port, then navigate to the "Logo Settings" menu, select the USB disk, and choose your preferred logo image.
Video 3: How to Set Customize Startup LOGO - A step-by-step guide to setting a personalized startup logo.
6.3 EQ and Sound Settings
The stereo features a 10-band EQ audio setting to customize your sound experience. Access the "Sound" settings to adjust equalizer presets (Jazz, Classic, Rock, Pop, Soft, User) or manually fine-tune individual frequency bands. You can also adjust balance and fader settings for optimal audio distribution.
Video 4: How to Set EQ - Demonstrates how to access and adjust the equalizer and sound balance settings.
7. Operating Instructions
7.1 Wireless CarPlay & Android Auto
Connect your smartphone wirelessly via Bluetooth to enable Apple CarPlay or Android Auto. Once connected, the system will automatically detect and launch the respective interface. This allows you to use navigation, make calls, send messages, and play music directly from your phone on the stereo's screen, with voice control support for safe driving.


Figure 4: Wireless Apple CarPlay and Android Auto Interfaces.
Video 5: Apple CarPlay / Android Auto / Bluetooth Call / Mirror Link - Overview of key connectivity features.
7.2 Wired Mirror Link
For wired Mirror Link, connect your iOS or Android phone using its original USB cable. The stereo will display your phone's screen content, allowing you to view maps, movies, or games on the larger display.

Figure 5: Wired Mirror Link.
7.3 Bluetooth Functionality
The stereo features Bluetooth 5.1 for stable wireless audio streaming and hands-free calling. Pair your smartphone to make and receive calls, access phone contacts, and play music from your device.
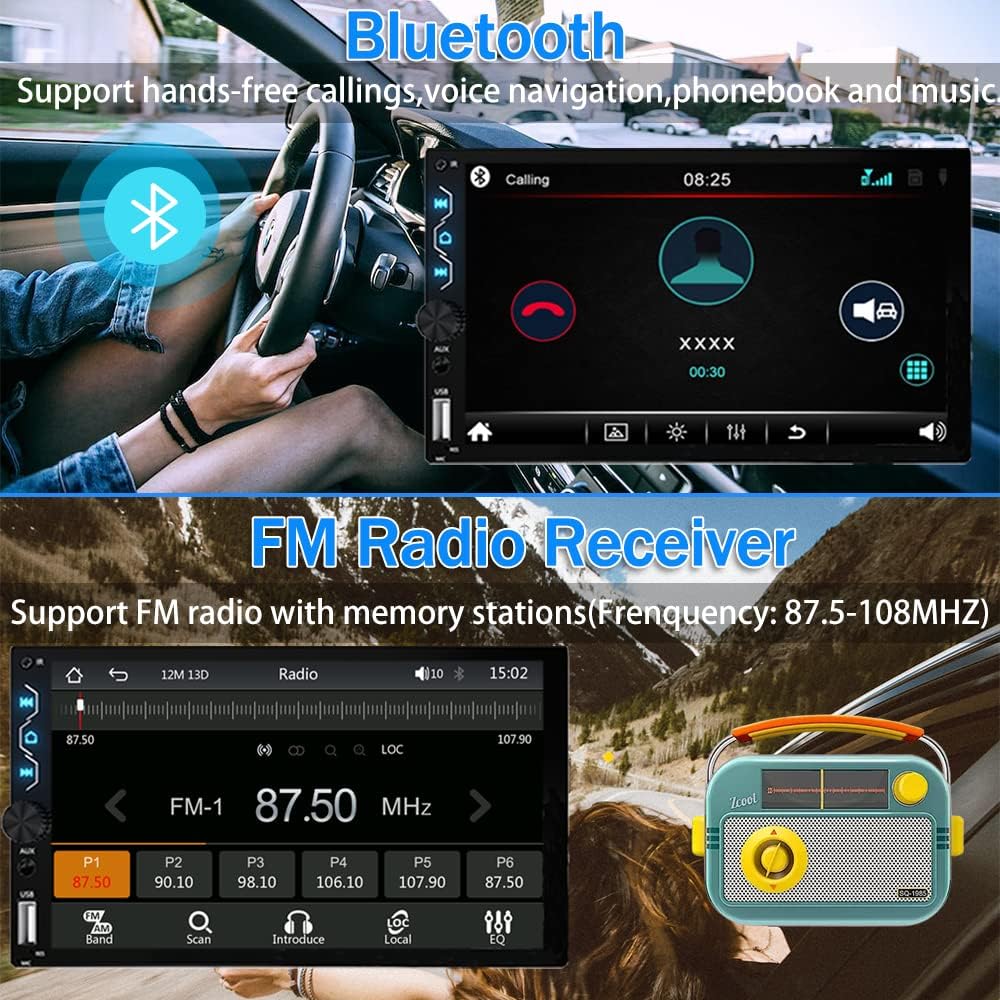
Figure 6: Bluetooth Hands-Free Calling.
7.4 FM Radio
Tune into FM radio stations (frequency range: 87.5-108MHz). The unit supports saving favorite stations for quick access.
7.5 Backup Camera
When your vehicle is shifted into reverse gear, the 7-inch touchscreen will automatically display the rear view from the included 170° ultra-wide angle backup camera. The camera features 12 LED wicks for clearer night vision and a waterproof design for reliable performance in various weather conditions.

Figure 7: 170° HD Reversing Camera.
7.6 Steering Wheel Control (SWC)
The stereo supports steering wheel controls. Follow the instructions in the settings menu to program your steering wheel buttons for functions like switching music, answering calls, and adjusting volume, allowing for convenient operation while driving.
8. Troubleshooting
- Wireless CarPlay/Android Auto Intermittent Connection: If wireless CarPlay or Android Auto does not start sometimes, try connecting via the original USB cable to establish the connection. Ensure your phone's Bluetooth and Wi-Fi are enabled and properly paired with the stereo.
- Screen Black/Controls Unresponsive: If the screen goes black or controls become unresponsive, check all wiring connections, especially the power and ground wires. Ensure the unit is receiving stable 12V power. A loose connection or power fluctuation can cause this.
- Incorrect Time Display: The unit may default to a 24-hour format. Navigate to the "Clock" settings within the system menu to adjust the time format to 12-hour if preferred.
- Annoying Button Beep: The button beep sound can be disabled in the system settings. Refer to the "Sound" or "Display Settings" menu to locate and turn off this feature.
- No Memory Function: If the stereo loses settings after turning off the vehicle, verify that the yellow B+ wire is correctly connected to a constant 12V power source from the battery. Reversing the ACC and B+ wires will cause this issue.
9. Specifications
| Brand | Leadfan |
| Model Number | X5W |
| Item Weight | 1.94 pounds |
| Product Dimensions | 2.44 x 7.01 x 3.94 inches |
| Screen Size | 7 Inch |
| Screen Resolution | 1024x600 |
| Connectivity Technology | Bluetooth, USB |
| Bluetooth Version | 5.1 |
| Special Features | Mirror Link, Bluetooth 5.1, EQ, FM, SWC, Backup Camera, Mic, 7 Inch Touchscreen, Wired/Wireless Apple Carplay & Android Auto & Voice Control, USB/AUX Input |
| Wattage | 240 watts |
| Audio Output Mode | Stereo |
| Surround Sound Channel Configuration | 4.0 |
10. Warranty and Support
Leadfan offers comprehensive support for your car stereo:
- After-Sales Technical Support: 24-hour technical support is available to assist with installation and operation questions.
- Money Back Service: Enjoy a 30-day money-back guarantee.
- Warranty: The product comes with 12 months of after-sales support, including replacement services if needed.
For any questions or assistance, please contact Leadfan customer service by clicking "sold by Leadfan" and then "ask a question" on the product page.


