
1. Introduction
This manual provides comprehensive instructions for the Vangoa Mini Portable DMX Controller, designed for efficient lighting control in various settings such as stages, parties, and bars. It covers setup, operation, maintenance, and troubleshooting to ensure optimal performance and longevity of your device.
The Vangoa DMX Controller is a compact and versatile unit, offering both wired DMX512 output via USB and wireless control capabilities with its included 2.4G DMX receivers. Its intuitive interface allows for easy programming and playback of lighting scenes.
2. Package Contents
Verify that all items listed below are present in your package:
- Vangoa Mini Portable DMX Controller Unit
- 3 x Wireless DMX 2.4G Receivers
- Power Adapter (for controller)
- 3 x Power Adapters (for receivers)
- USB Cable
- User Manual (this document)
- Carrying Bag

Figure 2.1: Overview of the Vangoa Mini Portable DMX Controller package contents, showing the main controller unit, three wireless DMX receivers, and associated power adapters and cables.
3. Product Overview
The Vangoa Mini Portable DMX Controller features a user-friendly layout with faders for channel control, buttons for scene and program management, and a digital display for feedback.

Figure 3.1: Front panel of the DMX controller, highlighting the digital display, six channel faders (push rods), and control buttons for scenes, programs, and navigation.

Figure 3.2: Rear panel of the DMX controller, illustrating the DMX input and output XLR 3-pin ports, 9-12V DC power input, Micro USB port, power indicator lights, power switch, wireless conversion switch, and 2.4G antenna.
3.1 Key Components
- Digital Display: Shows current scene, program, and project information.
- Faders (Push Rods): Six faders for controlling individual DMX channels (1-6).
- Control Buttons:
- SCENES: Used for managing and selecting scenes.
- PROG. (Program): Used for managing and selecting programs.
- PROJ. (Project/Page): Used for navigating between pages of DMX channels.
- INSERT/DELETE: For saving or deleting scenes/programs.
- A/B: Mode selection buttons.
- UP/DOWN/SELECT: Navigation and selection buttons.
- DMX Input/Output: Standard 3-pin XLR connectors for wired DMX connections.
- Power Interface: 9-12V DC input and Micro USB for power/charging.
- Wireless Conversion Switch: Activates/deactivates wireless DMX functionality.
- 2.4G Antenna: For wireless DMX signal transmission.
4. Setup Guide
4.1 Powering the Controller
The DMX controller can be powered in two ways:
- 9V Battery: Insert a 9V battery into the battery compartment.
- DC Power Adapter: Connect the provided 9-12V DC power adapter to the DC IN port. The controller can be used while charging.
The wireless DMX receivers have built-in batteries and can be charged using their dedicated power adapters. A full charge takes approximately 2 hours and provides about 16 hours of operation.
4.2 Wireless DMX Setup
The Vangoa DMX Controller is compatible with 2.4G wireless DMX signal receivers. Follow these steps to establish a wireless connection:
- Ensure both the DMX controller and the wireless receivers are powered on.
- On the DMX controller, slide the "WLSS" (Wireless) switch to the ON position.
- On each wireless receiver, ensure it is set to the same ID code as the controller. The controller supports 7 groups of ID codes to prevent interference.
- The indicator lights on both the controller and receivers will confirm a successful connection.
Video 4.1: Demonstrates the basic setup and connection of the Mini DMX 512 Controller with wireless DMX receivers, showing power connections and wireless activation.
4.3 Wired DMX Setup
For wired connections, use standard 3-pin DMX cables:
- Connect the DMX OUT port of the controller to the DMX IN port of your first lighting fixture.
- Daisy-chain additional fixtures by connecting the DMX OUT of one fixture to the DMX IN of the next.
- Ensure all connected devices are DMX512 compatible.
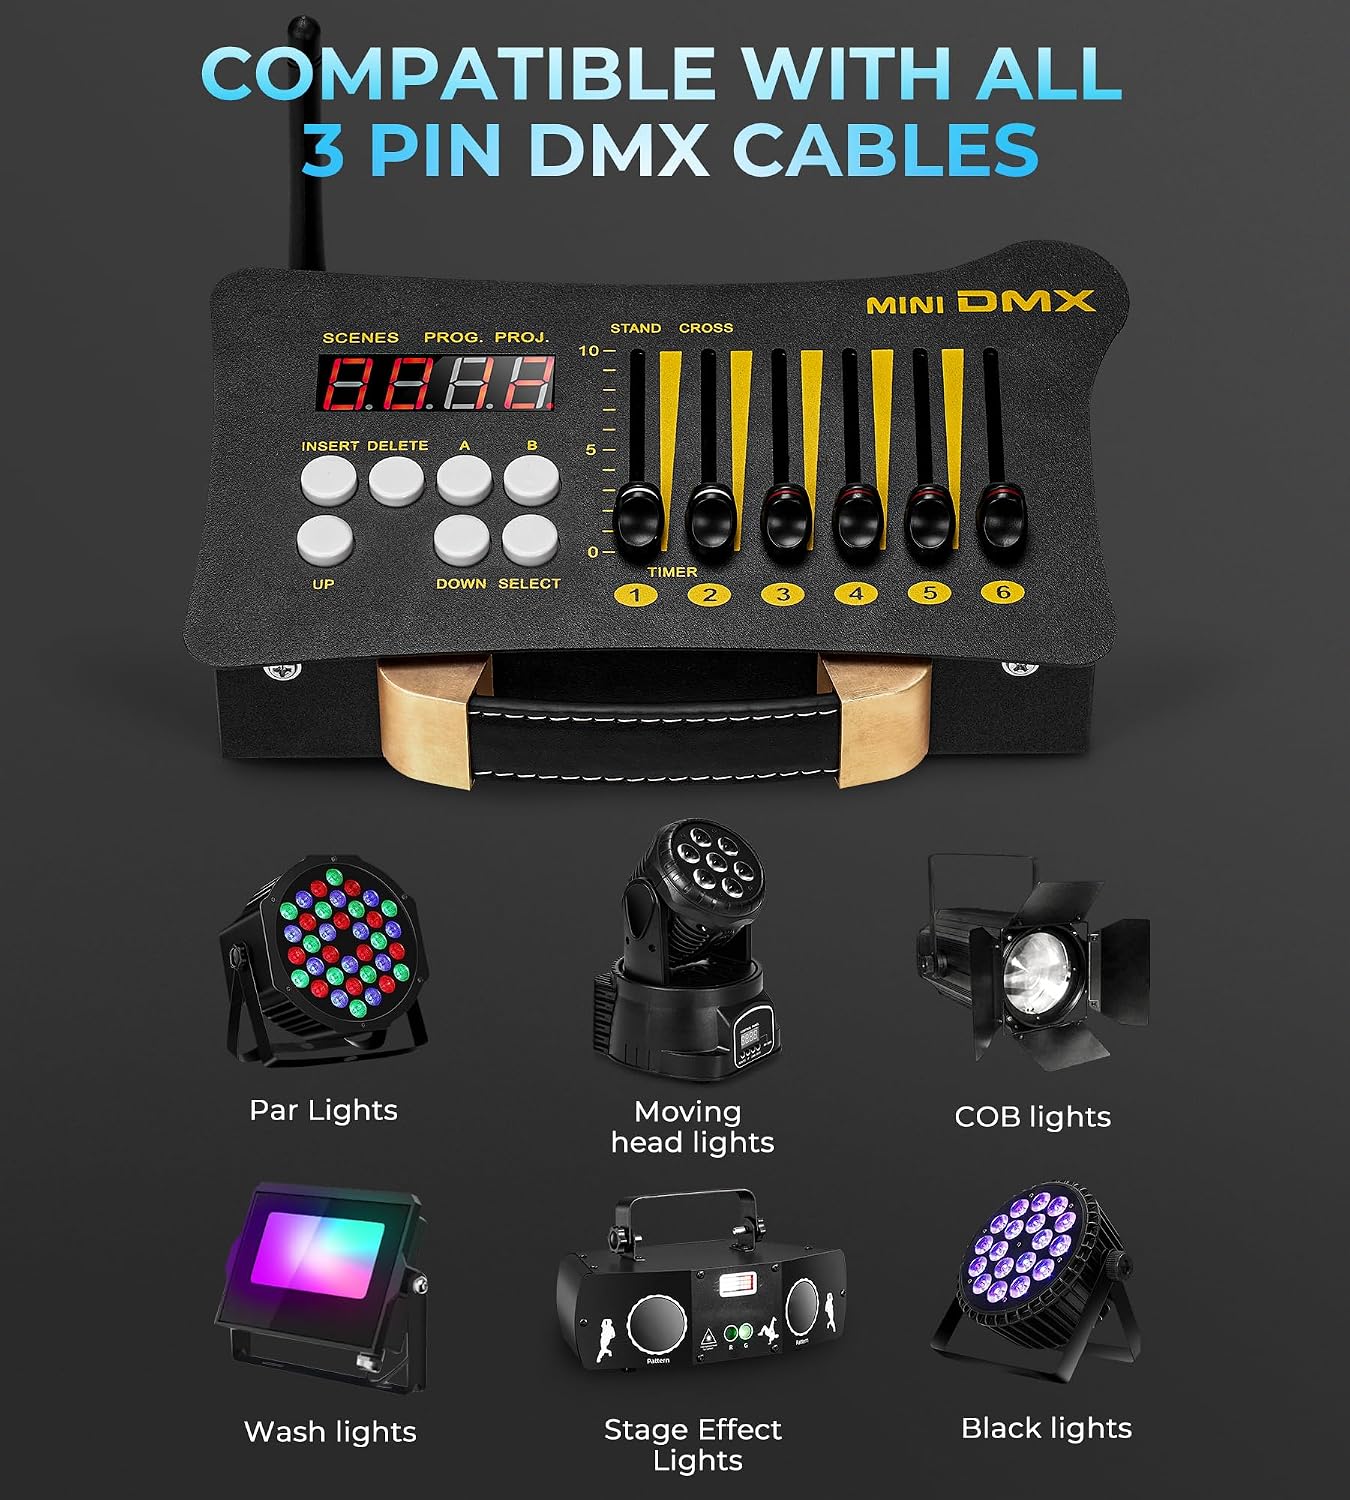
Figure 4.1: The DMX controller demonstrating compatibility with various lighting types such as Par Lights, Moving Head Lights, COB Lights, Wash Lights, Stage Effect Lights, and Black Lights, connected via 3-pin DMX cables.
5. Operating Instructions
The Vangoa DMX Controller offers intuitive operation for both manual control and programmed scene playback.
5.1 Manual Control Mode
In manual control mode, you directly adjust DMX channels using the faders.
- Press the 'B' button to enter manual control mode. The display will show "ON" or similar indication for active pages.
- Use the UP/DOWN buttons to navigate through the 9 available pages (projects). Each page controls 6 DMX channels.
- Adjust the six faders to control the intensity or parameters of the corresponding DMX channels (1-6 for Page 1, 7-12 for Page 2, etc.).
- To exit manual control mode, long press the 'SELECT' button.
Video 5.1: Detailed explanation of the DMX Controller's operation, including manual control of individual channels and programming scenes. This video covers the functionality of faders, scene buttons, and program modes.
5.2 Programming Scenes and Programs
The controller allows you to save up to 50 scenes per program, with 9 programs available.
- Enter Programming Mode: Long press the 'A' button. The display will show the current program number and the number of scenes programmed.
- Select Program: Use the UP/DOWN buttons to select the desired program (1-9).
- Create a Scene:
- Adjust the faders to achieve your desired lighting state.
- Press the 'INSERT' button to save the current lighting state as a scene. The scene count will increment.
- Exit Programming Mode: Long press the 'A' button again.
5.3 Playing Back Scenes and Programs
To play back programmed scenes:
- Enter Playback Mode: Short press the 'A' button. The display will show the current program and scene number.
- Select Program: Use the UP/DOWN buttons to select the desired program.
- Adjust Playback Speed (Cross Fader): The 'CROSS' fader controls the transition speed between scenes.
- Higher values (towards 10) result in slower, smoother fades.
- Lower values (towards 0) result in faster, more abrupt changes.
- Adjust Hold Time (Stand Fader): The 'STAND' fader controls how long each scene is held before transitioning to the next.
- Higher values (towards 10) result in longer hold times.
- Lower values (towards 0) result in shorter hold times.
- To exit playback mode and return to manual control, long press the 'SELECT' button.
6. Specifications
| Feature | Description |
|---|---|
| Model | Mini Portable DMX 512 Controller (B0CPTRBLWW) |
| Item Weight | 3.05 pounds (approx. 1.38 kg) |
| Package Dimensions | 13.86 x 9.88 x 2.91 inches (approx. 35.2 x 25.1 x 7.4 cm) |
| Power Input | 9V battery or 9-12V DC universal power supply |
| Wireless Receivers | 3 Pcs DMX Controller Dfi DJ 2.4G Receivers (built-in battery) |
| Wireless Communication Distance | Up to 500M (visible distance) |
| Total Channel Number | 54 Groups (6 channels per page, 9 pages) |
| Storage Programs | 9 programs |
| Program Scenarios (Scenes) | Up to 50 scenes per program |
| Standard Control | DMX512 |
| Memory Space | 32K |

Figure 6.1: Visual representation of the DMX controller's dimensions and a summary of its technical specifications.
7. Maintenance and Care
- Keep the device clean and free from dust. Use a soft, dry cloth for cleaning.
- Avoid exposing the controller to extreme temperatures, humidity, or direct sunlight.
- Do not attempt to disassemble or repair the unit yourself. Refer to qualified service personnel for any repairs.
- Store the controller and receivers in the provided carrying bag when not in use to protect them from damage.
8. Troubleshooting
| Problem | Possible Cause | Solution |
|---|---|---|
| Controller not powering on. | Low battery or power adapter issue. | Ensure 9V battery is correctly inserted or connect to DC power adapter. Verify power outlet functionality. |
| Wireless connection unstable or not connecting. | Incorrect ID code, interference, or out of range. | Verify controller and receiver ID codes match. Reduce distance between devices. Check for other 2.4G devices causing interference. |
| Lights not responding in wired DMX mode. | Incorrect DMX addressing, faulty cable, or non-DMX512 compatible fixture. | Check DMX addresses on fixtures. Test DMX cables. Ensure fixtures support DMX512. |
| Scenes not saving or playing back correctly. | Incorrect programming steps or memory full. | Review programming steps in Section 5.2. Ensure sufficient memory space. |
If you encounter issues not covered here, please contact Vangoa customer support for assistance. An electronic user manual is available upon request for detailed operational support.
9. Warranty and Support
Vangoa provides customer support for its products. For any questions regarding setup, operation, or troubleshooting, please contact our support team. If you require an electronic version of this manual or further assistance, please reach out to us directly.
Please note that specific warranty details may vary. Refer to your purchase documentation or contact Vangoa customer service for precise warranty terms and conditions.