
1. Safety Information
Read all instructions carefully before using your microwave oven. Keep this manual for future reference. Improper use may result in fire, electric shock, or injury.
General Safety Precautions:
- Do not attempt to operate this oven with the door open or if the door is damaged.
- Do not place any object between the oven front face and the door or allow soil or cleaner residue to accumulate on sealing surfaces.
- Do not operate the oven if it is damaged. It is particularly important that the oven door closes properly and that there is no damage to the: (1) door (bent), (2) hinges and latches (broken or loosened), (3) door seals and sealing surfaces.
- The oven should not be adjusted or repaired by anyone except properly qualified service personnel.
- Always ensure the turntable and roller ring are correctly positioned before operating the oven.
- Do not heat liquids or other foods in sealed containers as they are liable to explode.
- Never use the oven for deep-frying.
- Do not use corrosive chemicals or vapors in this appliance.
2. Setup and Installation
Proper installation is crucial for the safe and efficient operation of your SHARP microwave oven.
Unpacking:
- Remove all packing materials from inside the oven cavity and from the door.
- Check the oven for any damage, such as a misaligned or bent door, damaged door seals and sealing surface, broken or loose door hinges and latches, or dents inside the cavity or on the door. If any damage is present, do not operate the oven and contact qualified service personnel.
Placement:
- Place the oven on a flat, stable surface that can support its weight and the heaviest food item likely to be cooked in the oven.
- Ensure adequate ventilation. Leave a minimum of 4 inches (10 cm) of space around the sides, top, and rear of the oven for proper airflow. Do not block any ventilation openings.
- Keep the oven away from heat sources and strong magnetic fields.
Electrical Requirements:
- The oven must be plugged into a properly grounded 3-prong outlet.
- Ensure the voltage and frequency match the ratings on the oven's nameplate.
- Do not use an extension cord unless absolutely necessary, and if so, ensure it is a grounded 3-wire cord of the correct rating.
Turntable Assembly:
Place the roller ring in the center of the oven cavity. Position the glass turntable securely on top of the roller ring, ensuring it sits correctly on the center hub.

Figure 2.1: Interior of the microwave showing the glass turntable and roller ring correctly installed.
3. Operating Instructions
Your SHARP Countertop Microwave Oven offers a variety of features for convenient cooking and reheating.

Figure 3.1: Detailed view of the control panel, highlighting the various cooking options and numerical keypad.
Basic Microwave Cooking:
- Place food in a microwave-safe container on the turntable.
- Close the oven door securely.
- Enter desired cooking time using the number pad.
- Press the 'START/+30 SEC' button to begin cooking.
Power Levels:
The oven features 10 power levels for precise cooking control. To adjust the power level:
- Enter desired cooking time.
- Press the 'POWER LEVEL' button.
- Enter the desired power level (1-10) using the number pad.
- Press 'START/+30 SEC'.
Sensor Cook Technology:
Sensor Cook automatically adjusts cooking time and power for optimal results. Available options include Potato, Beverage, Veggie, Frozen Entree, Popcorn, Sensor Reheat, Meat, Poultry, and Fish.
- Place food in the oven.
- Press the desired Sensor Cook button (e.g., 'POTATO', 'POPCORN').
- The oven will automatically detect the food's moisture and adjust cooking.
Auto Defrost:
The Auto Defrost feature allows for quick and accurate thawing based on weight or time.
- Weight Defrost: Press 'AUTO DEFROST', enter the food's weight, then press 'START/+30 SEC'.
- Time Defrost: Press 'TIME DEFROST', enter the desired defrost time, then press 'START/+30 SEC'.
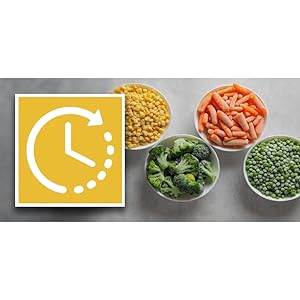
Figure 3.2: Illustration of food items suitable for the Auto Defrost function.
Express Cook:
For quick heating, simply press any number button (1-6) for 1 to 6 minutes of cooking at full power. Press 'START/+30 SEC' to add 30 seconds to any cooking cycle.
Child Lock Feature:
The Child Lock feature prevents unintended operation of the microwave oven, enhancing safety in households with children. This model includes a child-resistant door lock.
Video 3.1: Demonstrates how the child-resistant door lock functions during a cooking cycle, preventing the door from opening.
Video 3.2: Instructions on how to enable or disable the child-resistant door lock feature.
Video 3.3: Shows how the child-resistant door lock remains engaged even after the cooking cycle is complete, requiring manual unlock.
4. Maintenance and Cleaning
Regular cleaning and maintenance will ensure the longevity and optimal performance of your microwave oven.
Cleaning the Interior:
- Wipe the oven cavity with a soft cloth and mild detergent after each use.
- For stubborn stains, boil a cup of water with a few lemon slices in the microwave for 5-10 minutes, then wipe clean.
- The glass turntable and roller ring can be removed and washed in warm soapy water or in the dishwasher.
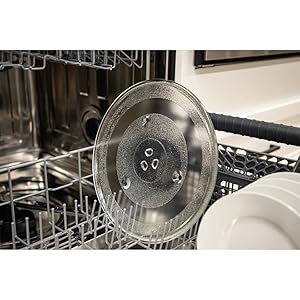
Figure 4.1: The removable glass turntable is dishwasher-safe for easy cleaning.
Cleaning the Exterior:
- Wipe the exterior surfaces with a soft, damp cloth. Avoid abrasive cleaners.
- Clean the control panel with a soft, damp cloth. Do not use excessive water.
5. Troubleshooting
If you experience issues with your microwave oven, refer to the following common problems and solutions.
Common Issues:
- Oven does not start: Check if the power cord is securely plugged in. Ensure the door is closed properly. Check your household fuse or circuit breaker.
- Food not heating: Ensure the cooking time and power level are set correctly. Check if the door is fully closed.
- Turntable not rotating: Ensure the turntable and roller ring are correctly positioned. Check for any obstructions beneath the turntable.
- Unusual noise during operation: This could be due to improper placement of the turntable or food containers. Reposition items and ensure the turntable is seated correctly.
Video 5.1: Guide on how to identify and fix buzzing or rattling noises that may occur during microwave operation.
6. Specifications
Detailed technical specifications for the SHARP Countertop Microwave Oven SMC2266KS.
| Feature | Detail |
|---|---|
| Model Number | SMC2266KS |
| Capacity | 2.2 Cubic Feet |
| Wattage | 1200 watts |
| Voltage | 120 Volts (AC) |
| Product Dimensions (D x W x H) | 19.6"D x 24.4"W x 13.6"H |
| Item Weight | 33.7 Pounds |
| Material | Stainless Steel |
| Special Feature | Defrost, Turntable, Child Lock |
| Installation Type | Countertop |
| Interior | Gray Interior, LED Interior Lighting |
| Display | White LED Display |
| Turntable Size | 16.5 inches |

Figure 6.1: Key dimensions of the SHARP Countertop Microwave Oven SMC2266KS.
7. Warranty and Support
For warranty information and customer support, please refer to the warranty card included with your product or visit the official Sharp website. Keep your proof of purchase for any warranty claims.
For further assistance, you may contact Sharp customer service through their official channels.


