
1. Introduction
Thank you for choosing the Dr.meter High Precision 0.01 pH Tester, Model PH838. This device is designed to provide accurate and reliable pH measurements for a wide range of applications. This manual provides detailed instructions for the proper setup, operation, maintenance, and troubleshooting of your pH tester to ensure optimal performance and longevity.
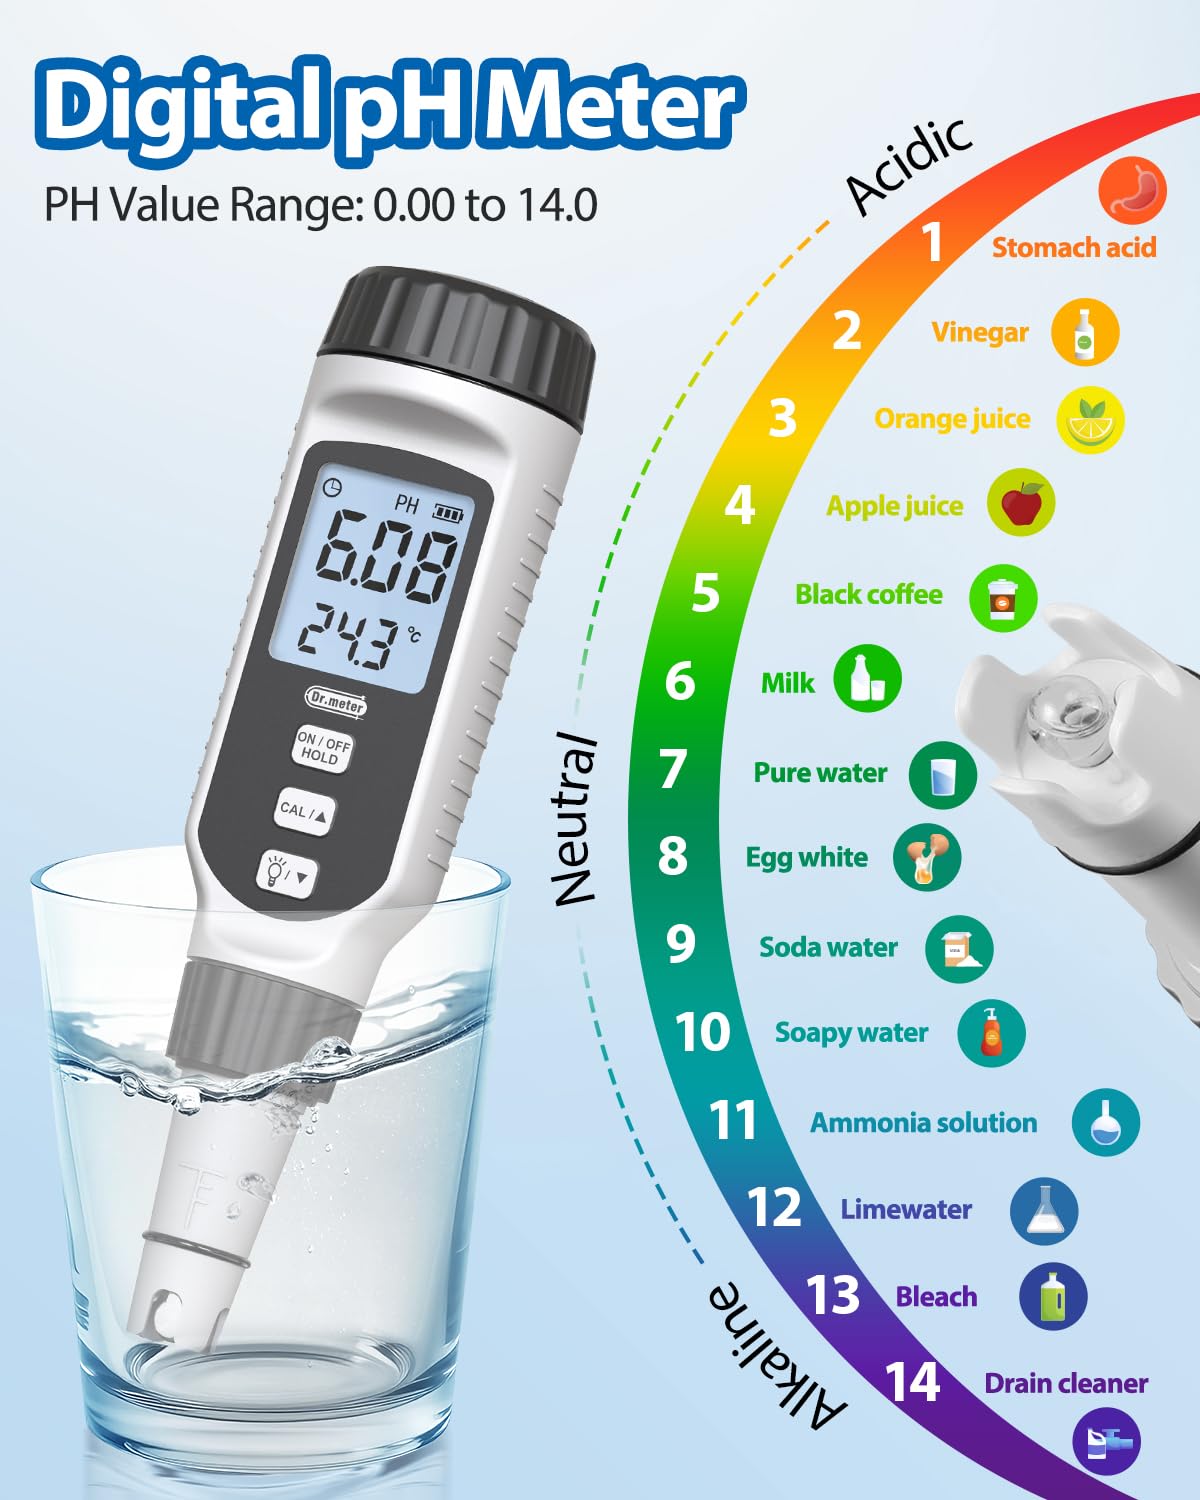
Image 1.1: Dr.meter Digital pH Meter illustrating the pH value range from 0.00 to 14.0, categorized into Acidic, Neutral, and Alkaline, with examples of common substances.
2. Product Features
- High Precision 0.01: Equipped with a sensitive glass electrode sensor, providing accurate pH readings from 0 to 14.0 with a testing accuracy of up to 0.01.
- Automatic Temperature Compensation (ATC): Ensures accurate readings across varying temperatures.
- Clear Backlit LCD Display: Large, backlit screen for easy reading of pH and temperature values, even in low light conditions.
- Two-Color Alarm Display: The display changes from white to red if the pH is below 3.5 or above 12.5, providing a clear visual alert for strong acid or alkali conditions.
- Automatic Shut-off: For energy efficiency, the pH meter automatically turns off after 15 minutes of inactivity.
- Wide Application Range: Suitable for various applications including pools, aquaculture, aquariums, brewing, and drinking water testing.
3. Package Contents

Image 3.1: The Dr.meter pH Tester shown with its included accessories: calibration powders, potassium chloride solution, and a protective storage bag.
Upon unpacking, please ensure all items are present:
- Dr.meter High Precision 0.01 pH Tester (Model PH838)
- 6 x Calibration Powder Packets (2x pH 4.00, 2x pH 6.86, 2x pH 9.18)
- 2 x Potassium Chloride (KCl) Powder Packets
- Storage Bag
- User Manual
4. Product Diagram
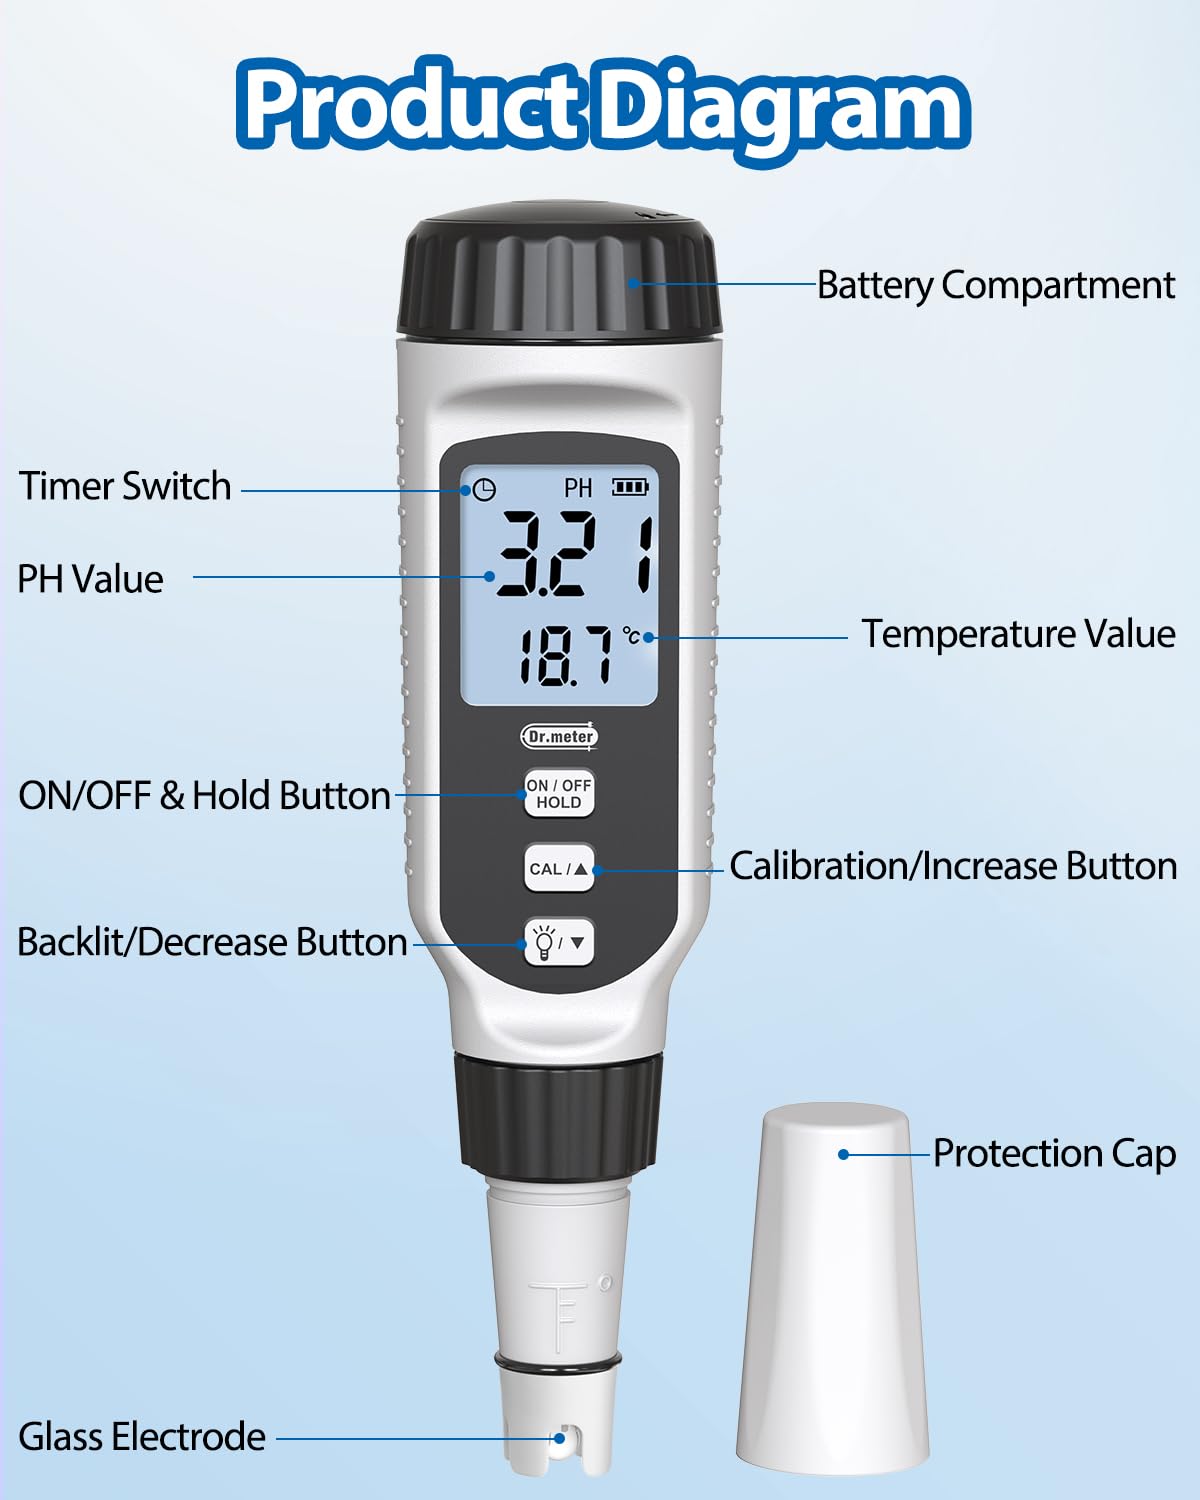
Image 4.1: Detailed diagram of the Dr.meter pH Tester with key components labeled for easy identification.
- Battery Compartment
- Timer Switch (for auto-off function)
- pH Value Display
- Temperature Value Display
- ON/OFF & Hold Button
- Calibration/Increase Button (CAL/▲)
- Backlit/Decrease Button (Light/▼)
- Glass Electrode
- Protection Cap
5. Setup
5.1 Battery Installation
The Dr.meter PH838 pH tester requires 2x AA batteries (not included). To install:
- Twist and remove the battery compartment cap located at the top of the device.
- Insert two AA batteries, ensuring correct polarity (+/-).
- Securely replace the battery compartment cap.
5.2 Initial Preparation
- Remove the protective cap from the bottom of the electrode.
- Rinse the electrode with distilled water or clean tap water. Gently blot dry with a clean tissue.
- It is recommended to perform a calibration before first use and after prolonged storage.
6. Operating Instructions
6.1 Powering On/Off
- Press the ON/OFF & Hold button to turn the device on.
- Press and hold the ON/OFF & Hold button for a few seconds to turn the device off.
6.2 Calibration (3-Point Calibration)
For accurate results, calibrate the device using the provided buffer powders. A 3-point calibration (pH 4.00, pH 6.86, pH 9.18) is recommended.

Image 6.1: Illustration of the 3-point calibration process using pH 4.00, pH 6.86, and pH 9.18 buffer solutions.
- Prepare the buffer solutions: Dissolve each calibration powder packet (pH 4.00, pH 6.86, pH 9.18) in 250ml of distilled water.
- Turn on the pH tester.
- Immerse the electrode into the pH 6.86 buffer solution (the neutral point). Ensure the electrode is fully submerged.
- Press and hold the CAL/▲ button until the display shows 'CAL' and the reading stabilizes to 6.86. Release the button.
- Rinse the electrode with distilled water and gently blot dry.
- Immerse the electrode into the pH 4.00 buffer solution.
- Press and hold the CAL/▲ button until the display shows 'CAL' and the reading stabilizes to 4.00. Release the button.
- Rinse the electrode with distilled water and gently blot dry.
- Immerse the electrode into the pH 9.18 buffer solution.
- Press and hold the CAL/▲ button until the display shows 'CAL' and the reading stabilizes to 9.18. Release the button.
- Rinse the electrode with distilled water. The calibration is now complete.
Important: The glass electrode is delicate. Handle with care and avoid testing strong acids, strong alkalis, or high-temperature liquids that may damage it.
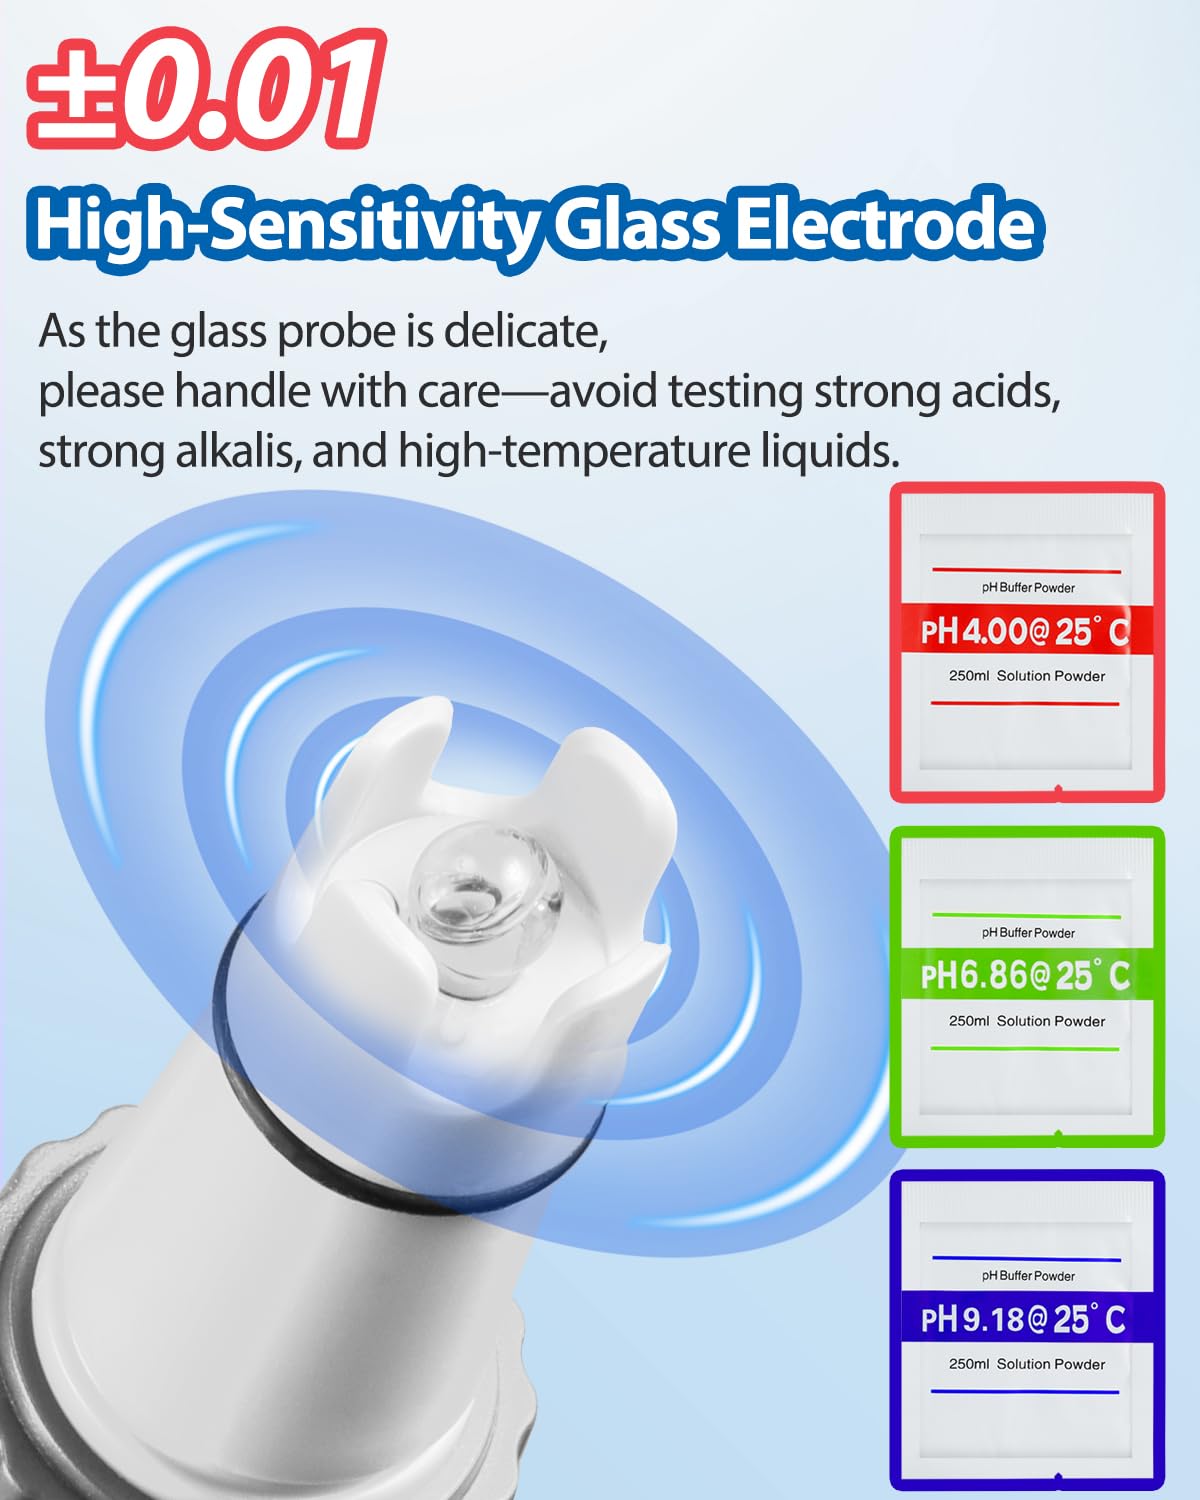
Image 6.2: Close-up of the high-sensitivity glass electrode and the three types of pH buffer powders used for calibration.
6.3 Taking Measurements
- Turn on the pH tester.
- Immerse the electrode into the sample solution up to the immersion line.
- Gently stir the solution and wait for the reading to stabilize (typically a few seconds).
- Read the pH value and temperature displayed on the LCD screen.
- To hold the current reading, press the ON/OFF & Hold button briefly. Press again to release.
- After measurement, rinse the electrode with distilled water and replace the protective cap.
6.4 Understanding the Display

Image 6.3: The large backlit LCD display clearly showing pH and temperature values for easy readability.
- The top large number indicates the pH value.
- The bottom smaller number indicates the temperature in Celsius.
- Press the Backlit/▼ button to toggle the backlight on or off.
6.5 Alarm Function

Image 6.4: The pH tester's screen displaying a red backlight, indicating a pH reading outside the normal range (below 3.5 or above 12.5).
The device features a two-color alarm display:
- If the pH level is below 3.5 (strong acid) or above 12.5 (strong alkali), the display backlight will change from white to red for 15 minutes to alert the user.
7. Maintenance
7.1 Electrode Cleaning
Regular cleaning of the electrode is crucial for accurate readings:
- After each use, rinse the electrode thoroughly with distilled water.
- If the electrode is visibly dirty or readings become erratic, soak the electrode in a cleaning solution (e.g., a mild detergent solution or specialized electrode cleaning solution) for 10-20 minutes, then rinse thoroughly with distilled water.
7.2 Electrode Storage
To maintain the accuracy and prolong the lifespan of the electrode:
- Always keep the electrode moist. Store it with a few drops of potassium chloride (KCl) storage solution in the protective cap.
- If the electrode dries out, soak it in KCl storage solution for several hours before use.
- Regularly add potassium chloride solution to the protective cap to ensure the electrode remains hydrated.
7.3 General Care
- Store the device in a cool, dry place away from direct sunlight.
- Avoid dropping or subjecting the device to strong impacts.
- Replace batteries when the low battery indicator appears on the display.
8. Troubleshooting
| Problem | Possible Cause | Solution |
|---|---|---|
| Inaccurate readings | Electrode is dirty or dry; Calibration is outdated or incorrect; Low battery. | Clean the electrode and re-hydrate; Perform a 3-point calibration; Replace batteries. |
| Display shows 'Err' or '---' | Electrode malfunction; Out of measurement range. | Ensure electrode is properly submerged; Contact customer support if issue persists. |
| Device does not turn on | Batteries are dead or incorrectly installed. | Check battery polarity; Replace with new AA batteries. |
9. Specifications
| Feature | Specification |
|---|---|
| Model Number | PH838 |
| Measurement Range | 0.00 - 14.00 pH |
| Measurement Precision | ± 0.01 pH |
| Temperature Range | 0.1 - 60.0 °C (32.0 - 140.0 °F) |
| Automatic Temperature Compensation (ATC) | Yes |
| Display | Backlit LCD |
| Power Supply | 2 x AA Batteries (not included) |
| Automatic Shut-off | 15 minutes |
| Material | PTFE (Polytetrafluoroethylene) |
| Package Dimensions | 22.4 x 9.8 x 5.7 cm |
| Weight | 270 grams |
| Country of Origin | China |
10. Intended Use

Image 10.1: Visual guide indicating suitable and unsuitable applications for the Dr.meter pH Tester.
10.1 Suitable For:
- Hydroponic Gardening
- Fish Tanks / Aquariums
- Brewing
- Swimming Pools
- Beverages
- Drinking Water
10.2 Unsuitable For:
- Medical Testing
- Laboratory Testing (professional grade)
Warning: This product is not designed for medical or professional laboratory purposes. Using it for such applications may lead to inaccurate results and potential risks.
11. Warranty and Support
Dr.meter products are designed for reliability and performance. For warranty information, please refer to the documentation provided at the time of purchase or visit the official Dr.meter website. If you encounter any issues or have questions regarding your PH838 pH Tester, please contact Dr.meter customer support for assistance. Ensure you have your model number (PH838) and purchase details ready when contacting support.
