1. Introduction
This manual provides comprehensive instructions for the installation, operation, maintenance, and troubleshooting of your Neewer Low Profile Mic Arm Desk Mount, model MS002. Please read this manual thoroughly before use to ensure proper functionality and safety.

Figure 1: Neewer Low Profile Mic Arm Desk Mount (MS002) with included accessories.
2. Package Contents
Verify that all items listed below are present in your package:
- 1 x Desktop C Clamp
- 1 x Bottom Bracket
- 1 x Spring Loaded Arm
- 1 x 5mm L Shaped Hex Key
- 1 x 4mm L Shaped Hex Key
- 1 x 3mm L Shaped Hex Key
- 1 x 1/4" to 3/8" Screw Adapter
- 1 x 1/4" to 5/8" Screw Adapter
- 1 x User Manual

Figure 2: Contents of the Neewer Low Profile Mic Arm Desk Mount package.
3. Setup Instructions
Follow these steps to properly install your mic arm desk mount:
- Attach the C-Clamp: Securely attach the desktop C-clamp to the edge of your desk. Ensure the desk thickness is between 0.4 inches (10mm) and 3.1 inches (80mm). Tighten the clamp firmly using the screw mechanism until it is stable. The non-slip pads on the clamp protect your desk surface.
- Insert the Bottom Bracket: Slide the bottom bracket of the mic arm into the hole on the C-clamp.
- Connect the Spring-Loaded Arm: Insert the spring-loaded arm into the top of the bottom bracket.
- Adjust Pneumatic Damping: The pneumatic arm features adjustable rebound damping. Use the provided hex key to adjust the strength of the pneumatic arm. This allows for stable positioning of microphones up to 5.5lb (2.5kg). Caution: When adjusting, avoid facing the boom arm to prevent injuries from bouncing.
- Attach Microphone/Accessory: The arm has a 1/4" screw at the top. Use the included 1/4" to 3/8" or 1/4" to 5/8" screw adapters as needed to connect your microphone, camera, monitor, LED video light, phone holder, or action camera adapter.
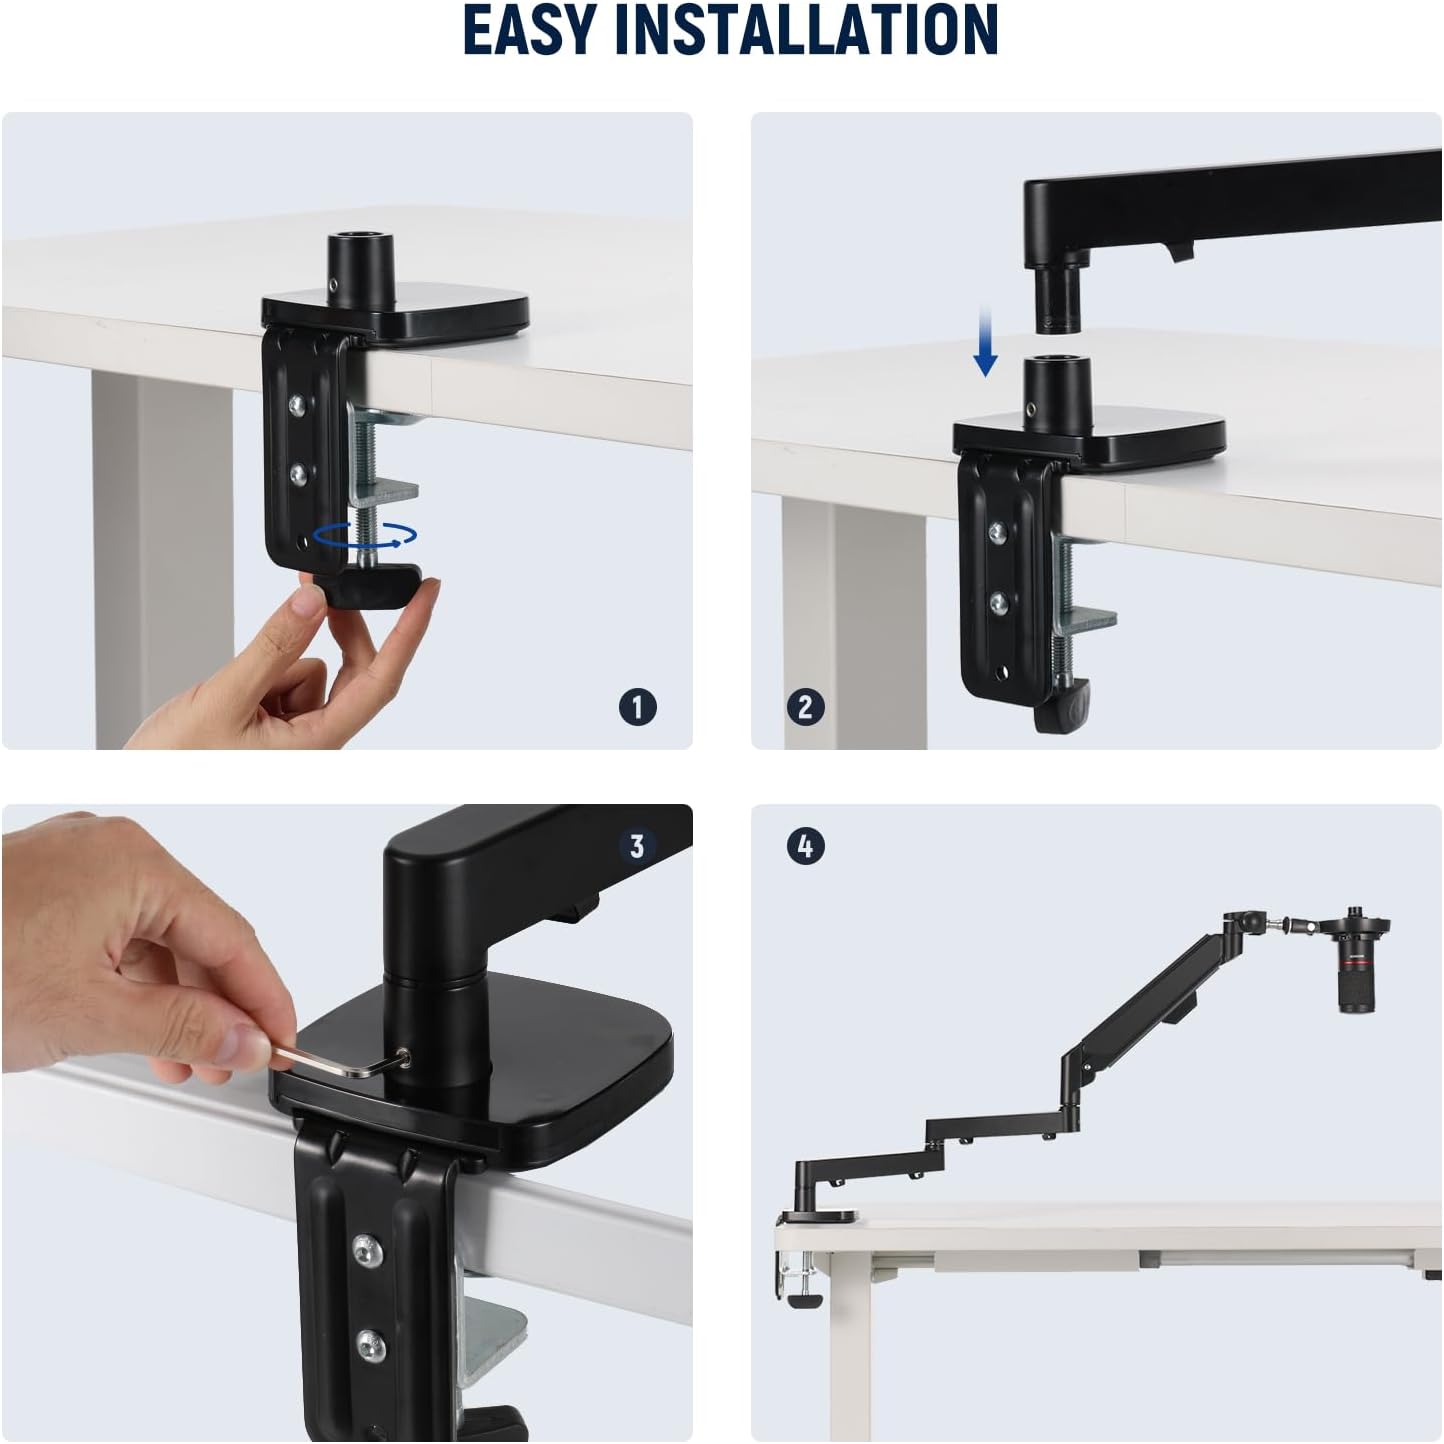
Figure 3: Step-by-step guide for easy installation of the mic arm.
4. Operating Instructions
The Neewer MS002 mic arm offers extensive adjustability for optimal positioning.
4.1 Extended Reach and Flexible Adjustment
- The arm extends horizontally up to 30.2 inches (76.8cm) and vertically up to 11.9 inches (30cm).
- The bottom bracket allows for 360° pan rotation.
- The microphone mounting point offers 360° swivel and 160° tilt.
- Damping adjustment threads at each joint allow you to tailor the desired tension using the included hex keys. Note that these cannot be fully locked.
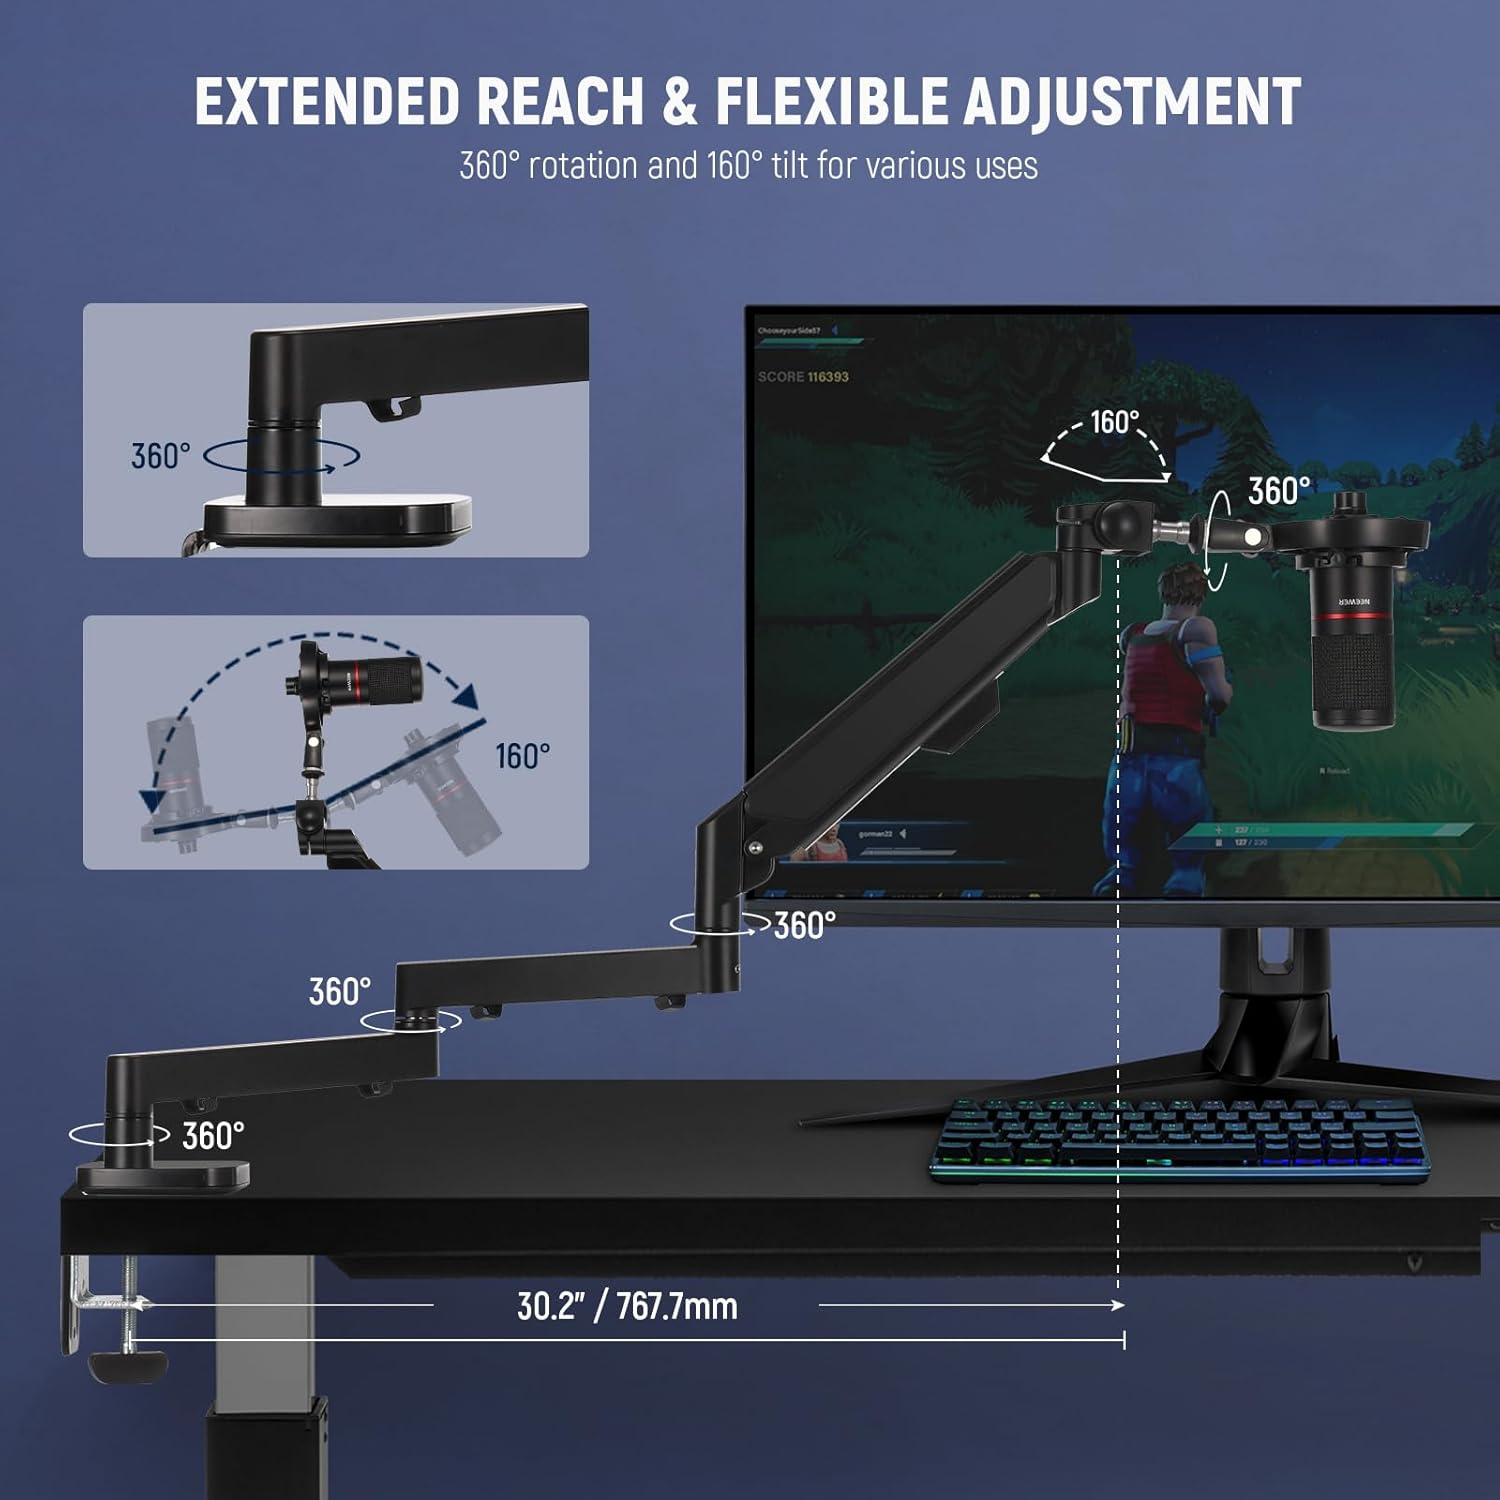
Figure 4: Demonstrating the arm's extended reach and flexible adjustment options.
4.2 Pneumatic Damping System
The advanced spring-loaded pneumatic balancing system ensures smooth, stable, and quiet movement, making it suitable for video recording or streaming. It is designed to support microphones weighing up to 5.5lb (2.5kg).
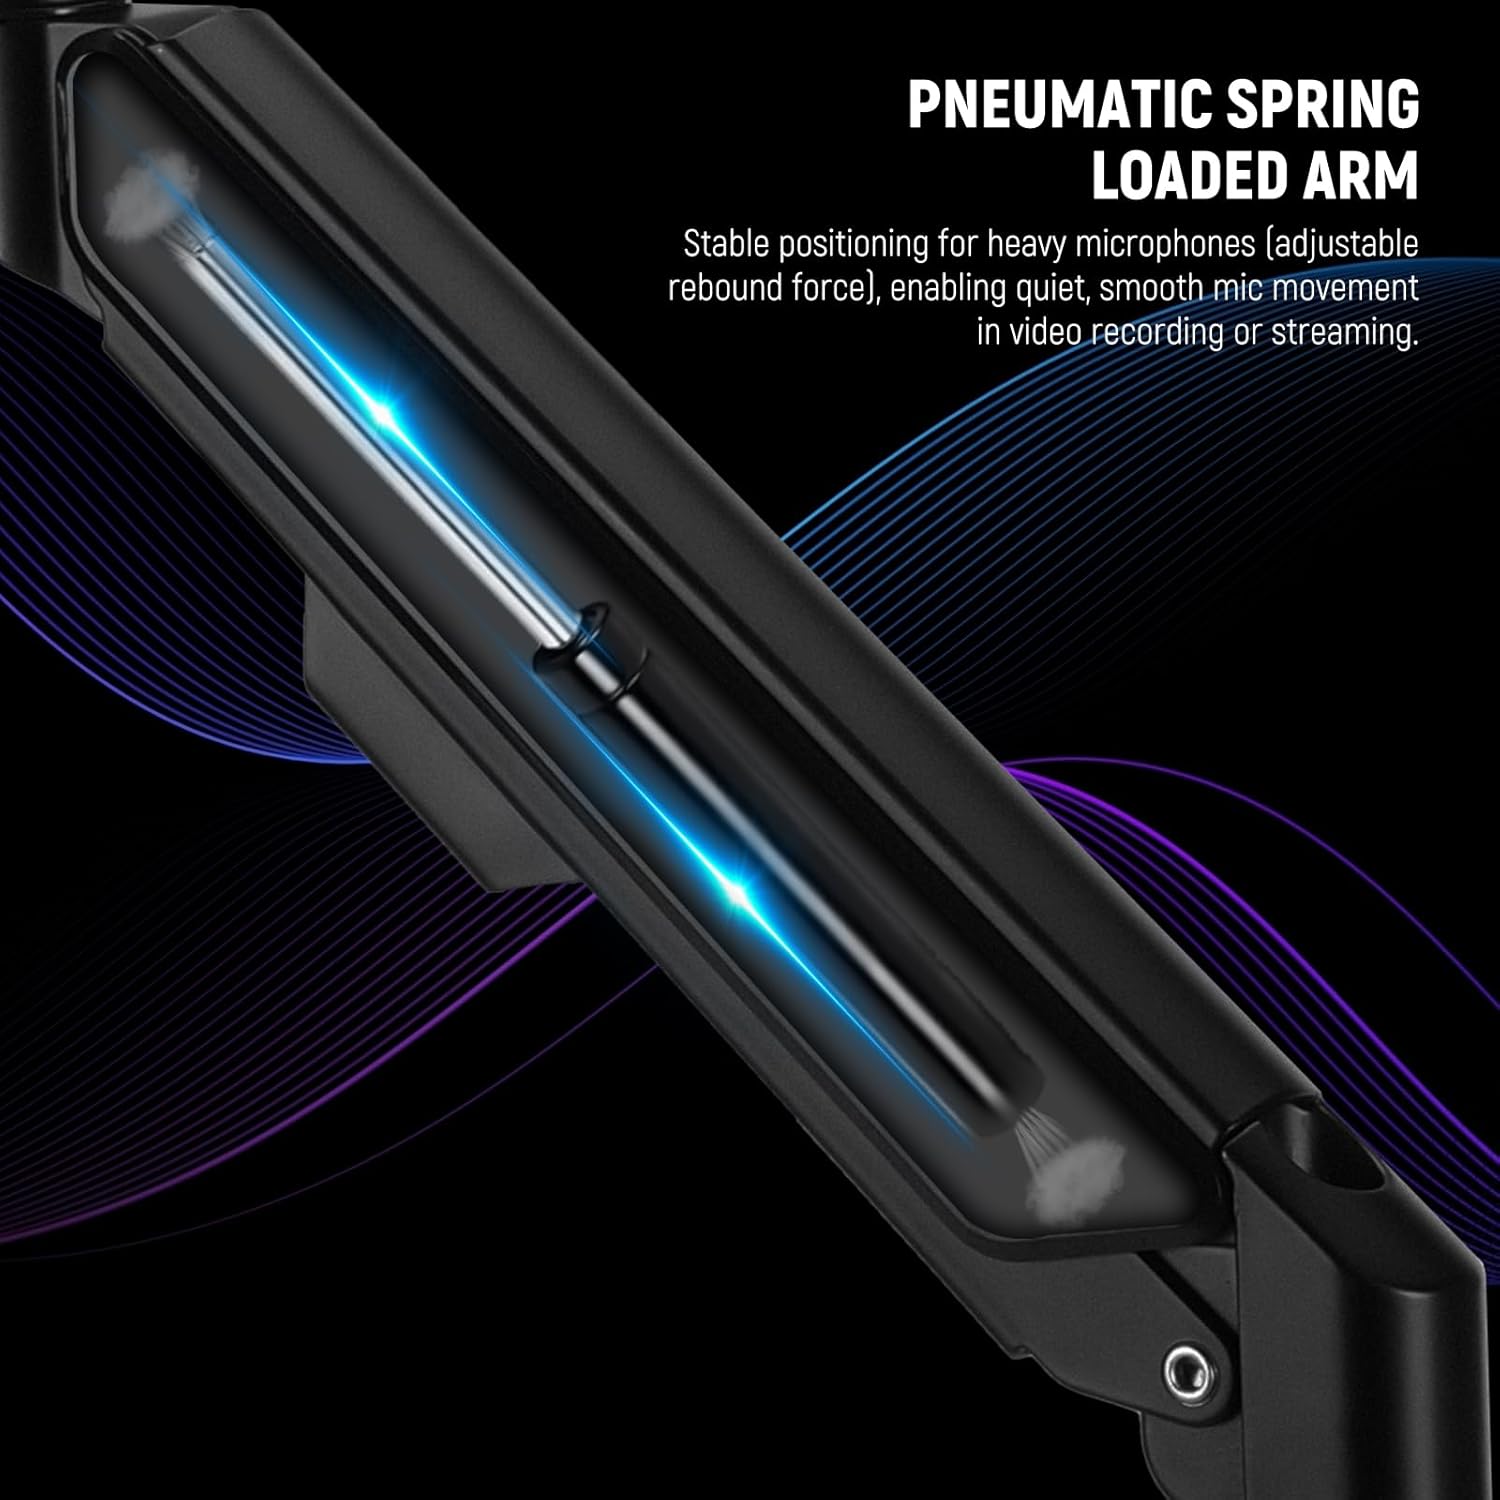
Figure 5: Internal view of the pneumatic spring-loaded arm.
4.3 Cable Management
The mic arm features multiple integrated cable channels to organize and conceal wires, contributing to a tidy workspace.

Figure 6: Cable management channels keep your workspace organized.
4.4 Universal Compatibility
The mic arm is compatible with a wide range of microphones and accessories, including but not limited to:
- Blue Yeti
- HyperX QuadCast
- SoloCast
- Blue Snowball
- Shure SM7B
- Shure MV7
- Audio-Technica AT2020, AT2020USB+, AT2035
- ATR2500-USB, ATR2100-USB
- Fifine K669B (excluding shock mount)
The included 1/4" to 3/8" and 1/4" to 5/8" screw adapters ensure broad compatibility.

Figure 7: Examples of compatible microphones and screw adapters.
5. Maintenance
Regular maintenance ensures the longevity and optimal performance of your mic arm.
- Cleaning: Wipe the arm and clamp surfaces with a soft, dry cloth. For stubborn dirt, use a slightly damp cloth and mild soap, then dry thoroughly. Avoid abrasive cleaners or solvents.
- Check Connections: Periodically inspect all screws and the C-clamp for tightness. Re-tighten as necessary to maintain stability.
- Pneumatic Arm Adjustment: If the arm feels too loose or too stiff, use the appropriate hex key to adjust the pneumatic damping as described in the setup section.
- Cable Management: Ensure cables are routed correctly through the channels to prevent pinching or damage.
6. Troubleshooting
If you encounter issues with your mic arm, refer to the following common problems and solutions:
| Problem | Possible Cause | Solution |
|---|---|---|
| Arm does not hold position or sags. | Pneumatic damping needs adjustment; microphone too heavy. | Adjust the pneumatic arm strength using the hex key. Ensure microphone weight does not exceed 5.5lb (2.5kg). |
| Arm feels too stiff or difficult to move. | Pneumatic damping is set too high. | Adjust the pneumatic arm strength using the hex key to a lower setting. |
| Mount wobbles or is unstable. | C-clamp is not tightened sufficiently or desk surface is uneven. | Ensure the C-clamp is securely tightened to the desk. Verify desk thickness is within specified limits. |
| Cables are messy or interfering with arm movement. | Cables not routed through integrated channels. | Route all cables through the designated cable management channels on the arm. |
7. Specifications
| Feature | Detail |
|---|---|
| Model Number | MS002 |
| Product Dimensions (L x W x H) | 16.61 x 9.88 x 4.69 inches |
| Item Weight | 7.14 pounds (114.29 ounces) |
| Material | Aluminum, Plastic, Stainless Steel |
| Supported Desktop Thickness | 0.4" - 3.1" (10-80mm) |
| Maximum Load Capacity | 5.5lb (2.5kg) |
| Horizontal Reach | Up to 30.2" (76.8cm) |
| Vertical Adjustment Range | 3.7" - 15.6" (9.4-40cm) above desk |
| Microphone Mount Thread | 1/4" (with 3/8" and 5/8" adapters included) |
| Rotation (Bottom Bracket) | 360° Pan |
| Rotation/Tilt (Microphone Mount) | 360° Swivel, 160° Tilt |
8. Warranty and Support
For warranty information, please refer to the documentation included with your purchase or visit the official NEEWER website. If you require technical assistance or have questions regarding your product, please contact NEEWER customer support through their official channels.


