
1. Introduction
This manual provides comprehensive instructions for the installation, operation, and maintenance of your Intellitronix Analog Gauge Panel, Model WL6003. This direct-fit instrument cluster is designed specifically for 1967-1972 Chevy C10 pickup trucks, offering a modern upgrade while retaining a classic aesthetic. Please read all instructions carefully before proceeding with installation or operation.
2. Product Overview
The Intellitronix Analog Gauge Panel WL6003 is an integrated dash instrument cluster designed to replace the original factory unit in 1967-1972 Chevy C10 trucks. It features a complete set of analog gauges with high visibility and modern accuracy.
- Direct OEM Fit: Engineered for a precise fit, requiring no cutting or modifications to the factory dash.
- Comprehensive Instrumentation: Includes a speedometer, tachometer, fuel level gauge, oil pressure gauge, water temperature gauge, and voltmeter.
- Modern Technology, Classic Look: Combines retro analog styling with contemporary electronic accuracy.
- Integrated Sensors: Supplied with all necessary sensors and sending units for oil pressure, water temperature, and fuel level.

Image: The Intellitronix Analog Gauge Panel, model WL6003, shown installed in a vehicle dashboard, displaying blue illumination. This panel integrates multiple gauges including speedometer, tachometer, and auxiliary gauges.
3. Package Contents
The Intellitronix Analog Gauge Panel WL6003 package includes the following components:
- Analog Gauge Panel Assembly (Model WL6003)
- Speedometer
- Tachometer
- Fuel Level Gauge
- Oil Pressure Gauge
- Water Temperature Gauge
- Voltmeter
- Oil Pressure Sending Unit
- Water Temperature Sending Unit
- Fuel Level Sending Unit (if applicable, verify vehicle compatibility)
- Wiring Harness
- Mounting Hardware
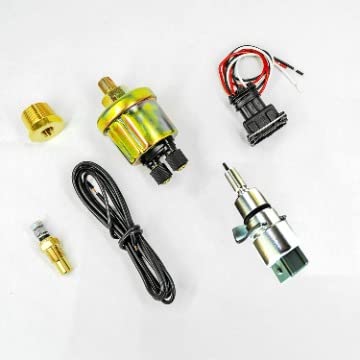
Image: A collection of sensors and wiring components, including an oil pressure sender, water temperature sender, and wiring harness, which are part of the gauge panel kit.
4. Setup and Installation
Installation of the Intellitronix Analog Gauge Panel requires basic automotive electrical and mechanical knowledge. If you are not comfortable performing this installation, it is recommended to seek assistance from a qualified professional.
4.1 Safety Precautions
- Always disconnect the vehicle's battery before beginning any electrical work.
- Ensure the vehicle is parked on a level surface with the parking brake engaged.
- Wear appropriate personal protective equipment (PPE), such as safety glasses.
4.2 Pre-Installation Steps
- Disconnect the negative terminal of the vehicle's battery.
- Carefully remove the existing instrument cluster from the dashboard. Refer to your vehicle's service manual for specific removal procedures.
- Inspect the existing wiring for any damage or corrosion. Repair as necessary.
4.3 Sensor Installation
Install the provided sending units for oil pressure, water temperature, and fuel level. Ensure proper thread sealant is used where necessary to prevent leaks.
- Oil Pressure Sender: Locate the factory oil pressure sender port on the engine block. Remove the old sender and install the new Intellitronix sender.
- Water Temperature Sender: Locate the factory water temperature sender port, typically on the engine block or intake manifold. Remove the old sender and install the new Intellitronix sender.
- Fuel Level Sender: The fuel level sender is located in the fuel tank. Accessing and replacing this sender may require dropping the fuel tank. Ensure the new sender is compatible with your tank's depth and resistance range.
4.4 Wiring Connections
Connect the wiring harness to the new gauge panel and to the vehicle's electrical system. Follow the wiring diagram provided with your specific product for accurate connections. Key connections typically include:
- Power: Constant 12V, Switched 12V (Ignition), Ground.
- Lighting: Connect to vehicle's dimmer circuit for adjustable backlighting.
- Sensor Inputs: Connect wires from the newly installed oil pressure, water temperature, and fuel level senders.
- Speedometer: Connect to vehicle speed sensor (VSS) or a dedicated speedometer output.
- Tachometer: Connect to the negative side of the ignition coil or a dedicated tachometer output from the ECU/ECM.
- Turn Signals & High Beam: Connect to respective vehicle indicator circuits.
4.5 Panel Installation
- Carefully position the new Intellitronix gauge panel into the dashboard opening.
- Secure the panel using the provided mounting hardware. Do not overtighten.
- Reconnect the vehicle's battery.
- Test all gauges and indicator lights for proper function.
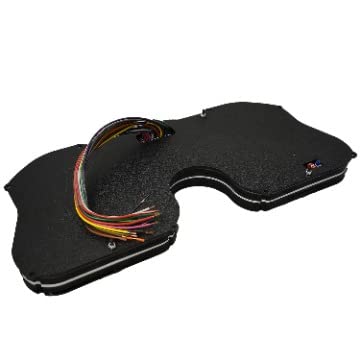
Image: The rear of the Intellitronix gauge panel, illustrating the integrated wiring harness and circuit board for electrical connections.
5. Operating Instructions
Once installed, the Intellitronix Analog Gauge Panel operates automatically with the vehicle's ignition. The gauges provide real-time information on your vehicle's performance and status.
5.1 Gauge Readings
- Speedometer (MPH): Displays vehicle speed.
- Tachometer (RPM): Displays engine revolutions per minute.
- Fuel Level: Indicates the amount of fuel in the tank.
- Oil Pressure: Shows the engine's oil pressure. Maintain within manufacturer specifications.
- Water Temperature: Displays engine coolant temperature. Monitor to prevent overheating.
- Voltmeter: Shows the vehicle's electrical system voltage. Typically, 12-14V when the engine is running.
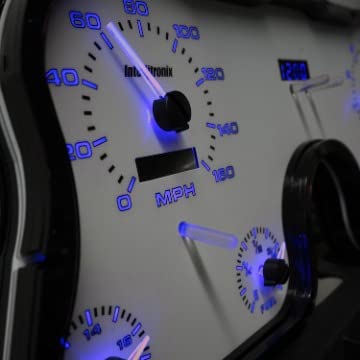
Image: A detailed view of the speedometer, featuring blue backlighting, an analog needle indicating speed in miles per hour, and a digital display for the odometer.
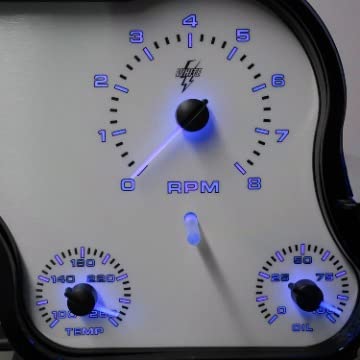
Image: A close-up of the tachometer, illuminated in blue, displaying engine RPM. Below it are smaller gauges for water temperature and oil pressure.
6. Maintenance
The Intellitronix Analog Gauge Panel is designed for durability and requires minimal maintenance. Regular cleaning and occasional checks are recommended.
- Cleaning: Use a soft, damp cloth to clean the gauge panel lens. Avoid abrasive cleaners or solvents that could damage the surface.
- Electrical Connections: Periodically check all wiring connections for tightness and corrosion. Ensure all sensor connections are secure.
- Sensor Functionality: If a gauge provides an erratic or no reading, inspect the corresponding sensor and its wiring for damage or improper installation.
7. Troubleshooting
If you encounter issues with your Intellitronix Analog Gauge Panel, refer to the following troubleshooting guide:
| Problem | Possible Cause | Solution |
|---|---|---|
| No power to panel/gauges | Blown fuse, loose power connection, disconnected battery. | Check vehicle fuses, verify battery connection, ensure main power and ignition wires are secure. |
| Inaccurate or no gauge reading | Faulty sensor, loose sensor connection, incorrect wiring. | Inspect the specific sensor and its wiring. Ensure connections are tight and correct according to the wiring diagram. Test sensor functionality if possible. |
| Backlighting not working | Loose lighting wire, dimmer switch issue, internal LED failure. | Check connection to vehicle's dimmer circuit. Ensure dimmer switch is not set to minimum. Contact support if LEDs are suspected. |
| Speedometer erratic or incorrect | Incorrect speedometer calibration, faulty VSS, loose VSS connection. | Refer to the Intellitronix calibration instructions (if applicable). Check VSS and its wiring. |
8. Specifications
Key specifications for the Intellitronix Analog Gauge Panel WL6003:
- Model Number: WL6003
- Application: 1967-1972 Chevy C10 Truck
- Material: Polycarbonate (PC)
- Item Weight: 6 Pounds
- Included Gauges: Speedometer, Tachometer, Fuel, Oil Pressure, Water Temperature, Voltmeter
- Included Components: Panel kit, sensors (oil pressure, water temperature, fuel level)
- Manufacturer: Intellitronix
9. Warranty and Support
Intellitronix products are proudly manufactured in the United States and backed by quality assurance. For specific warranty details, please refer to the documentation included with your purchase or visit the official Intellitronix website.
For technical assistance, troubleshooting, or warranty claims, please contact Intellitronix customer support directly. You can find contact information on their official website or through your authorized dealer.
Intellitronix Official Website: www.intellitronix.com