1. Introduction
Thank you for choosing the UCOCARE 4MP FHD Wireless Doorbell Camera X6. This manual provides detailed instructions for the installation, operation, and maintenance of your new doorbell camera. Please read this manual thoroughly before use to ensure proper functionality and safety. Keep this manual for future reference.
2. Package Contents
Verify that all items listed below are included in your package. If any items are missing or damaged, please contact UCOCARE customer service.
- 1 x UCOCARE 4MP FHD Wireless Doorbell Camera X6
- 1 x 32GB Micro SD Card (pre-installed)
- 1 x Wireless Indoor Chime (requires 3 AAA batteries, included)
- 1 x Charging Cable
- 1 x Set of Screws and Installation Tools
- 1 x User Manual
3. Product Overview
The UCOCARE X6 Wireless Doorbell Camera provides advanced security features for your home. It includes a 4MP camera for clear video, two-way audio, AI human detection, and local storage with a pre-installed 32GB SD card.

Figure 3.1: UCOCARE X6 Doorbell Camera, Chime, and Key Features.
Components
- Doorbell Camera: Main unit with camera, motion sensor, microphone, speaker, and doorbell button.
- Wireless Chime: Receives signals from the doorbell and plays a customizable ringtone indoors.
- Micro SD Card: For local video storage.
4. Setup
4.1 App Installation
- Download the 'CloudEdge' app from your smartphone's app store (iOS App Store or Google Play Store).
- Register for a new account or log in if you already have one.
4.2 Device Pairing
- Ensure your smartphone is connected to a 2.4 GHz Wi-Fi network. The doorbell camera does not support 5 GHz Wi-Fi.
- Power on the doorbell camera.
- Open the CloudEdge app and follow the on-screen instructions to add a new device.
- Scan the QR code on the doorbell camera or manually select the device type.
- Follow the prompts to connect the doorbell to your Wi-Fi network.
- Pair the wireless chime by pressing its pairing button and then pressing the doorbell button on the camera.

Figure 4.1: Stable 2.4 GHz Wi-Fi Connection.
4.3 Physical Installation
- Choose a suitable location for the doorbell camera, typically near your front door, ensuring a clear view and good Wi-Fi signal.
- Use the provided mounting bracket, screws, and tools to securely attach the doorbell camera to the wall.
- Ensure the doorbell is installed at an appropriate height for optimal viewing angle.
5. Operating Instructions
5.1 Live View and Video Quality
Access the live feed from your doorbell camera through the CloudEdge app. The camera offers 4MP Full HD resolution for clear day and night vision.
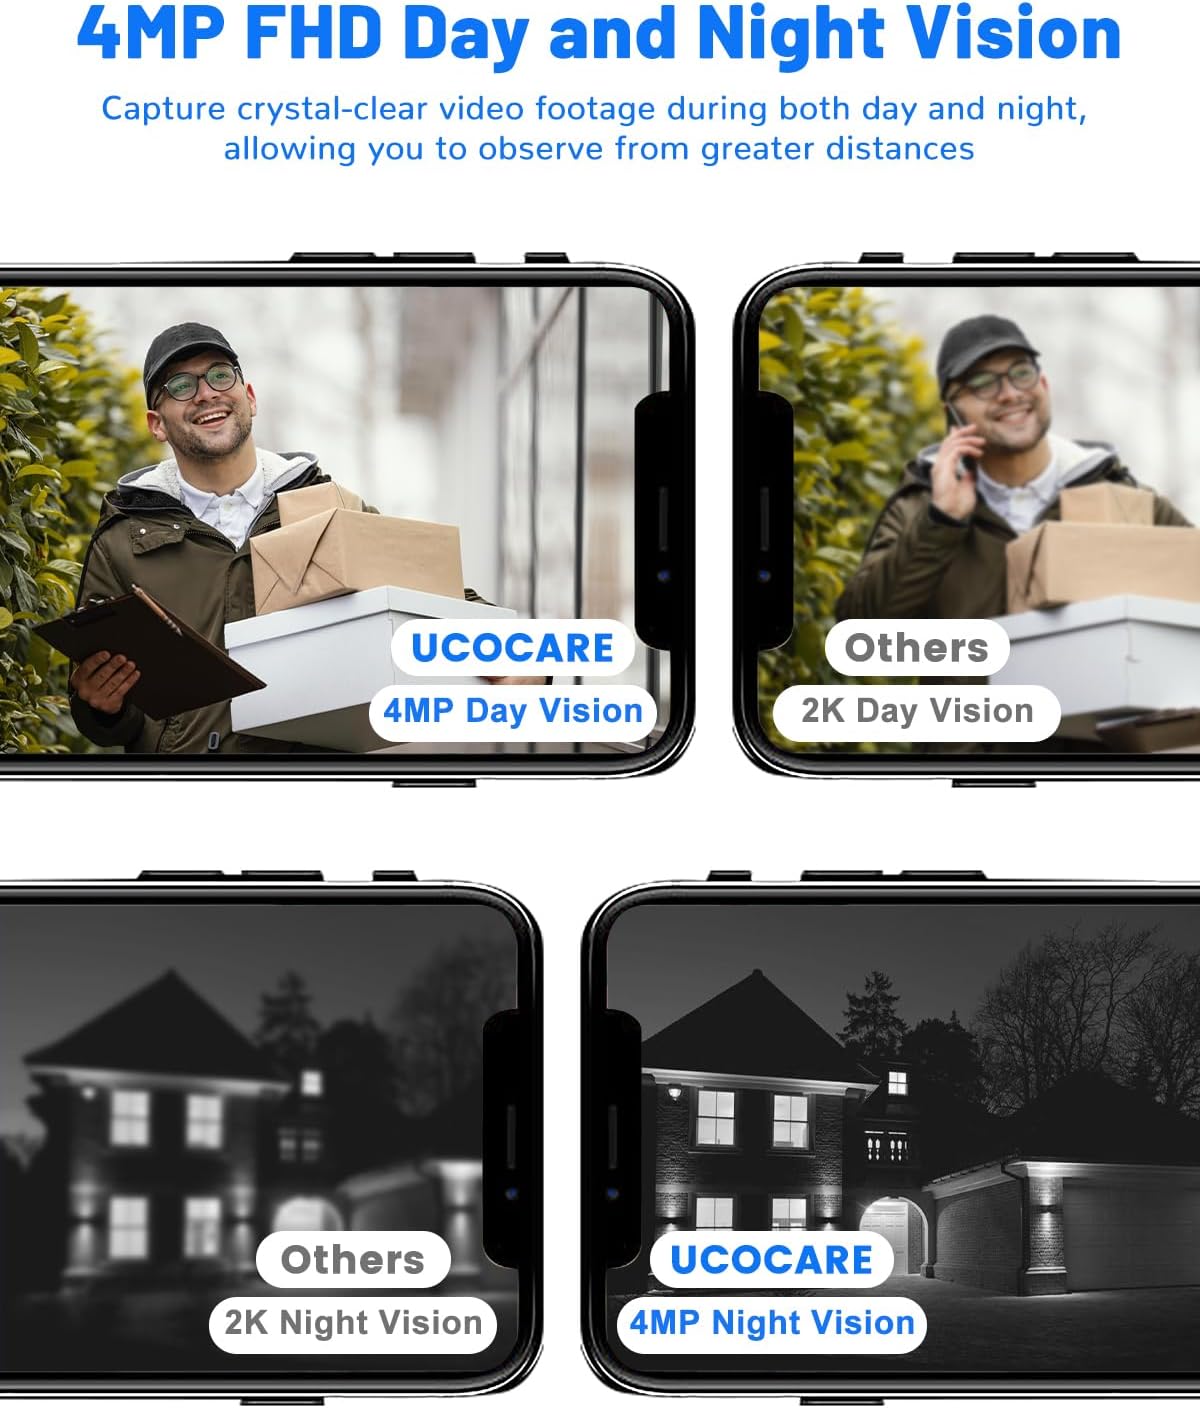
Figure 5.1: 4MP FHD Day and Night Vision.
The 4:3 aspect ratio provides a wider vertical field of view, allowing you to see visitors from head to toe and monitor packages on the ground without blind spots.

Figure 5.2: 4:3 Aspect Ratio for Comprehensive View.
5.2 Two-Way Audio and Voice Changer
Engage in real-time conversations with visitors at your door using the two-way audio feature. The app also includes a voice changer function to protect your identity, offering options like 'Original', 'Clown', and 'Uncle' voices.
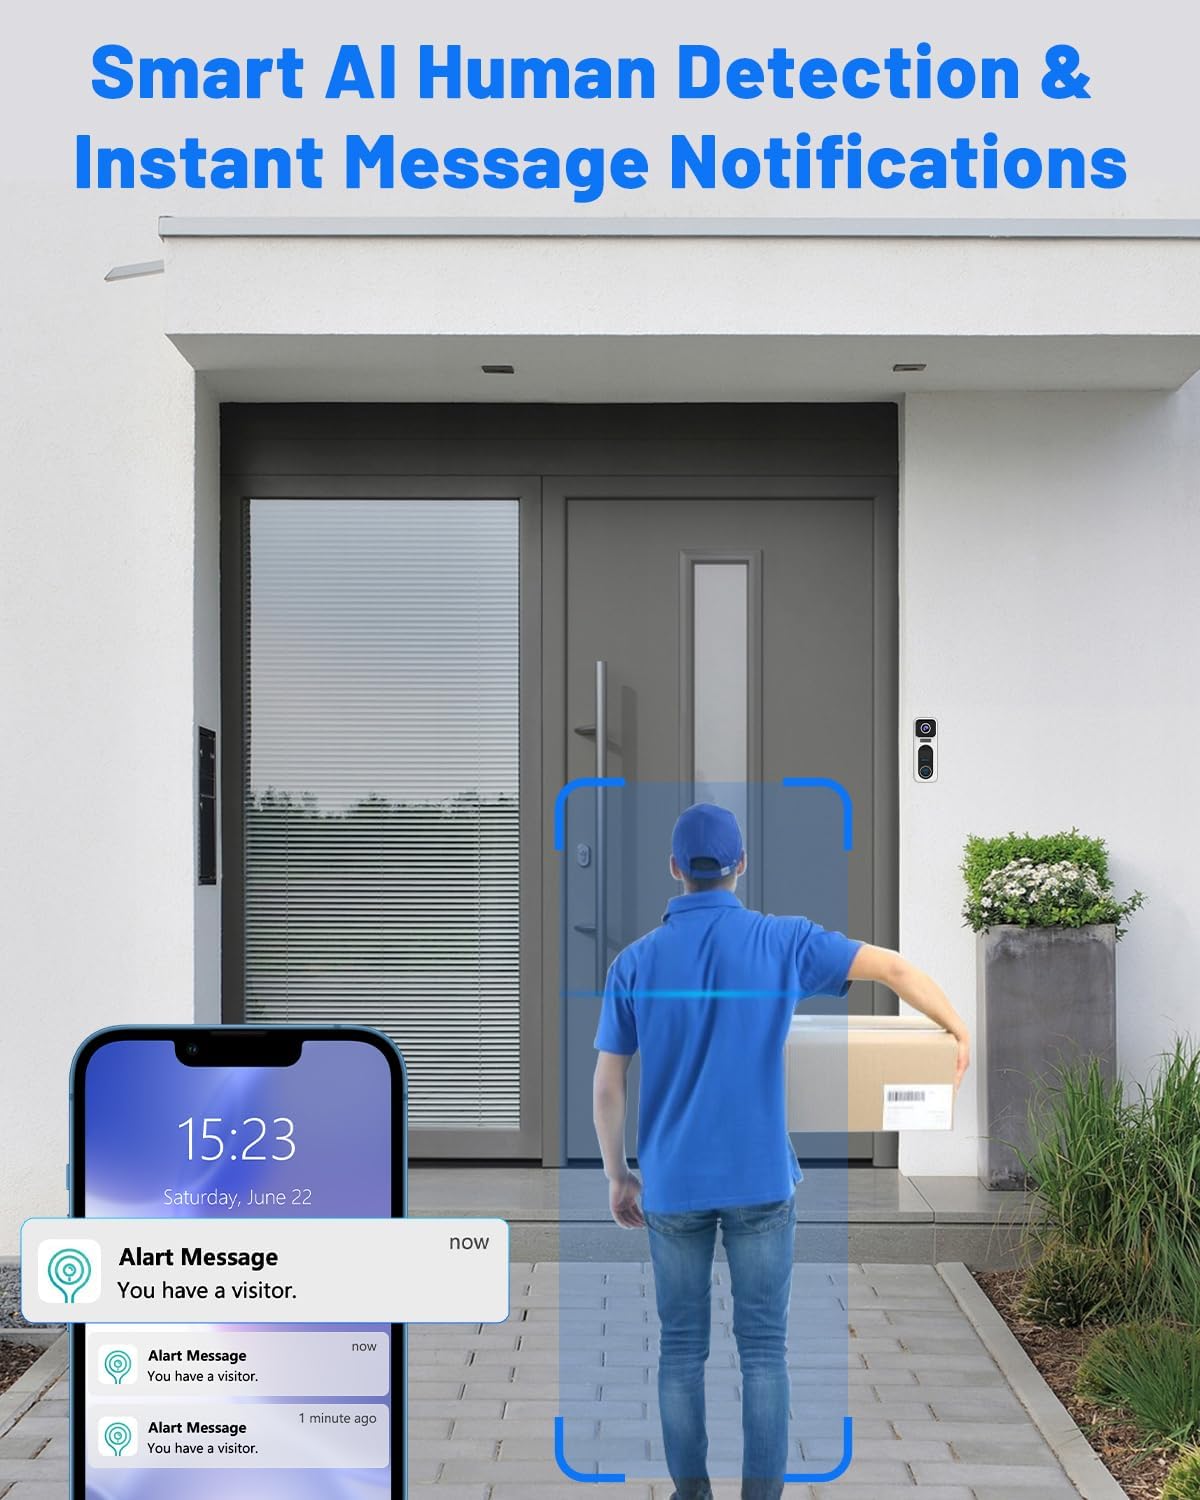
Figure 5.3: Two-Way Audio and Voice Changer Interface.
5.3 Motion Detection and Alerts
The doorbell camera features AI human detection, which intelligently identifies human presence and sends instant alert notifications to your smartphone. This minimizes false alarms from pets or inanimate objects.

Figure 5.4: Smart AI Human Detection and Instant Notifications.
You can customize detection zones and sensitivity settings within the app to focus on specific areas and reduce unwanted alerts.
5.4 Video Recording and Storage
The doorbell comes with a pre-installed 32GB Micro SD card for local storage, eliminating the need for monthly subscription fees. It supports up to 128GB SD cards (not included). Cloud storage options are also available.

Figure 5.5: 32GB Memory Card Pre-installed for Local Storage.
5.5 Security Features
The doorbell camera includes a siren alarm and voice warning capabilities to deter potential intruders. It can also trigger a tamper alarm if someone attempts to remove it.

Figure 5.6: Siren and Voice Warning for Enhanced Security.
5.6 Smart Assistant Integration
The UCOCARE X6 is compatible with Alexa and Google Assistant. You can use voice commands to view the live feed from your doorbell on compatible smart displays.

Figure 5.7: Works with Alexa and Google Assistant.
6. Maintenance
6.1 Battery Charging
The doorbell camera is equipped with a 10000 mAh rechargeable Lithium-ion battery. When the battery level is low, connect the doorbell to the provided charging cable and a compatible USB power adapter (not included). The app will notify you when charging is required.
6.2 Cleaning
To maintain optimal performance, periodically clean the camera lens and the doorbell's exterior with a soft, damp cloth. Avoid using harsh chemicals or abrasive materials.
6.3 Environmental Conditions
The UCOCARE X6 doorbell camera is IP66 waterproof, designed to withstand various weather conditions, including rain, snow, and dust. It operates effectively in temperatures ranging from -35°C to 60°C (-31°F to 140°F).

Figure 6.1: IP66 Waterproof and Weather Resistant.
7. Troubleshooting
- Device not connecting to Wi-Fi: Ensure your router is broadcasting a 2.4 GHz Wi-Fi signal. Confirm the Wi-Fi password is correct. Move the doorbell closer to the router during setup.
- No notifications: Check app notification settings on your phone and within the CloudEdge app. Ensure the doorbell has a stable internet connection.
- Poor video quality: Verify Wi-Fi signal strength. Clean the camera lens. Ensure there are no obstructions.
- Battery draining quickly: Reduce motion detection sensitivity or frequency. Adjust detection zones. Ensure the doorbell is not in an area with constant motion.
- Chime not ringing: Ensure the chime is powered on and paired with the doorbell. Check chime battery levels (if applicable).
8. Specifications
| Feature | Specification |
|---|---|
| Model Number | X6 |
| Video Resolution | 4MP FHD |
| Viewing Angle | 170 Degrees |
| Night Vision Range | 20 Meters |
| Wireless Connectivity | Wi-Fi (2.4 GHz only) |
| Battery Capacity | 10000 mAh Lithium-ion |
| Power Input | 5 Volts |
| Storage | 32GB Micro SD card (pre-installed), supports up to 128GB, Cloud Storage |
| Weather Resistance | IP66 |
| Operating Temperature | -35°C to 60°C (-31°F to 140°F) |
| Dimensions (L x W x H) | 12.7 x 7.62 x 17.78 cm |
| Weight | 580 grams |
| App Control | CloudEdge |
| Smart Home Integration | Alexa, Google Assistant |
9. Warranty Information
Please refer to your purchase documentation or the UCOCARE official website for detailed warranty information regarding your product. Warranty terms and conditions may vary by region and retailer.
10. Support
For technical assistance, product inquiries, or troubleshooting not covered in this manual, please contact UCOCARE customer service through the contact information provided on the official UCOCARE website or your purchase platform.


