Introduction
Thank you for choosing the Ledvion Smart Dimmable RGB LED Strip. This manual provides essential information for the safe and efficient installation, operation, and maintenance of your new LED strip. Please read this manual thoroughly before use and retain it for future reference.

Image: Ledvion Smart LED Strip 10M with packaging and accessories.
Safety Information
- Ensure the power supply is disconnected before installation or maintenance.
- This product operates at a safe 24V low voltage, reducing the risk of electric shock.
- For indoor use only. Do not expose to water or high humidity.
- Do not bend the LED strip sharply or apply excessive force, as this may damage the internal circuitry.
- Keep out of reach of children and pets.
- Use only the provided power adapter and remote control.
- If any part of the product is damaged, discontinue use immediately and contact customer support.

Image: Safety features and components of the Ledvion LED Strip.
What's in the Box
Please check the contents of your package against the list below:
- 1x Ledvion Smart LED Strip (10 meters)
- 1x Remote Control
- 1x Power Adapter
- 1x Switch/Controller
- 15x Mounting Clips
- 1x User Manual

Image: Detailed view of all components included in the Ledvion LED Strip package.
Setup and Installation
- Prepare the Surface: Ensure the installation surface is clean, dry, and smooth. Dust or moisture can affect the adhesive's effectiveness.
- Measure and Cut (Optional): If a shorter length is required, the LED strip can be cut at designated marks (typically every 16.7 cm). Use sharp scissors for a clean cut.

Image: Instructions for safely cutting the LED strip to adjust its length.
- Attach the LED Strip: Peel off the protective backing from the 3M double-sided tape on the back of the LED strip. Carefully press the strip onto the desired surface, ensuring firm adhesion. For added security, use the provided mounting clips.
- Connect Components:
- Connect the LED strip to the switch/controller.
- Connect the switch/controller to the power adapter.
- Plug the power adapter into a standard electrical outlet.
- Power On: Once all connections are secure, plug the power adapter into a wall socket. The LED strip should illuminate.
Operating Instructions
1. Remote Control Operation
The included remote control allows for basic functions such as turning the strip on/off, adjusting brightness, and changing colors.
- Power Button: Turns the LED strip on or off.
- Brightness Adjustment: Use the + and - buttons to increase or decrease brightness (10%-100%).
- Color Selection: Press the dedicated color buttons (R, G, B, W, etc.) to select a static color.
- Mode Selection: Cycle through various dynamic lighting modes (e.g., flash, fade, jump) using the mode buttons.
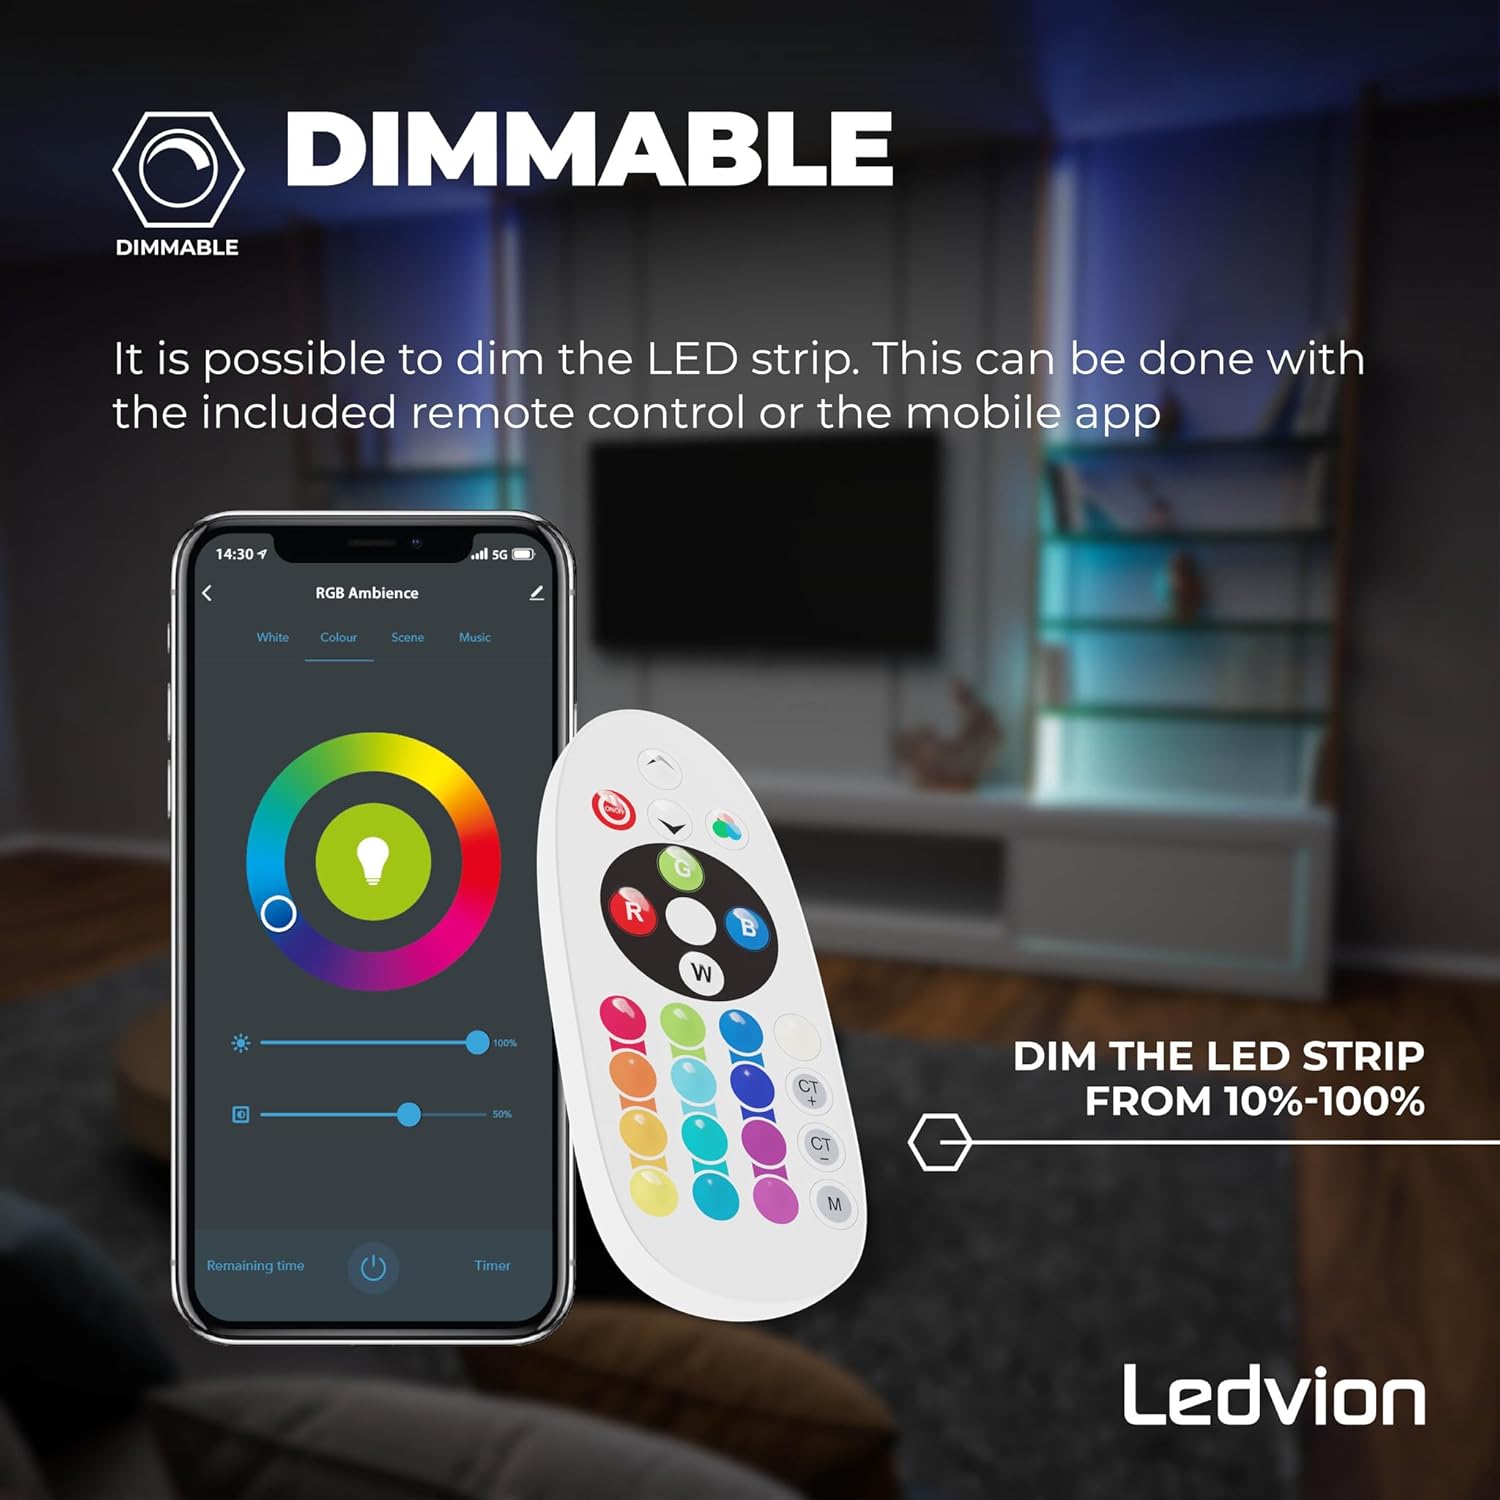
Image: Remote control and app interface for dimming the LED strip.
2. Smartphone App Control
For advanced features and full control, download the compatible smart home app (e.g., Tuya Smart or Smart Life).
- Download App: Search for "Tuya Smart" or "Smart Life" in your smartphone's app store and install it.
- Register/Login: Create an account or log in to the app.
- Add Device: Follow the in-app instructions to add a new device. Ensure your phone's Bluetooth and Wi-Fi are enabled. The app will guide you through the pairing process.
- Control Features: Once connected, you can:
- Select from over 16 million colors (RGB + CCT).
- Adjust brightness and color temperature (3000K-6500K).
- Set custom scenes and dynamic lighting effects.
- Utilize the timer function for scheduled on/off times.
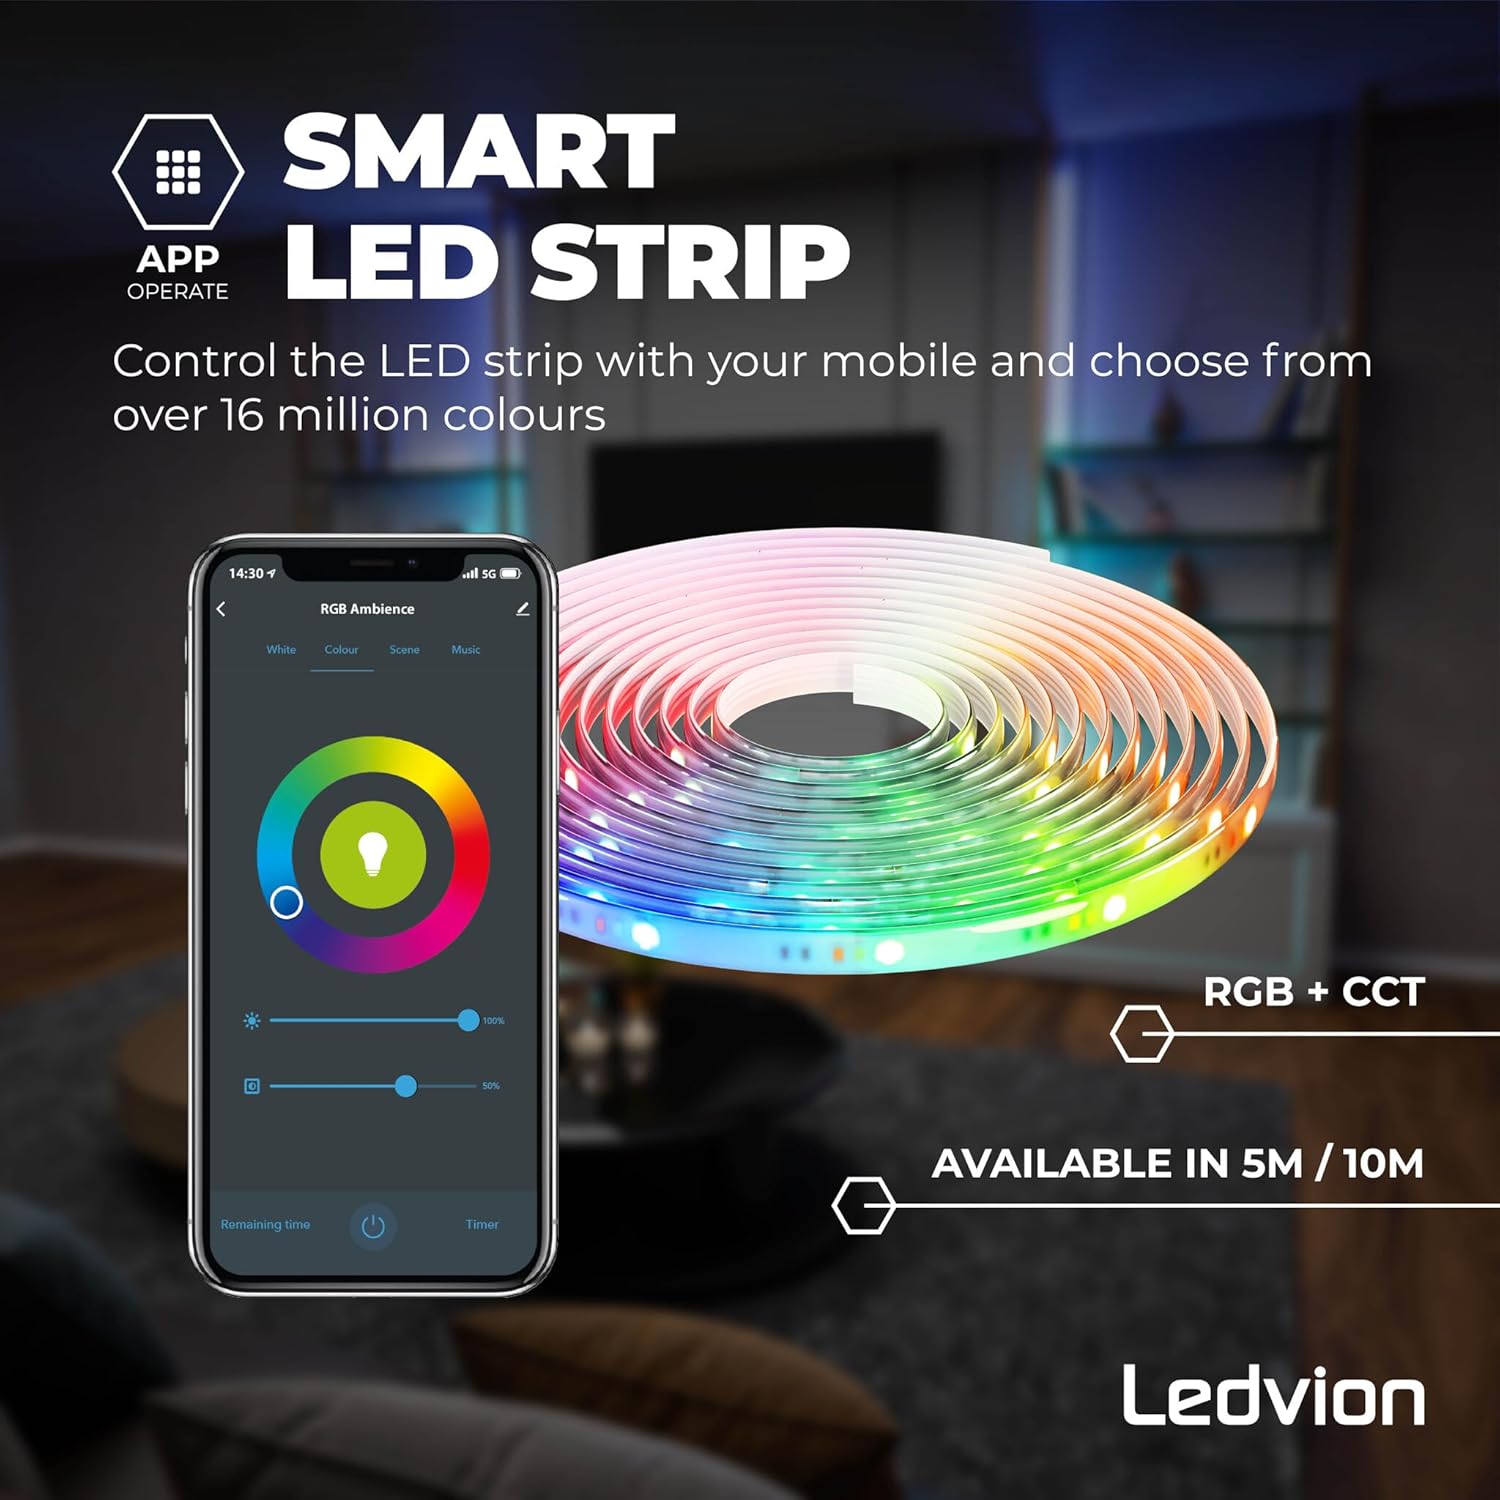
Image: Smartphone app interface for comprehensive control of the LED strip.
3. Voice Assistant Compatibility
The Ledvion Smart LED Strip is compatible with popular voice assistants like Google Home, Amazon Alexa, and Apple Siri.
- Link Account: In your voice assistant's app (e.g., Google Home, Alexa app), link your Tuya Smart/Smart Life account.
- Discover Devices: Instruct your voice assistant to discover new devices.
- Voice Commands: You can now control your LED strip using voice commands, such as:
- "Hey Google, turn on the LED strip."
- "Alexa, set LED strip to blue."
- "Siri, dim the LED strip to 50%."

Image: Voice assistant compatibility for the Ledvion LED Strip.
4. Timer Function
The app allows you to set schedules for the LED strip to turn on or off automatically.
- Access Timer: In the smart home app, navigate to the LED strip's control interface and look for the "Timer" or "Schedule" option.
- Create Schedule: Set desired times for the strip to turn on or off, and select specific days if needed.
- Save: Confirm and save your schedule.

Image: App interface demonstrating the timer function for scheduling LED strip operation.
Maintenance
- Cleaning: Ensure the LED strip is powered off and unplugged before cleaning. Gently wipe the strip with a soft, dry cloth. Do not use abrasive cleaners or solvents.
- Storage: If storing the LED strip for an extended period, ensure it is clean, dry, and coiled loosely to prevent damage. Store in a cool, dry place.
- Inspection: Periodically check the strip and connections for any signs of wear or damage.
Troubleshooting
| Problem | Possible Cause | Solution |
|---|---|---|
| LED strip does not light up. |
|
|
| Remote control not working. |
|
|
| App cannot connect to the strip. |
|
|
| Only part of the strip lights up. |
|
|
Specifications
| Brand | Ledvion |
| Model Number | LVS20008 |
| Length | 10 Meters |
| LEDs per Meter | 60 |
| Voltage | 12V (Strip), 24V (Operating) |
| Power Consumption | 12W (Strip), 19W (Total) |
| Luminous Flux | 1850 lm |
| Color Temperature | 3000K (Warm White) - 6500K (Cool White), RGB |
| Dimmable | Yes (10%-100%) |
| Cuttable Interval | Every 16.7 cm |
| Material | ABS+PS |
| Usage | Indoor |
| Product Dimensions | 18 x 7 x 18 cm (packaging); 630 grams |
Warranty and Support
For warranty information or technical support, please refer to the documentation provided with your purchase or contact Ledvion customer service through their official website. Keep your proof of purchase for warranty claims.


