
Introduction
Thank you for choosing the NVX QBSTA 11" Powered Spare Tire Subwoofer. This system is designed to enhance your vehicle's audio experience by providing powerful bass in a compact, space-saving design. It integrates seamlessly into your spare tire well, offering a discreet yet impactful audio upgrade. This manual provides essential information for proper installation, operation, and maintenance of your subwoofer.
Safety Information
Please read all instructions carefully before installation and use. Failure to follow these guidelines may result in damage to the product, vehicle, or personal injury.
- Professional Installation Recommended: For optimal performance and safety, professional installation by a qualified car audio technician is highly recommended.
- Power Connections: Always disconnect the vehicle's negative battery terminal before making any power connections. Ensure all wiring is properly insulated and fused.
- Mounting: Securely mount the subwoofer to prevent movement during vehicle operation. Loose equipment can cause injury in an accident.
- Ventilation: Ensure adequate ventilation around the amplifier to prevent overheating.
- Volume Levels: Prolonged exposure to high volume levels can cause hearing damage.
- Water Exposure: This product is not waterproof. Avoid exposure to moisture.
What's in the Box
Verify that all components are present before beginning installation:
- NVX QBSTA 11" Powered Spare Tire Subwoofer
- Wired Remote Bass Level Control
- 8 Gauge Power Wire
- Ground Wire
- Mounting Hardware (e.g., long bolt, wing nut)
- RCA Input Harness
- Speaker Level Input Harness

Image: NVX QBSTA subwoofer with all included accessories, including wiring harnesses, remote bass knob, and mounting hardware.
Features
- Integrated Amplifier: Built-in 900W Max (300W RMS) Class-D amplifier for powerful bass output.
- Space-Saving Design: Mounts directly into the hub of your spare tire, preserving cargo space.
- Durable Construction: Features a heavy-duty die-cast aluminum enclosure for enhanced durability and sound quality.
- Versatile Compatibility: Works with both aftermarket and factory audio systems.
- Adjustable Controls: Top-mount amplifier controls for precise sound tuning, including:
- Variable Low-Pass Filter (50-180 Hz)
- Bass Boost (0-12 dB at 50 Hz)
- Subsonic Filter (10-50 Hz)
- Phase Shift (0-180°)
- Remote Bass Control: Includes a wired remote bass level control for convenient adjustment from the driver's seat.
- Automatic Turn-On: Signal sensing for automatic turn-on, simplifying integration with factory head units.

Image: Close-up view of the robust cast aluminum enclosure, highlighting the durable construction of the subwoofer.
Setup
Mounting the Subwoofer
The QBSTA is designed to fit inside the spare tire of most vehicles. Ensure your vehicle has a spare tire mounted inside the trunk with a removable spare tire post.
- Remove the spare tire from its well.
- Place the QBSTA subwoofer inside the center of the spare tire.
- Align the center hole of the subwoofer with the spare tire's mounting bolt hole.
- Use the provided long bolt and wing nut to secure the subwoofer and spare tire to the vehicle's chassis. Tighten firmly to prevent movement.
- Ensure the subwoofer's control panel and wiring connections are accessible.
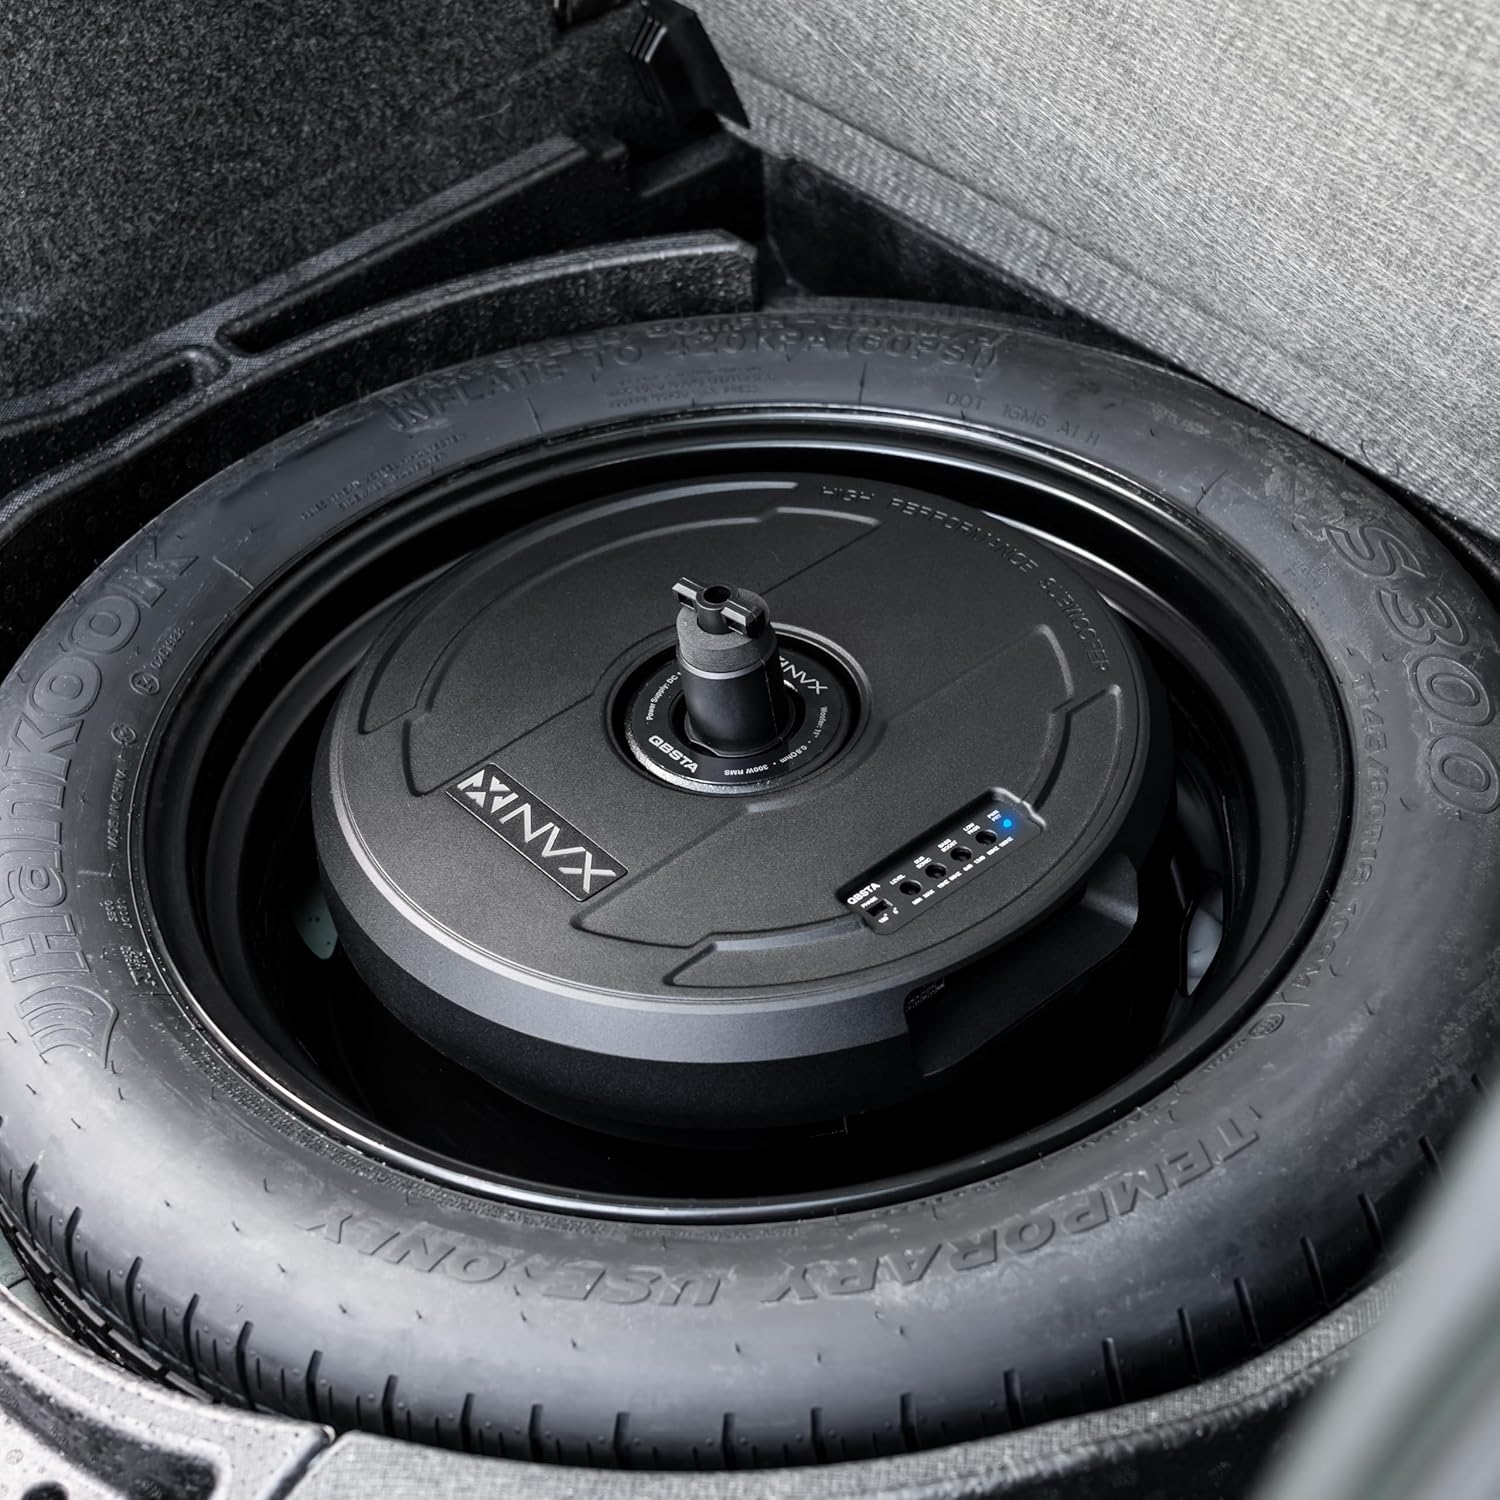
Image: The NVX QBSTA subwoofer neatly installed within a vehicle's spare tire well, demonstrating its space-saving design.
Wiring Connections
Proper wiring is crucial for performance and safety. Refer to your vehicle's wiring diagram if unsure.
- Power (B+): Connect the provided 8-gauge power wire to the vehicle's positive battery terminal. Install an appropriate fuse (not included, typically 30A-40A) within 18 inches of the battery. Connect the other end to the +12V terminal on the subwoofer.
- Ground (GND): Connect the provided ground wire to a clean, unpainted metal surface on the vehicle's chassis. Ensure a solid electrical connection. Connect the other end to the GND terminal on the subwoofer.
- Remote Turn-On (REM):
- Aftermarket Head Unit: Connect the remote turn-on wire from your head unit to the REM terminal on the subwoofer.
- Factory Head Unit (Signal Sensing): If using speaker-level inputs, the subwoofer can automatically turn on when it detects an audio signal. Set the DC/REM switch on the subwoofer to 'DC'.
- Audio Input:
- RCA Input: Connect RCA cables from your head unit's subwoofer output to the RCA input harness of the QBSTA.
- Speaker Level Input: If your head unit does not have RCA outputs, use the provided speaker level input harness. Connect the speaker wires from your head unit (or rear speakers) to the corresponding inputs on the harness.
- Remote Bass Knob: Connect the wired remote bass level control to the 'REMOTE VOLUME' port on the subwoofer. Route the cable to a convenient location near the driver.

Image: Close-up of the wiring harness input side of the subwoofer, showing connections for signal input and remote turn-on.

Image: Close-up of the power and ground terminals, along with the fuse holders, on the subwoofer.
Video: An official NVX video demonstrating the features and installation process of the QBSTA 11" Powered Spare Tire Subwoofer Box.
Operating Instructions
The QBSTA features top-mounted controls for easy adjustment. Familiarize yourself with these settings to optimize your audio experience.
Amplifier Controls

Image: Detailed view of the control panel on the NVX QBSTA subwoofer, showing the various adjustment knobs and switches.
- LEVEL (Gain): Adjusts the input sensitivity of the amplifier. Start at minimum and slowly increase until the desired volume is achieved without distortion.
- SUB SONIC (High-Pass Filter): Filters out extremely low frequencies (10-50 Hz) that are inaudible and can cause distortion or damage to the subwoofer. Set this to protect the subwoofer from over-excursion.
- BASS BOOST: Provides an adjustable bass enhancement (0-12 dB) at 50 Hz. Use sparingly to avoid distortion.
- LOW PASS (Low-Pass Filter): Controls the upper frequency limit of the subwoofer (50-180 Hz). Adjust this to blend the subwoofer's output seamlessly with your main speakers.
- PHASE (0°/180°): Adjusts the phase of the subwoofer's output relative to the main speakers. Experiment with both settings to find the one that provides the most cohesive bass response in your vehicle.
- PWR/PRT Indicator: The Power (PWR) LED indicates the unit is on. The Protect (PRT) LED indicates a fault condition (e.g., overheating, short circuit).
Remote Bass Level Control
The wired remote bass knob allows for convenient, on-the-fly adjustment of the subwoofer's output level from the driver's seat without accessing the subwoofer directly.

Image: The compact wired remote bass knob, designed for easy installation and convenient bass level adjustment.
Maintenance
The NVX QBSTA subwoofer requires minimal maintenance to ensure long-lasting performance.
- Cleaning: Use a soft, dry cloth to wipe down the enclosure. Avoid using harsh chemicals or abrasive cleaners.
- Connection Checks: Periodically inspect all wiring connections (power, ground, signal) to ensure they are secure and free from corrosion.
- Fuse Replacement: If the subwoofer stops working and the PWR LED is off, check the fuses. Replace blown fuses only with fuses of the same type and rating (30A).
Troubleshooting
If you experience issues with your QBSTA subwoofer, refer to the following common problems and solutions:
| Problem | Possible Cause | Solution |
|---|---|---|
| No Power (PWR LED off) | Blown fuse, poor power/ground connection, no remote turn-on signal. | Check fuses and replace if necessary. Verify all power and ground connections are secure. Ensure remote turn-on wire is connected or DC sensing is active. |
| No Sound | No audio input signal, gain set too low, phase incorrect, low-pass filter set too low. | Check RCA or speaker-level input connections. Increase gain. Adjust phase and low-pass filter settings. |
| Distorted Sound | Gain set too high, bass boost too high, improper crossover settings, poor signal quality. | Reduce gain. Lower bass boost. Adjust low-pass and subsonic filters. Check input signal for distortion. |
| Subwoofer Overheating (PRT LED on) | Insufficient ventilation, prolonged high volume. | Ensure adequate airflow around the amplifier. Reduce volume. Allow unit to cool down. |
Specifications
| Feature | Specification |
|---|---|
| Model Number | QBSTA |
| Speaker Size | 11 inches |
| Speaker Maximum Output Power | 900 watts (Peak) |
| RMS Power | 300 watts |
| Frequency Response | 50 Hz (Lower limit, adjustable via filters) |
| Low-Pass Filter | 50-180 Hz (Variable) |
| Subsonic Filter | 10-50 Hz (Variable) |
| Bass Boost | 0-12 dB at 50 Hz |
| Phase Shift | 0-180° (Switchable) |
| Connectivity Technology | RCA, Speaker Level Input |
| Audio Output Mode | Mono |
| Mounting Type | Spare Tire Mount |
| Enclosure Material | Aluminum |
| Item Dimensions (D x W x H) | 4.72"D x 14.17"W x 4.72"H |
| Item Weight | 10.52 kg |
Warranty
The NVX QBSTA 11" Powered Spare Tire Subwoofer comes with a 1-year Manufacturer's Warranty. This warranty covers defects in materials and workmanship under normal use. It does not cover damage resulting from improper installation, accident, misuse, abuse, neglect, unauthorized modification, or normal wear and tear. Please retain your proof of purchase for warranty claims.
Support
For technical assistance, warranty inquiries, or further information regarding your NVX QBSTA subwoofer, please contact NVX customer support. Refer to the official NVX website or your purchase documentation for current contact details.
Online Resources: Visit the NVX Store on Amazon for additional product information and support.