
Blackview Table 8
Blackview Table 8 Portable Monitor User Manual
Model: Table 8
Brand: Blackview
1. Product Overview
The Blackview Table 8 Portable Monitor is a versatile 15.6-inch Full HD (1080P) display designed to enhance productivity and entertainment on the go. Featuring HDR and IPS technology, it delivers vibrant colors and wide viewing angles. Its lightweight and slim design, coupled with broad compatibility via USB-C and HDMI, makes it an ideal second screen for laptops, gaming consoles, smartphones, and more.

Blackview Table 8 Portable Monitor with '15.6"', '1080P', and 'HDR Portable Monitor' text overlays, showcasing its slim design and vibrant display.
2. Package Contents
Please check the package carefully to ensure all items are present and in good condition:
- Blackview Table 8 Portable Monitor
- Smart Protective Cover
- USB Type-C to Type-C Cable
- Mini HDMI to HDMI Cable
- Power Adapter (Charger)

Image displaying the Blackview Table 8 Portable Monitor along with its included accessories: a Type-C cable, an HDMI cable, and a power charger.
3. Product Features
- 15.6-inch FHD IPS Display: Enjoy stunning visuals with 1920x1080 resolution, HDR support, and wide 178° viewing angles for consistent image quality from any perspective.
- High Refresh Rate & Color Accuracy: Experience smooth visuals with a 60Hz refresh rate, 72% NTSC, 8-bit color depth, 800:1 contrast ratio, 380 nits brightness, and 16.7 million colors for vibrant and lifelike images.
- Wide Compatibility: Equipped with USB Type-C and Mini HDMI ports, it connects seamlessly to laptops, PCs, MacBooks, smartphones, PS4/PS5, Xbox, Nintendo Switch, and more.
- Lightweight & Portable Design: Weighing just 816g and only 6mm thick, it's easy to carry in your bag, making it perfect for business trips or mobile entertainment.
- Smart Magnetic Stand: The included durable protective cover doubles as a magnetic stand, offering adjustable viewing angles up to 98 degrees for optimal comfort.
- Built-in Speakers: Integrated speakers provide audio output, eliminating the need for external speakers in many scenarios.

Comparison image showing the difference between 720P and 1920x1080 FHD resolution on the Blackview Table 8 monitor, highlighting its superior clarity.

Image depicting the Blackview Table 8 monitor in use for gaming, emphasizing its 60Hz refresh rate, 72% NTSC, 8-bit color, HDR, 800:1 contrast, 380 nits brightness, and 16.7M colors for an immersive experience.

Diagram illustrating the wide compatibility of the Blackview Table 8 monitor, detailing its ports including 3.5mm Audio Output, Menu Control Wheel, Power Button, Micro HDMI, and USB Type-C, and showing connections to various devices like cameras, laptops, smartphones, game consoles (PS4/PS5/Switch/Xbox ONE), and computers.
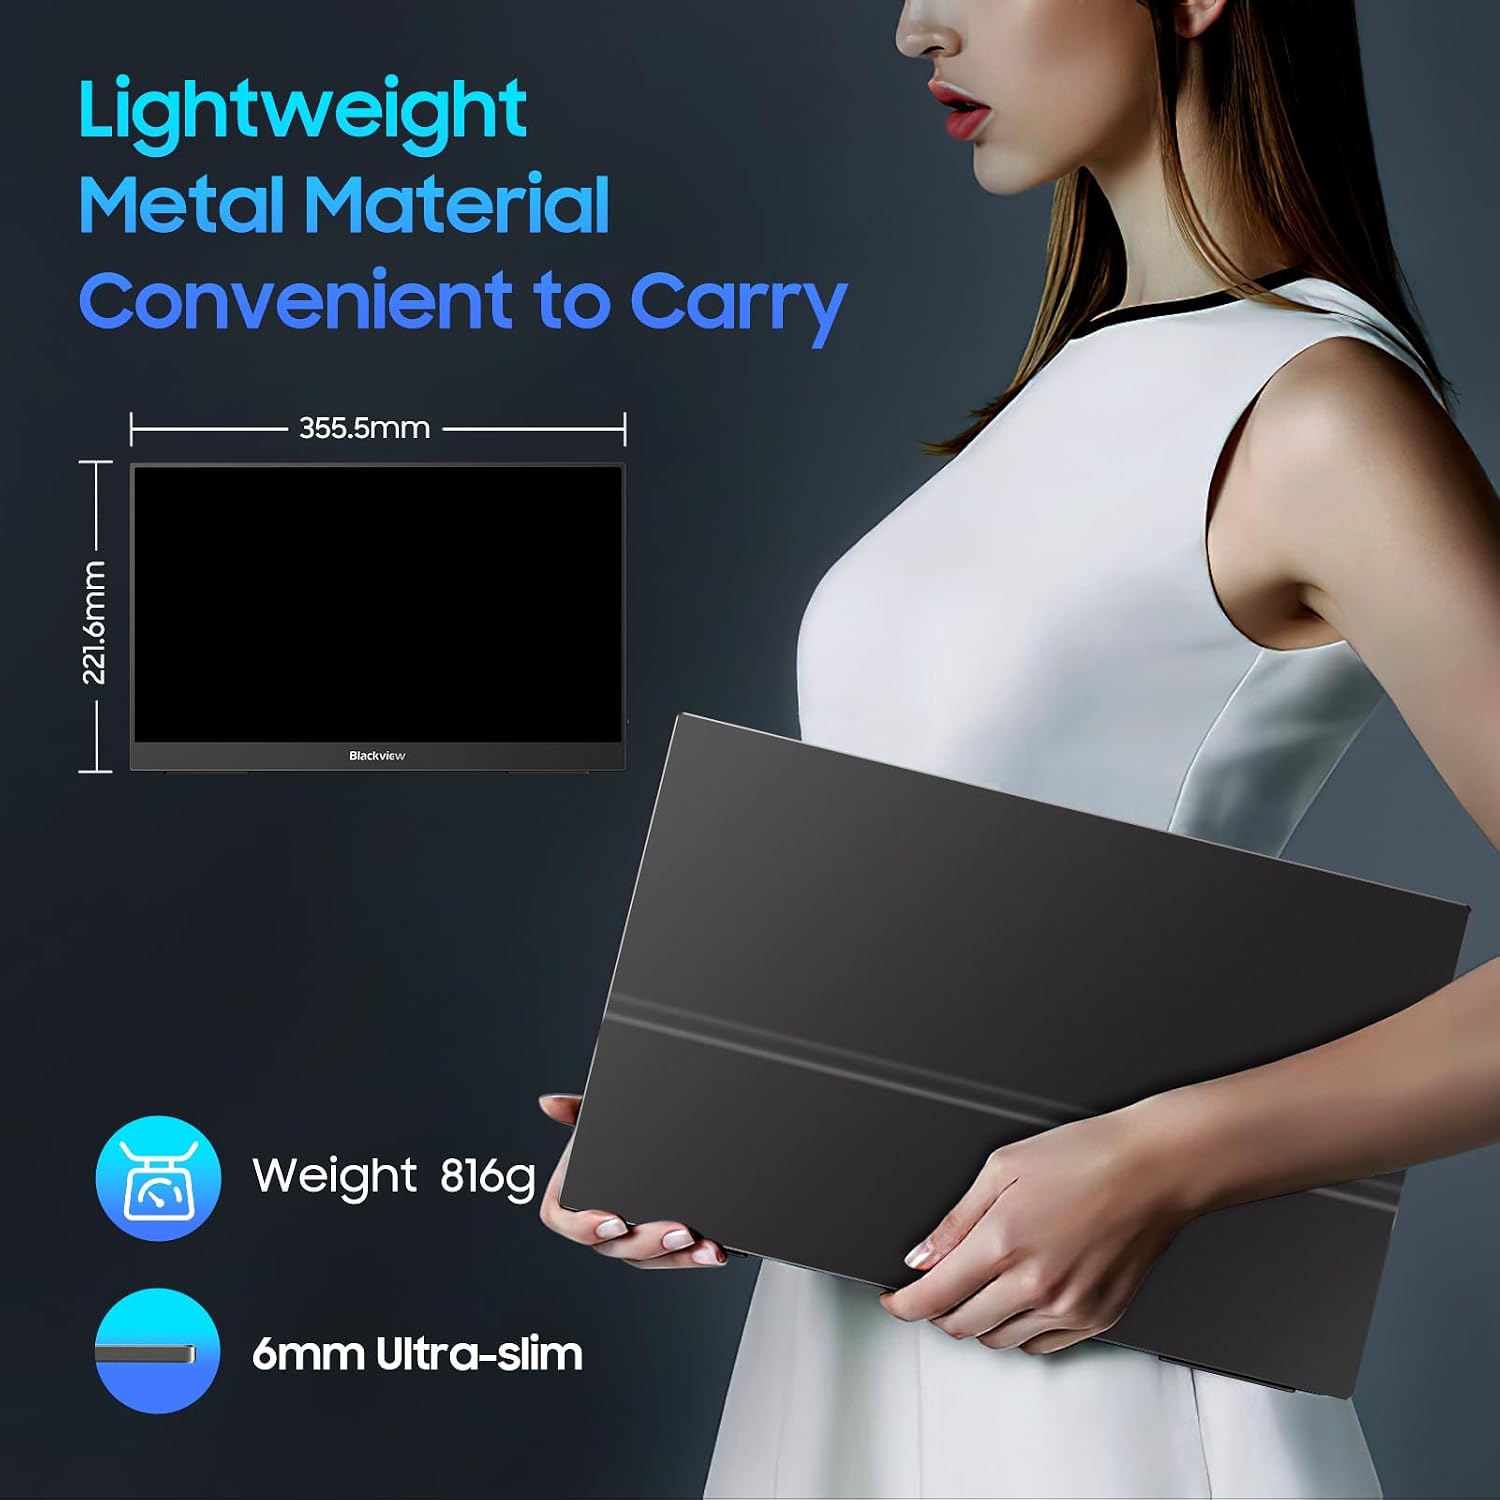
Image showcasing the Blackview Table 8 Portable Monitor's lightweight and ultra-slim design, with dimensions of 355.5mm width and 221.6mm height, weighing 816g and being 6mm thick.
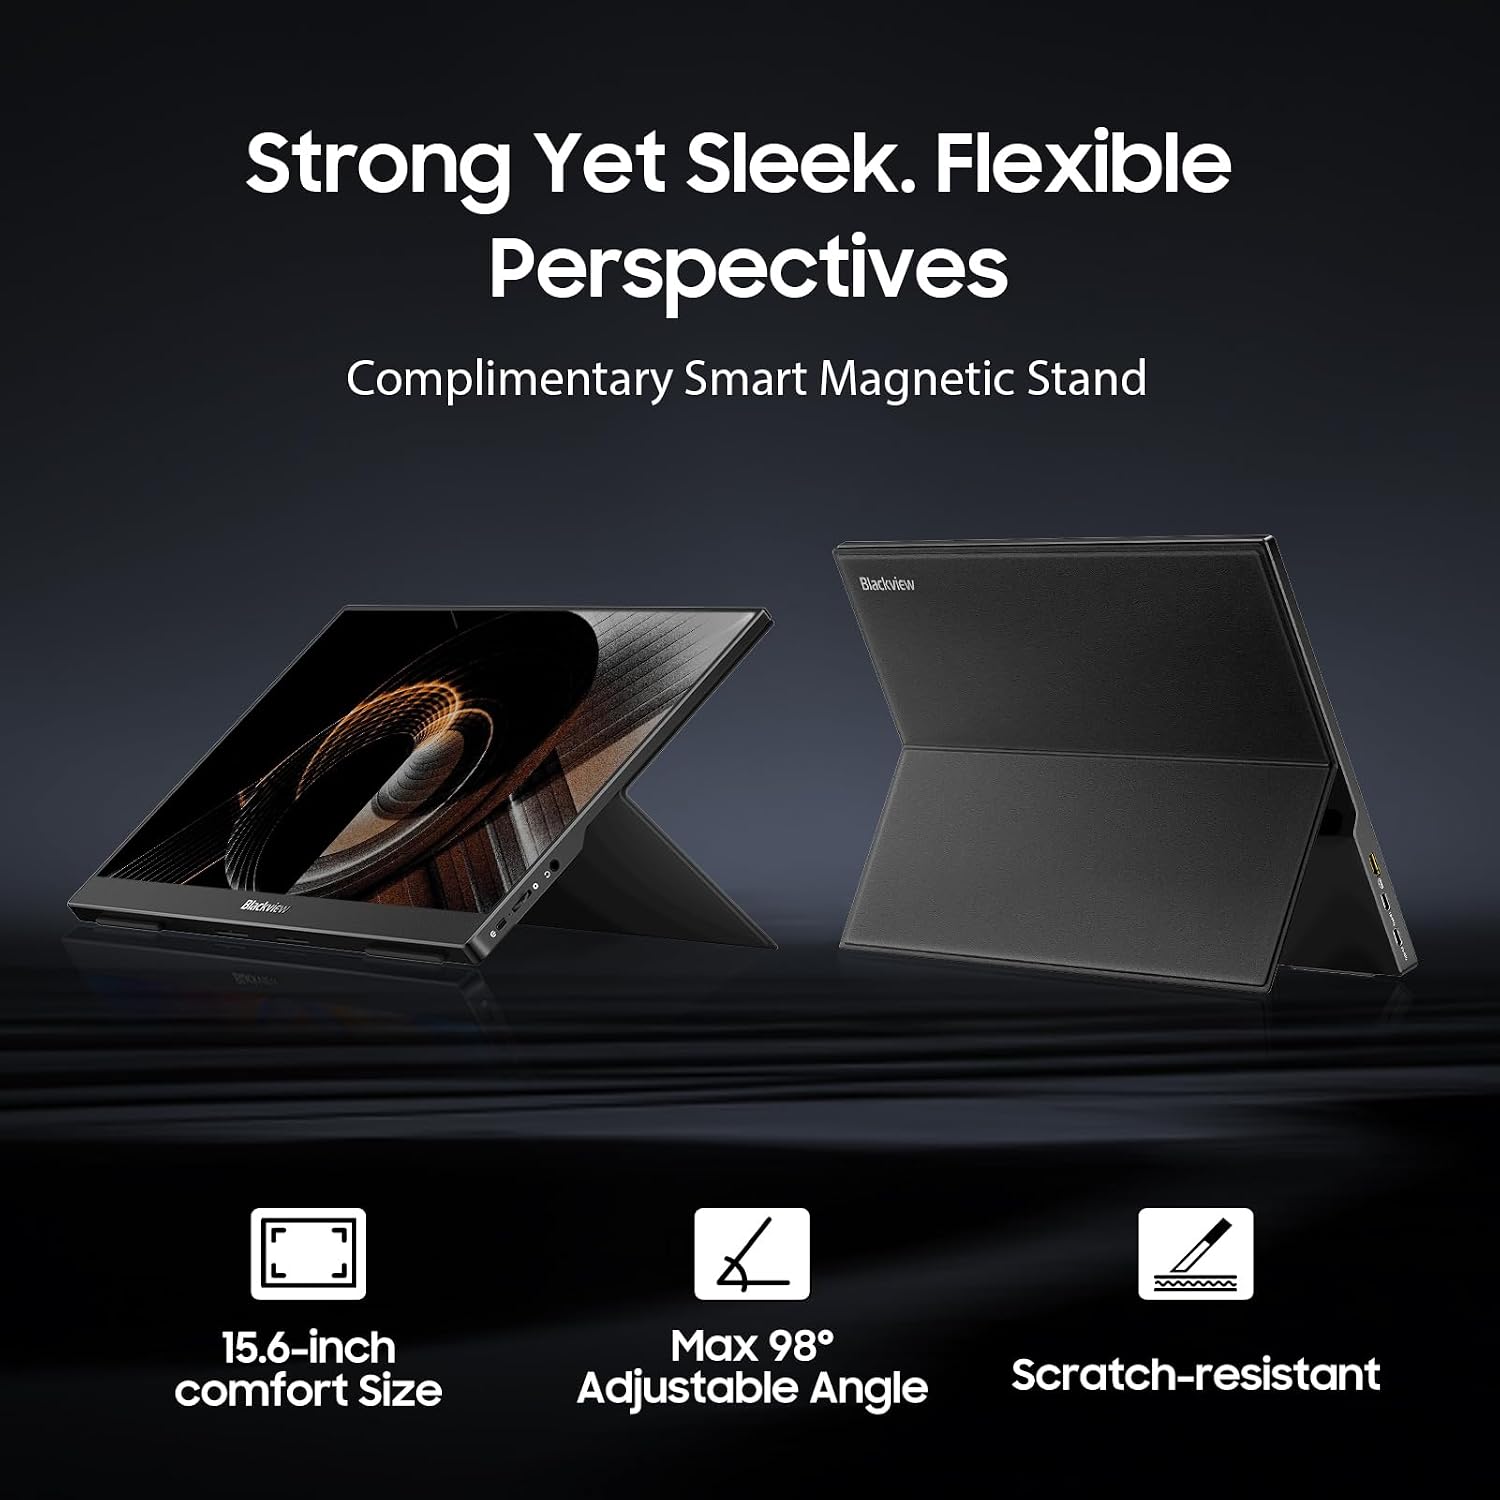
The Blackview Table 8 Portable Monitor shown with its complimentary smart magnetic stand, demonstrating adjustable viewing angles and its scratch-resistant design.

Collage of images demonstrating various uses of the Blackview Table 8 Portable Monitor: maximizing gaming pleasure, serving as a home office monitor, and functioning as a portable screen for on-the-go productivity.
4. Setup Guide
4.1 Connecting to a Power Source
Connect the provided power adapter to the monitor's USB Type-C power input port and plug the adapter into a wall outlet. The monitor can also draw power directly from a compatible USB-C device if it supports power delivery.
4.2 Connecting to a Device
- Using USB Type-C (Full-featured): If your device (laptop, smartphone, etc.) has a full-featured USB Type-C port that supports video output and power delivery, connect the monitor using the provided USB Type-C to Type-C cable. This single cable can transmit video, audio, and power.
- Using Mini HDMI: Connect the provided Mini HDMI to HDMI cable from the monitor's Mini HDMI port to your device's HDMI port. If your device does not supply sufficient power via HDMI, you will also need to connect the monitor to a power source using the USB Type-C power input.
4.3 Setting Up the Stand
The included smart protective cover can be folded to form a stable stand for the monitor. Adjust the folds to achieve your desired viewing angle. The magnetic design ensures the monitor stays securely in place.
5. Operating Instructions
5.1 Power On/Off
Press and hold the Power Button (located on the side of the monitor, as shown in the compatibility diagram) for a few seconds to turn the monitor on or off.
5.2 Menu Navigation
The Menu Control Wheel (also on the side) is used to navigate the On-Screen Display (OSD) menu:
- Press the wheel: To enter the OSD menu or confirm a selection.
- Roll the wheel up/down: To navigate through menu options or adjust values.
- Press and hold (specific contexts): May act as a shortcut for certain functions (e.g., input source selection).
5.3 OSD Menu Options
Common settings you can adjust via the OSD menu include:
- Brightness/Contrast: Adjust display luminance and contrast levels.
- Color Settings: Modify color temperature, hue, and saturation.
- Input Source: Manually select between USB-C and HDMI inputs.
- Audio: Adjust volume for the built-in speakers or connected headphones.
- HDR Mode: Enable or disable High Dynamic Range.
- Aspect Ratio: Change the display's aspect ratio (e.g., 16:9, 4:3).
6. Maintenance
6.1 Cleaning the Screen
Gently wipe the screen with a soft, lint-free cloth. For stubborn smudges, lightly dampen the cloth with water or a non-abrasive screen cleaner. Avoid using alcohol, ammonia, or harsh chemicals, as they can damage the screen surface.
6.2 Cleaning the Body
Use a soft, dry cloth to wipe the monitor's casing. Do not use liquid cleaners directly on the monitor.
6.3 Storage
When not in use, store the monitor in its protective cover to prevent scratches and dust accumulation. Keep it in a cool, dry place away from direct sunlight and extreme temperatures.
7. Troubleshooting
7.1 No Signal / Black Screen
- Ensure the monitor is properly powered on.
- Verify that the video cable (USB-C or HDMI) is securely connected to both the monitor and your device.
- Check if your device's display output is enabled (e.g., press Windows key + P on Windows, or check display settings on Mac/smartphone).
- Try selecting the correct input source manually via the OSD menu.
- Test with a different cable or device if possible.
7.2 No Power
- Confirm the power adapter is correctly plugged into a working wall outlet and the monitor's power input.
- If using USB-C for power, ensure your device supports power delivery through that port.
- Try a different power outlet or adapter if available.
7.3 Image Flickering or Distortion
- Check the video cable for damage or loose connections.
- Ensure the display resolution and refresh rate settings on your connected device are compatible with the monitor.
- Reduce interference by moving other electronic devices away from the monitor.
7.4 No Audio from Speakers
- Increase the volume level on the monitor's OSD menu.
- Check the audio output settings on your connected device to ensure audio is routed to the monitor.
- Ensure the video connection (USB-C or HDMI) supports audio transmission.
8. Specifications
| Feature | Specification |
|---|---|
| Brand | Blackview |
| Model | Table 8 |
| Screen Size | 15.6 Inches |
| Display Resolution | 1920 x 1080 (FHD) |
| Display Technology | LCD, IPS Panel |
| Response Time | 1 Milliseconds |
| Refresh Rate | 60 Hz |
| Viewing Angle | 178 Degrees |
| Aspect Ratio | 16:9 |
| Image Contrast Ratio | 800:1 |
| Brightness | 380 nits |
| Hardware Interface | USB Type-C (x2), Mini HDMI (x1), 3.5mm Audio Output |
| Special Features | Built-In Speakers, HDR Support, Smart Magnetic Cover |
| Product Dimensions | 2.29 x 2.03 x 1.27 cm (0.9 x 0.8 x 0.5 inches) |
| Item Weight | 1.5 kg (3.3 lbs) - Note: Product image states 816g, specification states 1.5kg. Please refer to product packaging for exact weight. |
9. Warranty and Support
For warranty information and customer support, please refer to the warranty card included with your purchase or visit the official Blackview website. You can typically find FAQs, driver downloads, and contact information for technical assistance there.
For further assistance, please contact Blackview customer service through their official channels.
Related documentsTable 8


Ask a question about this manual
Ask about setup, troubleshooting, compatibility, parts, safety, or missing instructions. Manuals+ will review the question and use this page’s manual context to help answer it.