1. Important Safety Instructions
Please read all instructions carefully before using this appliance and retain for future reference.
- Always place the air purifier on a firm, flat, and stable surface.
- Do not block air inlets or outlets. Ensure at least 12 inches (30 cm) clearance from walls and furniture.
- Do not use the appliance in wet or humid environments, such as bathrooms.
- Unplug the air purifier before cleaning, performing any maintenance, or when not in use for extended periods.
- Keep the appliance out of reach of children and pets.
- Use only original Afloia replacement filters.
- Do not attempt to repair or disassemble the air purifier yourself. Contact qualified service personnel.
2. Product Overview
2.1 Components
- Main Unit
- 3-in-1 Composite Filter (Pre-Filter, Efficient Filter, Active Carbon Filter)
- Power Cord
2.2 Key Features
- Faster Air Circulation: CADR 280m³/h, purifies air 5 times per hour in 320 sq ft, and a 2000 sq ft room in approximately one hour.
- Laser Sensor: Upgraded laser air quality sensor provides faster and more accurate real-time PM2.5 display.
- Automatic Mode: Automatically adjusts fan speed based on monitored air quality levels.
- 3-Stage Filtration: Imported filters capable of filtering particles as small as 0.03 microns, removing 99.99% of pet dander, dust, pollen, smoke, odor, and mold.
- Sleep Mode: Reduces noise levels to a near-silent 26dB for undisturbed sleep.
- Timer Function: Allows setting operation for 2 to 24 hours.

Figure 1: Afloia Air Purifier Main Unit
3. Setup
3.1 Unpacking
- Carefully remove the air purifier from its packaging.
- Remove all protective plastic films and packaging materials.
3.2 Filter Installation
- Turn the air purifier upside down and twist the base cover counter-clockwise to unlock.
- Remove the old filter (if any) and unwrap the new 3-in-1 composite filter from its plastic packaging.
- Insert the new filter into the air purifier, ensuring it is seated correctly.
- Replace the base cover and twist clockwise to lock it securely.

Figure 2: 3-Stage Powerful Filtration System
3.3 Placement
Place the air purifier on a flat, stable surface in the desired room. Ensure there is adequate space around the unit for optimal air circulation (at least 12 inches from walls or furniture).

Figure 3: Optimal Placement for 360° Purification
4. Operating Instructions
4.1 Power On/Off
Plug the power cord into a suitable electrical outlet. Press the Power Button (symbol: circle with vertical line) on the control panel to turn the unit on or off.
4.2 Fan Speed Adjustment
Press the Fan Speed Button (symbol: fan blades) repeatedly to cycle through different fan speeds (Low, Medium, High, Turbo).
4.3 Auto Mode
Press the Auto Mode Button (symbol: 'A' in a circle) to activate Auto Mode. In this mode, the air purifier will automatically adjust its fan speed based on the detected air quality, displayed on the PM2.5 screen.
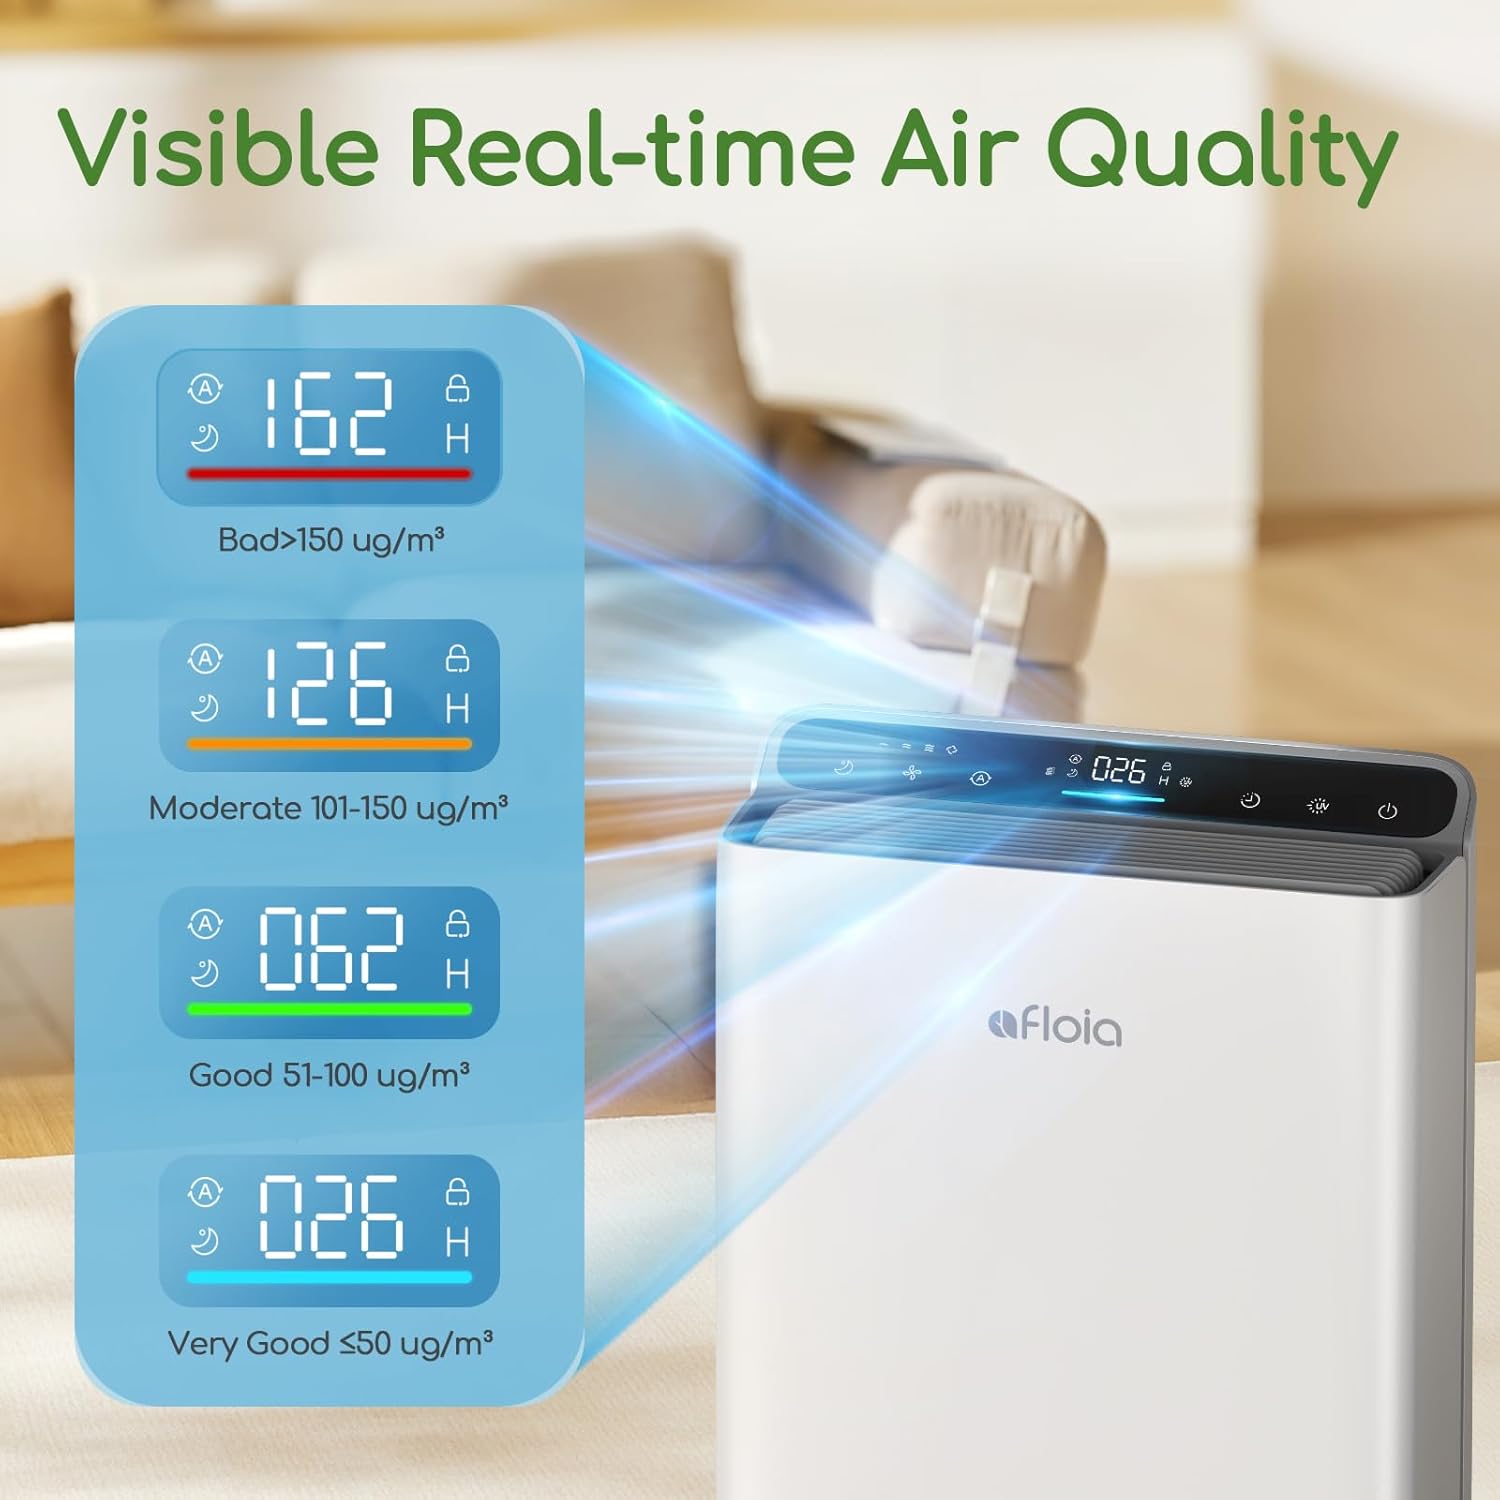
Figure 4: Real-time Air Quality Display
4.4 Sleep Mode
Press the Sleep Mode Button (symbol: crescent moon) to enter Sleep Mode. The fan speed will reduce to the lowest setting (26dB), and the display lights will dim or turn off for a quiet environment.
4.5 Timer Function
Press the Timer Button (symbol: clock) repeatedly to set the desired operating time (2-24 hours). The unit will automatically turn off after the set time.
4.6 UV Light Function
Press the UV Light Button (symbol: UV lamp) to turn the UV-C light on or off. The UV-C light provides an additional layer of purification by helping to sanitize the air.
5. Maintenance
5.1 Filter Replacement
The filter life indicator on the control panel will illuminate when it's time to replace the filter. Filter lifespan varies depending on usage and air quality. Typically, filters should be replaced every 6-8 months.
- Unplug the air purifier from the power outlet.
- Follow the steps in Section 3.2 to remove the old filter and install a new one.
- After replacing the filter, plug in the unit and press and hold the Filter Reset Button (if available, or refer to manual for specific reset procedure) for 3-5 seconds until the indicator light turns off.
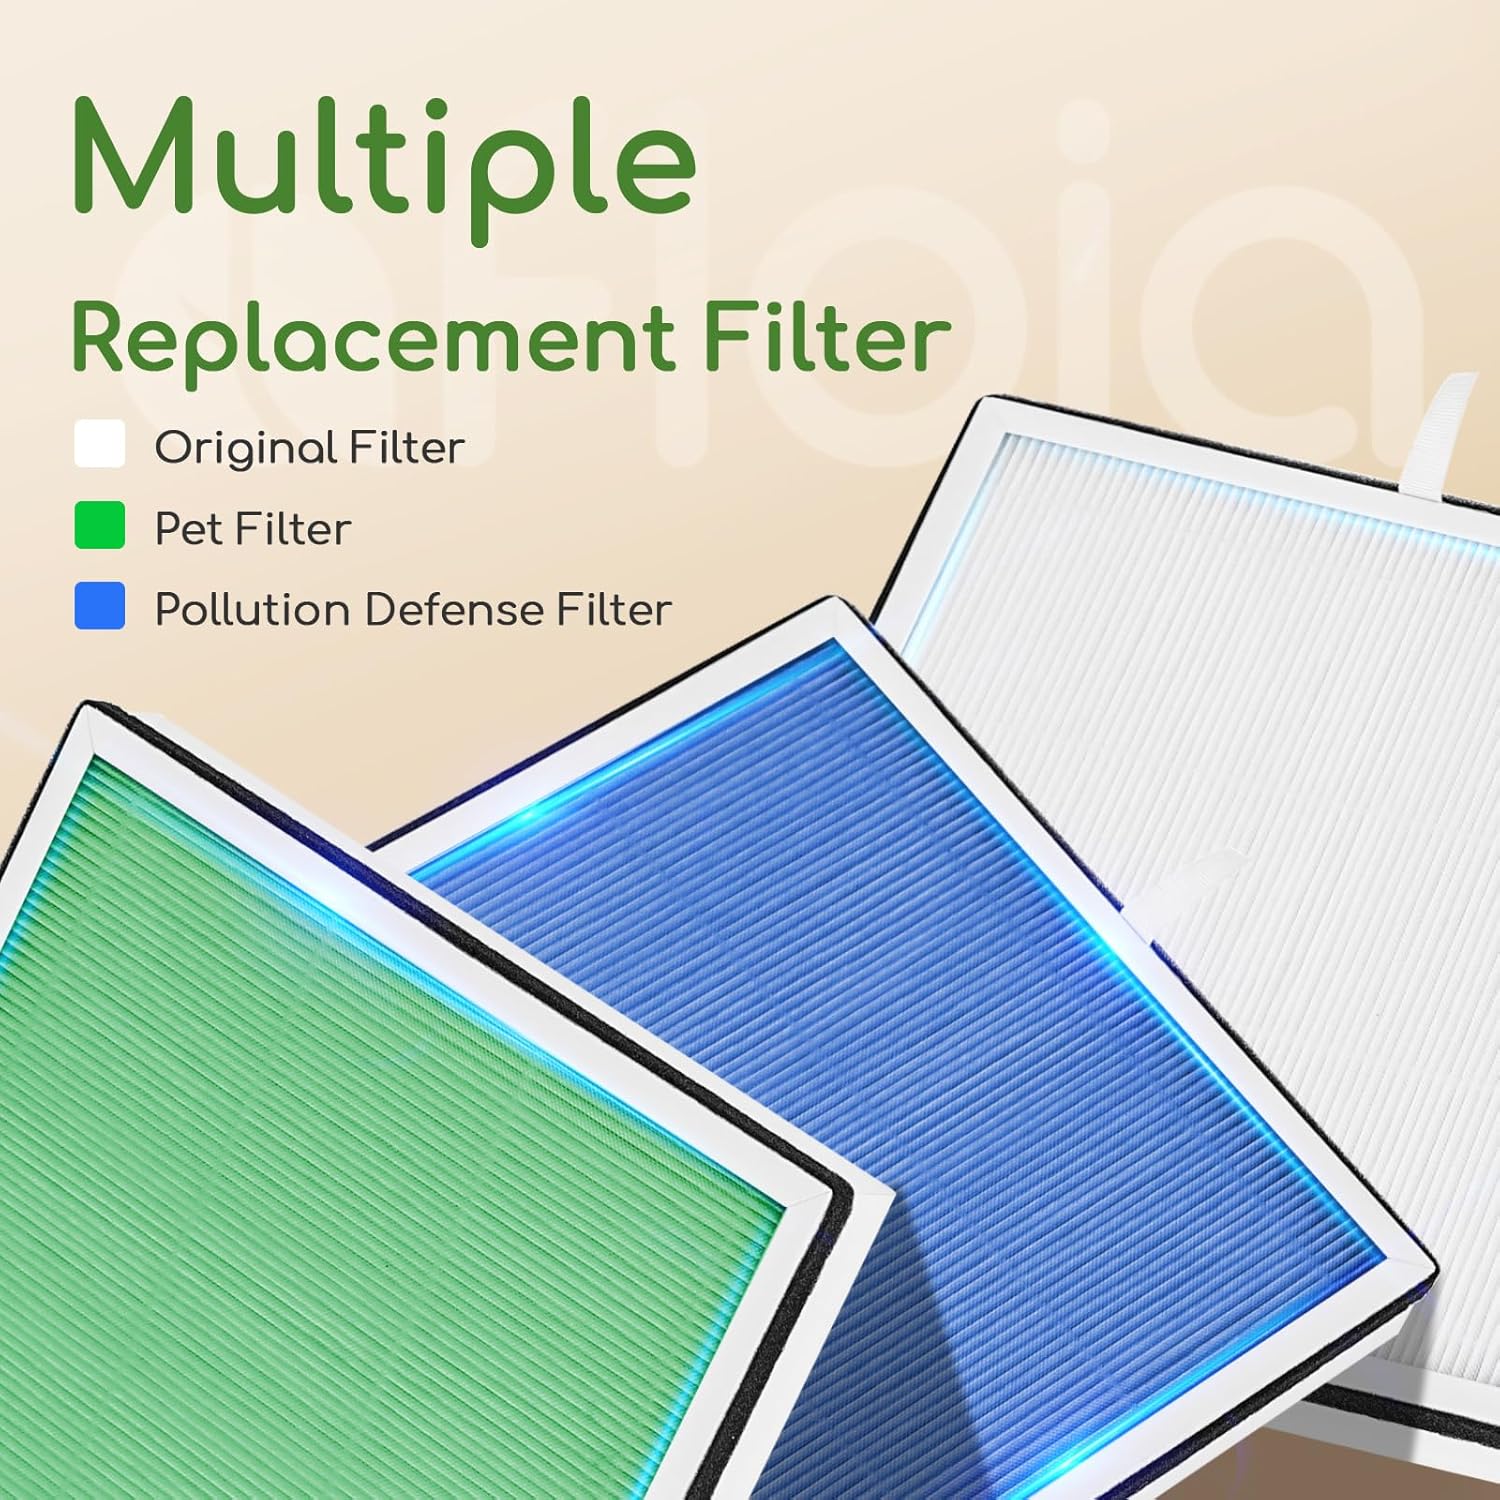
Figure 5: Multiple Replacement Filter Options
5.2 Cleaning
- Wipe the exterior of the air purifier with a soft, dry cloth.
- Do not use abrasive cleaners or solvents.
- The pre-filter can be gently vacuumed to remove large dust particles between replacements.
6. Troubleshooting
| Problem | Possible Cause | Solution |
|---|---|---|
| Unit does not turn on | Not plugged in; Power outage; Filter not installed correctly | Check power connection; Check circuit breaker; Reinstall filter securely. |
| Airflow is weak | Filter is dirty; Air inlets/outlets blocked | Replace filter; Clear any obstructions. |
| Unusual noise | Foreign object inside; Unit not on a flat surface | Unplug and check for foreign objects; Place on a stable, flat surface. |
| Air quality reading seems inaccurate | Sensor is dirty | Gently clean the sensor area with a dry cotton swab. |
7. Specifications
| Feature | Detail |
|---|---|
| Model Number | EUROPA |
| Product Dimensions | 6.22 x 12.44 x 15.67 inches |
| Item Weight | 7.72 Pounds |
| CADR (Clean Air Delivery Rate) | 280 m³/h |
| Applicable Floor Area | Up to 2000 Square Feet (for one air change per hour) |
| Noise Level (Sleep Mode) | 26dB |
| Certification | CARB Certified |
8. Warranty and Support
Afloia products are designed and manufactured to the highest quality standards. For detailed warranty information and customer support, please refer to the official Afloia website or the warranty card included with your purchase.
You can also find additional resources and a downloadable PDF user guide at: Afloia Air Purifier User Guide (PDF)


