
1. Introduction
Thank you for choosing the Nunoo Car Stereo. This manual provides detailed instructions for the installation, operation, and maintenance of your new car stereo system, designed specifically for Ford F150 models from 2009 to 2012. Please read this manual thoroughly before installation and use to ensure proper function and safety.
2. Safety Information
- Always consult a professional for installation if you are unsure about any steps. Incorrect installation can damage the vehicle's electrical system or the stereo unit.
- Do not operate the device in a manner that distracts you from driving. Always prioritize road safety.
- Ensure all wiring is properly insulated and secured to prevent short circuits or damage.
- Keep the unit away from water and excessive moisture.
- Do not attempt to disassemble or modify the unit. This will void the warranty and may cause damage.
3. Package Contents
Verify that all items listed below are present in your package:

Image: Overview of included accessories and wiring connections.
- Nunoo Car Stereo Head Unit
- Power Cable (A)
- RCA Cable (B)
- 4P USB Cable (C)
- 6P USB Cable (D)
- Rear View Input Cable (E)
- GPS Antenna (F)
- AHD 1080P Rear Camera (if included in package)
- User Manual
- Cleaning Cloth
4. Setup and Installation
4.1 Compatibility Check
This car stereo is designed for Ford F150 models manufactured between 2009 and 2012. Please ensure your vehicle's dashboard configuration matches the compatible type shown below.

Image: Dashboard compatibility for Ford F150 2009-2012. Ensure your vehicle matches Type A.
4.2 Installation Steps (General Guide)
- Preparation: Disconnect the vehicle's battery to prevent electrical shorts.
- Remove Original Unit: Carefully remove the existing car stereo and dashboard trim. Refer to your vehicle's service manual for specific instructions.
- Connect Wiring: Connect the provided power cable, RCA cables, USB cables, and GPS antenna to the corresponding ports on the Nunoo head unit. Ensure all connections are secure.
- Backup Camera (Optional): If installing the backup camera, connect its video output to the 'Rear View Input' on the head unit and its power to the vehicle's reverse light circuit.
- Test Functionality: Before fully reassembling the dashboard, reconnect the battery and power on the unit to test basic functions like power, audio, and touchscreen response.
- Secure Unit: Mount the Nunoo head unit securely into the dashboard opening.
- Reassemble: Reinstall all dashboard trim pieces.
5. Operating Instructions
5.1 Power On/Off and Basic Controls
Press the power button on the unit or steering wheel controls to turn the stereo on or off. Adjust volume using the physical buttons or the touchscreen interface.
5.2 Touchscreen Interface
The unit features a 9-inch 1280x720 IPS multi-touch screen for clear visuals and responsive interaction. Navigate through menus and applications by tapping, swiping, and pinching.

Image: Details of the 9-inch 1280x720 IPS multi-touch screen resolution.
5.3 Wireless CarPlay and Android Auto
Connect your smartphone wirelessly to access navigation, make calls, send messages, and play music through the stereo's interface. Use voice commands for hands-free operation.

Image: Wireless CarPlay, Android Auto, and Mirror Link interfaces.
5.4 AM/FM/RDS Radio
Access the radio function to listen to AM, FM, and RDS broadcasts. Scan for stations, save presets, and enjoy news and music.
5.5 Bluetooth Connectivity
Pair your mobile phone via Bluetooth 5.2 for hands-free calling and wireless audio streaming. Access your phone's contact list and call history directly from the stereo.
5.6 Audio Settings (16-Band EQ & Subwoofer)
Customize your audio experience with the built-in 16-band equalizer. Adjust frequency bands to match your preferred music style. The unit also offers subwoofer control for enhanced bass.
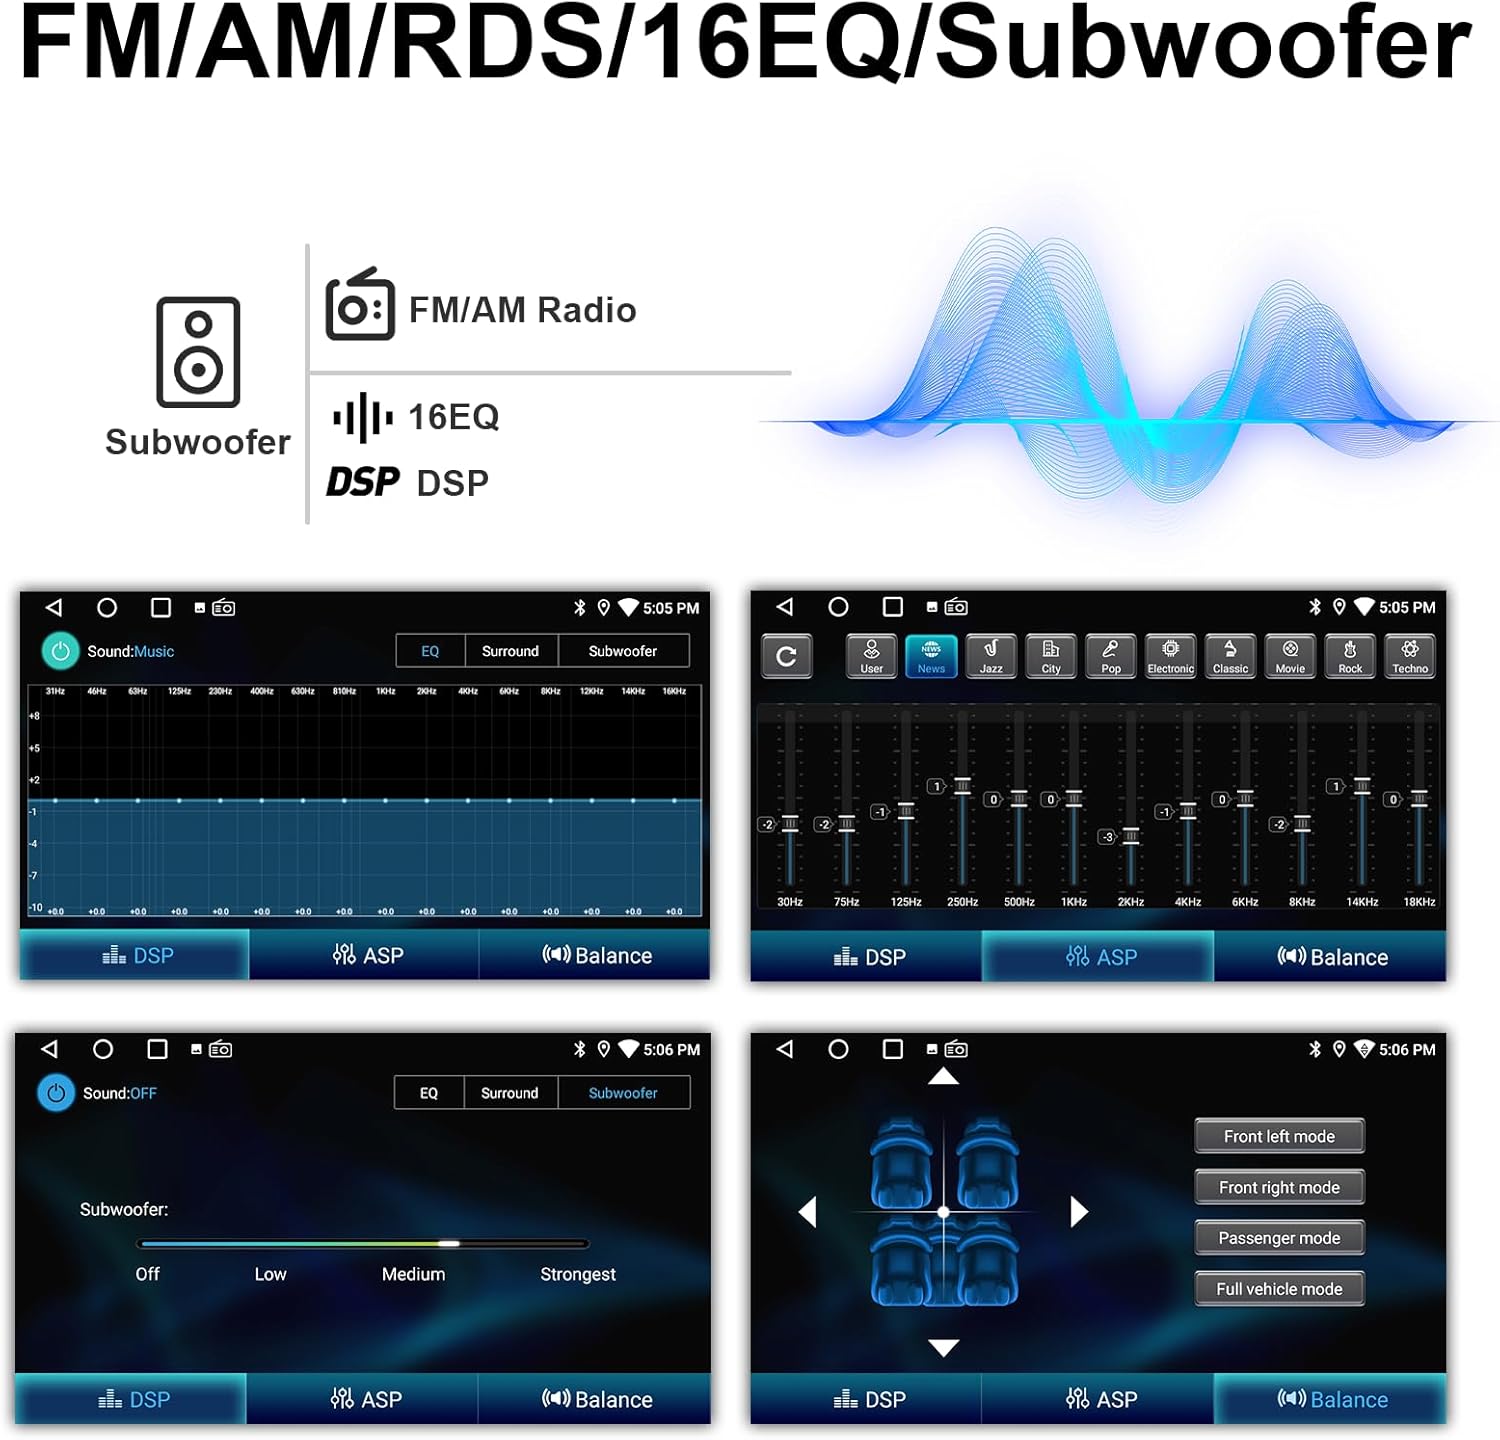
Image: Audio settings interface, including equalizer and subwoofer controls.
5.7 Mirror Link
Project your mobile phone screen onto the car stereo display, allowing you to view content from your phone directly on the larger screen.
5.8 Steering Wheel Control (SWC)
The unit supports existing steering wheel controls, allowing you to manage volume, tracks, and calls without taking your hands off the wheel.
6. Maintenance
6.1 Screen Cleaning
Use the provided cleaning cloth or a soft, lint-free cloth to gently wipe the touchscreen. Avoid abrasive cleaners or solvents that could damage the screen surface.
6.2 Cooling System
The unit is equipped with a small cooling fan that automatically adjusts its speed based on ambient temperature to maintain optimal operating conditions. This helps prevent overheating during high-speed operation.

Image: Integrated cooling fan for temperature regulation.
7. Troubleshooting
- No Power: Check all power connections and vehicle fuses. Ensure the battery is properly connected.
- No Sound: Verify speaker connections. Check volume levels and audio settings (EQ, balance). Ensure the correct audio source is selected.
- Bluetooth Connection Issues: Ensure Bluetooth is enabled on both the stereo and your phone. Delete previous pairings and attempt to re-pair.
- CarPlay/Android Auto Not Connecting: Ensure your phone's operating system is up to date. Check USB cable connection if using wired mode. Restart both the stereo and your phone.
- Touchscreen Unresponsive: Perform a soft reset of the unit (refer to specific instructions if available, or disconnect/reconnect power).
- Poor Radio Reception: Check the antenna connection. Ensure the antenna is properly installed and not obstructed.
8. Specifications
| Feature | Specification |
|---|---|
| Operating System | Android 12 |
| CPU | 8-Core |
| RAM | 2GB |
| ROM | 32GB |
| Screen Size | 9 inch |
| Screen Resolution | 1280x720 IPS |
| Connectivity | Bluetooth 5.2, USB, Wi-Fi |
| Special Features | Wireless CarPlay, Android Auto, Mirror Link, AM/FM/RDS Tuner, 16-Band EQ, Subwoofer Output, Touchscreen, SWC |
| Audio Output Mode | Stereo |
| Surround Sound Config | 4.0 |
| Number of Channels | 4 |
| Compatible Devices | Amplifier |
| Item Model Number | Nunoo-FordF150-2009-2012 |
9. Warranty and Support
This product comes with a standard manufacturer's warranty. Please refer to the warranty card included in your package or contact Nunoo customer support for specific details regarding warranty coverage and duration.
For technical assistance, troubleshooting, or any questions not covered in this manual, please contact Nunoo customer support through the retailer's platform or the official Nunoo website.


