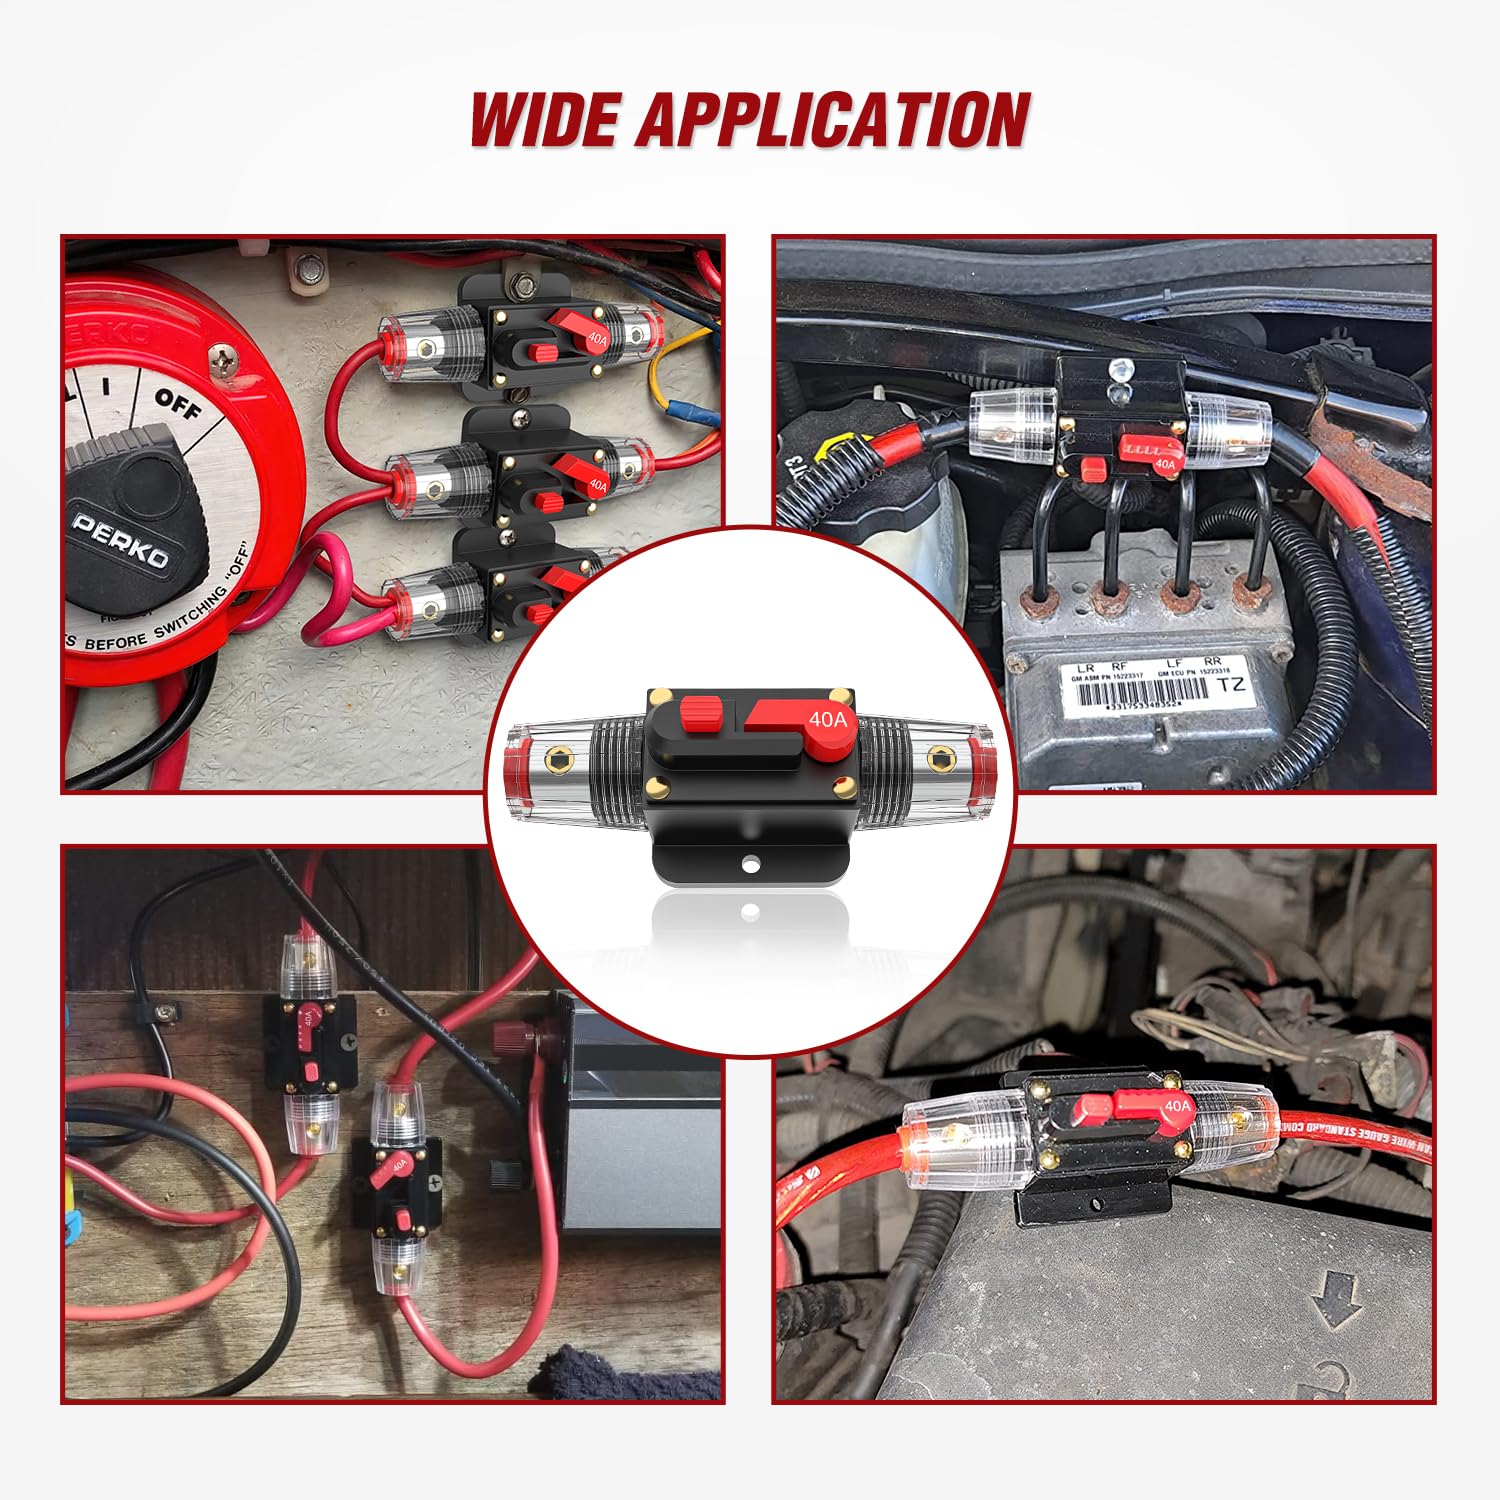
1. Product Overview
The Nilight 40A Inline Circuit Breaker is a resettable 12-24V DC manual reset fuse holder designed to provide overload protection for various electrical systems. It eliminates the need for traditional inline fuses, offering a convenient manual reset button that can also function as a kill switch. This device is suitable for car audio systems, low-voltage and high-current electrical equipment, RVs, marine applications, trucks, and solar inverters.

2. Key Features
- Manual Reset Function: Features a manual reset button, eliminating the need to replace blown fuses.
- Overload Protection: Automatically disconnects the circuit when current exceeds the rated amperage, protecting connected electrical appliances.
- Durable Construction: Manufactured from alloy materials with a water-resistant cover, ensuring good conductivity and resistance to temperature and pressure.
- Versatile Application: Ideal for auxiliary and accessory circuits in trucks, buses, RVs, ATV winches, marine vessels, battery chargers, and DC sound amplifier systems.
- Kill Switch Capability: The unique push-button reset mechanism can also serve as a convenient kill switch for immediate power disconnection.

3. Specifications
| Attribute | Detail |
|---|---|
| Brand | Nilight |
| Model Number | 50124R |
| Current Rating | 40 Amps |
| Voltage | 12-24 Volts DC |
| Circuit Breaker Type | Standard, Manual Reset |
| Mounting Type | Screw Mount (Surface Mount) |
| Number Of Poles | 2 |
| Item Weight | 3.7 ounces |
| Package Dimensions | 4.37 x 2.01 x 1.73 inches |

4. Installation Guide
The Nilight 40A Inline Circuit Breaker is designed for surface mounting on a panel or firewall. Ensure the mounting location is secure and provides adequate clearance for wiring and operation.
Wiring Connections:
- Identify the positive (+) terminal of your battery and the positive (+) input of the electrical appliance you wish to protect.
- Connect one end of the circuit breaker to the positive pole of the battery.
- Connect the other end of the circuit breaker to the positive pole of the electrical appliance.
- Ensure all connections are tight and secure to prevent loose contacts and potential arcing.
Wire Gauge Compatibility:
The circuit breaker supports various wire gauges:
- For wires of 3-15 AWG, use with the inner core installed. The inner core opening is approximately 0.236 inches.
- For wires of 0-10 AWG, remove the inner core. The opening without the inner core is approximately 0.336 inches.

Mounting:
The circuit breaker is designed for surface mounting. Use appropriate screws (not included) to secure the unit to a flat surface. Ensure the mounting holes are accessible and do not interfere with wiring.
5. Operation
The Nilight 40A Inline Circuit Breaker features a simple manual reset mechanism for ease of use.
Circuit Protection:
When the current in the circuit exceeds the rated 40 Amps, the internal mechanism of the circuit breaker will automatically trip, disconnecting the power to protect your electrical system from overload damage. The red lever will pop out, indicating a tripped state.
Manual Reset:
To reset the circuit breaker after it has tripped, simply push the red lever back into its original position. This will re-establish the connection and restore power to the circuit. Ensure the cause of the overload has been addressed before resetting to prevent immediate re-tripping.
Kill Switch Function:
The manual reset lever can also be used as a kill switch. By manually pushing the lever to the 'off' position, you can intentionally disconnect power to the circuit, providing an immediate shut-off capability for maintenance or safety purposes.

6. Maintenance and Care
The Nilight 40A Inline Circuit Breaker is designed for durability and minimal maintenance.
- Cleaning: Periodically inspect the circuit breaker for dirt, dust, or corrosion. Clean the exterior with a dry, soft cloth. Avoid using harsh chemicals or abrasive cleaners.
- Water Resistance: The unit features a water-resistant cover. While designed to withstand splashes, it is not intended for submersion. Ensure the cover remains intact and properly sealed.
- Connection Integrity: Regularly check all wiring connections to ensure they remain tight and free from corrosion. Loose connections can lead to poor performance or overheating.
- Environmental Factors: Although built with strong temperature and pressure resistance, avoid exposing the unit to extreme temperatures or direct, prolonged sunlight that could degrade materials over time.
7. Troubleshooting
Circuit Breaker Trips Frequently:
- Identify Overload: Frequent tripping indicates an excessive current draw. Disconnect non-essential devices from the circuit to identify the source of the overload.
- Check Wiring: Inspect all wiring for shorts, frayed insulation, or incorrect connections.
- Appliance Fault: A faulty appliance or component connected to the circuit may be drawing too much current. Test appliances individually if possible.
- Incorrect Amperage: Ensure the 40A rating of the circuit breaker is appropriate for the total current draw of your connected devices. If the normal operating current consistently approaches or exceeds 40A, a higher-rated circuit breaker may be required (e.g., 50A or 60A, if compatible with your system).
Circuit Breaker Does Not Reset:
- Persistent Overload: If the overload condition is still present, the breaker may immediately trip again or resist resetting. Resolve the overload before attempting to reset.
- Internal Damage: In rare cases, severe overcurrent or physical damage can cause the internal mechanism to fail. If the breaker cannot be reset after confirming no overload, it may need replacement.
8. Package Contents
Your package should contain the following item:
- 1 x Nilight 12V-24V DC 40A Auto Audio Circuit Breaker Reset Fuse Holder
9. Warranty and Support
For any questions, technical assistance, or warranty inquiries regarding your Nilight 40A Inline Circuit Breaker, please contact Nilight customer support through their official website or the retailer where the product was purchased. Please have your model number (50124R) and purchase information ready when contacting support.


