1. Introduction
Thank you for purchasing the A-ZONE Solar Motion Sensor Dummy Security Camera Light. This product is designed to enhance your outdoor security by providing both deterrent lighting and the appearance of a surveillance camera, all powered by solar energy. Please read this manual carefully before installation and use to ensure proper operation and longevity of the product.
2. Safety Information
- Ensure the product is installed in a location with sufficient direct sunlight for optimal charging.
- Do not attempt to disassemble or modify the product, as this may void the warranty and cause damage.
- Keep the product away from open flames or extreme heat sources.
- This product is IP66 waterproof, but avoid submerging it in water.
- Handle with care during installation to prevent damage to the solar panel or light unit.
3. Product Overview
The A-ZONE Solar Motion Sensor Dummy Security Camera Light combines a solar-powered LED light with the realistic appearance of a security camera to deter potential intruders. It features a PIR motion sensor for automatic lighting and a constantly lit red LED to simulate recording activity.

Figure 3.1: Overview of the A-ZONE Solar Motion Sensor Dummy Security Camera Light units.
3.1 Components

Figure 3.2: Detailed view of product components and dimensions.
- Solar Panel: Charges the internal battery using sunlight.
- PIR Motion Sensor: Detects movement of humans or vehicles.
- LED Lights: 8 high-brightness LED beads for illumination.
- Red Dummy Light: Constantly lit to simulate a recording camera.
- Adjustable Bracket: Allows for 360° rotation and angle adjustment.
- Power Switch: Activates the device.
4. Setup
Follow these steps for proper installation of your solar light:
- Choose an Installation Location: Select a location that receives direct sunlight for at least 5-6 hours daily to ensure optimal battery charging. The location should also be suitable for motion detection, such as an entrance, garden, or driveway.
- Activate the Device: Before mounting, locate the power switch on the unit and turn it ON. Perform a quick test to ensure the red light illuminates and the motion sensor triggers the main LEDs.
- Mount the Light: Use the provided screws and wall plugs to securely mount the light to a wall or desired surface. Ensure the mounting surface is stable.
- Adjust Solar Panel and Light Angle: Adjust the solar panel to face the sun for maximum exposure. Then, adjust the light unit's angle using the 360° adjustable bracket to cover the desired detection and illumination area.

Figure 4.1: Installation steps and suggested locations.

Figure 4.2: Angle adjustment capabilities of the light unit.
5. Operating Instructions
The A-ZONE Solar Motion Sensor Dummy Security Camera Light operates automatically once installed and activated.
- Daytime Operation: During the day, the solar panel automatically charges the internal 2000mAh lithium-ion battery. The main LED lights will remain off.
- Nighttime Operation (Red Light): As dusk approaches, the red dummy light will automatically turn on and remain constantly lit, simulating a recording security camera. This provides a continuous deterrent effect.
- Motion Detection (Main Light): When motion (human or vehicle) is detected within the sensor's range (detection angle: 120°, detection distance: 3-6m), the main high-brightness LED lights will automatically turn on.
- Automatic Shut-off: After approximately 20 seconds of no further motion detection, the main LED lights will automatically turn off, while the red dummy light will remain on.

Figure 5.1: Daytime charging and nighttime illumination.
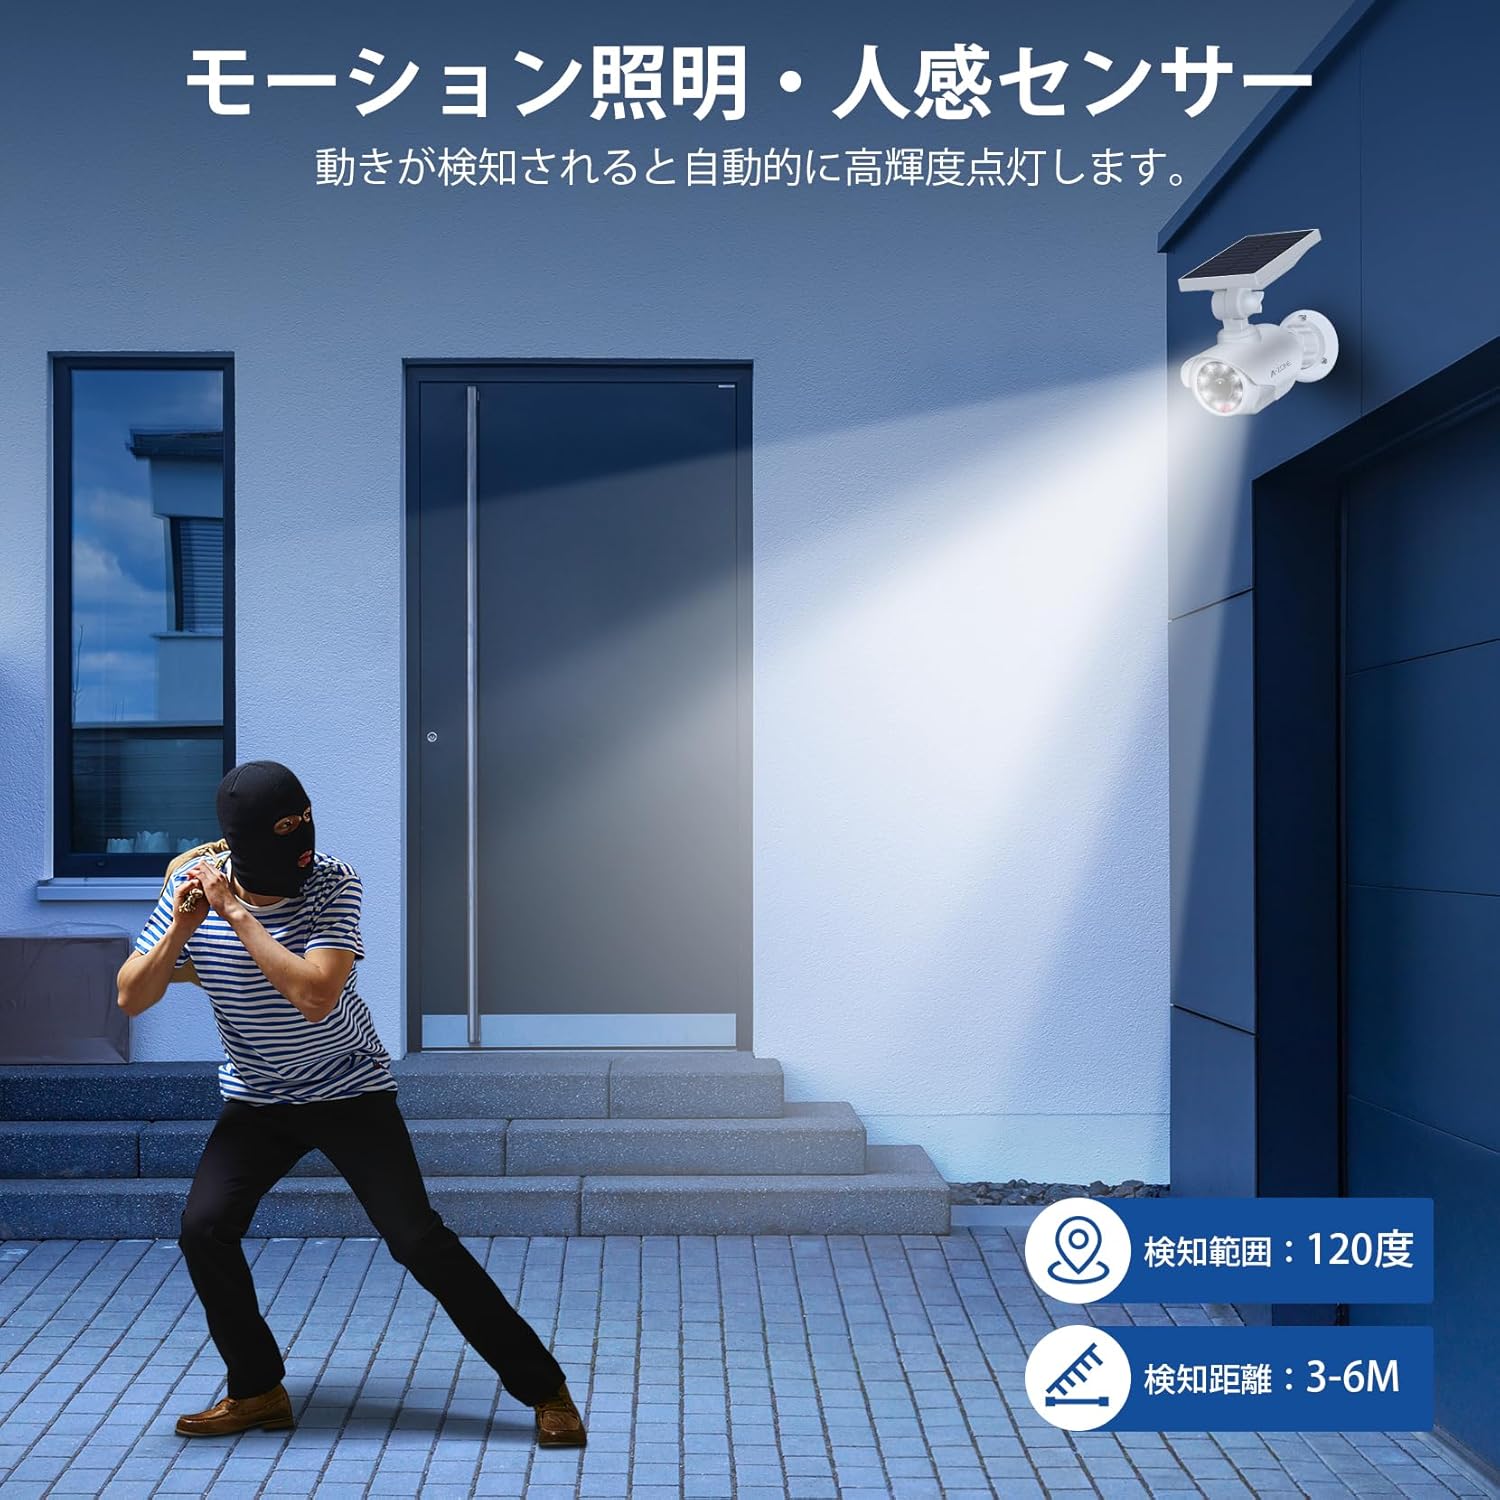
Figure 5.2: Motion sensor detection in action.
6. Maintenance
- Cleaning: Regularly wipe the solar panel and LED light surface with a soft, damp cloth to remove dust, dirt, or debris. This ensures efficient solar charging and optimal light output.
- Battery: The product uses a built-in 2000mAh lithium-ion battery. Under good sunlight conditions, it can fully charge in 5-6 hours and provide up to 12 hours of high-brightness illumination. Battery performance may vary with seasonal changes, daylight hours, and weather conditions.
- Inspection: Periodically check the mounting screws and bracket to ensure they are secure.

Figure 6.1: High-efficiency solar panel charging and battery capacity.
7. Troubleshooting
| Problem | Possible Cause | Solution |
|---|---|---|
| Light does not turn on at night. | Insufficient solar charge. | Ensure the solar panel is in direct sunlight for at least 5-6 hours daily. Clean the solar panel. |
| Motion sensor not detecting. | Sensor obstructed or incorrect angle. | Clear any obstructions from the sensor. Adjust the light's angle to cover the desired detection area. |
| Light stays on constantly or flashes. | Continuous motion detected or low battery. | Ensure no constant motion is in the detection zone. Allow the unit to fully charge in sunlight. |
| Red dummy light not working. | Power switch off or internal issue. | Check if the power switch is ON. If the issue persists, contact customer support. |
8. Specifications
| Feature | Detail |
|---|---|
| Model | Tollar |
| Dimensions (LxWxH) | 21 x 12 x 9 cm |
| Weight | 950 g |
| Battery | 1 Lithium Ion battery (included), 2000mAh |
| Power Source | Solar Powered |
| Voltage | 3.7 Volts |
| Material | Acrylonitrile Butadiene Styrene (ABS) |
| Waterproof Rating | IP66 |
| Motion Sensor Angle | 120 degrees |
| Motion Detection Range | 3-6 meters |
| Illumination Range | Up to 10 meters |
| Installation Type | Semi-flush mount |
| Usage Environment | Outdoor |
9. Warranty and Support
This A-ZONE product comes with a 1-year quality guarantee from the date of purchase. During this period, we offer support for accessory updates or main unit replacement in case of manufacturing defects or malfunctions under normal use.
For any questions, concerns, or technical support, please contact our customer service team through the platform where you purchased the product. Please have your order number and product model (Tollar) ready when contacting support.
We are committed to ensuring your satisfaction and providing a reliable product experience.


