
1. Introduction
The OLIGHT Seeker 4 Pro is a high-performance rechargeable flashlight designed for various applications including emergencies, camping, and searching. It features an impressive 4,600 lumens maximum output and a throw distance of up to 260 meters. This manual provides detailed instructions for the proper use, maintenance, and care of your Seeker 4 Pro flashlight.
2. Package Contents
Upon opening your OLIGHT Seeker 4 Pro package, please verify that all the following items are included:
- Seeker 4 Pro Flashlight (battery included) x 1
- Holster x 1
- Holster Fixing Bracket x 1
- USB-C Charging Cable x 1
- Stainless Steel Screw x 2

Image: All items included in the OLIGHT Seeker 4 Pro package.
3. Product Overview
The Seeker 4 Pro is engineered for superior performance and user convenience. Key features include:
- High Performance: Delivers a maximum output of 4,600 lumens and a beam distance of 260 meters.
- Multi-functional Holster: Provides secure storage, charging capabilities, and flexible carrying options.
- Dual Charging Options: Supports both Type-C charging via the holster and magnetic charging with an optional MCC3 cable.
- Enlarged Side Switch: Offers improved rotational grip for stepless dimming and easy operation, even with gloves.
- Hidden Indicators: Integrated brightness and battery level indicators maintain the flashlight's IPX8 waterproof rating.

Image: The OLIGHT Seeker 4 Pro flashlight, showcasing its design and color.

Image: The flashlight's powerful beam lighting up a distant landscape, highlighting its 4600 lumens output and 260-meter throw capability.

Image: Close-up of the flashlight's ergonomic wrap-around silicone grip, designed for secure and comfortable handling.

Image: Diagram illustrating the enlarged metal side switch, which allows for smoother stepless dimming and easier operation.
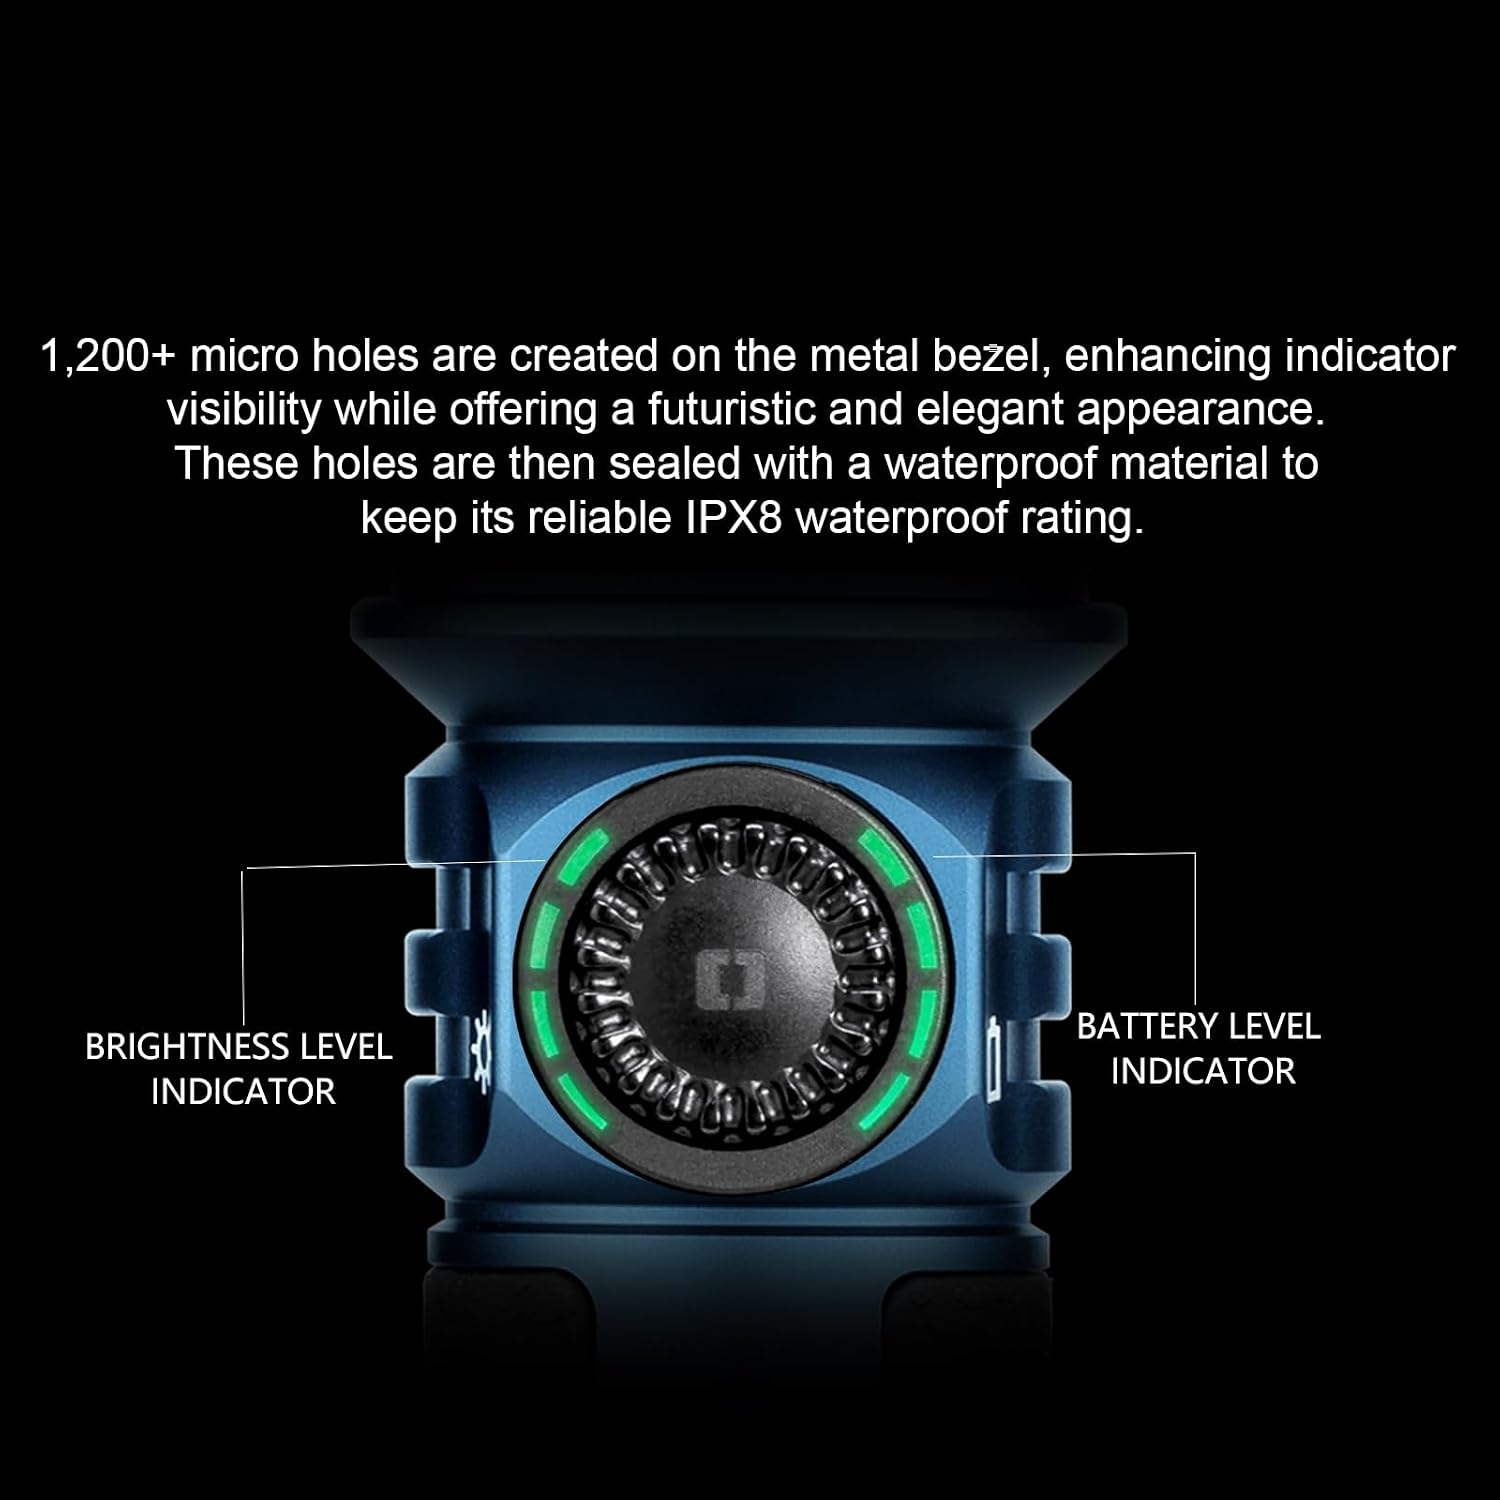
Image: Detailed view of the hidden brightness and battery level indicators, visible through micro holes on the metal bezel.

Image: The flashlight submerged in water, illustrating its IPX8 waterproof capability.
4. Setup
Before first use, ensure the flashlight is fully charged and familiarize yourself with its basic functions.
4.1 Unlocking and Locking
The Seeker 4 Pro features a pull-out unlock function when used with its holster. When the flashlight is off:
- To unlock, simply remove the flashlight from the holster.
- To lock, place the flashlight back into the holster.

Image: Demonstrates removing the flashlight from its holster to unlock it for use.
4.2 Presetting Brightness
For the first time in the Seeker series, you can preset the brightness level by rotating the side switch before turning the flashlight on. This allows for quick access to your preferred illumination level.
- Rotate the switch to adjust the desired brightness output (Low, Medium, High).
- The Turbo mode does not need to be preset; it can be accessed directly by simply double-pressing the switch after unlocking the flashlight.

Image: Visual guide on how to preset brightness levels (Low, Medium, High) by rotating the switch before activating the flashlight.
5. Operating Instructions
5.1 Basic Operation
- Turn On/Off: Press the side switch once to turn the flashlight on or off.
- Change Brightness: When the flashlight is on, rotate the side switch to cycle through brightness levels. Long-press the switch for stepless dimming.
- Turbo Mode: Double-press the side switch to activate Turbo mode. Double-press again to return to the previous brightness level.
- Strobe Mode: Triple-press the side switch to activate Strobe mode. Press once to exit.
- Lockout/Unlock: When the flashlight is off, press and hold the side switch for approximately two seconds until the moonlight mode turns on and then off. The flashlight is now locked out. To unlock, press and hold the switch for about two seconds until the light turns on.
5.2 Output and Runtime
The Seeker 4 Pro offers various output modes with corresponding runtimes and throw distances:

Image: A table detailing the output, runtime, and throw distance for each mode (Mode 1 to Mode 5) of the Seeker 4 Pro.
5.3 Color Temperature Options
The OLIGHT Seeker 4 Pro is available in different color temperature options to suit various preferences and environments.

Image: A visual comparison showing the difference between Neutral White (4000K~5000K) and Cool White (5700K~7000K) light outputs.
6. Charging
The Seeker 4 Pro offers convenient dual charging methods:
- Type-C Charging with Holster: The included holster features a built-in Type-C port for direct charging.
- Magnetic Charging: For added versatility, the flashlight can also be charged using an optional MCC3 magnetic charging cable.
Note: Ensure the end cap is fully tightened before charging, as slight looseness may cause charging issues.

Image: Illustrates both Type-C charging via the holster and magnetic charging directly to the flashlight's tailcap.

Image: The flashlight securely placed in its holster, connected to a power source for charging.
6.1 Holster Functionality
The versatile holster not only provides charging but also offers multiple carrying options:
- Vertical Holster: Included for standard belt carry.
- Charging Dock: The holster itself serves as a charging dock.
- In-Car Charging: Can be mounted in a vehicle for convenient charging on the go.
- Backpack Attachment: Easily attaches to backpacks for outdoor activities.
- Horizontal Holster: An optional accessory for horizontal belt carry.

Image: The flashlight secured in its vertical holster, attached to a belt.

Image: The holster functioning as a charging dock for the flashlight.

Image: The holster mounted within a car, providing a charging solution for the flashlight while driving.
7. Maintenance
To ensure the longevity and optimal performance of your OLIGHT Seeker 4 Pro, follow these maintenance guidelines:
- Cleaning: Regularly clean the flashlight body with a soft, damp cloth. For the lens, use a lens cleaning cloth to avoid scratches.
- Threads and O-rings: Apply a thin layer of silicone grease to the threads and O-rings periodically to maintain water resistance.
- Battery Care: Store the flashlight with a partially charged battery if not in use for extended periods. Avoid fully discharging the battery frequently.
- Avoid Extreme Temperatures: Do not expose the flashlight to extreme heat or cold, as this can affect battery life and electronic components.
8. Troubleshooting
If you encounter issues with your Seeker 4 Pro, refer to the following common problems and solutions:
| Problem | Possible Cause | Solution |
|---|---|---|
| Flashlight does not turn on. | Low battery; Lockout mode activated; Loose tailcap. | Charge the battery; Unlock the flashlight (see Section 4.1); Tighten the tailcap. |
| Flashlight does not charge. | Loose tailcap; Dirty charging contacts; Faulty cable/adapter. | Ensure tailcap is fully tightened; Clean charging contacts with a clean cloth; Try a different USB-C cable or power adapter. |
| Light output is dim or flickers. | Low battery; Dirty contacts; Overheating. | Charge the battery; Clean battery contacts and flashlight body contacts; Allow flashlight to cool down. |
If the problem persists after attempting these solutions, please contact OLIGHT customer support for further assistance.
9. Specifications
Detailed technical specifications for the OLIGHT Seeker 4 Pro flashlight:
| Feature | Specification |
|---|---|
| Model | O-SEEKER4PRO#USFBA |
| Special Feature | Adjustable Light Modes, High Power, Long Range, Rechargeable, Waterproof |
| Color | Midnight Blue |
| Power Source | Battery Powered |
| Light Source Type | LED |
| Material | Aluminum |
| Product Dimensions | 1.1"D x 1.1"W x 5.2"H |
| Voltage | 3.6 Volts |
| Light Path Distance | 260 Meters |
| Battery Cell Composition | Lithium Ion |
| Number of Batteries | 1 Lithium Ion (included) |
| Water Resistance Level | Waterproof (IPX8) |
| Brightness | 4600 Lumens (Max) |
| Style | Cool White (5700K~7000K) |
| Item Weight | 1.28 pounds |
10. Warranty and Support
OLIGHT is committed to providing high-quality products. The OLIGHT Seeker 4 Pro comes with a Lifetime Warranty, reflecting the brand's confidence in its durability and performance.
For any questions, technical support, or warranty claims, please visit the official OLIGHT store or contact their customer service directly. You can find more information and contact details on the OLIGHT Store on Amazon.
OLIGHT is dedicated to enhancing the well-being of society by providing reliable illumination solutions. We hope to make the world brighter with our actions—utilizing everything possible we can to illuminate your world.


