
1. Introduction
Thank you for choosing the XtremepowerUS 1/2HP Swimming Pool Pump with Timer. This pump is designed for above-ground pools, spas, and ponds, offering efficient water circulation with a self-priming, high-flow design. It features a built-in programmable timer for convenient operation and is engineered for quiet performance. Please read this manual thoroughly before installation and operation to ensure safe and optimal use of your pump.

Figure 1.1: XtremepowerUS 1/2HP Swimming Pool Pump. This image provides an overall view of the pump, highlighting its main components and compact form factor.
2. Important Safety Information
WARNING: Failure to follow these instructions can result in serious injury or death.
- Always disconnect power to the pump before performing any service or maintenance.
- This pump is for above-ground use only. Do not use for inground pools.
- Ensure the electrical supply matches the pump's requirements (115V). Use a Ground Fault Circuit Interrupter (GFCI) for electrical connections.
- Installation must comply with all local electrical and plumbing codes.
- Keep children away from the pump and electrical connections.
- Do not run the pump dry. Ensure the pump is fully primed with water before starting.
- Do not operate the pump if any part is damaged.

Figure 2.1: Safety and Quality Certifications. This image displays the ETL, CEC, and DOE logos, confirming the pump adheres to recognized safety and quality standards for electrical and energy efficiency.
3. Setup and Installation
3.1 Placement
Position the pump on a solid, level surface as close to the pool as possible to minimize friction loss from plumbing. Ensure adequate ventilation around the pump motor.
3.2 Plumbing Connections
Connect the pool plumbing to the pump's 1.5-inch inlet and outlet ports. Use appropriate fittings and sealants to ensure watertight connections. Avoid overtightening plastic fittings.
3.3 Electrical Connection
Connect the pump to a dedicated 115V electrical outlet protected by a GFCI. Ensure the power cord is not damaged and is routed to prevent tripping hazards or damage from pool water.
3.4 Priming the Pump
Before starting the pump for the first time, or after cleaning the strainer basket, the pump must be primed. Open the transparent lid (see Figure 3.1) and fill the strainer basket housing with water until it reaches the suction pipe level. Replace the lid securely. This ensures the pump does not run dry, which can cause damage.
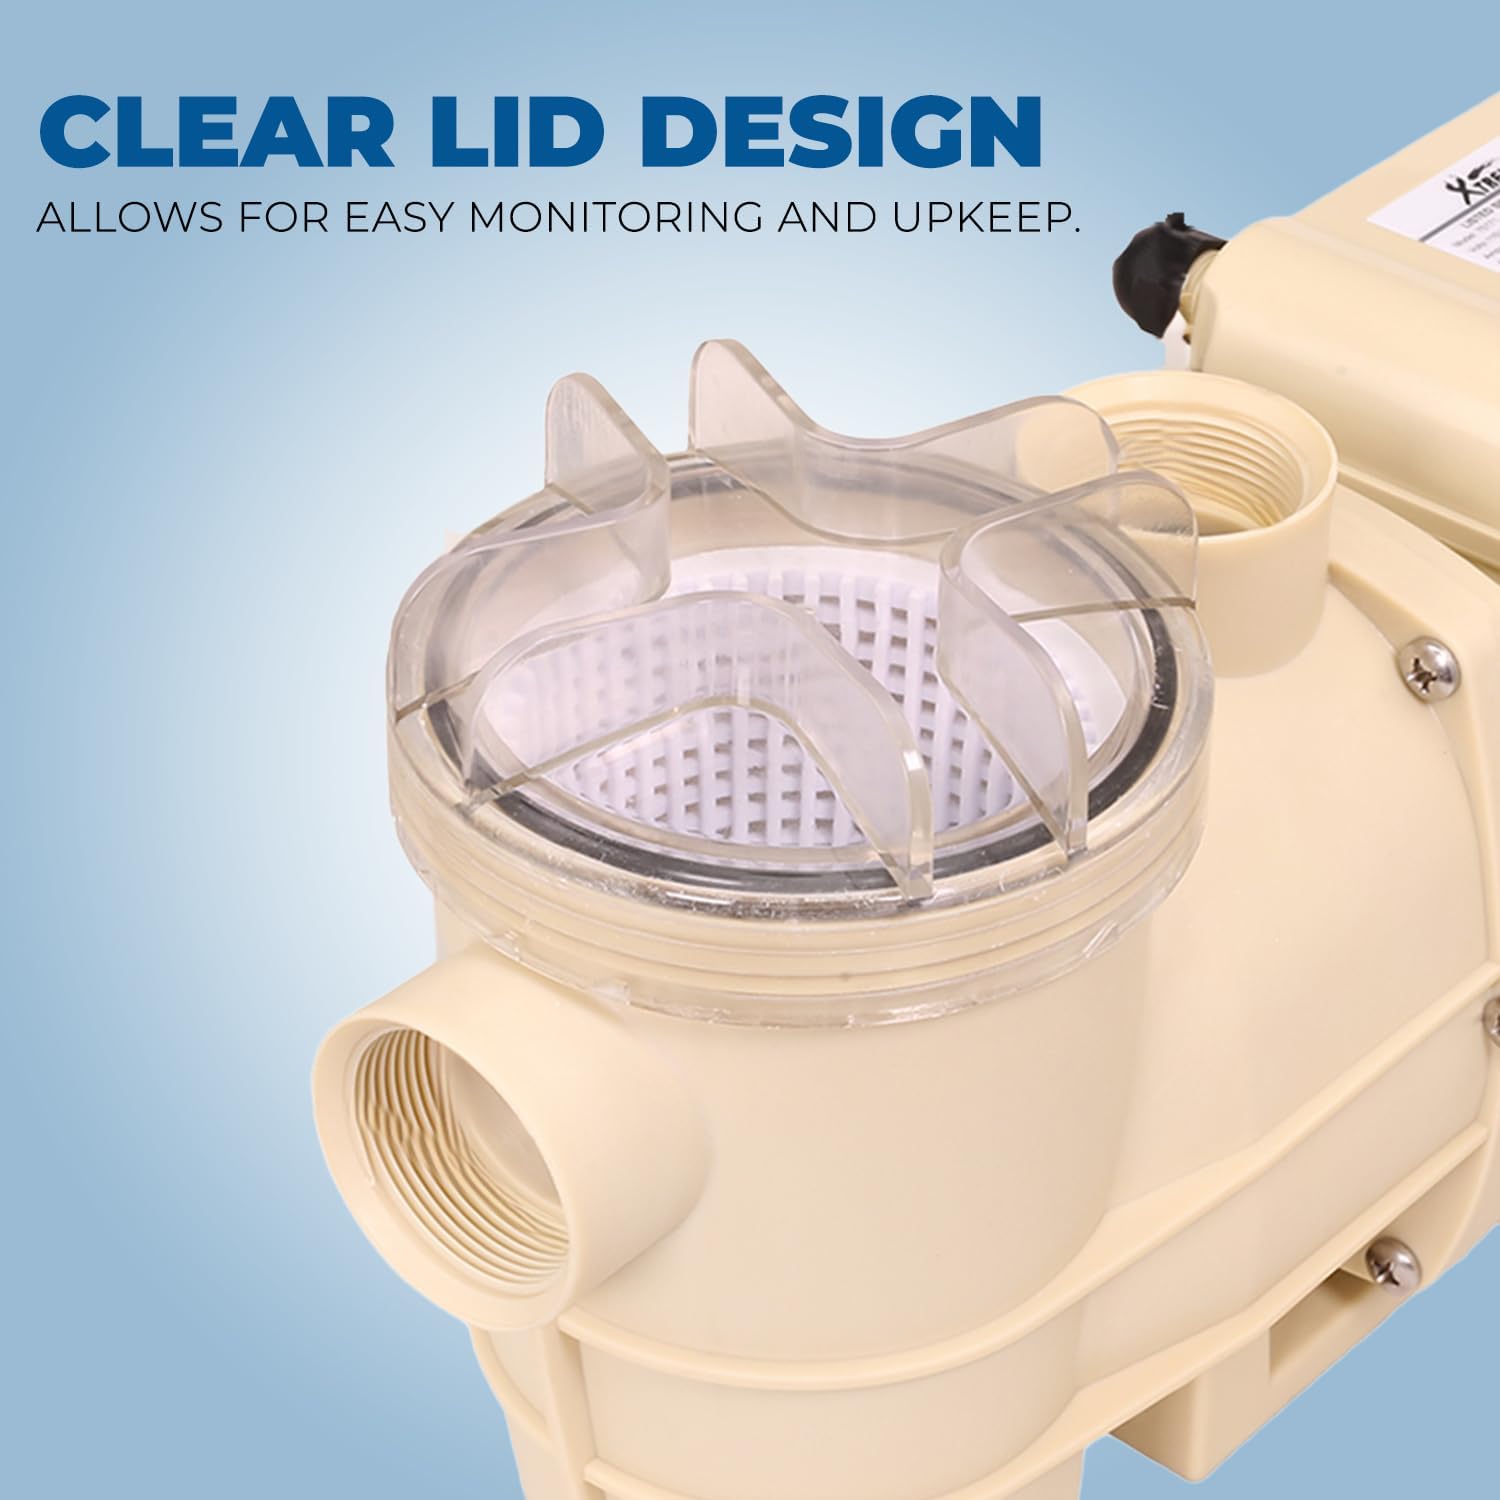
Figure 3.1: Clear Lid Design. The transparent lid allows for easy visual inspection of the strainer basket, making it simple to determine when cleaning is required and to assist with priming.
4. Operating Instructions
4.1 Initial Start-up
After ensuring the pump is properly primed and all connections are secure, turn on the power. The pump should begin circulating water. Monitor for any leaks or unusual noises.
4.2 Using the Built-in Timer
The pump features a built-in 24-hour programmable timer. This allows you to set specific operating hours for automatic daily cycling, reducing manual adjustments and saving energy.
- Setting Operating Hours: The timer offers 8 selectable operating durations, ranging from 2 to 24 hours. Refer to the control panel on the pump (Figure 4.1) for specific button functions.
- Automatic Operation: Once the desired running time is selected, the pump will operate for that duration each day at the current time it was set.
- Manual Override: The timer can typically be overridden for manual operation or to adjust settings as needed. Consult the control panel for specific manual control options.

Figure 4.1: Built-in 24-Hour Programmable Timer. This image shows the pump's integrated timer control panel, allowing users to set daily operating schedules and reduce manual intervention.
4.3 Monitoring Filtration
The transparent lid on the strainer basket allows for easy visual monitoring of the filtration process. Regularly check the basket to determine when cleaning is needed.
5. Maintenance
5.1 Cleaning the Strainer Basket
The large filter basket is designed to collect debris, leaves, and grits. Regular cleaning is essential for optimal pump performance and to prevent damage.
- Turn off the pump and disconnect it from the power source.
- Carefully unscrew and remove the transparent lid.
- Lift out the strainer basket.
- Empty any collected debris and rinse the basket thoroughly with water.
- Inspect the basket for any damage.
- Place the clean basket back into the housing.
- Fill the housing with water to prime the pump (refer to Section 3.4).
- Replace the transparent lid, ensuring it is securely tightened to prevent air leaks.
5.2 Winterization
In areas subject to freezing temperatures, the pump must be drained and stored indoors or protected from freezing. Disconnect all plumbing and drain all water from the pump to prevent damage.
6. Troubleshooting
If you encounter issues with your pump, please review the following common problems and solutions:
- Pump Not Starting:
- Check power supply and GFCI.
- Ensure the timer is set correctly or try manual operation.
- Verify all electrical connections are secure.
- Low Water Flow:
- Check and clean the strainer basket for debris.
- Ensure the pump is properly primed and there are no air leaks in the suction line.
- Inspect plumbing for blockages or restrictions.
- Pump Making Unusual Noise:
- Check for air leaks in the suction line, which can cause cavitation.
- Ensure the pump is properly primed.
- Inspect for any foreign objects in the impeller area (disconnect power first).
- Pump Leaking:
- Check all plumbing connections for tightness.
- Inspect O-rings and gaskets for proper seating and damage.
If problems persist after attempting these solutions, please contact XtremepowerUS customer support for assistance.
7. Specifications

Figure 7.1: Product Dimensions. This image illustrates the physical dimensions of the pump, including its length, width, height, and net weight, which are important for installation planning.
| Feature | Detail |
|---|---|
| Brand | XtremepowerUS |
| Model Number | 75171 |
| Horsepower | 1/2 HP |
| Maximum Flow Rate | 3120 GPH (54 Gallons Per Minute) |
| Voltage | 115 Volts |
| Power Source | Corded Electric |
| Inlet/Outlet Size | 1.5-inch NPT Connections |
| Product Dimensions (L x W x H) | 16.5" x 6" x 8.5" |
| Item Weight | 16 Pounds (Net Weight: 15.2 lbs) |
| Material | Aluminum |
| Style | Above Ground |
| Timer | Built-in 24-hour programmable |
8. Warranty and Support
For warranty information and customer support, please contact the seller or manufacturer directly. Warranty terms and conditions may vary and typically require proof of purchase. It is recommended to retain your purchase receipt and any warranty documentation provided with the product.
For technical assistance or inquiries, please visit the XtremepowerUS store or contact their customer service department.
XtremepowerUS Store: https://www.amazon.com/stores/XtremepowerUS/page/5D222F4A-4CDB-45E0-902A-18ADE4FC9970


