
1. Introduction
Thank you for choosing the isYoung Automatic Chicken Coop Door. This solar-powered door is designed to provide a secure and convenient solution for managing your poultry, offering multiple automatic modes, remote control, and robust weather resistance. This manual provides detailed instructions for installation, operation, and maintenance to ensure optimal performance and longevity of your product.

Figure 1.1: Automatic Chicken Coop Door with Remote Control
2. Product Features
- Premium Stainless Steel Construction: Crafted from high-grade 304 stainless steel, offering superior strength, corrosion resistance, and enhanced security against predators compared to aluminum alternatives.
- Multiple Operation Modes: Features 4 automatic modes (Time-Time, Time-Light, Light-Light, Light-Time) customizable with precise light sensors and timers. Includes manual and remote control options for flexible operation.
- Solar-Powered with Dual Power Option: Equipped with a solar charging panel and an included lithium-ion battery, providing reliable power and extended operation.
- Weather Resistant Design: Rigorously tested to withstand temperatures from -10℉ to 140℉, ensuring resilience against rain, snow, and wind.
- Anti-Pinch Safety Function: Designed to prevent harm to poultry by stopping door closure if an obstruction is detected.
- Remote Control: Operate the door effectively from a distance of 80-130 feet.
Feature Details with Visuals
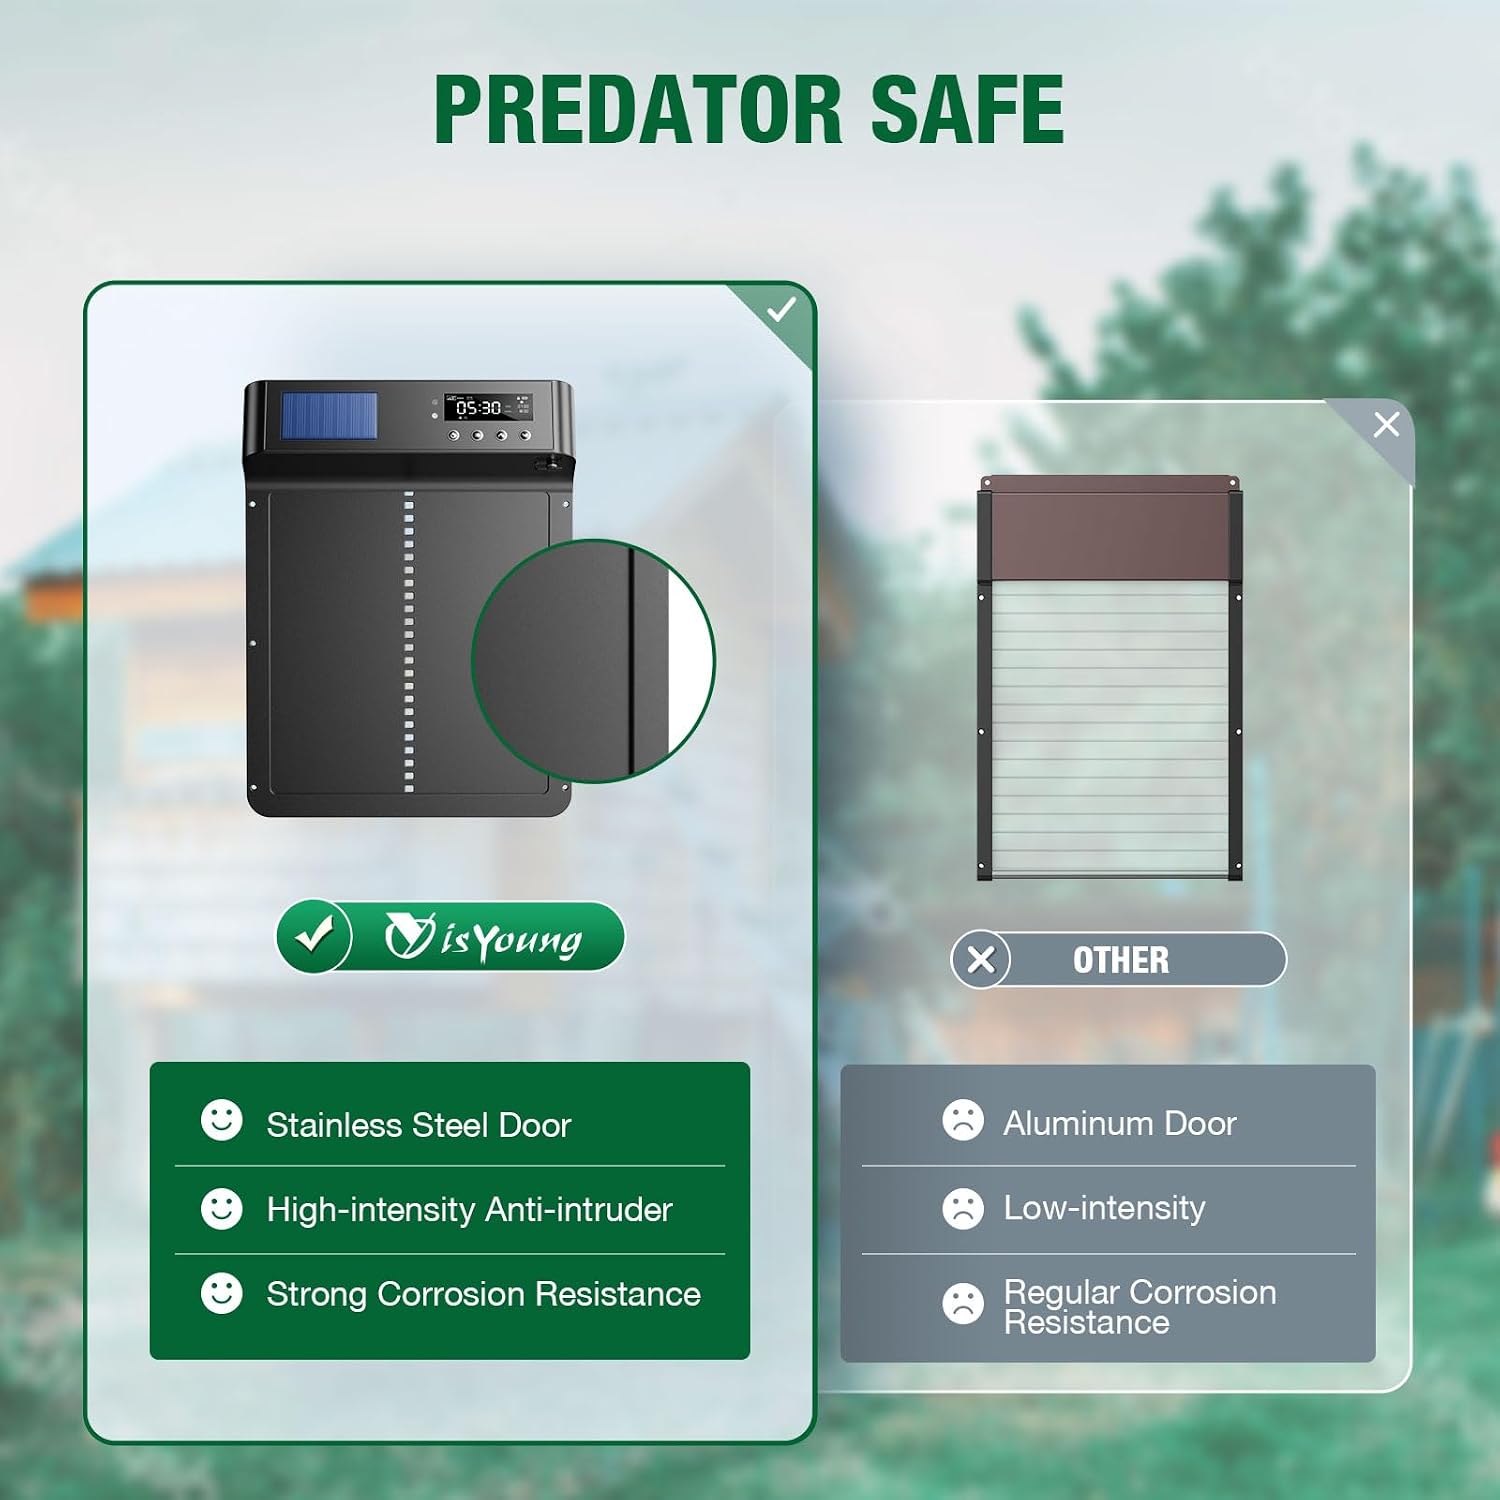
Figure 2.1: Stainless Steel for Predator Safety. The 304 stainless steel construction provides high-intensity anti-intruder protection and strong corrosion resistance.

Figure 2.2: Four Automatic Door Modes. Customize operation using light sensors and timers for flexible usage.

Figure 2.3: Solar Charging and Dual Power. The integrated solar panel charges the internal 5000mAh battery, providing up to 180 days of operation without external charging.

Figure 2.4: Weather Resistant. The door is designed to be weather-proof, water-proof, and scratch-proof, suitable for temperatures from -20°F to 140°F.

Figure 2.5: Anti-Pinch Function. The door automatically stops if an obstruction is detected during closure, preventing harm to poultry. Ensure the anti-pinch function is turned on (indicated by an icon on the display).
3. Package Contents
Verify that all components are present in your package:
- Automatic Chicken Coop Door (1 unit)
- Remote Control (1 unit)
- Charging Cable (1 unit)
- Screws (8 pieces)
- Instruction Manual (this document)

Figure 3.1: Package Contents and Dimensions
4. Specifications
| Attribute | Value |
|---|---|
| Model Number | JY-JMT037 |
| Dimensions (L x W x H) | 14.4" x 10.7" x 2.34" |
| Item Weight | 2.16 pounds (approx. 0.98 kg) |
| Material | 304 Stainless Steel |
| Color | Black |
| Power Source | Solar-powered, 1 Lithium Ion battery (included) |
| Operating Temperature | -10℉ to 140℉ (-23℃ to 60℃) |
| Remote Control Range | 80-130 feet |
| Manufacturer | isYoung |
5. Installation Guide
Follow these steps to properly install your automatic chicken coop door:
- Ensure Clearance: Ensure there is at least 11 inches of clearance above the desired installation location for the door to open fully.
- Mark Opening Location: Use the door frame as a template to mark the precise location for the opening on your chicken coop.
- Drill Corners: Drill pilot holes in each of the four marked corners of the opening.
- Saw Opening: Carefully saw out the marked opening, connecting the drilled holes. Ensure the edges are smooth.
- Position and Screw: Place the chicken coop door unit over the opening. Align the screw holes on the door frame with the coop wall. Gently screw in the provided screws to secure the door.
- Complete Installation: Ensure the door is firmly attached and operates smoothly.

Figure 5.1: Step-by-Step Installation Process
6. Operating Instructions
6.1 Powering On and Charging
The chicken coop door is equipped with an internal lithium-ion battery that is charged via the integrated solar panel. For initial use or if the battery is low, you may use the provided charging cable to charge the unit via a USB power source.
6.2 Setting Operation Modes
The door offers four automatic modes, along with manual and remote control options. Use the control buttons on the unit to navigate the settings menu on the display screen.
- T-T (Time-Time) Mode: Set specific opening and closing times. The door will operate based on your programmed schedule.
- T-L (Time-Light) Mode: Set a specific opening time, and the door will close based on the light sensor (when it gets dark).
- L-L (Light-Light) Mode: The door opens when it detects sufficient light (dawn) and closes when it detects low light (dusk).
- L-T (Light-Time) Mode: The door opens based on the light sensor (dawn), and closes at a specific programmed time.
- Manual Mode: Use the control buttons on the unit to manually open or close the door.
- Remote Control Mode: Use the provided remote control to open or close the door from a distance of 80-130 feet. Ensure the remote control has working batteries.

Figure 6.1: Multiple Control Options
6.3 Anti-Pinch Function
The anti-pinch function is a safety feature that prevents the door from closing if an obstruction (like a chicken) is detected in its path. An icon on the display screen indicates if this function is active. It is recommended to always keep this function enabled for the safety of your poultry.
7. Maintenance
Regular maintenance ensures the longevity and proper functioning of your chicken coop door:
- Cleaning: Periodically wipe down the door and solar panel with a soft, damp cloth to remove dirt, dust, or debris. Avoid abrasive cleaners.
- Track Inspection: Ensure the door's tracks are clear of any obstructions that might impede smooth operation.
- Battery Check: Monitor the battery indicator on the display. While solar charging is efficient, ensure the battery maintains a sufficient charge, especially during prolonged periods of low sunlight.
- Screw Tightness: Occasionally check that all mounting screws are tight to ensure the door remains securely installed.
8. Troubleshooting
If you encounter issues with your automatic chicken coop door, refer to the following common problems and solutions:
| Problem | Possible Cause | Solution |
|---|---|---|
| Door not opening/closing | Low battery; Obstruction in track; Incorrect mode setting; Sensor dirty/blocked | Charge battery; Clear track; Verify mode settings; Clean light sensor |
| Remote control not working | Remote battery dead; Out of range; Signal interference | Replace remote battery; Move closer to door; Reduce interference |
| Door closes on poultry | Anti-pinch function disabled or malfunctioning | Ensure anti-pinch function is enabled (check display icon); Contact support if issue persists |
| Solar panel not charging | Panel dirty/blocked; Insufficient sunlight; Damaged panel | Clean panel; Relocate door to sunnier spot; Contact support |
If the problem persists after attempting these solutions, please contact customer support.
9. Warranty and Support
isYoung is committed to providing high-quality products. This Automatic Chicken Coop Door comes with a Lifetime Warranty, reflecting our confidence in its quality and reliability. We use premium materials and high-quality internal components to ensure the longevity of our products.
If you experience any issues or require assistance, please do not hesitate to contact us. You can reach our support team via Amazon message or through the support email provided with your purchase documentation.
Please have your model number (JY-JMT037) and a description of the issue ready when contacting support.


