
1. Introduction
The Hyperice Normatec 3 Recovery System utilizes dynamic air compression technology to enhance wellness, accelerate recovery, and optimize performance. This system is designed to provide a restorative massage experience for your legs, aiding in circulation and muscle recovery. This manual provides essential information for the proper setup, operation, and maintenance of your Normatec 3 system with standard size leg attachments and the accompanying backpack.

Image 1.1: Hyperice Normatec 3 Legs and Backpack. This image displays the two leg compression attachments connected to the control unit, alongside the dedicated Hyperice backpack for transport and storage.
2. Safety Information
Before using the Normatec 3 Recovery System, please read and understand all safety instructions. Improper use can lead to injury or device malfunction.
- Body Positioning: Ensure proper body positioning during use. Consult with a healthcare professional if you have any pre-existing medical conditions or contraindications for compression therapy.
- Electrical Safety: Follow all electrical safety guidelines for powered massagers. Do not use the device near water or in excessively humid environments. Ensure the charging port and cables are dry before connecting.
- Medical Advice: This device is intended for personal recovery and wellness. It is not a substitute for professional medical treatment. If you experience pain or discomfort, discontinue use immediately and consult a healthcare professional.
- Children and Pets: Keep the device out of reach of children and pets.
3. Setup
3.1 Unpacking and Inspection
- Carefully remove all components from the packaging.
- Inspect the control unit, leg attachments, and hoses for any signs of damage. If any components are damaged, do not use the system and contact customer support.
3.2 Sizing and Fit
The Normatec 3 Legs are available in a standard size on Amazon. To ensure proper fit and effectiveness, verify your measurements against the following guidelines:
- Standard Size: Inseam 31" - 35"
- Maximum Thigh Circumference: 30"
To measure your inseam, measure from just below your crotch to your ankle. For thigh circumference, measure around the fullest part of your mid-thigh.

Image 3.1: Normatec Size Chart. This chart illustrates how to measure inseam and thigh circumference to ensure the standard Normatec leg attachments fit comfortably.
3.3 Connecting the System
- Place the control unit on a stable, flat surface.
- Connect the air hoses from the leg attachments to the hose connection port on the control unit. Ensure a secure connection.
- Plug the power adapter into the control unit's charging port and then into a wall outlet to charge the device before first use, or to operate while charging.
4. Operating Instructions
4.1 Control Unit Overview
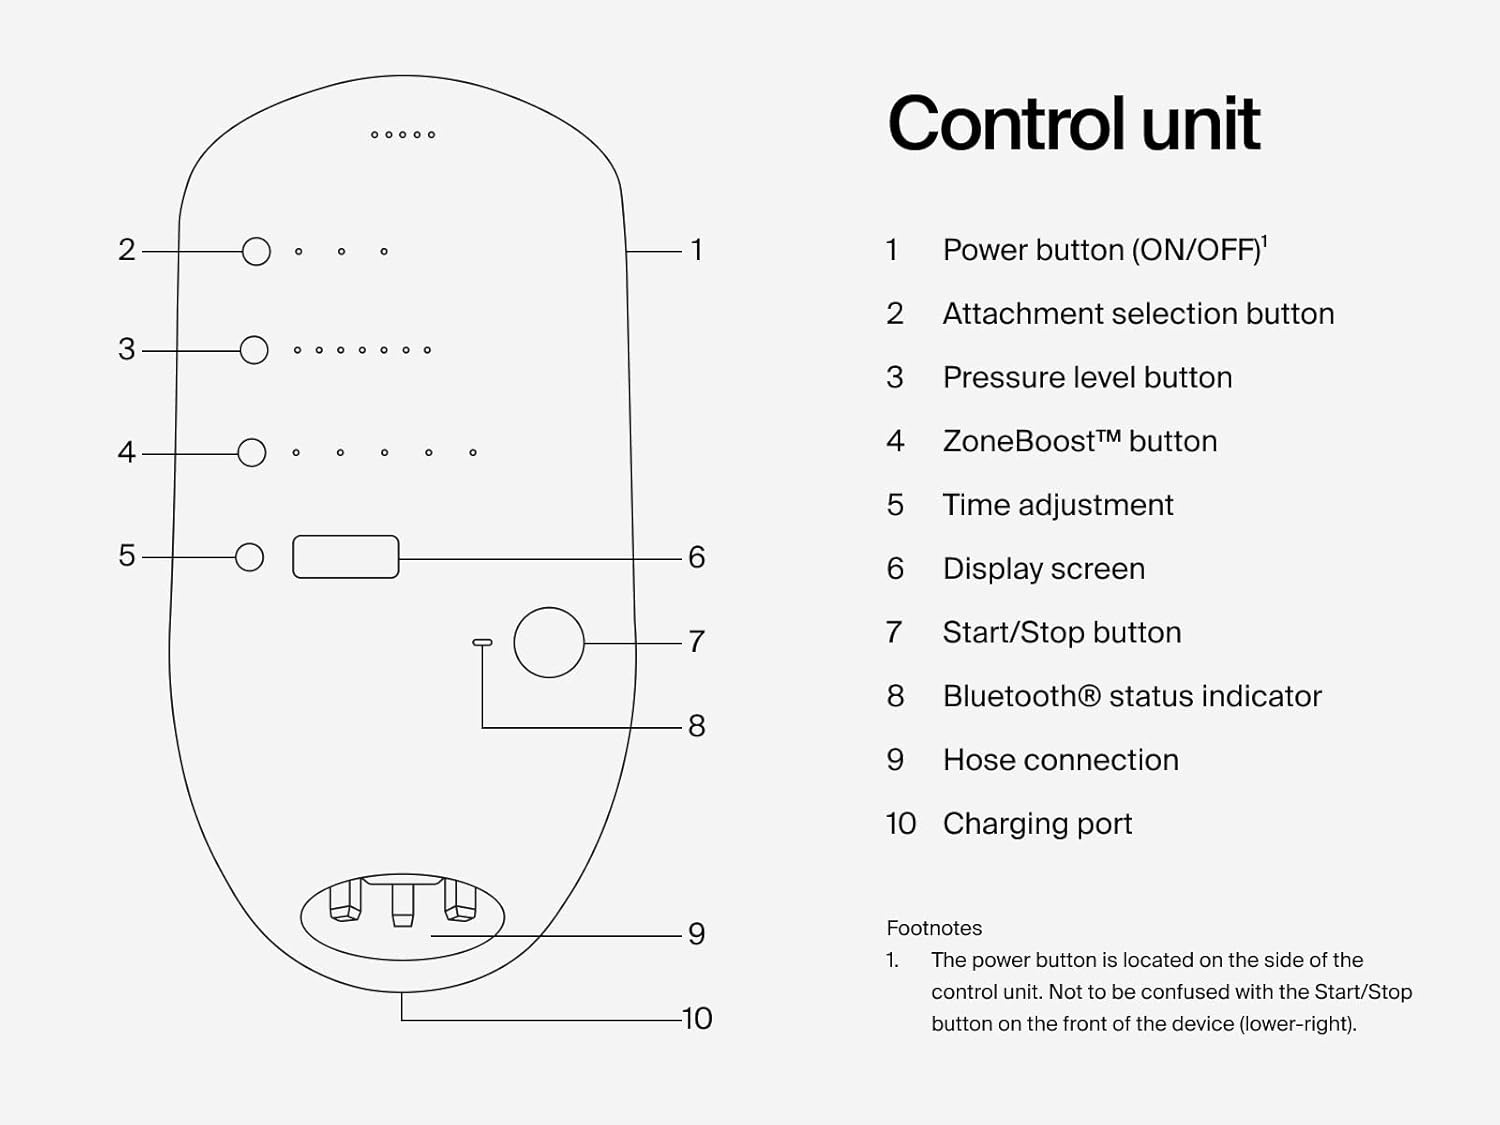
Image 4.1: Normatec 3 Control Unit Diagram. This diagram labels the various buttons and indicators on the control unit, including the power button, attachment selection, pressure level, ZoneBoost, time adjustment, display screen, start/stop button, Bluetooth status indicator, hose connection, and charging port.
- Power Button (ON/OFF): Located on the side of the device. Press and hold to turn on or off.
- Attachment Selection Button: Used to select the type of attachment (e.g., legs, hips, arms).
- Pressure Level Button: Adjusts the compression intensity (7 levels available).
- ZoneBoost™ Button: Activates targeted compression in specific zones.
- Time Adjustment: Sets the duration of the session.
- Display Screen: Shows current settings and session time.
- Start/Stop Button: Initiates or pauses the compression session.
- Bluetooth® Status Indicator: Shows Bluetooth connectivity status for the Hyperice App.
- Hose Connection: Port for connecting the air hoses from the attachments.
- Charging Port: For connecting the power adapter.
4.2 Starting a Session
- Put on the leg attachments. Ensure they are snug but not overly tight before inflation.
- Press and hold the Power Button (located on the side) to turn on the control unit.
- Use the Pressure Level Button to select your desired compression intensity (levels 1-7).
- Adjust the session time using the Time Adjustment button.
- Optionally, use the ZoneBoost™ Button to apply extra compression to specific areas.
- Press the Start/Stop Button to begin the compression session. The display screen will show the remaining time.
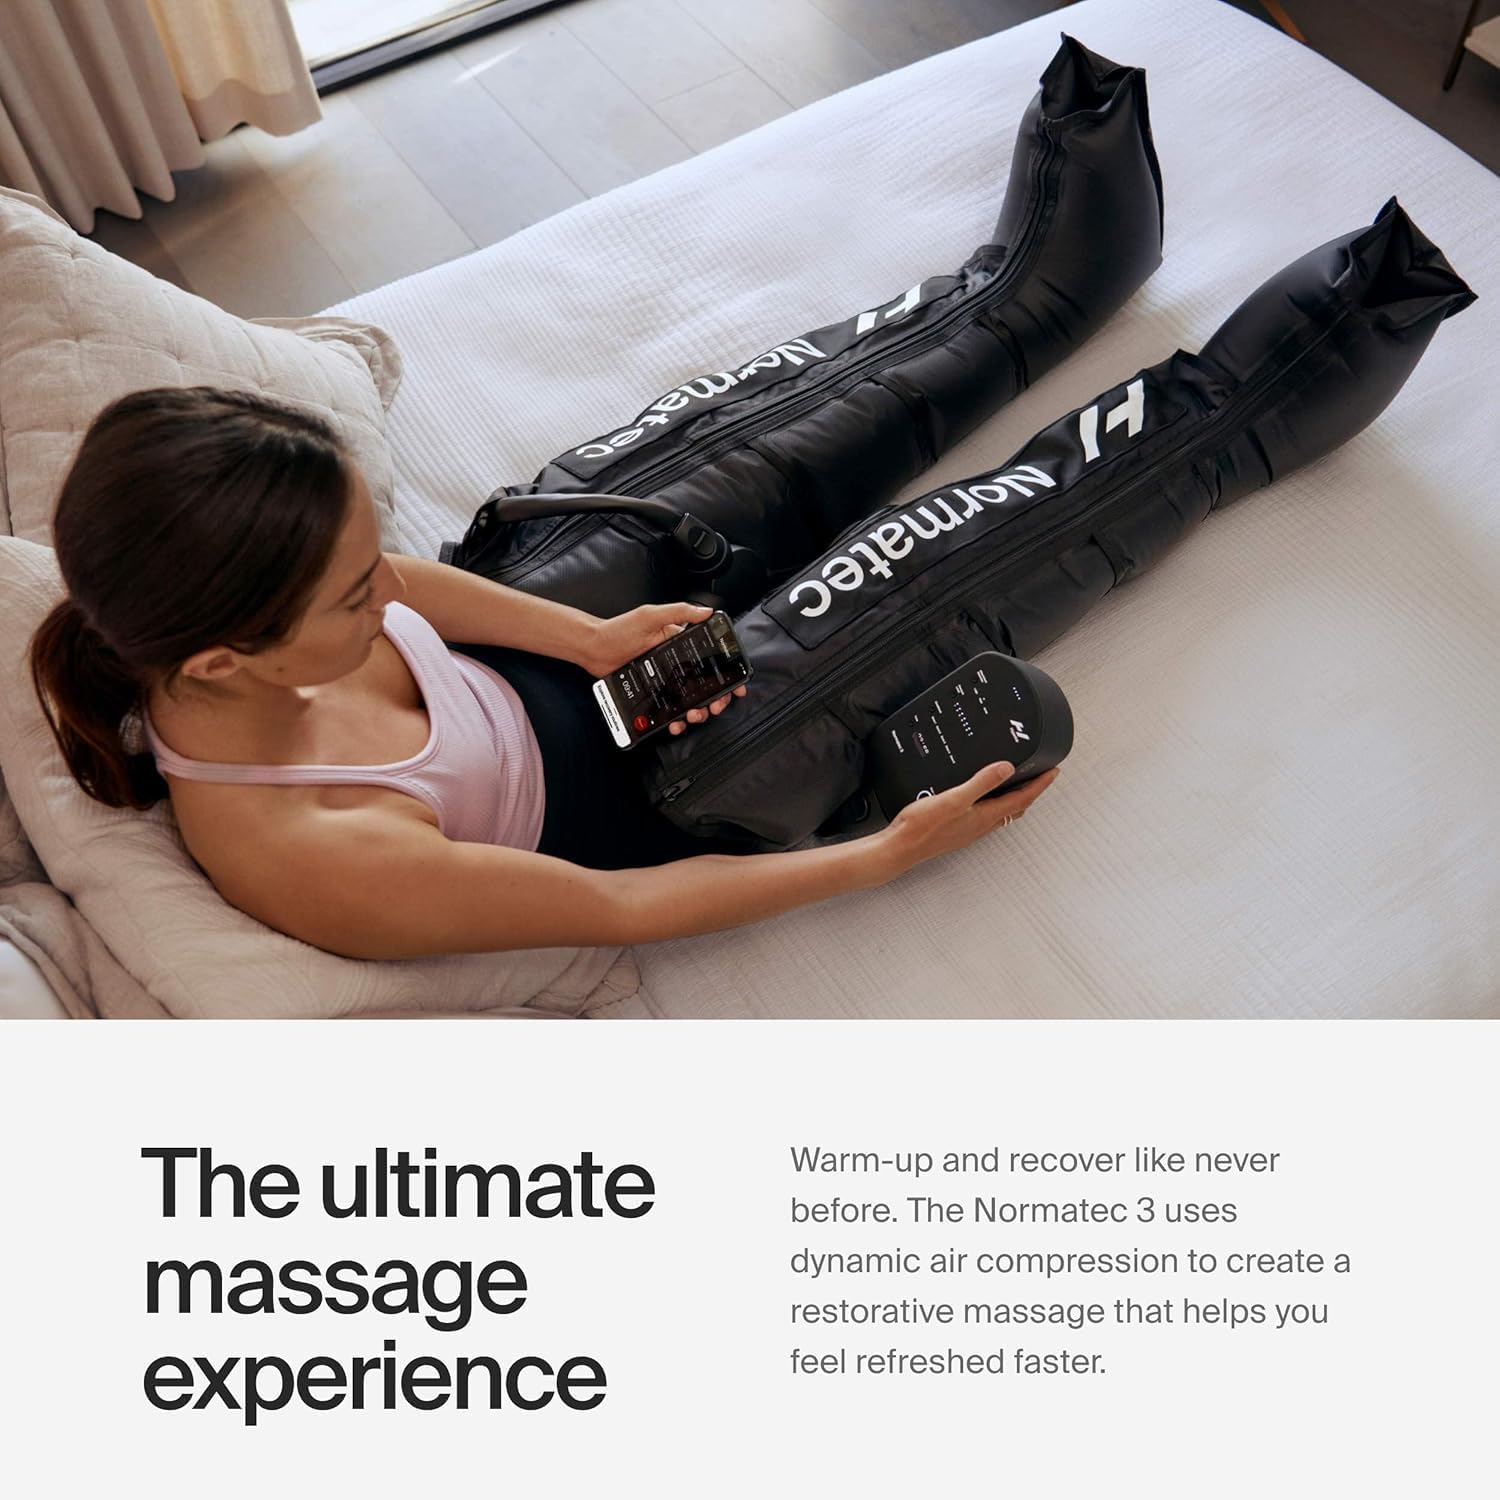
Image 4.2: User operating Normatec 3 Legs. This image shows an individual comfortably seated, using the Normatec 3 leg attachments and interacting with the control unit.
4.3 Using the Hyperice App (Bluetooth Connectivity)
The Normatec 3 features Bluetooth connectivity, allowing you to control and customize your sessions via the Hyperice App.
- Download the Hyperice App from your device's app store.
- Ensure Bluetooth is enabled on your mobile device.
- Open the Hyperice App and follow the on-screen instructions to pair with your Normatec 3 control unit. The Bluetooth® Status Indicator on the control unit will confirm connection.
- Through the app, you can access additional features, customize settings, and track your recovery sessions.
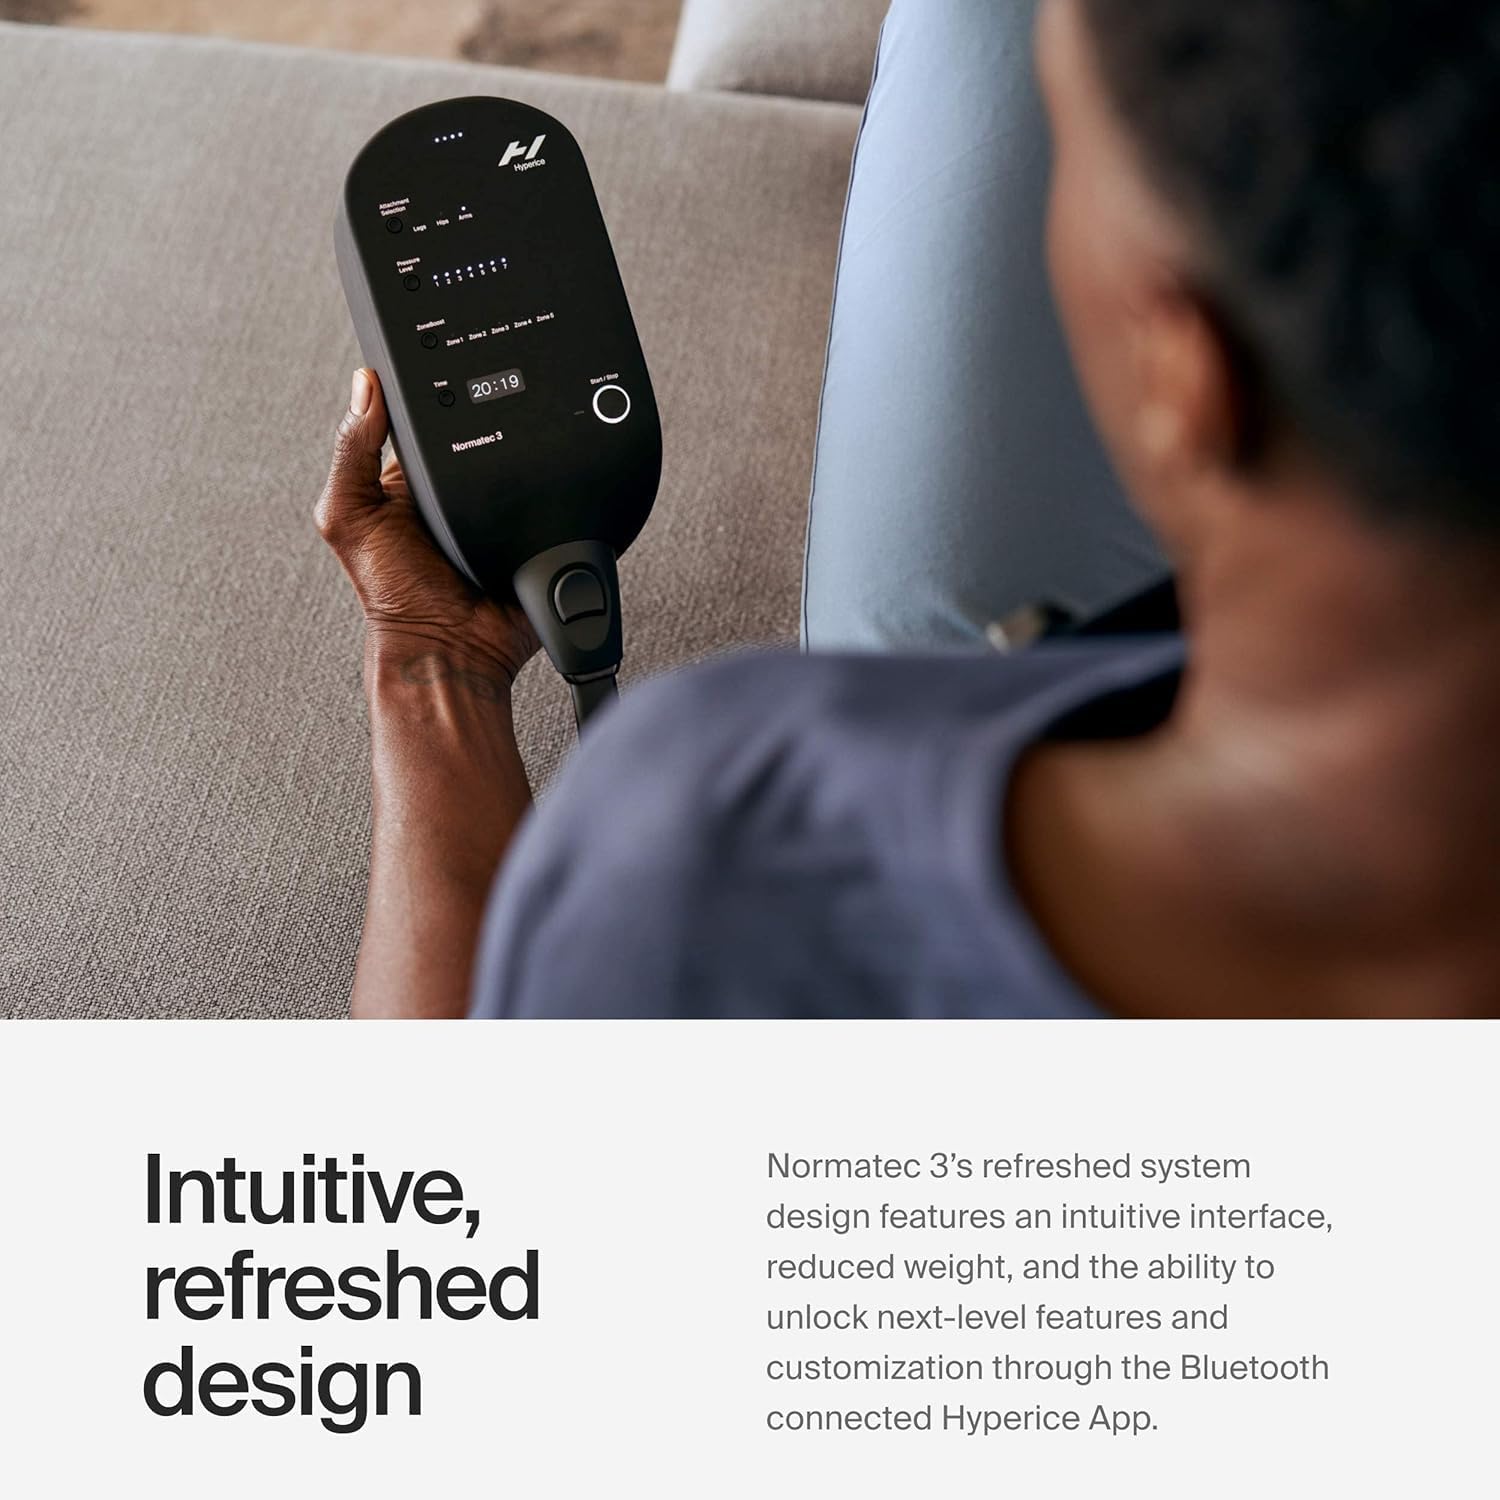
Image 4.3: Hyperice App interface for Normatec 3. This image shows a user interacting with the Hyperice mobile application to control their Normatec 3 session, demonstrating the intuitive, refreshed design.
5. Maintenance
5.1 Cleaning
- Control Unit: Wipe the control unit with a soft, damp cloth. Do not use abrasive cleaners or submerge the unit in water.
- Leg Attachments: The nylon material of the leg attachments can be wiped clean with a damp cloth and mild soap. Ensure they are completely dry before storage.
- Hoses: Wipe hoses clean with a damp cloth. Ensure no moisture enters the connectors.
5.2 Storage
When not in use, store the Normatec 3 system in a cool, dry place. The included backpack is designed for convenient and protective storage and transport.
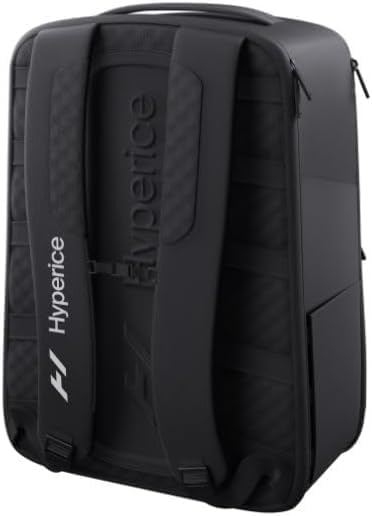
Image 5.1: Hyperice Backpack rear view. This image shows the rear of the Hyperice backpack, highlighting its ventilated shoulder straps and ergonomic design.

Image 5.2: Hyperice Backpack open view. This image displays the interior of the Hyperice backpack, showing its various compartments, including a padded lining, compression-molded sunglass case, elastic side pockets, and a laptop compartment, designed to hold the Normatec 3 system.
6. Troubleshooting
If you encounter issues with your Normatec 3 system, refer to the following common troubleshooting steps. For more detailed assistance, please consult the official Troubleshooting Guide PDF available on the product page or contact Hyperice customer support.
| Problem | Possible Cause | Solution |
|---|---|---|
| Device does not power on | Low battery; Power adapter not connected; Device malfunction | Charge the device; Ensure power adapter is securely connected; Contact support if issue persists. |
| No compression or weak compression | Hoses not securely connected; Leak in attachment or hose; Incorrect pressure setting | Check all hose connections; Inspect attachments and hoses for damage; Increase pressure level. |
| Bluetooth connection issues | Bluetooth off on mobile device; Device not in pairing mode; Interference | Ensure Bluetooth is on; Restart control unit and app; Move closer to the device. |
| Attachments feel uncomfortable | Incorrect sizing; Too high pressure setting; Improper positioning | Verify sizing (refer to Section 3.2); Reduce pressure; Adjust attachment position. |
7. Specifications
- Product Dimensions: 5.71 x 4.43 x 1.34 inches (Control Unit)
- Item Weight: 12.4 Pounds (Total System)
- Model Number: REJ6 63085 001-00, 67070 001-00, 61020 001
- Batteries: 1 Lithium Ion battery required (included)
- Power Source: Battery Powered
- Material: Nylon (Leg Attachments)
- Use For: Legs
- Manufacturer: Hyperice
- First Available: December 7, 2022

Image 7.1: Normatec 3 Legs and Backpack with dimensions. This image provides visual representation of the approximate dimensions for the Normatec 3 system components.
8. Warranty and Support
For information regarding your product's warranty, please refer to the documentation included with your purchase or visit the official Hyperice website. For technical support, replacement parts, or any other inquiries, please contact Hyperice customer service directly.
Online Resources:


