
Product Overview
The Blackview BV5300 Pro is a rugged smartphone designed for durability and performance in challenging environments. It features a robust build, a powerful processor, and a long-lasting battery, making it suitable for outdoor activities and demanding professional use. This manual provides essential information for setting up, operating, maintaining, and troubleshooting your device.

Image: Front and back view of the Blackview BV5300 Pro smartphone, showcasing its rugged design and camera module.
Key Features:
- Processor: MTK6765 Helio P35 Octa-Core CPU (4x A53 2.3GHz + 4x A53 1.8GHz) for high performance and smooth operation.
- Display: 6.1-inch HD+ IPS display (1560x720 pixels) offering a large and vibrant viewing experience.
- Memory & Storage: 4GB RAM + 64GB ROM, expandable up to 512GB with an external card (not included).
- Cameras: 8.0MP front camera (S5K4H7) and 13.0MP rear camera (Hi1336) with flash for clear photos and video calls.
- Battery: High-capacity 6580mAh battery for extended usage.
- Durability: IP68, IP69K, and MIL-STD-810H certified for water, dust, and shock resistance.

Image: Visual representation of the Blackview BV5300 Pro's MIL-STD-810H certification, IP68 & IP69K waterproofness, balanced durability and portability, and glove-friendly screen.
Setup Guide
1. Unboxing and Initial Inspection
Carefully remove all items from the packaging. Ensure the following components are present:
- 1 x Blackview BV5300 Pro Smartphone
- 1 x User Manual
- 1 x USB Cable
- 1 x EU Power Adapter
- 1 x Pre-applied Protective Film
Inspect the device for any visible damage. If any components are missing or damaged, contact customer support immediately.
2. Inserting SIM Cards and SD Card
The Blackview BV5300 Pro supports dual Nano SIM cards and an external memory card (up to 512GB). To insert them:
- Locate the SIM card tray on the side of the phone.
- Use the provided SIM ejector tool (if included, otherwise a small paperclip) to open the tray.
- Carefully place your Nano SIM card(s) and/or microSD card into the designated slots on the tray. Ensure they are correctly oriented.
- Gently push the tray back into the phone until it clicks into place.
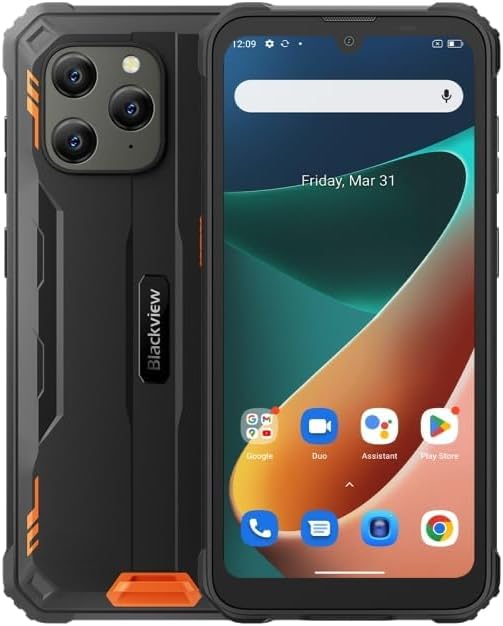
Image: Side view of the Blackview BV5300 Pro, showing the location of the SIM card tray and physical buttons.
3. Charging the Battery
Before first use, it is recommended to fully charge the device.
- Connect the USB cable to the phone's charging port.
- Connect the other end of the USB cable to the power adapter.
- Plug the power adapter into a wall outlet.
- The charging indicator will appear on the screen. Once fully charged, disconnect the charger.
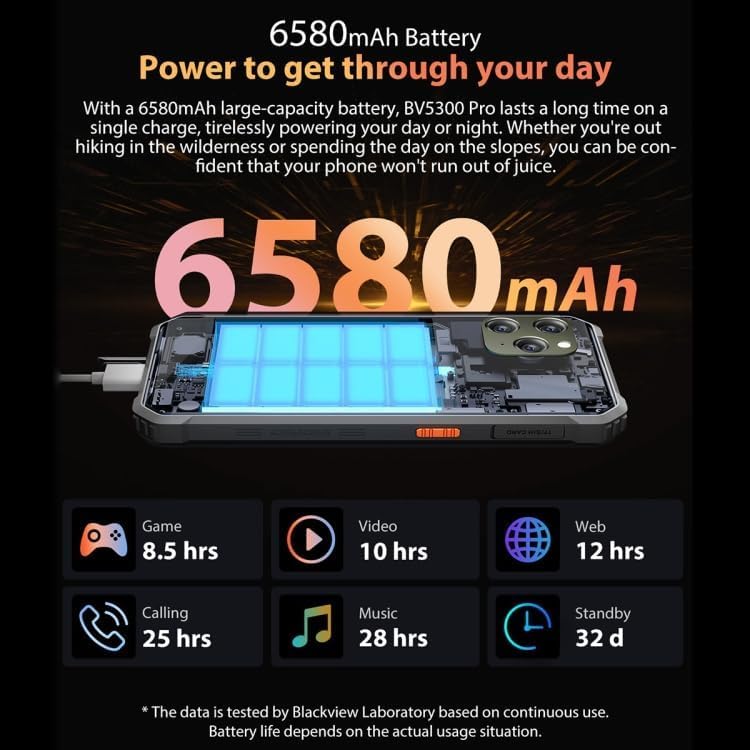
Image: Illustration demonstrating the long battery life of the Blackview BV5300 Pro's 6580mAh battery, showing estimated hours for various activities like gaming, video playback, and standby.
4. Powering On and Initial Setup
Press and hold the Power button until the Blackview logo appears. Follow the on-screen prompts to complete the initial setup, including language selection, Wi-Fi connection, and Google account setup.
Operating Instructions
Basic Navigation
- Power Button: Press to turn the screen on/off. Press and hold to power off or restart.
- Volume Buttons: Adjust media volume, call volume, or ringtone volume.
- Touchscreen: Tap to select, swipe to scroll, pinch to zoom. The screen supports 10-point multi-touch and is glove-friendly.

Image: Front view of the Blackview BV5300 Pro, displaying the screen and front camera.
Making Calls and Sending Messages
To make a call, open the Phone app and dial the number or select a contact. To send a message, open the Messages app, tap to compose a new message, enter the recipient and your text.
Using the Camera
Open the Camera app from the home screen or app drawer. Tap the shutter button to take a photo. Switch between front and rear cameras using the camera toggle icon. The rear camera is 13MP with flash, and the front camera is 8MP.
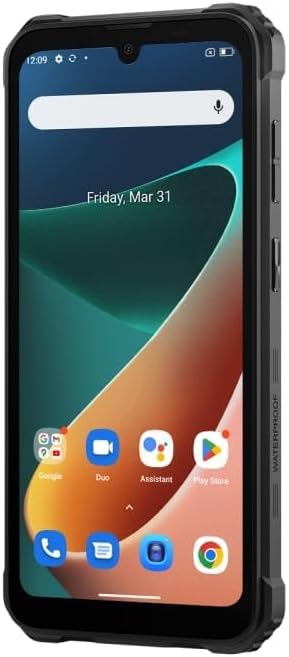
Image: Back view of the Blackview BV5300 Pro, highlighting the rear camera module and Blackview branding.
Connectivity (Wi-Fi, Bluetooth, NFC)
- Wi-Fi: Go to Settings > Network & internet > Wi-Fi to connect to available networks.
- Bluetooth: Go to Settings > Connected devices > Bluetooth to pair with other Bluetooth devices.
- NFC: The device supports NFC for contactless payments and data transfer. Enable it in Settings > Connected devices > Connection preferences > NFC.
Maintenance
Cleaning Your Device
To clean the phone, use a soft, lint-free cloth. For stubborn dirt, slightly dampen the cloth with water. Avoid using harsh chemicals or abrasive materials. Ensure all port covers are securely closed before exposing the phone to water or dust.
Software Updates
Regularly check for system updates to ensure optimal performance and security. Go to Settings > System > System update to check for and install available updates.
Storage Management
To manage your device's storage, go to Settings > Storage. You can free up space by uninstalling unused apps, deleting old photos/videos, or moving files to an external SD card.
Troubleshooting
| Problem | Possible Solution |
|---|---|
| Device won't turn on | Ensure the battery is charged. Connect to the charger and wait a few minutes before attempting to power on again. |
| Apps are crashing or freezing | Clear the app's cache (Settings > Apps > [App Name] > Storage & cache > Clear cache). If the issue persists, restart the phone or reinstall the app. |
| Poor network signal | Check if your SIM card is properly inserted. Move to an area with better network coverage. Restart the phone. |
| Battery drains quickly | Reduce screen brightness, close unused apps running in the background, disable Wi-Fi/Bluetooth/GPS when not in use. Check battery usage in Settings > Battery. |
| Touchscreen unresponsive | Restart the device by holding the power button. If the issue persists, consider a factory reset (backup data first). |
Specifications
| Feature | Detail |
|---|---|
| Model | BV5300 Pro |
| CPU | MTK6765 Helio P35 Octa-Core up to 2.3GHz |
| GPU | IMG GE8320 680MHz |
| Operating System | Android 12 |
| RAM | 4GB |
| ROM | 64GB |
| External Memory | TF card up to 512GB (not included) |
| SIM Card Quantity | Dual SIM |
| SIM Card Types | Nano SIM Card |
| Screen Size | 6.1 inch |
| Screen Type | IPS, Capacitive |
| Screen Color | 16.7M |
| Resolution | 1560 x 720 pixels |
| Refresh Rate | 60Hz |
| Pixel Density | 283 PPI |
| Display Area | 83% |
| Multi-touch | 10 points |
| Front Camera | 8MP FF |
| Rear Camera | 13MP |
| Rear Flashlight | Yes |
| Aperture | Rear: f2.2, Front: f/2.0 |
| Video Recording | Yes |
| Battery Type | Non-removable Li-polymer Battery |
| Battery Capacity | 6580mAh |
| Talk Time | 25 hours |
| Standby Time | 768 hours |
| Charging Power | 5V 2A 10W |
| Dimensions | 161.5 x 77.6 x 15.0 mm |
| Weight | 273g |
| Rugged Features | IP68, IP69K, MIL-STD-810H certified (Waterproof, Dustproof, Shockproof) |
| Wireless Carrier | All Carriers |
| Cellular Technology | 4G |

Image: Comprehensive overview of the Blackview BV5300 Pro's features, including camera details, display size, processor, storage, battery, and dual SIM support.
Warranty and Support
For warranty information and customer support, please refer to the warranty card included in your product packaging or visit the official Blackview website. Keep your proof of purchase for warranty claims.
Additional protection plans may be available for purchase. Please check with your retailer for details on extended warranty or accidental damage protection plans.
- Manufacturer: Tajomo
- First Available Date: June 5, 2023


