
Lorex N883A64B
Lorex N883A64B 16-Channel 4K Pro Series NVR
User Instruction Manual
Introduction
This manual provides detailed instructions for the installation, operation, and maintenance of your Lorex N883A64B 16-Channel 4K Pro Series Network Video Recorder (NVR). Please read this manual thoroughly before using the product to ensure proper setup and optimal performance. Keep this manual for future reference.
The Lorex N883A64B NVR is designed to record and manage video from up to 16 4K Ultra HD security cameras, offering advanced features like person and vehicle detection, extensive local storage, and real-time 4K recording at 30 frames per second.
What's in the Box
- Lorex N883A64B 16-Channel 4K Pro Series NVR (Recorder)
- Power Adapter
- USB Mouse
- Ethernet Cable
- HDMI Cable
- Quick Start Guide
Key Features
- Ultra HD 4K Resolution Recording: Records video at 4K resolution up to 30 frames per second, providing smooth, real-time footage. Supports digital zoom for enhanced clarity.
- Local Storage with No Monthly Fees: Equipped with 2 hard drive bays, supporting up to 2 x 10TB of storage space. Features a security-grade hard drive designed for 24/7 recording and storage mirroring for continuous data backup.
- Advanced Person and Vehicle Detection: Reduces false alarms by sending push notifications only when motion from a person or vehicle is detected. Includes Smart Search for quick review of motion-triggered events.
- Plug-and-play PoE Installation: Integrated Power-over-Ethernet (PoE) ports simplify camera connection, requiring only a single Ethernet cable per camera for both power and video transmission.
- Secure Access Anytime, Anywhere: Access your security system remotely via the Lorex Cloud app on mobile devices or the Lorex Cloud client on computers. View live feeds, watch recorded playback, and receive motion-triggered notifications.
Setup Guide
1. Unpacking and Initial Inspection
Carefully remove all components from the packaging. Inspect the NVR and accessories for any signs of damage. If any items are missing or damaged, contact Lorex customer support immediately.
2. NVR Overview

Figure 1: Front panel of the Lorex N883A64B NVR, showing the Lorex logo, status indicators, channel numbers, control buttons (prev, next, play, pause, stop, shift, rec, fn, esc), a directional pad, and a USB port.

Figure 2: Rear panel of the Lorex N883A64B NVR, displaying the power input, cooling fan, 16 PoE ports, alarm input/output terminals, VGA, RS232, HDMI, USB 3.0, Ethernet, and audio input/output ports.
3. Connecting the NVR
- Connect to a Monitor: Use the provided HDMI cable to connect the NVR's HDMI output port to an HDMI input on your monitor or TV. Alternatively, use a VGA cable for VGA connections.
- Connect the Mouse: Plug the USB mouse into one of the USB ports on the NVR (front or rear).
- Connect to Network: Connect an Ethernet cable from the NVR's LAN port to your router or network switch. This is essential for remote access and network features.
- Connect Cameras: Connect your Lorex IP cameras to the PoE ports on the rear of the NVR using Ethernet cables. Each camera will receive power and transmit video data through a single cable.
- Power On: Connect the power adapter to the NVR's power input and then plug it into a power outlet. The NVR will power on automatically.
4. Initial Configuration
Upon first boot, the NVR will guide you through a setup wizard. Follow the on-screen prompts to:
- Set up a secure password for the administrator account.
- Configure date and time settings.
- Adjust network settings (DHCP is recommended for most home networks).
- Initialize the hard drive(s) for recording.
- Scan and add connected IP cameras.
Operating the NVR
1. Live View
After setup, the NVR will display the live view from all connected cameras. You can switch between single-camera view, multi-camera grids (e.g., 4-channel, 9-channel, 16-channel), and sequence modes using the on-screen controls or the NVR's front panel buttons/mouse.
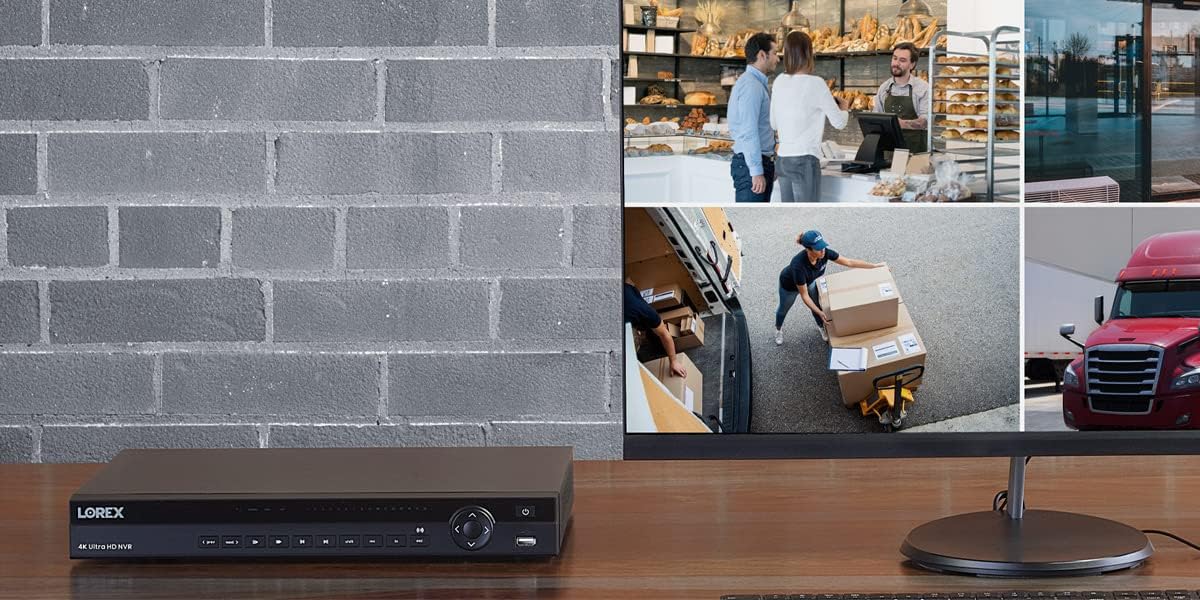
Figure 3: An example setup showing the Lorex NVR connected to a monitor, displaying a multi-view grid of surveillance camera feeds from various locations.
2. Recording and Playback
- Continuous Recording: The NVR is configured for 24/7 continuous recording by default, utilizing its security-grade hard drive.
- Motion Detection Recording: Configure specific channels to record only when motion is detected. With advanced person and vehicle detection, this reduces unnecessary recordings and saves storage space.
- Scheduled Recording: Set up custom recording schedules based on time of day or day of the week.
- Playback: Access recorded footage by navigating to the playback menu. Use the timeline to select specific dates and times. Utilize the Smart Search feature to quickly filter and review motion events.
3. Remote Access (Lorex Cloud)
The Lorex Cloud platform allows you to access your NVR remotely from anywhere with an internet connection.
- Download the App: Download the Lorex Cloud app from your mobile device's app store (iOS/Android) or the Lorex Cloud client for your computer (Windows/macOS).
- Create an Account: Register for a Lorex Cloud account if you don't already have one.
- Add Your Device: Follow the in-app instructions to add your NVR by scanning the QR code on the NVR or manually entering its device ID.
- Access Features: Once connected, you can view live feeds, play back recorded video, receive push notifications for motion events, and configure certain NVR settings remotely.

Figure 4: The Lorex Cloud application interface displayed across various devices including a laptop, desktop monitor, tablet, and smartphone, demonstrating remote access capabilities for surveillance systems.
Maintenance
- Regular Cleaning: Gently wipe the NVR's exterior with a soft, dry cloth. Do not use liquid cleaners or aerosols. Ensure ventilation openings are clear of dust and debris.
- Firmware Updates: Periodically check the Lorex support website for firmware updates. Keeping your NVR's firmware up-to-date ensures optimal performance, security, and access to new features.
- Hard Drive Health: The NVR's hard drive is designed for 24/7 operation. Monitor its health through the NVR's system settings. Consider backing up critical footage periodically.
- Password Security: Regularly change your NVR and Lorex Cloud account passwords to strong, unique combinations to prevent unauthorized access.
Troubleshooting
| Problem | Possible Cause | Solution |
|---|---|---|
| No video output on monitor. | Loose HDMI/VGA cable, incorrect input selected on monitor, NVR not powered on. | Check cable connections. Ensure monitor is set to the correct input source. Verify NVR power indicator is on. |
| Cameras not displaying video. | Loose Ethernet cable, camera not powered, camera not added/initialized, network issue. | Ensure Ethernet cables are securely connected to PoE ports. Check camera status indicators. Re-scan for cameras in NVR settings. Verify network connectivity. |
| Cannot access NVR remotely. | NVR not connected to internet, incorrect network settings, firewall blocking connection, Lorex Cloud account issue. | Verify NVR has internet access. Check network settings (DHCP/Static IP). Ensure router firewall is not blocking ports (refer to Lorex support for port forwarding if needed). Re-login to Lorex Cloud app. |
| No recording or playback. | Hard drive not initialized, hard drive full, recording schedule not set, motion detection not configured. | Initialize hard drive in NVR settings. Check hard drive capacity and configure overwrite settings. Verify recording schedules and motion detection settings for relevant channels. |
Specifications
| Feature | Detail |
|---|---|
| Model Number | N883A64B |
| Channels | 16 |
| Recording Resolution | Up to 4K (8MP) per channel |
| Recording Frame Rate | 30fps (real-time) at 4K |
| Hard Disk Size | 4 TB (expandable up to 2 x 10TB) |
| PoE Ports | 16 |
| Video Outputs | HDMI, VGA |
| USB Ports | Yes (for mouse, backup) |
| Connectivity | Ethernet |
| Dimensions | 20.47 x 16.22 x 6.77 inches |
| Weight | 10.73 pounds |
| Manufacturer | Lorex |
| Country of Origin | China |
Compatibility
The Lorex N883A64B NVR is compatible with a wide range of Lorex IP cameras. Compatible models include, but are not limited to:
E581CB, E581CD, E861ABB, E891AB, LNB8111, LNB8921, LNB8973, LNB9232, LNB9242B, LNB9252B, LNB9272, LNB9282B, LNE8950AB, LNE8964ABW, LNE8974, LNE9242B, LNE9252B, LNZ32P12S, LNZ32P4, LNZ3522, LNZ44P12B, LNZ44P4B, LNB3143, LNB3153, LNB3163, LNB3321, LNB3373, LNB4163, LNB4321, LNB4421, LND3152, LND3374B, LND4750AB, LND4751AB, LNE3142RB, LNE3162, LNE4162, LNE4322, LNE4422, E841CA, E841CAB, E841CD, E881AP, LNB8963BW, LNB9292B, LNE9282B, LNE9292B, LNZ81P25.
Warranty and Support
This Lorex N883A64B NVR is a renewed product. Please refer to the specific warranty terms provided by the seller or Amazon Renewed at the time of purchase. Typically, renewed products come with a limited warranty.
For technical support, troubleshooting assistance, or warranty inquiries, please contact Lorex customer support or the seller from whom you purchased the renewed product. You can often find support contact information on the Lorex official website or through your Amazon order details.
Online Resources: For the latest manuals, software downloads, and FAQs, visit the official Lorex support website: www.lorex.com/support
Related documentsN883A64B


Ask a question about this manual
Ask about setup, troubleshooting, compatibility, parts, safety, or missing instructions. Manuals+ will review the question and use this page’s manual context to help answer it.