
EPOMAKER Aura75
EPOMAKER Aura75 75% Mechanical Keyboard Kit Instruction Manual
Model: Aura75 | Brand: EPOMAKER
1. Product Overview
The EPOMAKER Aura75 is a 75% layout mechanical keyboard kit designed for customization and versatile connectivity. It features a compact design, hot-swappable switch sockets, and dynamic RGB backlighting. This kit supports multiple connection modes and is compatible with various operating systems.
Key Features:
- 75% Layout: Optimized for functionality and space efficiency.
- Tri-Mode Connectivity: Supports 2.4GHz wireless, Bluetooth 5.0, and USB-C wired connections.
- Hot-Swappable PCB: Allows for easy installation and removal of 3-pin and 5-pin mechanical switches without soldering.
- Dynamic RGB Backlight: Features per-key RGB lighting and unique side lighting effects.
- Multifunction Knob: Provides control over volume and RGB brightness.
- Sound Absorption: Equipped with silicone pads and IXPE switch cushioning for a quieter typing experience.
- Durable Construction: Crafted with a robust injection-molded casing and PC plate.
2. Setup Guide
Package Contents:
- EPOMAKER Aura75 Keyboard Kit
- USB-C Cable
- 2.4GHz Wireless Dongle
- Keycap Puller
- Switch Puller
2.1 Installing Switches and Keycaps
The Aura75 is a barebone kit, meaning switches and keycaps are not pre-installed. You will need to install your preferred 3-pin or 5-pin mechanical switches and keycaps.
- Align the pins of your mechanical switch with the hot-swappable socket on the PCB.
- Gently press the switch until it clicks into place. Ensure the pins are straight to avoid bending.
- Repeat for all desired switch positions.
- Place your chosen keycaps onto the installed switches, pressing firmly until they are secure.
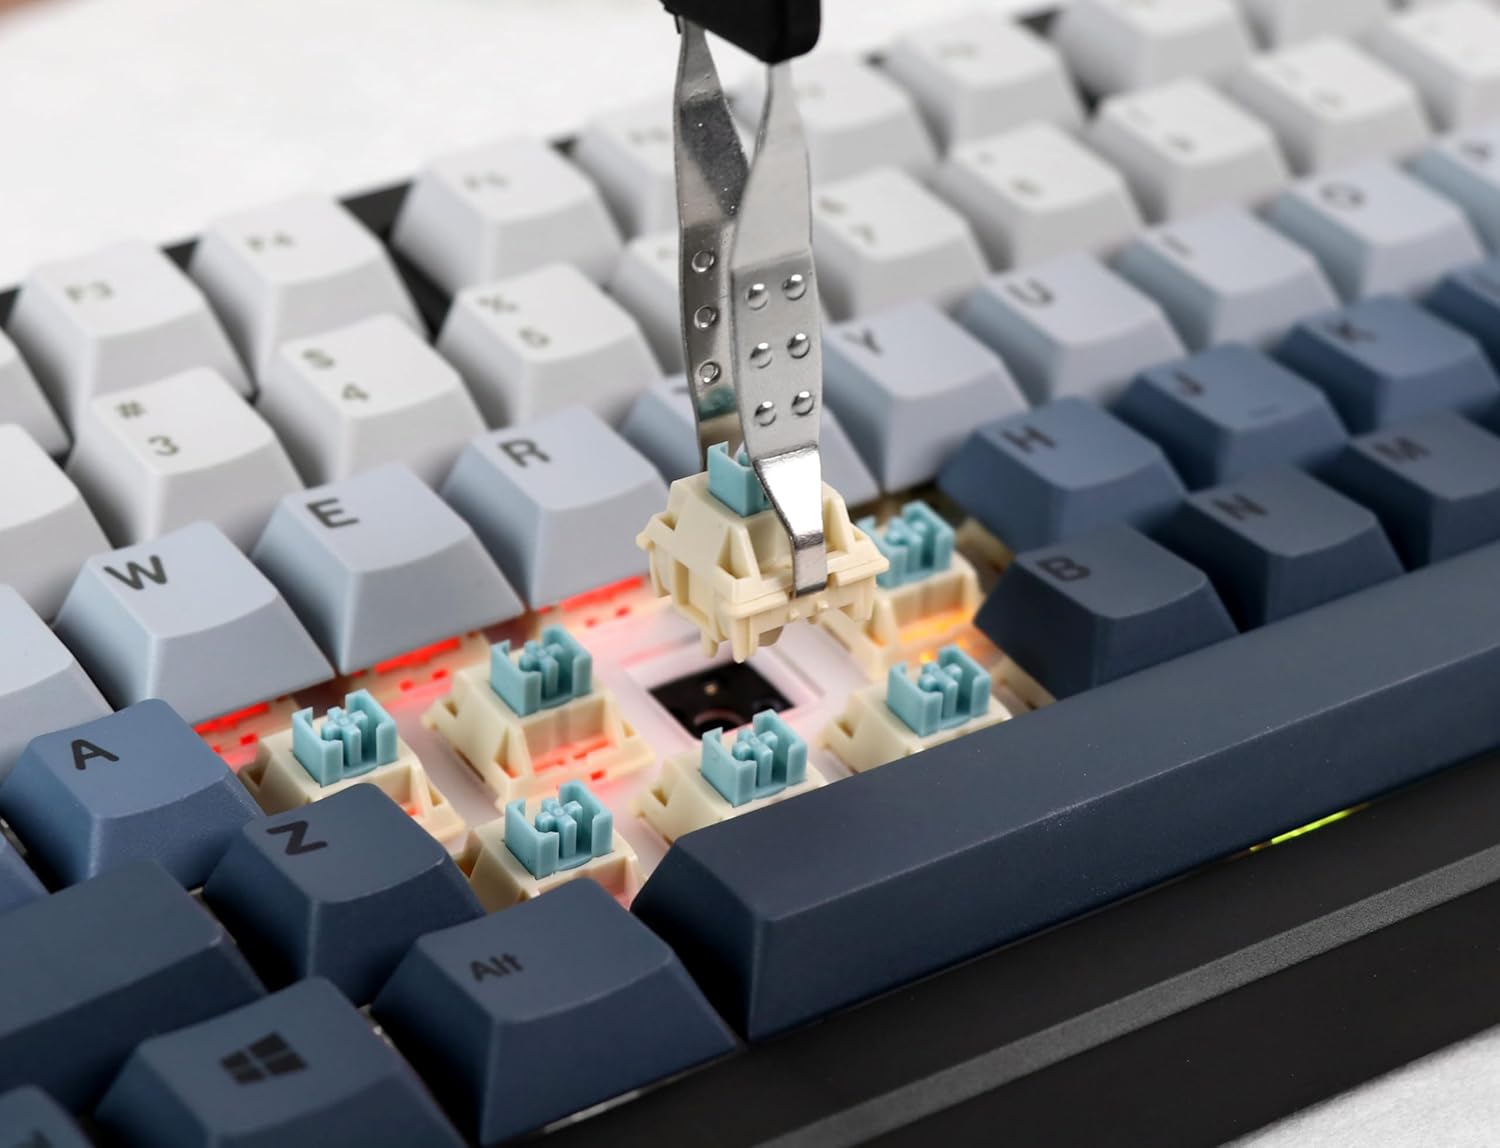
Image: Proper installation of a mechanical switch into the hot-swappable PCB.

Image: The hot-swappable barebone kit featuring south-facing RGB LEDs and tuned plate-mounted stabilizers.
2.2 Connecting the Keyboard:
The Aura75 offers three connectivity options:
- USB-C Wired: Connect the keyboard directly to your device using the provided USB-C cable.
- 2.4GHz Wireless: Insert the 2.4GHz USB dongle into your device. Flip the switch on the back of the keyboard to the 2.4G position.
- Bluetooth 5.0: Flip the switch on the back of the keyboard to the Bluetooth position. Press FN + 1/2/3 to enter pairing mode for up to three different devices. The indicator light will flash, then become solid upon successful connection.
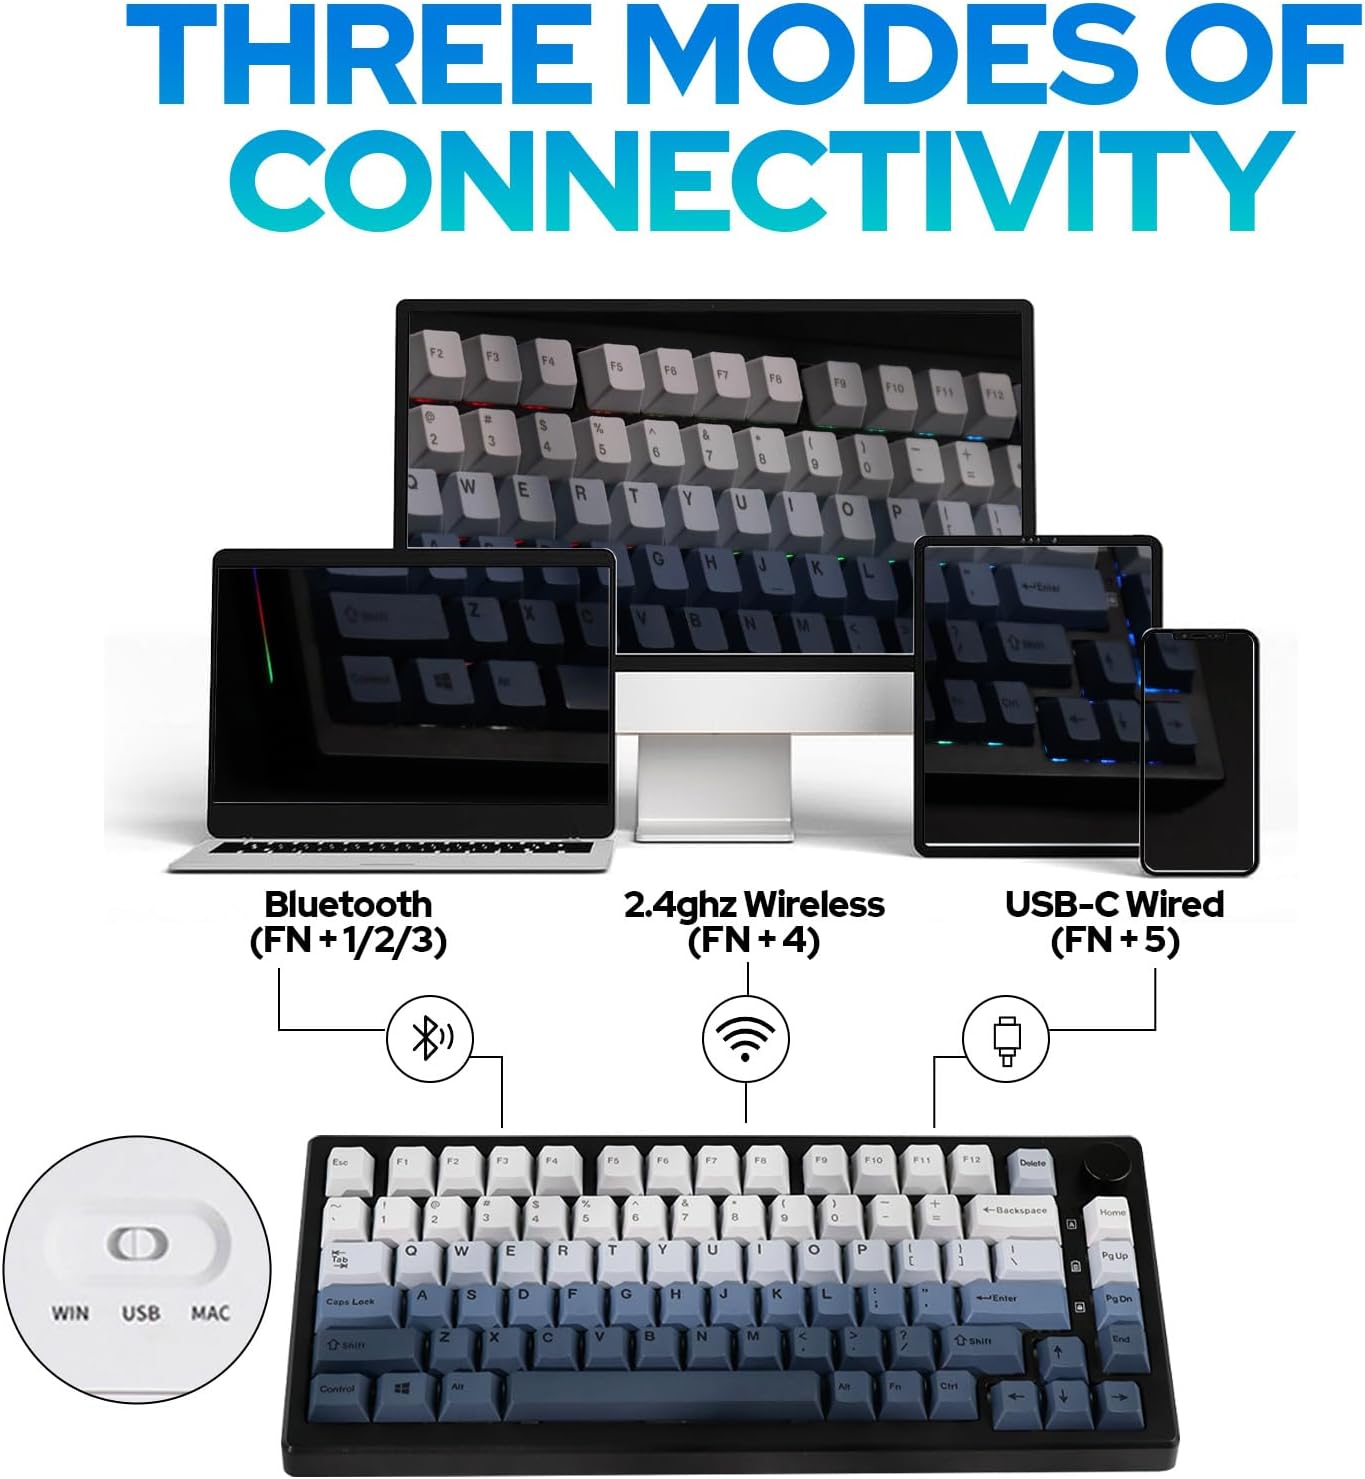
Image: Overview of the three connectivity modes: Bluetooth (FN+1/2/3), 2.4GHz Wireless (FN+4), and USB-C Wired (FN+5).

Image: Detailed view of the keyboard's rear, highlighting the connectivity switch, 2.4GHz dongle storage, and USB-C port.
2.3 Adjusting Keyboard Height:
The keyboard features two-stage adjustable feet on the underside to customize the typing angle for ergonomic comfort.
3. Operating Instructions
3.1 RGB Backlight Control:
The Aura75 features extensive RGB lighting options, including per-key and side lighting.
- FN + \|: Cycle through different backlight effects (Light Effect 1-20).
- FN + Home/PU: Cycle through different backlight colors/brightness (Light Effect 1-10).
- FN + L: Turn backlight on/off.
- FN + L_Ctrl: Toggle sidelight effect on/off.
- FN + L_Alt: Cycle through sidelight colors.
- FN + Z/X: Adjust sidelight brightness/speed.

Image: The keyboard showcasing its RGB backlight and unique side light effects.

Image: FN key combinations for adjusting backlight effects, colors, brightness, and speed.
3.2 Multifunction Knob:
The knob located on the top right of the keyboard serves dual functions:
- Rotate: Adjusts system volume or RGB brightness.
- Press: Toggles between volume control and RGB brightness control.

Image: The multifunction knob, used to switch between volume and RGB brightness adjustments.
3.3 Operating System Mode Switching:
The keyboard supports both Windows and Mac operating systems.
- Windows Mode: Press FN + W.
- Mac Mode: Press FN + E. If this does not work, try FN + Q.
3.4 Software Programming:
The EPOMAKER Aura75 is programmable using the dedicated EPOMAKER software. This software allows for:
- Key remapping
- Macro creation
- Customizing lighting effects
- Setting sleep modes

Image: The EPOMAKER software interface for advanced keyboard customization.
4. Maintenance
Regular maintenance helps ensure the longevity and optimal performance of your EPOMAKER Aura75 keyboard.
- Cleaning Keycaps: Use a keycap puller to remove keycaps. Clean them with a mild soap solution and a soft cloth, then air dry completely before reattaching.
- Cleaning the PCB/Switches: Use compressed air to remove dust and debris from between switches. For deeper cleaning, carefully remove switches with a switch puller and clean the PCB with a soft brush.
- Cable Care: Avoid sharp bends or excessive pulling on the USB-C cable to prevent damage.
- Battery Care: For wireless modes, ensure the keyboard is charged regularly. Avoid fully depleting the battery for extended periods.
5. Troubleshooting
Common Issues and Solutions:
- Keyboard not responding:
- Ensure the keyboard is fully charged or connected via USB-C.
- Check the connectivity switch on the back of the keyboard (Wired, 2.4G, Bluetooth).
- For 2.4GHz, ensure the dongle is securely inserted.
- For Bluetooth, re-pair the device if necessary.
- Incorrect key functions in Mac OS:
- Ensure the keyboard is set to Mac mode by pressing FN + E. If this does not resolve the issue, try pressing FN + Q.
- RGB lights not working or flickering:
- Check brightness settings using the multifunction knob or FN key combinations.
- Ensure the keyboard is not in a low-power state.
- Update keyboard firmware using the EPOMAKER software.
- Accidental key presses (high sensitivity):
- Some users may find the actuation point of certain switches sensitive. Adjust your typing style or consider different switch types if customization is desired.
6. Specifications
| Feature | Detail |
|---|---|
| Brand | EPOMAKER |
| Model Number | Aura75 |
| Layout | 75% |
| Connectivity Technology | 2.4GHz Wireless, Bluetooth 5.0, USB-C Wired |
| Compatible Devices | Gaming Console, Laptop, PC, Smartphone, Tablet |
| Special Features | Backlit, Ergonomic, Hot-Swappable, Programmable Keys |
| Keyboard Backlighting | RGB |
| Material | Plastic |
| Item Weight | 2.12 pounds |
| Package Dimensions | 14.92 x 8.11 x 1.77 inches |
| Manufacturer | EPOMAKER |
| First Available | May 6, 2023 |
7. Warranty and Support
For warranty information and technical support, please refer to the official EPOMAKER website or contact their customer service directly. Keep your purchase receipt for warranty claims.
Official EPOMAKER Store: Visit EPOMAKER Store
8. Additional Resources
Product Videos:
EPOMAKER Sea Salt Switch VS Sea Salt Silent Switch
Video: A comparison between EPOMAKER Sea Salt Switches and Sea Salt Silent Switches, demonstrating their sound and feel differences.
AURA75 Keyboard Kit Typing Sound
Video: Demonstrates the typing sound profile of the AURA75 Keyboard Kit, highlighting its acoustic characteristics.
F75 purple gaming keyboard
Video: A brief overview of the F75 keyboard, showcasing its design and RGB lighting in a purple variant.
Typing Video Epomaker AULA F75 Black Pink Gradient
Video: A short typing demonstration on an Epomaker AULA F75 keyboard with a black and pink gradient keycap set.
Related documentsAura75


Ask a question about this manual
Ask about setup, troubleshooting, compatibility, parts, safety, or missing instructions. Manuals+ will review the question and use this page’s manual context to help answer it.