
1. Introduction
This manual provides essential instructions for the safe and efficient operation of your ACAUTO Antminer L7 9050Mh/s Scrypt Miner. The Antminer L7 is designed for mining cryptocurrencies using the Scrypt algorithm, primarily Litecoin (LTC) and Dogecoin (DOGE). Please read this manual thoroughly before setting up and operating the device.
2. Safety Information
- Ensure the miner is placed in a well-ventilated area to prevent overheating.
- Use only the provided power supply unit (PSU) and power cables.
- Do not operate the miner in environments with high humidity or extreme temperatures.
- Avoid blocking the air inlets or outlets of the miner.
- Disconnect power before performing any maintenance or cleaning.
- This device operates at high temperatures and produces significant noise. Take appropriate precautions.
3. Package Contents
Verify that all items are present in your package:
- ACAUTO Antminer L7 9050Mh/s Scrypt Miner
- Integrated Power Supply Unit (PSU)
- Power Cables (region-specific)
- User Manual (this document)
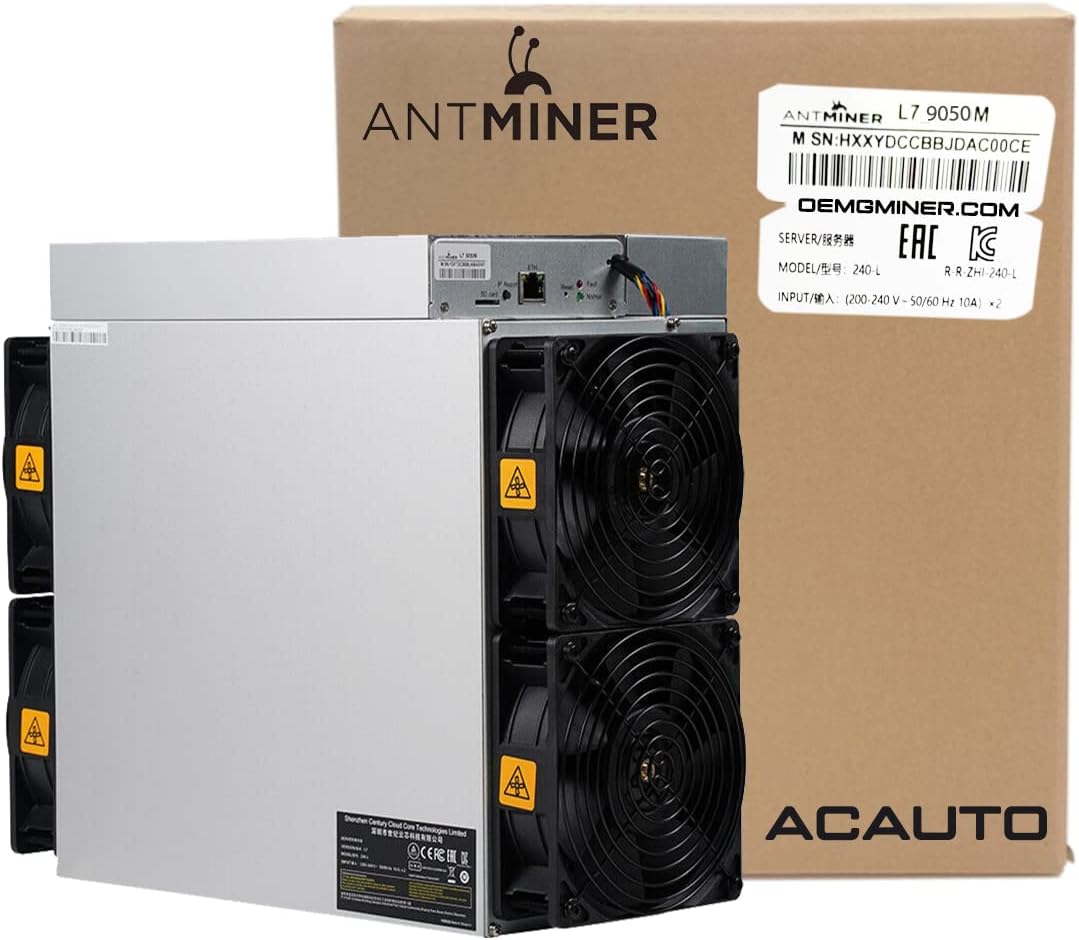
Figure 3.1: The Antminer L7 9050Mh/s unit, as received in its original packaging, highlighting the model and serial number label.
4. Product Overview
The Antminer L7 features a robust design with integrated cooling and power components. Familiarize yourself with the various parts of the miner.
4.1 Front and Side View

Figure 4.1: A front-side view of the Antminer L7, showcasing its design and indicating its compatibility with Litecoin and Dogecoin mining.

Figure 4.2: A side perspective of the Antminer L7, illustrating the arrangement of its cooling fans and the overall chassis design.
4.2 Rear Panel and Control Board

Figure 4.3: The rear panel of the Antminer L7, featuring the dual power input ports and the exhaust fans for cooling.

Figure 4.4: A detailed view of the control board, including the Ethernet port, IP Report button, Reset button, and the Fault and Normal indicator LEDs, along with an SD card slot.
Key Components:
- Ethernet Port (ETH): For network connection.
- IP Report Button: Press to report the miner's IP address.
- Reset Button: Restores factory settings (use with caution).
- Fault Indicator (Red LED): Illuminates if an error occurs.
- Normal Indicator (Green LED): Illuminates when the miner is operating correctly.
- SD Card Slot: For firmware updates or recovery.
- Power Input Ports: Connect power cables from the integrated PSU.
- Cooling Fans: Multiple high-speed fans for heat dissipation.
5. Setup Instructions
5.1 Placement
Place the Antminer L7 on a stable, flat surface in a clean, dust-free, and well-ventilated environment. Ensure there is adequate space around the air inlets and outlets for proper airflow. Maintain an ambient temperature between 5°C and 35°C (41°F and 95°F).
5.2 Connecting Power
- Connect the provided power cables to the power input ports on the rear of the miner.
- Plug the other end of the power cables into a grounded electrical outlet. Ensure the outlet can handle the miner's 3260W power consumption.
5.3 Connecting Network
Connect an Ethernet cable from your router or network switch to the Ethernet port (ETH) on the control board of the miner.
5.4 Initial Power-On
Once power and network are connected, the miner will automatically power on. The green 'Normal' LED should illuminate after a short boot sequence. If the red 'Fault' LED illuminates, refer to the Troubleshooting section.
5.5 Accessing the Web Interface
- Find the Miner's IP Address: Use an IP scanner tool on your network or press the 'IP Report' button on the control board. Some miners will broadcast their IP address to a specific tool provided by the manufacturer.
- Log In: Open a web browser and enter the miner's IP address. The default username and password are typically 'root' for both, but refer to specific Antminer documentation if these do not work.
5.6 Configuration
Within the web interface, navigate to the 'Miner Configuration' or 'Pool Settings' section. Enter your mining pool URL, worker name, and password. Save the settings to begin mining.
6. Operating Instructions
After successful configuration, the miner will begin hashing. You can monitor its status through the web interface, which displays hashrate, temperature, and fan speed.
- Normal Operation: The green 'Normal' LED should be steadily lit. The fans will operate at varying speeds depending on the temperature.
- Monitoring: Regularly check the miner's web interface or your mining pool dashboard to ensure stable operation and optimal hashrate.
7. Maintenance
7.1 Cleaning
Periodically clean the miner to prevent dust buildup, which can impede cooling and reduce efficiency. Use compressed air to gently clear dust from the fans and heatsinks. Ensure the miner is powered off and unplugged before cleaning.
7.2 Environmental Control
Maintain a stable operating environment. Avoid sudden temperature changes or exposure to corrosive gases. Optimal performance is achieved within the recommended temperature and humidity ranges.
7.3 Firmware Updates
Check the official Antminer website for the latest firmware updates. Firmware updates can improve performance, stability, and security. Follow the manufacturer's instructions carefully when performing updates, typically via the web interface or SD card.
8. Troubleshooting
If you encounter issues, refer to the following common problems and solutions:
| Problem | Possible Cause | Solution |
|---|---|---|
| Miner does not power on | No power, faulty cable, or PSU issue | Check power connections, try a different outlet, ensure PSU is functional. |
| No network connection | Loose Ethernet cable, router issue, incorrect IP settings | Verify Ethernet cable connection, restart router, check IP configuration. |
| Low hashrate or 'Fault' LED on | Overheating, faulty hashboard, incorrect pool settings | Ensure proper ventilation, check fan operation, verify pool settings in web interface. If issue persists, contact support. |
| Cannot access web interface | Incorrect IP address, network issue, browser problem | Use IP Report button to confirm IP, check network connection, try a different browser. |
If you are unable to resolve an issue, please contact ACAUTO technical support for assistance. Our professional technical team can provide remote debugging support.
9. Specifications
The following are the technical specifications for the ACAUTO Antminer L7 9050Mh/s:
- Model: ANTMINER-L7-9050
- Algorithm: Scrypt
- Hashrate: 9050 MH/s
- Power Consumption: 3260W
- Input Voltage: 200-240V AC
- Cooling Method: Air cooling with multiple high-speed fans
- Connector Type: ATX (for internal PSU connections)
- Manufacturer: ACAUTO

Figure 9.1: An informational graphic detailing the Antminer L7's key features, including its 9050Mh/s hashrate, 3260W power consumption, and its position as a powerful Litecoin and Dogecoin miner.

Figure 9.2: An informational graphic highlighting the Antminer L7's advanced design, improved power efficiency, and its optimization for Scrypt algorithm mining.
10. Warranty and Support
Your Antminer L7 9050Mh/s comes with a 180-day warranty from Antminer. This warranty covers manufacturing defects and hardware failures under normal operating conditions.
For technical assistance, installation, or debugging issues, ACAUTO provides a professional technical team. You can contact them for remote support.
Return Policy Note: Returns for non-quality reasons (e.g., no longer needed, lower than expected ROI) may incur a restocking fee of 15-34%. Ensure all parts are intact, not damaged, altered, or missing labels, and returned with original packaging and accessories, including the manual and cables.
11. Regulatory Compliance
This device complies with relevant regulatory standards for electronic equipment. Any modifications not expressly approved by the manufacturer could void the user's authority to operate the equipment.