
Introduction
This manual provides detailed instructions for the installation, operation, and maintenance of your GROHE 29431000 Timeless Pressure Balance Shower Set. Please read this manual thoroughly before installation and use to ensure proper function and longevity of your product. This shower set is designed to enhance your showering experience with its exceptional features and durable construction.
Included Components
The GROHE 29431000 Timeless Pressure Balance Shower Set includes the following components:
- Timeless Pressure Balance Valve Trim (29 423): Features a 2-way diverter with a cartridge for smooth operation and drip-free performance.
- GrohSafe 3.0 Pressure Balance Rough Valve (35 117): Integrated diverter for 2-way or 3-way operation.
- Rainshower SmartActive 6 ½” Shower Head (26 789): Equipped with GROHE SmartToggle lever to switch between Rain, Active Massage, and Jet sprays, with a flow rate of 1.75 gpm.
- Relexa 6 ¼" Shower Arm (27 412): Connects the shower head to the wall.
- Hand Shower: For flexible showering.
- Hose: Connects the hand shower.
- Wall Union: For hand shower connection.
- Check Valves: For water flow control.
- Shower Bar: For mounting the hand shower.
- Installation Guide: Detailed instructions for assembly.
Setup and Installation
Installation of this shower set requires plumbing knowledge and tools. It is highly recommended to have this product installed by a qualified professional plumber to ensure correct and safe operation, and to comply with local building codes.
- Prepare the Installation Area: Ensure water supply is turned off at the main valve. Clear the wall area where the shower set will be installed.
- Install the GrohSafe 3.0 Pressure Balance Rough Valve: Follow the specific instructions provided in the separate GrohSafe 3.0 rough valve manual for proper in-wall installation and connection to hot and cold water lines. This valve includes an integrated diverter for managing water flow to different outlets.
- Install the Shower Arm: Secure the Relexa 6 ¼" shower arm to the wall outlet, ensuring a watertight seal. Refer to the technical drawing for dimensions and proper fitting.

Image: Technical drawing showing the dimensions and installation details of the Relexa 6 ¼" shower arm.
- Attach the Rainshower SmartActive Shower Head: Screw the Rainshower SmartActive 6 ½” shower head onto the shower arm. Hand-tighten, then use a wrench for a final quarter turn, being careful not to overtighten.

Image: The GROHE Rainshower SmartActive shower head, highlighting its features and generous 6 ½” diameter.

Image: Detailed dimensions of the Rainshower SmartActive shower head.
- Install the Shower Bar and Hand Shower: Mount the shower bar to the wall according to the provided installation guide. Connect the hand shower hose to the wall union and the hand shower. Ensure the hand shower can slide smoothly along the bar and its angle can be adjusted.

Image: The GROHE hand shower system, illustrating adjustable height, angle, swivel function, and the EasyReach tray.
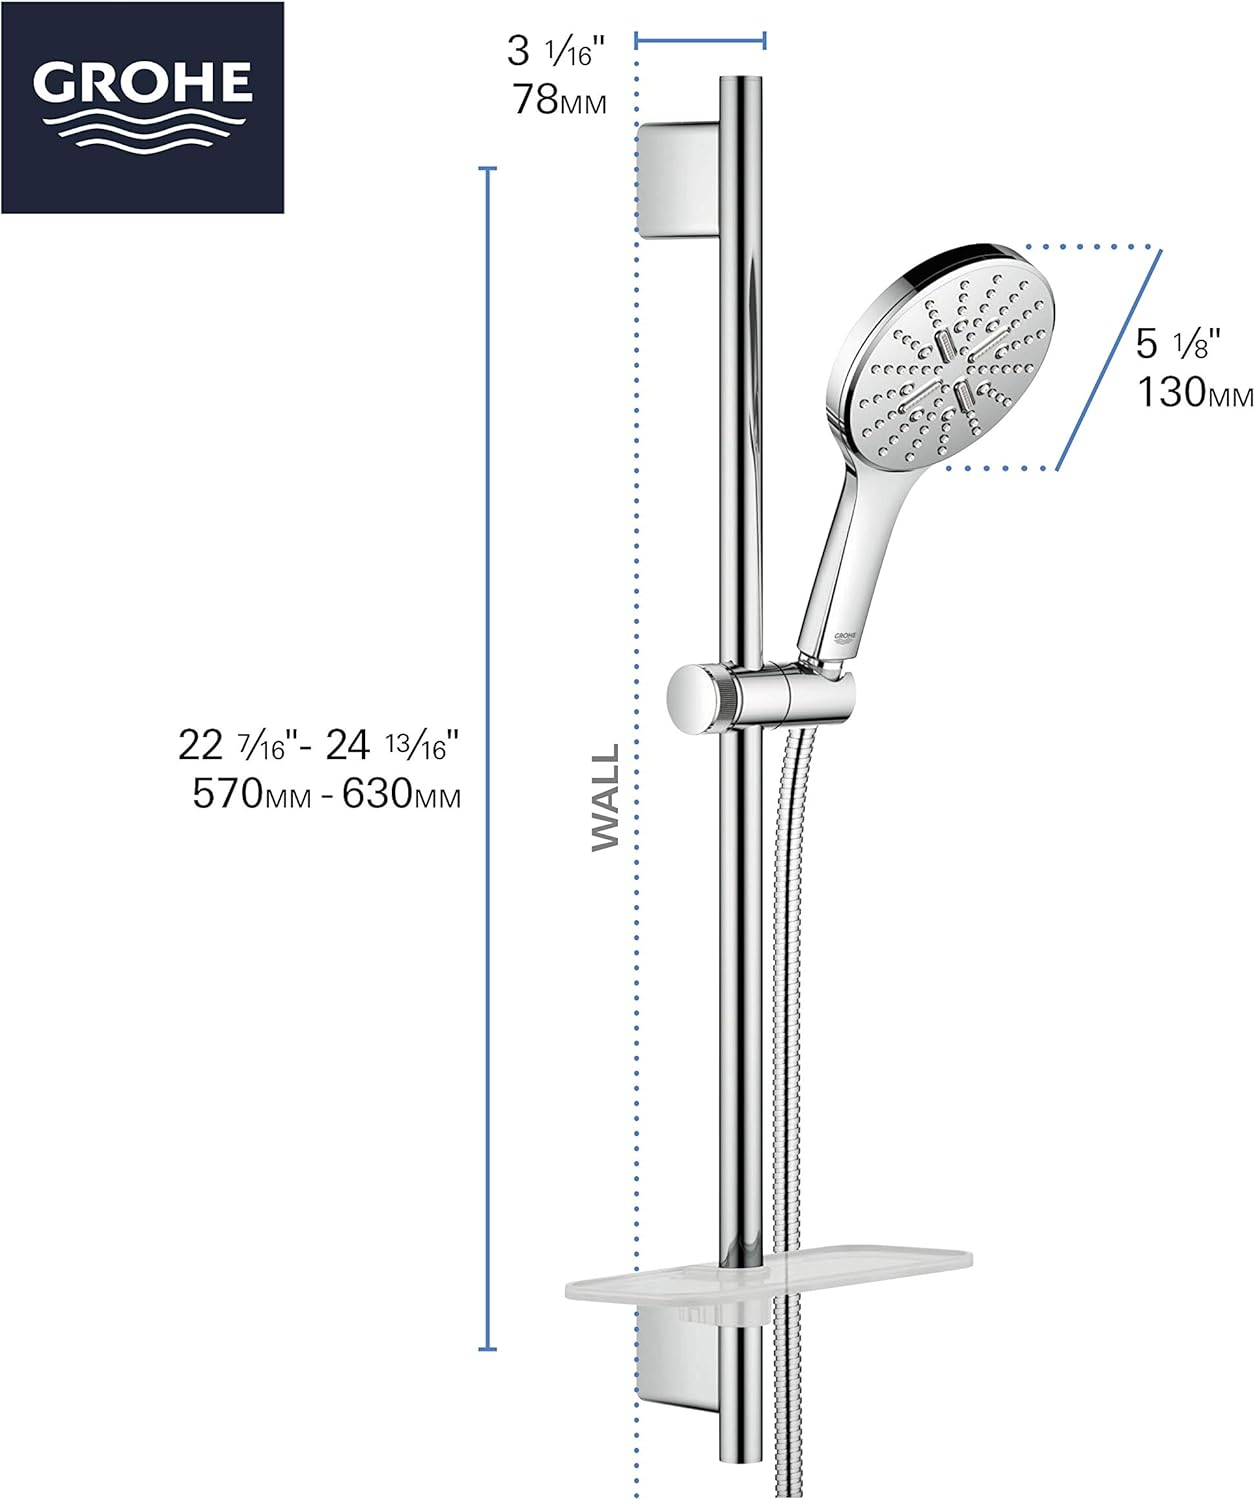
Image: Dimensions of the hand shower and shower bar assembly.
- Install the Valve Trim: Once the rough valve is installed, attach the Timeless Pressure Balance Valve Trim to the wall, aligning it with the rough valve. Secure it according to the trim's specific instructions.

Image: Dimensions of the Timeless Pressure Balance Valve Trim.
- Test for Leaks: After all components are installed, slowly turn on the main water supply and check all connections for leaks.
Operating Instructions
Your GROHE Timeless Pressure Balance Shower Set is designed for intuitive operation.
- Water Flow and Temperature Control: Use the main handle on the pressure balance valve trim to turn the water on/off and adjust the temperature. Rotate the handle to achieve your desired temperature. The pressure balance feature maintains a consistent temperature even with fluctuations in water pressure.
- Diverter Function: The valve trim includes a 2-way diverter. Use the diverter handle to switch water flow between the main shower head and the hand shower.
- Shower Head Spray Patterns: The Rainshower SmartActive shower head features a GROHE SmartToggle lever. Move this lever to easily switch between the three available spray patterns:
- Rain Spray: A soft, delicate pattern for full body coverage.
- Active Massage Spray: A pulsating spray for a stimulating massage.
- Jet Spray: A focused, powerful spray for rinsing or cleaning.
- Hand Shower Operation: The hand shower also allows you to switch between its 3 spray patterns using a similar control. Adjust the height and angle of the hand shower on the shower bar for personalized comfort. The swivel function allows you to direct the spray as needed.
Maintenance
Regular cleaning and maintenance will ensure the long-lasting performance and appearance of your GROHE shower set.
- Cleaning the Finish: The GROHE StarLight Chrome finish is durable and designed to maintain its lustrous appearance. Clean regularly with a soft cloth and a mild, non-abrasive cleaner. Avoid harsh chemicals, abrasive sponges, or cleaners containing alcohol, acid, or ammonia, as these can damage the finish.
- Speed Clean Nozzles: The shower head and hand shower are equipped with Speed Clean nozzles. To remove limescale buildup, simply wipe the flexible silicone nozzles with your fingertip. This helps maintain optimal spray performance.
- General Care: Periodically check all connections for tightness. If any leaks are detected, turn off the water supply and tighten the connections or replace seals as necessary.
Troubleshooting
If you encounter issues with your shower set, refer to the following common troubleshooting steps. For complex problems, contact a qualified plumber or GROHE customer support.
| Problem | Possible Cause | Solution |
|---|---|---|
| Low water flow from shower head/hand shower. | Limescale buildup in nozzles; partially closed shut-off valves; low household water pressure. | Clean Speed Clean nozzles by wiping them. Ensure shut-off valves at the rough-in are fully open. Consult a plumber for household water pressure issues. |
| Water temperature fluctuates. | Pressure balance cartridge issue; insufficient hot water supply. | Ensure hot water heater is functioning correctly. If problem persists, the pressure balance cartridge may need inspection or replacement by a professional. |
| Leaking from connections. | Loose connections; worn seals/gaskets. | Turn off water supply. Carefully tighten connections. If leaks persist, replace relevant seals or gaskets. |
| Diverter not switching properly. | Debris in diverter mechanism; worn diverter cartridge. | Flush the system. If the issue continues, the diverter cartridge may need to be cleaned or replaced by a professional. |
Specifications
- Brand: GROHE
- Model Number: 29431000
- Color: StarLight Chrome
- Material: Metal, Plastic, Zinc
- Finish Type: Polished
- Number of Handles: 2
- Mounting Type: Wall Mount
- Flow Rate: 1.75 gallons per minute (gpm)
- Item Weight: 14.5 Pounds
- Shower Head Size: 6.5 inches diameter
- Handle Material: Ceramic
- Global Trade Identification Number (GTIN): 04005176764219
Warranty Information
This GROHE product comes with a LIMITED manufacturer's warranty. For specific details regarding coverage, duration, and how to make a claim, please refer to the warranty documentation included with your purchase or visit the official GROHE website. Keep your proof of purchase for warranty purposes.
Support
For technical assistance, replacement parts, or further inquiries, please contact GROHE customer support. You can typically find contact information on the GROHE official website or in the packaging materials.
Online Resources: Visit the official GROHE website for product registration, FAQs, and additional support documents.


