
1. Introduction
Thank you for choosing the Bushnell CORE 4KS 30MP No Glow Trail Camera. This manual provides detailed instructions for setting up, operating, and maintaining your camera to ensure optimal performance in capturing wildlife images and videos. The CORE 4KS features 4K video recording, 30 MP photos, a 0.2-second trigger speed, and a 1.5-inch color LCD screen, all designed for reliable outdoor surveillance.
2. Package Contents
- Bushnell CORE 4KS Trail Camera
- User Manual (this document)
- Mounting Strap
3. Setup
3.1. Battery Installation
The camera requires six (6) AA batteries for operation. For best performance and battery life, we recommend using high-quality alkaline or lithium batteries. The camera is also compatible with a 12V external power source, such as a solar panel (sold separately), connected via the DC port.
- Open the camera housing by unlatching the side clips.
- Locate the battery compartment at the bottom of the camera.
- Pull out the battery tray.
- Insert six AA batteries, ensuring correct polarity (+/-) as indicated inside the tray.
- Slide the battery tray back into the compartment until it clicks securely.

Figure 3.1: Battery tray removed for battery installation.

Figure 3.2: Internal view highlighting the removable battery tray and SD card slot.
3.2. SD Card Installation
A Class 10 or higher SD card (up to 512GB capacity) is required for storing photos and videos. The SD card is not included.
- With the camera housing open, locate the SD card slot on the side of the internal unit.
- Insert the SD card into the slot with the label facing the front of the camera until it clicks into place.
- To remove, press the card in until it springs out.
3.3. Mounting the Camera
The camera features a tree bark camouflage pattern for discreet placement in natural environments. Use the included mounting strap or a tripod (via the 1/4"-20 threaded insert on the back) to secure the camera.
- Select a sturdy tree or post at the desired height.
- Thread the mounting strap through the slots on the back of the camera.
- Wrap the strap around the tree/post and secure it tightly.
- Adjust the camera angle to cover the desired area.

Figure 3.3: Camera mounted on a tree using the provided strap.

Figure 3.4: Rear view of the camera, showing the mounting strap slots and tripod thread.
4. Operating Instructions
4.1. Powering On/Off and Navigation
After installing batteries and an SD card, open the camera housing to access the controls and 1.5-inch color LCD screen.

Figure 4.1: Camera open, displaying the LCD screen and control panel.
- Slide the power switch to the ON position. The LCD screen will illuminate.
- Use the navigation buttons (UP, DOWN, LEFT, RIGHT, OK) to move through the menu options.
- Press the MENU button to access the main settings menu.
- To power off, slide the power switch to the OFF position.
4.2. Basic Settings
Access the MENU to configure the following settings:
- Mode: Select between Photo, Video, or Hybrid (Photo + Video) mode.
- Photo Resolution: Choose from various resolutions up to 30 MP.
- Video Resolution: Select resolutions up to 4K (3840 x 2160).
- Video Length: Set video clip duration up to 60 seconds.
- Trigger Interval: Adjust the delay between consecutive triggers (from 1 second).
- PIR Sensitivity: Set the Passive Infrared sensor sensitivity to Low, Medium, High, or Auto.
- Exposure Mode: Choose from 3 exposure time modes.
- Date/Time: Set the current date and time.
- GPS Geotagging: Enable or disable GPS for location stamping on images.
- Time Lapse: Configure automatic interval recordings (2 programmable periods).
4.3. Viewing Recordings
You can view captured photos and videos directly on the camera's LCD screen or by transferring them to a computer.
- On Camera: In playback mode, use the navigation buttons to scroll through images and videos. Press OK to play videos.
- Via SD Card: Remove the SD card and insert it into a compatible card reader on your computer.
- Via USB: Connect the camera to your PC using a USB cable (not included) via the USB port located under the device.
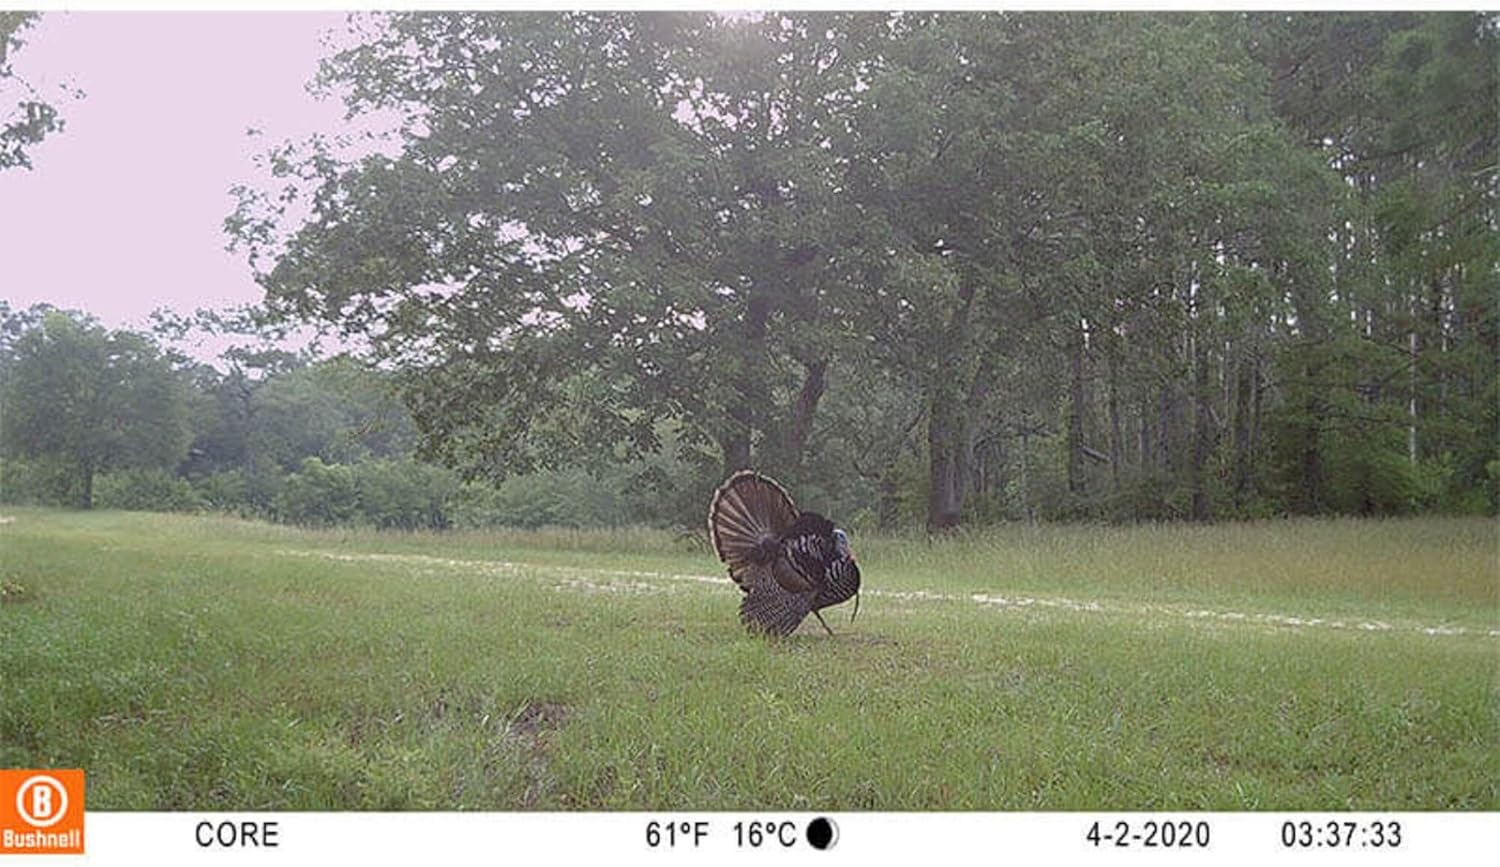
Figure 4.2: Example of an image captured by the camera, displaying data overlay.
5. Maintenance
5.1. Battery Management
The camera offers up to 12 months of battery life depending on usage and settings. Replace batteries when the low battery indicator appears on the screen.
5.2. SD Card Management
Regularly check the SD card capacity. Format the SD card periodically to maintain optimal performance and prevent data corruption. Back up important files before formatting.
5.3. Cleaning
Use a soft, dry cloth to clean the camera lens and housing. Avoid abrasive cleaners or solvents. Ensure the camera is dry before closing the housing and exposing it to outdoor elements.
6. Troubleshooting
- Camera not powering on: Check battery installation and ensure batteries are fresh. Verify the power switch is in the ON position.
- No photos/videos captured: Ensure an SD card is inserted and has sufficient space. Check PIR sensitivity settings and trigger interval. Verify the camera is in the correct operating mode.
- Poor image/video quality: Clean the camera lens. Ensure the camera is stable and not subject to excessive movement. Check resolution settings.
- Short battery life: Use high-quality alkaline or lithium batteries. Reduce video length or increase trigger interval. Consider using an external solar panel.
7. Specifications

Figure 7.1: Key features and specifications of the camera.
| Feature | Specification |
|---|---|
| Model Number | 119949M |
| Effective Still Resolution | 30 MP |
| Video Recording Resolution | 4K (3840 x 2160) |
| Video Length | Up to 60 seconds |
| Trigger Speed | 0.2 seconds |
| Night Range | 34 meters (approx. 110 feet) |
| LED Type | No-Glow LEDs |
| Display Screen | 1.5-inch Color LCD |
| Storage | SD card, up to 512 GB (not included) |
| Power Source | 6x AA batteries or 12V DC external (solar compatible) |
| Battery Life | Up to 12 months |
| PIR Sensor Sensitivity | 3 levels or Auto |
| Exposure Modes | 3 modes |
| Included Components | User Manual |
| Dimensions (L x W x H) | 20 x 13 x 7 centimeters |
| Country of Origin | China |
8. Warranty Information
This Bushnell CORE 4KS Trail Camera is covered by a manufacturer's warranty for a period of 2 years from the date of purchase. Please retain your proof of purchase for warranty claims. The warranty covers defects in materials and workmanship under normal use. It does not cover damage caused by misuse, accident, unauthorized modification, or neglect.
9. Support
For further assistance, technical support, or warranty inquiries, please refer to the official Bushnell website or contact their customer service department. Detailed contact information can typically be found on the manufacturer's website or in the product packaging.


