
1. Introduction
Welcome to the VGR Beard Trimmer Kit user manual. This 7-in-1 multi-functional grooming kit is designed to provide a crisp, clean, and professional look with ease. Please read this manual thoroughly before using the device to ensure safe and effective operation. Keep this manual for future reference.
2. Safety Information
WARNING: To reduce the risk of burns, electrocution, fire, or injury to persons:
- May cause skin irritation or eye injury. Avoid use on infants.
- Keep away from water sources. Do not use while bathing or showering.
- Follow recommended cleaning and maintenance procedures.
- Do not use while charging. Unplug when not in use.
- Always keep the trimmer within sight while in use.
- Do not disassemble or attempt to repair the device yourself. Contact qualified service personnel.
- Keep out of reach of children.
3. Product Overview & Package Contents
Your VGR Beard Trimmer Kit includes a comprehensive set of tools for various grooming needs. Familiarize yourself with all components before use.

Figure 3.1: The complete VGR 7-in-1 Multi-Functional Beard Grooming Kit, including the main trimmer unit, various attachment heads, guide combs, charging stand, and cleaning accessories.

Figure 3.2: Detailed view of the Hair Clipper, T-Blade Trimmer, and Body Trimmer heads, illustrating the different guide comb sizes available for each.
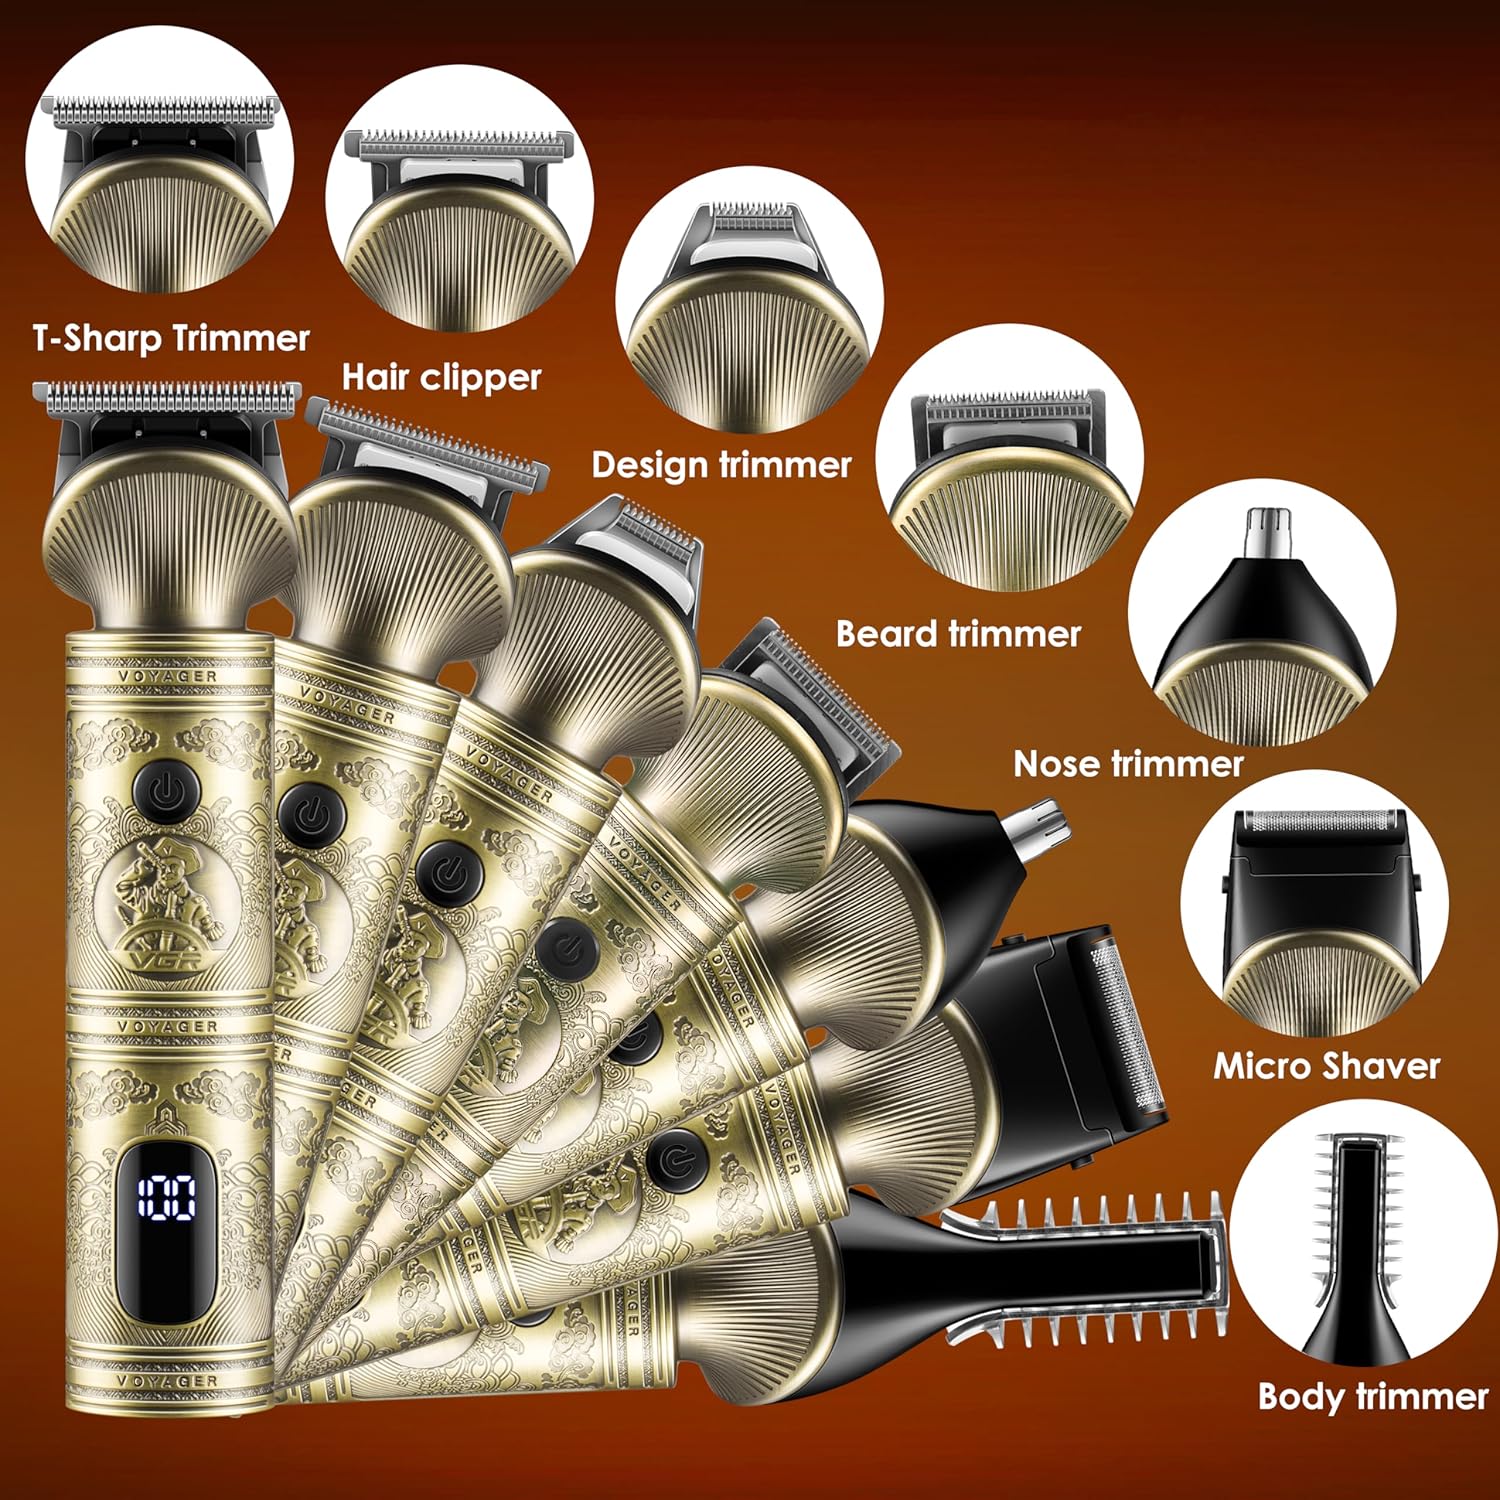
Figure 3.3: An array of VGR trimmer units showcasing the versatility of the kit with different attachment heads for various grooming tasks, including T-Sharp, Hair Clipper, Design, Beard, Nose, Micro Shaver, and Body Trimmer.
Components:
- Main Trimmer Unit (with digital display)
- T-Blade Trimmer Head
- Hair Clipper Head
- Precision Trimmer Head
- Micro Shaver Head
- Nose Trimmer Head
- Body Trimmer Head
- Multiple Guide Combs (various lengths for hair clipper and T-blade)
- Charging Stand
- USB Charging Cable
- Cleaning Brush
- Lubricating Oil
- 2 Hair Clips
4. Setup
4.1 Initial Charging
Before first use, fully charge the VGR Beard Trimmer Kit. The built-in rechargeable lithium-ion battery provides up to 180 minutes of run time on a full charge, which takes approximately 1.5 hours.
- Connect the USB charging cable to the charging port on the trimmer or the charging stand.
- Plug the other end of the USB cable into a compatible USB power adapter (not included) or a computer USB port.
- The digital display on the trimmer will indicate the charging status.
- Once fully charged, unplug the device.

Figure 4.1: The VGR trimmer's digital display indicating battery level and the Type-C charging interface for quick and efficient charging.
4.2 Attaching and Detaching Trimmer Blades/Heads
The VGR kit features detachable and washable blades for easy cleaning and versatility. Ensure the trimmer is turned off before changing heads.
- To remove a blade/head: Gently twist or pull the current head upwards from the main unit until it detaches.
- To install a blade/head: Align the desired head with the slot on the main unit and push down firmly until it clicks into place.
- To install a guide comb: Snap the desired guide comb onto the trimmer blade until it is securely fastened.
Video 4.1: This video demonstrates how to remove and install different trimmer blades and guide combs on the VGR Beard Trimmer Kit, ensuring proper attachment for various grooming styles.
5. Operating Instructions
The VGR Beard Trimmer Kit offers multiple functions for comprehensive grooming. Always ensure your skin and hair are clean and dry before trimming for best results.
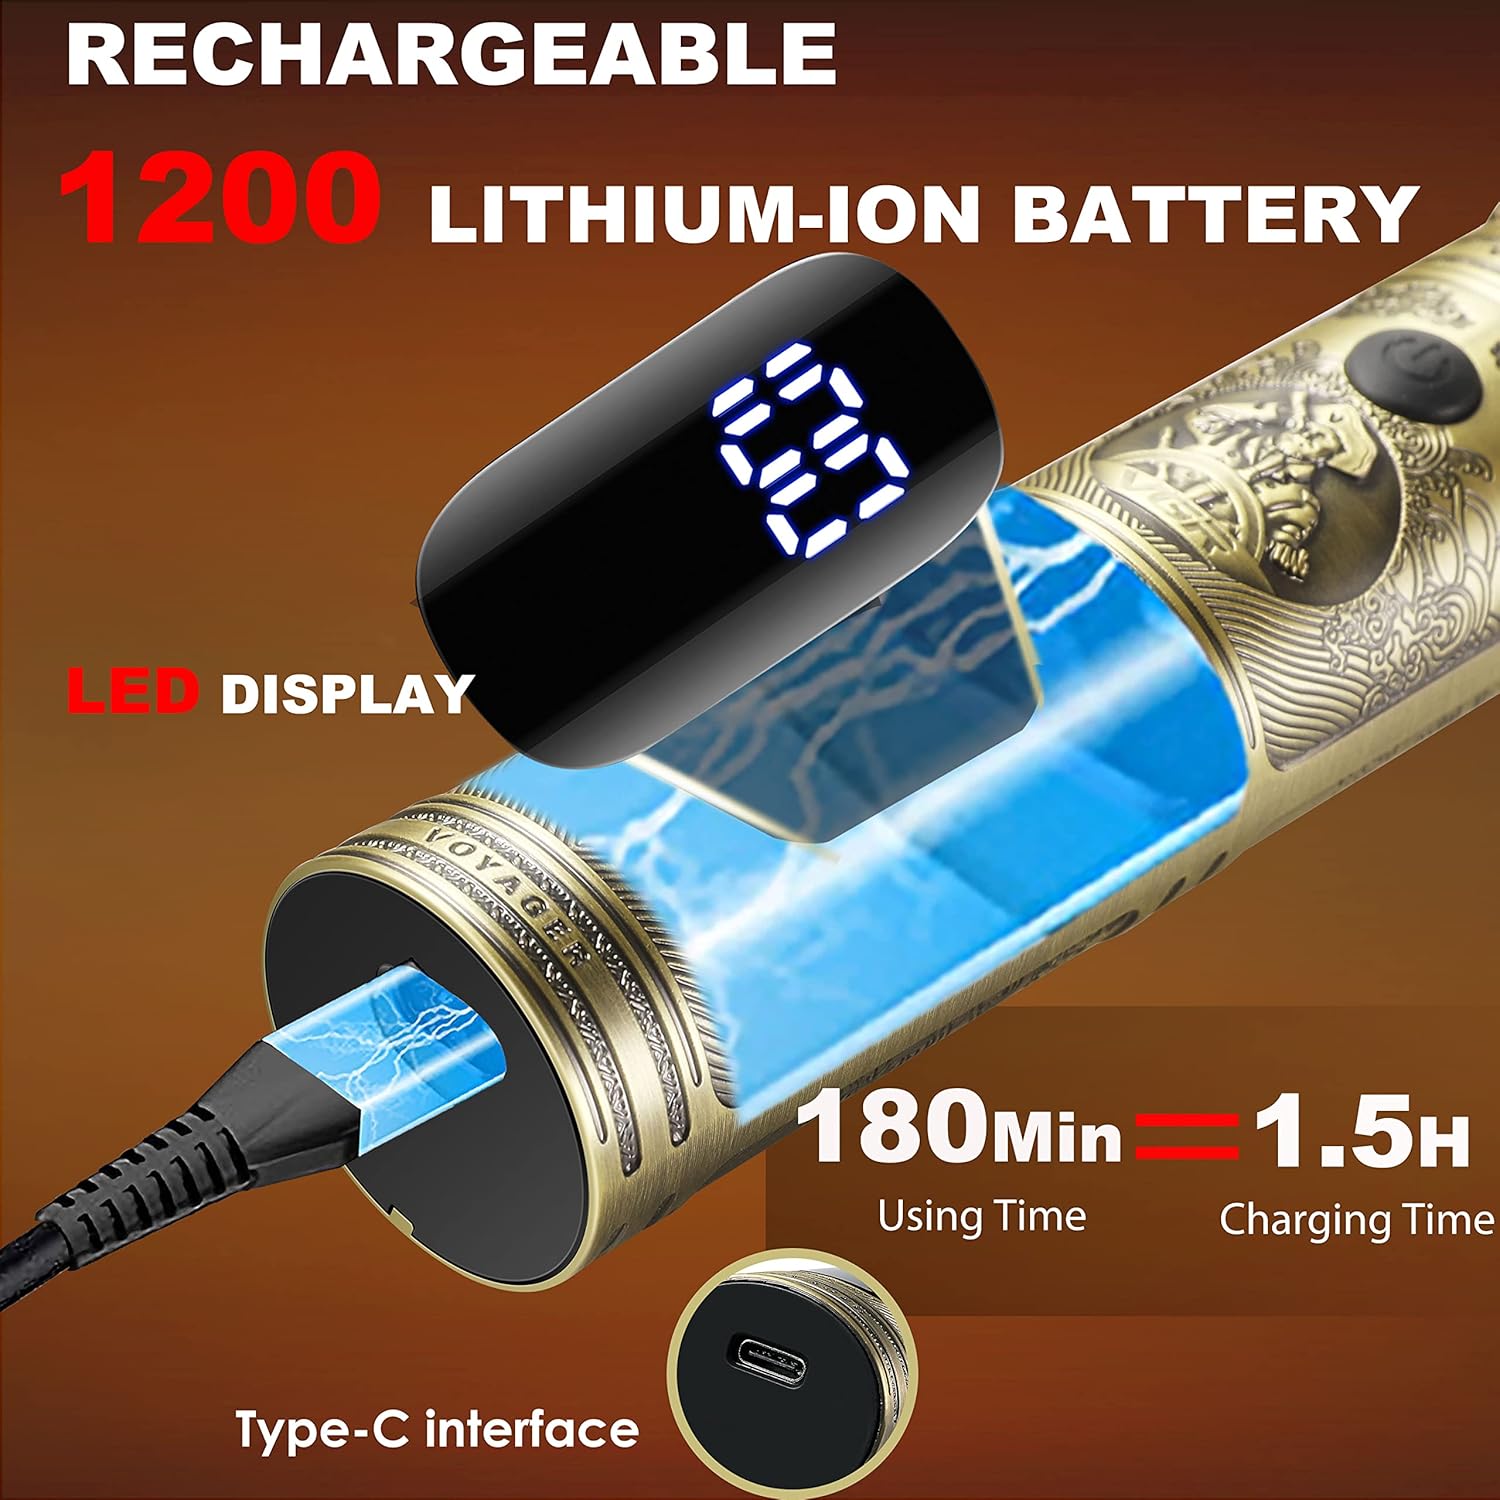
Figure 5.1: Key features of the VGR trimmer, including the durable blade, power switch, charging port, digital display for battery status, and its whole-body washable design, along with a visual of the included accessories.
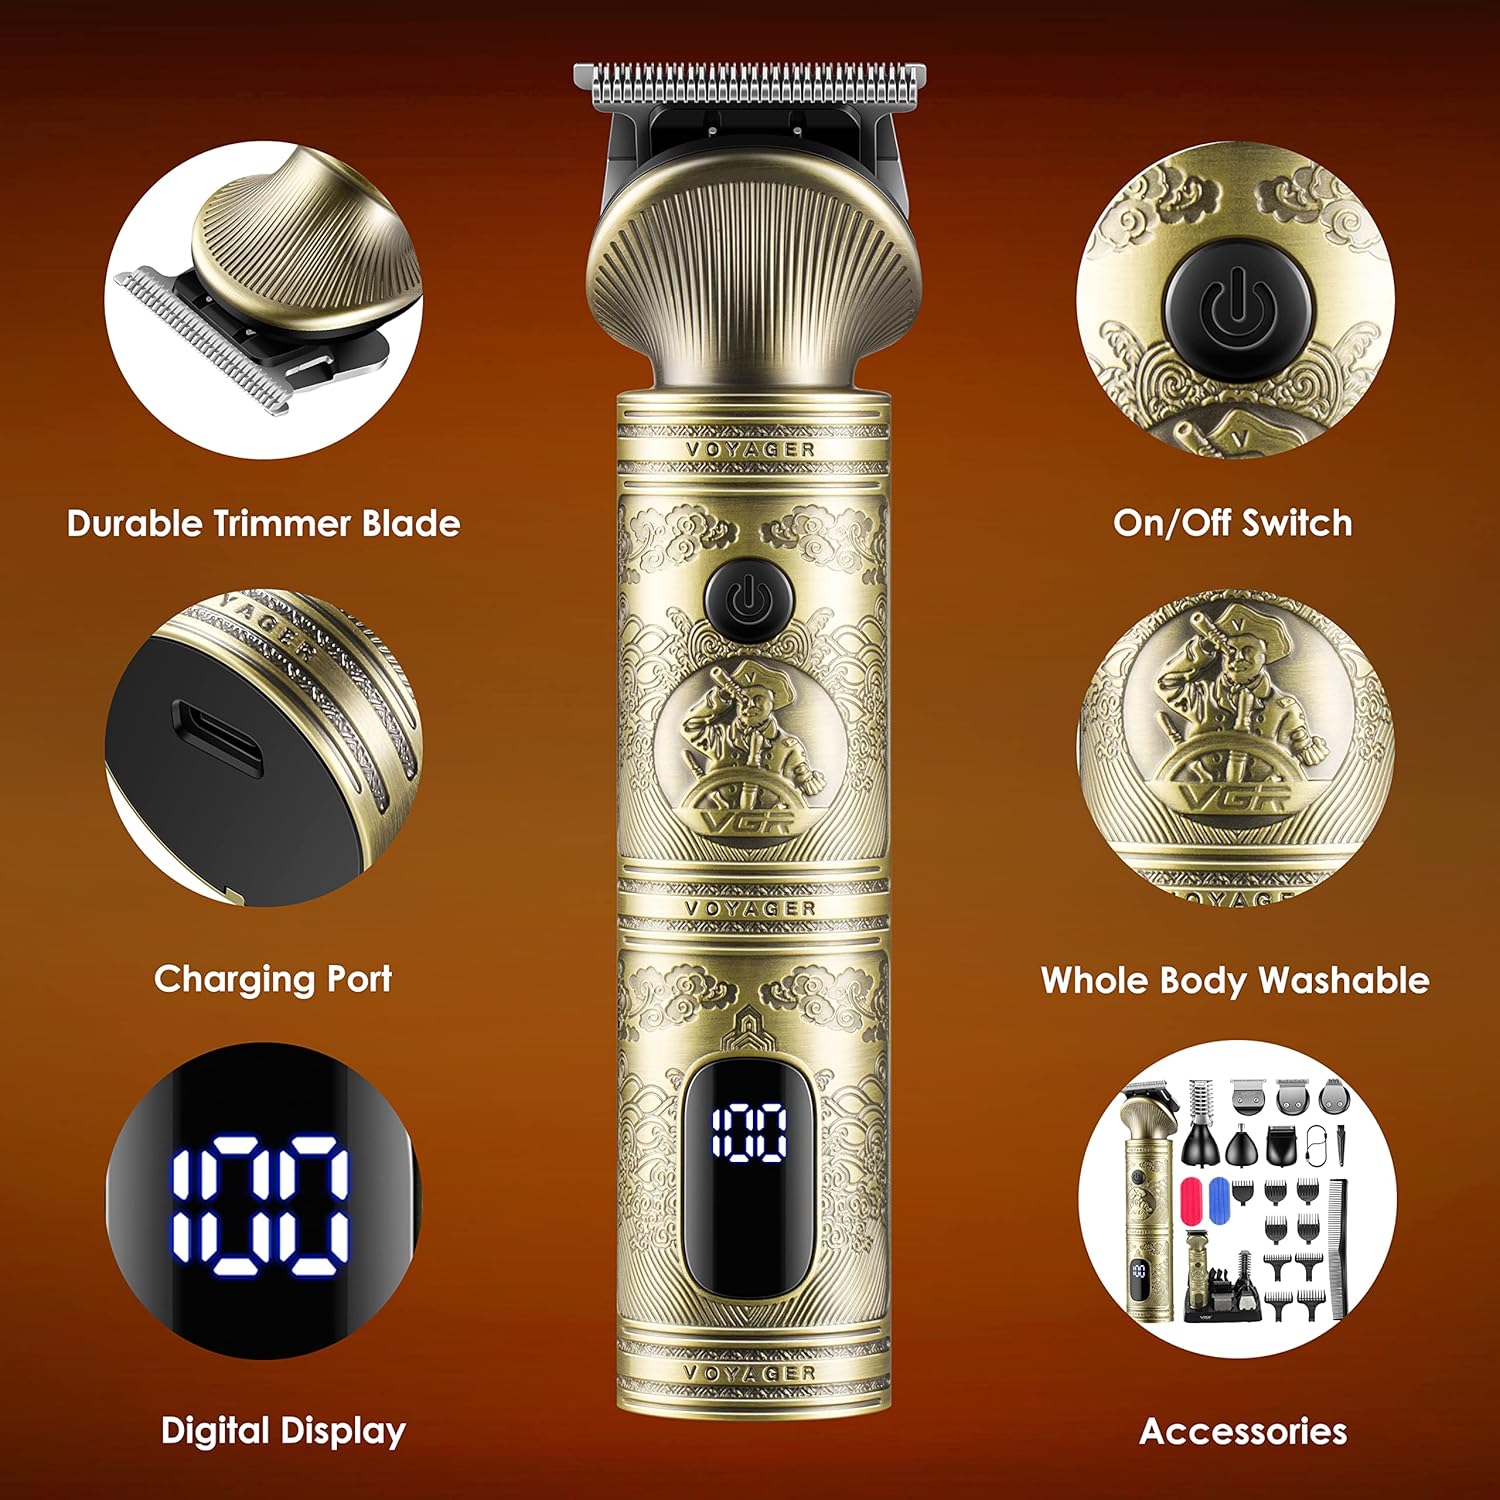
Figure 5.2: A visual guide to the different trimming functions of the VGR kit, showing the specific heads for Hair Clipping, T-blade Trimming, Design Trimming, Nose Trimming, Micro Shaving/Precision Trimming, and Body Trimming.
5.1 General Trimming
- Select the appropriate trimmer head (e.g., T-Blade Trimmer for beard, Hair Clipper for hair).
- Attach the desired guide comb for your preferred length.
- Press the On/Off switch to turn on the trimmer.
- Hold the trimmer with the blade flat against the skin and move it slowly against the direction of hair growth.
- For precise lines and artwork, use the T-Blade Trimmer without a guide comb.
5.2 Nose and Ear Trimming
- Attach the Nose Trimmer Head.
- Gently insert the trimmer tip into your nostril or ear canal.
- Move the trimmer in a circular motion to trim unwanted hair.
5.3 Body Grooming
- Attach the Body Trimmer Head.
- Use with or without a guide comb depending on desired length.
- Move the trimmer smoothly over the skin to remove body hair.
5.4 Micro Shaving / Precision Shaving
- Attach the Micro Shaver Head.
- Use for a close, smooth finish on smaller areas or for detailing.
- Hold the shaver flat against the skin and move gently.
6. Maintenance
Regular cleaning and maintenance will ensure the longevity and optimal performance of your VGR Beard Trimmer Kit.
6.1 Cleaning the Blades
The detachable and washable blades make cleaning simple.
- After each use, turn off the trimmer and detach the blade head.
- Rinse the blade head under running water to remove hair clippings.
- Use the provided cleaning brush to remove any stubborn hair from the blade and inside the trimmer unit.
- Allow the blade head to air dry completely before reattaching or storing.
- Do not submerge the main trimmer unit in water. Only the blade heads are washable.
Video 6.1: This video demonstrates the easy cleaning process of the VGR Beard Trimmer Kit, showing how to rinse the blade head under flowing water after use.
6.2 Lubrication
- Periodically apply a small drop of the included lubricating oil to the blades to maintain smooth operation and prevent rust.
- Turn on the trimmer for a few seconds to distribute the oil evenly.
6.3 Storage
- Store the trimmer and all accessories in the charging stand or a dry, cool place away from direct sunlight and moisture.
7. Troubleshooting
If you encounter any issues with your VGR Beard Trimmer Kit, refer to the following common problems and solutions:
| Problem | Possible Cause | Solution |
|---|---|---|
| Trimmer does not turn on. | Battery is low or depleted. | Charge the trimmer fully (refer to Section 4.1). |
| Trimmer pulls hair or cuts poorly. | Blades are dull, dirty, or not lubricated. | Clean and lubricate the blades (refer to Section 6.1 & 6.2). Replace blades if necessary. |
| Trimmer makes unusual noise. | Hair caught in blades or motor issue. | Clean blades thoroughly. If issue persists, contact customer support. |
| Charging indicator not working. | Charging cable or adapter issue. | Try a different USB cable or power adapter. Ensure connections are secure. |
If the problem persists after trying these solutions, please contact VGR customer support for assistance.
8. Specifications
Detailed technical specifications for your VGR Beard Trimmer Kit:
| Feature | Specification |
|---|---|
| Product Dimensions | 6.3 x 1.57 x 1.18 inches |
| Item Model Number | V-106 Professional 6-in1 Grooming Kit |
| Batteries | 1 Lithium Ion batteries required (included) |
| Date First Available | February 27, 2023 |
| Manufacturer | VGR |
| ASIN | B0BWS9J5HX |
| Recommended Uses | Trimming, Grooming, Professional |
| Hair Type | Dry |
| Item Weight | 0.23 Grams |
| Brand | VGR |
| Power Source | Battery Powered |
9. Warranty and Support
VGR stands behind the quality of its products. Your VGR Beard Trimmer Kit comes with a 1-Year Warranty from the date of purchase.
9.1 Warranty Coverage
This warranty covers defects in materials and workmanship under normal use. It does not cover damage caused by misuse, accident, unauthorized modification, or failure to follow the instructions in this manual.
9.2 Customer Support
For any questions, concerns, or warranty claims, please contact VGR customer support. You can typically find contact information on the product packaging, the official VGR website, or through your retailer.
Please have your product model number (V-106 Professional 6-in1 Grooming Kit) and proof of purchase ready when contacting support.

