1. Introduction
The LASERLINER VideoPocket HD 082262A is a compact and versatile industrial endoscope designed for visual inspection in hard-to-reach areas. This device allows for real-time viewing, image capture, and video recording, making it an essential tool for professionals in various fields. This manual provides detailed instructions for the safe and effective operation, maintenance, and troubleshooting of your VideoPocket HD.
2. Safety Instructions
- General Safety: Read all instructions carefully before use. Keep the device away from water, high temperatures, and direct sunlight.
- Battery Safety: Use only specified AA alkaline batteries. Do not mix old and new batteries, or different types of batteries. Remove batteries if the device will not be used for an extended period.
- Camera Cable: Do not bend, pinch, or pull the camera cable excessively. Avoid inserting the camera into live electrical circuits or hazardous environments without proper safety precautions.
- Cleaning: Disconnect power before cleaning. Use a soft, dry cloth. Do not use abrasive cleaners or solvents.
- Repair: Do not attempt to open or repair the device yourself. Refer all servicing to qualified personnel.
3. Package Contents
Verify that all items are present in your package:
- LASERLINER VideoPocket HD Main Unit
- Camera Cable with 5.2mm Camera Head (1m length)
- Magnet Attachment
- Mirror Attachment
- Hook Attachment
- Camera Tip Attachments (for securing magnet, mirror, hook)
- User Manual
4. Product Overview
The VideoPocket HD features a robust design for industrial use, with an integrated display and flexible camera probe.

Figure 1: LASERLINER VideoPocket HD industrial endoscope handheld unit. This image shows the complete device, highlighting its compact form factor and integrated display.

Figure 2: Close-up of the 5.2mm camera head with 6 integrated LEDs for illumination. The small diameter allows access into narrow spaces, and the LEDs provide necessary lighting.
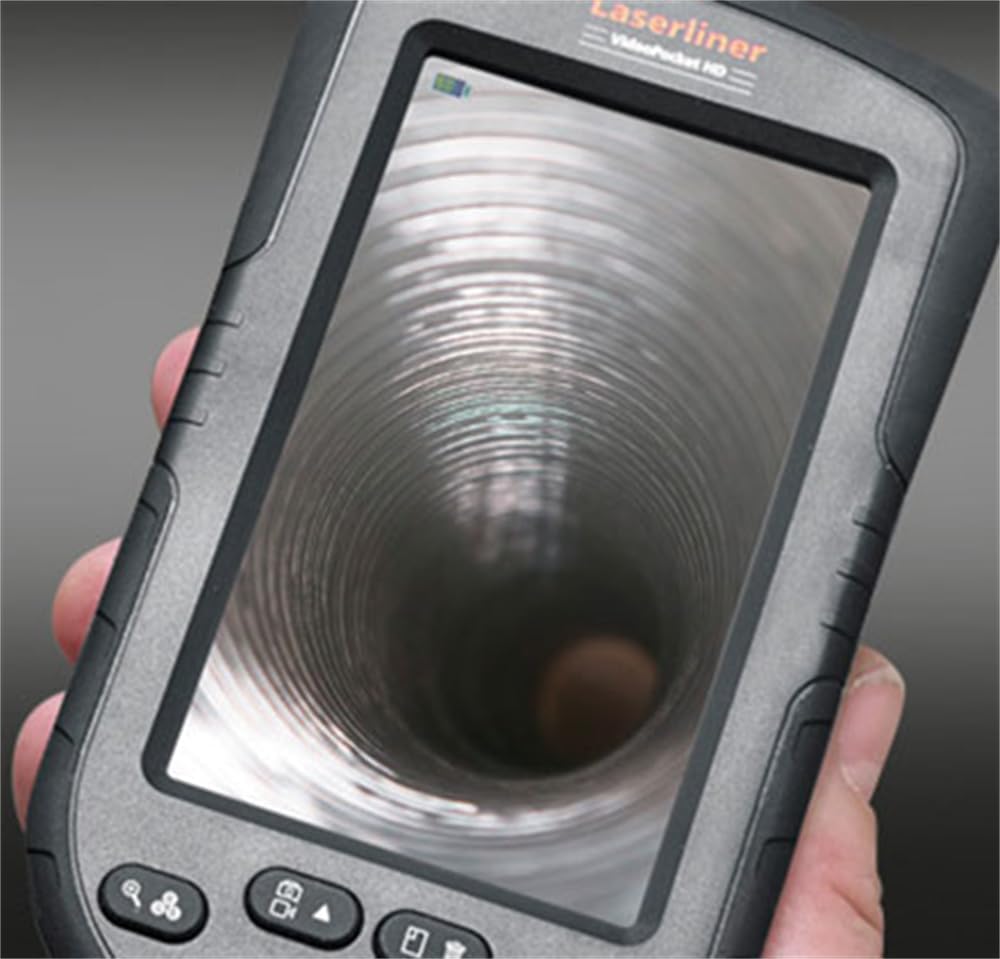
Figure 3: LASERLINER VideoPocket HD display showing a live view from inside a corrugated pipe. This demonstrates the device's capability to provide clear visuals during inspection.

Figure 4: Side view of the VideoPocket HD unit, highlighting the MicroUSB port and microSD card slot. These ports are used for data transfer and memory expansion.

Figure 5: Rear view of the LASERLINER VideoPocket HD, showing the integrated storage for the camera cable. This design ensures convenient and secure storage of the probe.
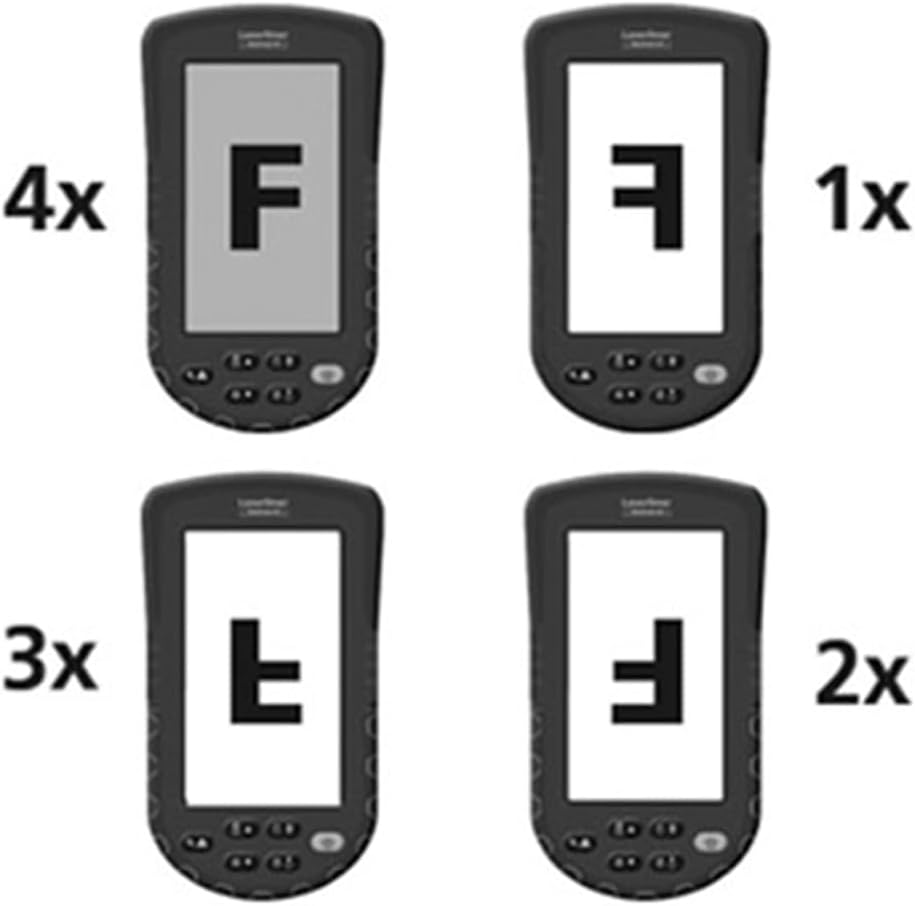
Figure 6: Diagram illustrating the 4x digital zoom function of the VideoPocket HD, showing different magnification levels. This feature allows for closer examination of details.
5. Setup
5.1 Battery Installation
- Locate the battery compartment cover on the back of the device.
- Open the cover by sliding or unlatching it.
- Insert four (4) AA alkaline batteries, ensuring correct polarity (+/-) as indicated inside the compartment.
- Close the battery compartment cover securely.
5.2 MicroSD Card Insertion
- Locate the microSD card slot on the side of the device (refer to Figure 4).
- Insert a microSD card (up to 32GB, not included) into the slot with the contacts facing down, until it clicks into place.
- To remove, gently push the card in until it springs out.
5.3 Attaching Accessories
The magnet, mirror, and hook attachments can be secured to the camera head using the provided camera tip attachments.
- Select the desired attachment (magnet, mirror, or hook).
- Carefully slide the camera tip attachment over the camera head.
- Ensure the accessory is firmly seated and aligned with the camera lens if necessary (e.g., mirror).
6. Operating Instructions
6.1 Powering On/Off
- Power On: Press and hold the Power button until the display illuminates.
- Power Off: Press and hold the Power button until the display turns off.
6.2 Live View and Navigation
- Once powered on, the device will display a live feed from the camera probe.
- Use the directional buttons (if present) to navigate through menus or adjust settings.
6.3 Adjusting Brightness
The camera head features 6 LEDs with 10-stage brightness adjustment.
- Locate the brightness adjustment buttons (often marked with sun icons or up/down arrows).
- Press the appropriate button to increase or decrease the LED illumination intensity.
6.4 Using Digital Zoom
The device supports up to 4x digital zoom (refer to Figure 6).
- Press the Zoom button (often marked with a magnifying glass icon) to cycle through zoom levels (1x, 2x, 3x, 4x).
6.5 Capturing Images and Videos
Ensure a microSD card is inserted before attempting to record.
- Capture Image: In live view, press the Photo/Capture button (often marked with a camera icon) to take a still image.
- Record Video: Press the Video/Record button (often marked with a video camera icon) to start recording. Press it again to stop recording.
6.6 Viewing Recorded Media
- Enter Playback mode (usually via a dedicated button or menu option).
- Use the directional buttons to browse through captured images and videos.
- Press the OK/Play button to view an image or play a video.
6.7 Connecting to a Computer
Use the MicroUSB port to transfer files to a computer.
- Connect the device to your computer using a MicroUSB cable (not included).
- The device should appear as a removable storage device on your computer.
- You can then access and transfer the images and videos stored on the microSD card.
7. Maintenance
7.1 Cleaning
- Main Unit: Wipe the main unit and display with a soft, dry, lint-free cloth. For stubborn dirt, a slightly damp cloth can be used, followed by a dry cloth.
- Camera Head: Gently clean the camera lens with a soft lens cleaning cloth or cotton swab. Avoid scratching the lens.
- Do not immerse any part of the device in water.
7.2 Storage
- Store the device in a cool, dry place, away from direct sunlight and extreme temperatures.
- Remove batteries if the device will not be used for an extended period to prevent leakage.
- Ensure the camera cable is neatly coiled and stored in its designated compartment (refer to Figure 5).
8. Troubleshooting
| Problem | Possible Cause | Solution |
|---|---|---|
| Device does not power on. | Batteries are dead or incorrectly inserted. | Replace batteries with new AA alkaline batteries, ensuring correct polarity. |
| No image on display. | Camera cable not properly connected or damaged. | Check the camera cable connection. If problem persists, contact support. |
| Cannot capture images/videos. | No microSD card inserted or card is full/corrupted. | Insert a valid microSD card. Delete unnecessary files or format the card (this will erase all data). |
| Image is too dark/bright. | LED brightness is not adjusted correctly. | Adjust the LED brightness using the dedicated buttons. |
| Device freezes or becomes unresponsive. | Temporary software glitch. | Remove and reinsert batteries to perform a hard reset. |
9. Specifications
| Feature | Specification |
|---|---|
| Brand | Laserliner |
| Model Number | 082262A |
| Product Dimensions (W x H x D) | 8.5 x 15.5 x 3.2 cm |
| Weight (with batteries) | 370 g |
| Product Weight (Gross/Shipping) | 810 g |
| Camera Head Diameter | 5.2 mm |
| Camera Cable Length | 1 m |
| Camera Resolution | 1280 x 720 pixels |
| Field of View | 65° |
| Focal Distance | 3 - 8 cm |
| Display Type | 4.3 inch TFT Color Display |
| Display Resolution | 480 x 272 pixels |
| LED Brightness Adjustment | 10 stages |
| Digital Zoom | 4x |
| Video Capture Resolution | 1080p (for saved files) |
| Memory Media | MicroSD card (up to 32GB) |
| Port | MicroUSB |
| Power Source | 4 x AA Alkaline Batteries |
| Included Accessories | Magnet, Mirror, Hook, Camera Tip Attachments |
10. Warranty and Support
10.1 Warranty Information
This LASERLINER VideoPocket HD 082262A comes with a 1-year manufacturer's warranty from the date of purchase. This warranty covers defects in materials and workmanship under normal use. It does not cover damage caused by misuse, accidents, unauthorized modifications, or normal wear and tear. Please retain your proof of purchase for warranty claims.
10.2 Customer Support
For technical assistance, troubleshooting beyond this manual, or warranty inquiries, please contact your retailer or visit the official Laserliner website for support contact information. When contacting support, please have your product model number (082262A) and proof of purchase readily available.


