
1. Introduction
This manual provides essential instructions for the safe and effective use of the Haosie DC Motor Speed Controller Regulator. Please read this manual thoroughly before installation and operation to ensure proper function and to prevent damage to the device or connected equipment.
2. Safety Information
- Electrical Safety: Always disconnect power before making any wiring connections or adjustments. Work with electricity can be dangerous and should only be performed by qualified personnel.
- Voltage Compatibility: Ensure the input voltage range (DC6V-60V) matches the rated voltage of the motor being controlled. Applying an incorrect voltage can damage both the controller and the motor.
- Current Limits: Do not exceed the maximum output current of 30A (20A continuous). Overloading the controller can lead to overheating and failure.
- Proper Ventilation: Ensure the controller is installed in an area with adequate ventilation to prevent overheating, especially during prolonged operation at high currents.
- Secure Connections: All wiring connections must be secure to prevent short circuits or intermittent operation.
3. Product Overview
The Haosie DC Motor Speed Controller Regulator is designed to control the speed of DC motors using Pulse Width Modulation (PWM). It features a digital display for speed percentage, a potentiometer for speed adjustment, and a momentary start/stop switch for convenient operation.

Image 3.1: Overview of the Haosie DC Motor Speed Controller showing the main unit, potentiometer, and start/stop button.

Image 3.2: The controller's digital display indicating the speed range (0% to 100%), input voltage range (DC6V-60V), and output current (0A-30A).
Key Components:
- Controller Unit: The main circuit board with a digital display.
- Digital Display: Shows the motor speed as a percentage from 0% to 100% of its maximum speed.
- Potentiometer: Used to adjust the motor speed.
- Start/Stop Switch: A momentary push-button switch to start or stop the motor.
- Screw Terminals: For secure and convenient wiring connections.
4. Specifications
| Feature | Specification |
|---|---|
| Input Voltage Range | DC6V-60V (Input voltage must match motor rated voltage) |
| Output Voltage | Linear with load |
| Output Current | 30A (Maximum) |
| Continuous Current | 20A |
| Speed Range | 0% to 100% |
| Regulation Method | Potentiometer |
| Regulation Type | Regulating Current |
| Control Frequency | 15KHz |
| Wiring Type | Screw Terminal |
| Product Dimensions | 9.6 x 6.1 x 3.4 cm |
| Item Weight | 110 g |
| Manufacturer | Haosie |
| Model Number | Haosiebqs0tufygg |
| Country of Origin | China |

Image 4.1: Physical dimensions of the Haosie DC Motor Speed Controller.
5. Setup
Follow these steps for proper wiring of the DC Motor Speed Controller:
- Power Off: Ensure all power sources are disconnected before beginning any wiring.
- Identify Terminals: The controller has screw terminals for power input and motor output. Refer to the wiring diagram below.
- Connect Power Input: Connect your DC power supply to the terminals labeled 'Power +' and 'Power -'. Ensure correct polarity. The input voltage must be within the DC6V-60V range and match your motor's rated voltage.
- Connect Motor Output: Connect your DC motor to the terminals labeled 'Motor +' and 'Motor -'. Ensure correct polarity for desired motor rotation direction. If the motor rotates in the opposite direction, reverse these connections.
- Connect Potentiometer and Switch: The potentiometer and start/stop switch are pre-wired to the controller. Ensure their connections are secure.
- Verify Connections: Double-check all wiring for correctness and security before applying power.

Image 5.1: Detailed wiring diagram for the Haosie DC Motor Speed Controller. Connect 'Power +' and 'Power -' to your DC power source, and 'Motor +' and 'Motor -' to your DC motor.

Image 5.2: Rear view of the controller illustrating the screw terminal connections for power and motor.
6. Operating Instructions
Once the controller is correctly wired and power is applied, follow these steps to operate your DC motor:
- Power On: Apply power to the controller. The digital display will illuminate.
- Start Motor: Press the momentary start/stop button to initiate motor operation. The motor will start at the speed set by the potentiometer.
- Adjust Speed: Rotate the potentiometer knob to adjust the motor speed. Turning the knob clockwise will increase the speed, and counter-clockwise will decrease it. The digital display will show the current speed as a percentage (0-100%).
- Digital Display Interpretation: The digital display indicates the motor's speed as a percentage of its full speed. For example, if your motor's maximum speed is 500 RPM, a display of '100' means 500 RPM, and '50' means 250 RPM. It does not show the actual RPM value.
- Stop Motor: Press the momentary start/stop button again to stop the motor.
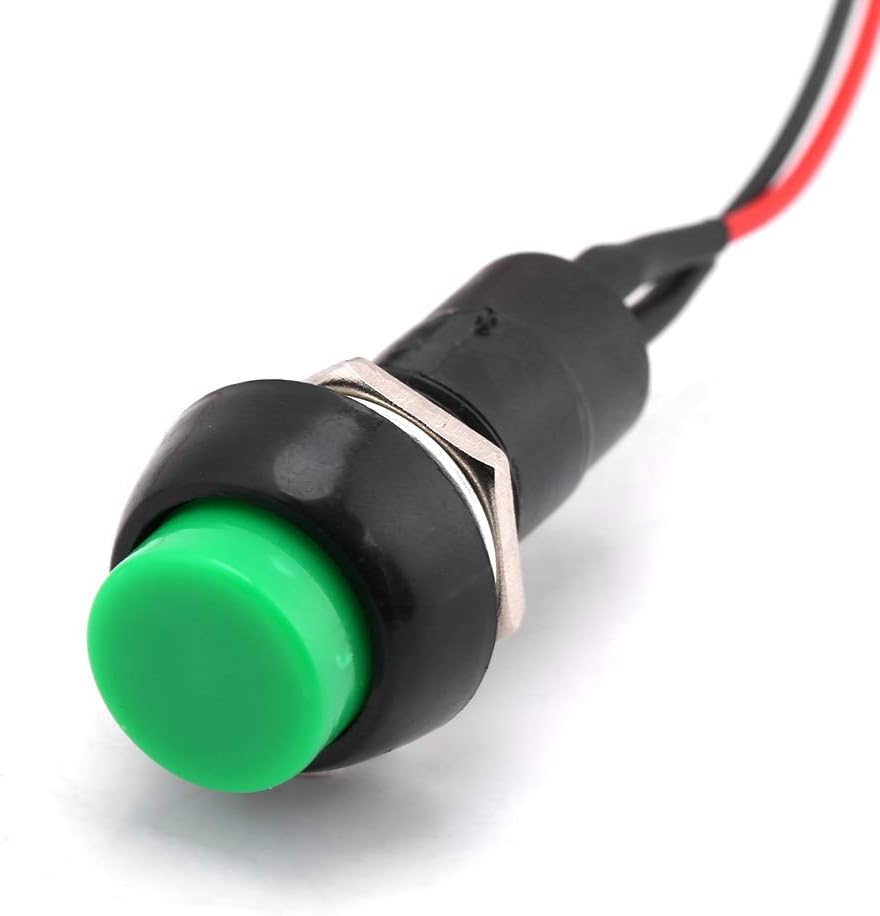
Image 6.1: Close-up of the momentary green start/stop button for motor control.
7. Maintenance
The Haosie DC Motor Speed Controller Regulator is designed for reliable operation with minimal maintenance. Follow these general guidelines:
- Cleaning: Keep the controller clean and free from dust and debris. Use a soft, dry cloth for cleaning. Do not use liquid cleaners or solvents.
- Inspection: Periodically inspect all wiring connections to ensure they remain secure. Check for any signs of wear, damage, or corrosion.
- Environment: Ensure the controller is operated within its specified environmental conditions (temperature, humidity) to prolong its lifespan. Avoid exposure to excessive moisture or extreme temperatures.
8. Troubleshooting
If you encounter issues with your DC Motor Speed Controller, refer to the following troubleshooting tips:
- Motor Not Starting:
- Check if power is supplied to the controller.
- Verify all wiring connections (power input, motor output) are correct and secure.
- Ensure the start/stop button is functioning correctly.
- Confirm the motor itself is operational by testing it independently.
- Incorrect Speed or No Speed Control:
- Check the potentiometer connections.
- Ensure the input voltage matches the motor's rated voltage.
- Verify the motor is not overloaded, which can prevent it from reaching desired speeds.
- Digital Display Not Working:
- Ensure the controller is receiving power.
- If the display is completely off, check power connections.
- Overheating:
- Ensure adequate ventilation around the controller.
- Verify the motor current does not exceed the controller's continuous current rating (20A).
- Reduce the load on the motor if it is consistently drawing high current.
If problems persist after following these steps, contact customer support for further assistance.
9. Warranty and Support
Specific warranty information for this product is not provided in the available documentation. For warranty claims or technical support, please refer to the retailer or manufacturer's official website where the product was purchased.